vertical portaband table build

Joined
Jun 30, 2004
Messages
376
Finally bit the bullet on a band saw. Got the Milwaukee 6232-21 and fabricated a vertical mount pedestal table for it. followed the same concept as the swag off road table.

All metal is 3/16" thick. the table and base are 12x12". the riser is 4x3"

8005294d885d1e8147b59ec89f76d28b.jpg


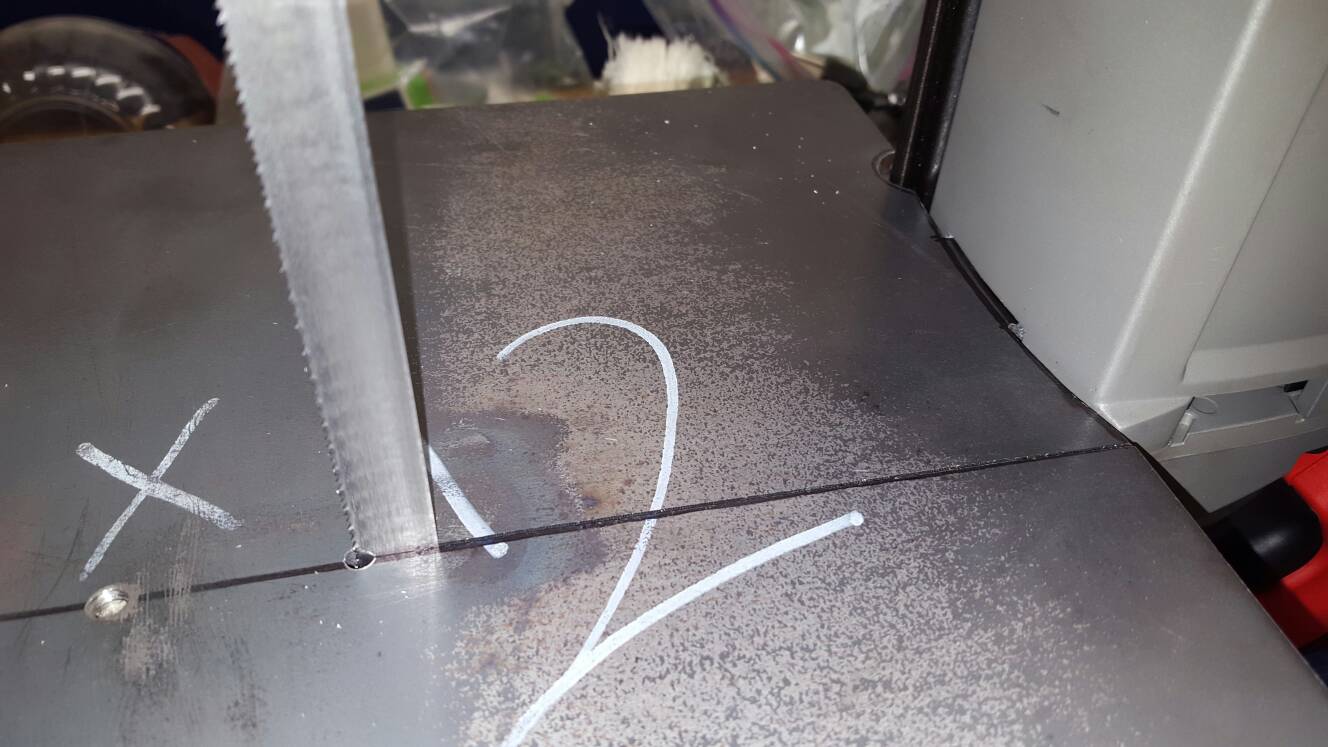
I used the bandsaw to cut the slot for the blade. once it hit the body of the saw I was able to trace the countour and mark the spot where the table inserts into the vent port. Ground the excess off and then finished cutting the slot the full length. Drilled a small hole at the end of the slot for the chips to fall through.

1210604244facf89719e0435c636bbb4.jpg


The saw is held in place with a single bolt which goes through the little mini table on the saw. Just loosen it up a bit and the saw can be removed and used as a portable saw again.

e2aaad538b9a4d460f539e2ad829b02c.jpg


I'll get it painted tomorrow.

Cheers.
 
Jerid, I think you did a really fine job. I have a SWAG table and love it ...I think your table will do just fine and you built it yourself. Well done. Larry
 
Milwaukee porta band

God I love mine ! Deep throat model, variable speed . . .
SWEET !

Way to go on the table you made. I have a Delta horizontal that locks upright or I might just make one like yourn.
 
Jerid nice work...now just add the Harbor Freight Variable speed foot pedal (there are 2 models BTW..make sure its variable speed) makes for hands free on/off operation. I use the pedal on a number of tools...disc grinders, dust collector.
 
Great setup! I do that kind of thing with my woodworking tools. I have a home made sanding table that holds my 3x18 Porter Cable belt sander and it works great for all kinds of stuff. I have as much fun building the fixtures and tooling as I do making the final project. Cool stuff.
 
all finished.. paint needs to cure before I can start using it. this was actually really easy to make and well worth the time. I also bought an aluminum bar that I can use as a fence when needed.

d871dfa650a828c7a5131cd0754105c0.jpg


refined the bolt that holds it in place with a tool-less option.

bbd9b742a79b431a64dfceb4227c9d24.jpg
 
have a home made sanding table that holds my 3x18 Porter Cable belt sander and it works great for all kinds of stuff. I have as much fun building the fixtures and tooling as I do making the final project.

I know what you mean. I took this little Porter Cable worm drive, routed a French fit (so I could get exact registration to the miter slot when removing and replacing) into the underside of a square of high grade plywood; then mount that into one of my Workmate tables. Fun stuff. This is quite a small circular saw so I have a mini table saw for small work. I use a bicycle toe clip strap to hold the power trigger on then plug into a power strip with a switch for each plug and have that at arms reach. They made such great power tools in the previous decade or two. Sorry state now last I looked.

 
A little follow up on this thread.. This has become one of the most useful and versatile tools in my shop.. It has easily cut through everything I have thrown at it.. steel, nonferrous metals, wood, micarta. The other day I cut through a 1" W1 round bar like nothing.. I've ripped wood blocks into handle scales.. Hard to believe I went so long without this.. Best part is I still have all my fingers :-)
 
now if someone can just figure out something for the switch to convert it from a squeeze trigger to an on/off toggle.... :-)
 
now if someone can just figure out something for the switch to convert it from a squeeze trigger to an on/off toggle.... :-)

I assume by "someone" you mean me... LOL.... gimme time gimme time... Perhaps after Knife Expo... I am balls to the wall right now making knives/sheaths..
 
now if someone can just figure out something for the switch to convert it from a squeeze trigger to an on/off toggle.... :-)

That's not too difficult at all. i have a similar set up.
I just locked the trigger "ON" and made a switched outlet box that my saw plugs into. Flip the switch on, the outlet has power, flip it off, it's off.
I left mine to where I could take the saw off and use it as it was originally designed, but if I knew it was going to be a permanent set up, I'd just pull the trigger switch out of the saw and drill a hole for a toggle to hardwire in. That, or lock the trigger on and splice the power cord from the saw into a switch box mounted on the side of the table.
 
I've been using this setup for over a year now. Only downside is you gotta remove the saw to change the blade. I get tons of like out of the blades so I've only had to change out the blades maybe 6 times. It's just a piece of 3/8" aluminum in place of the stock little work rest. Even used the same bolts. You'll find you use it for everything, even cutting open the cardboard tubes your metal comes in.
FE4F4F2D-E92E-4F9D-A8FA-085872FBE123_zps4k8pwuyr.jpg

My super high tech variable speed on/off toggle switch!
Off
099923BE-7C56-4B6A-B856-5DAB7C692513_zpslhhjkxh8.jpg

On(slow)
If I want faster I slide it up the trigger, or adjust the trigger speed thing. I don't tighten or loosen the zip tie I just slip it on and slip it off.
1C2B0CED-1DD3-42EE-AFF1-7924543CB41D_zpsisddocgj.jpg

And jerrid, nice job on the stand. If you want the weld to be a little nicer, just slow down a tad.
 
I have the swag and a foot pedal and when I first got it I was amazed at how great a addition it was . I don't know how I made due without it.

Nice job. I think one of my next tools is a welding unit of some sort
 
Back
Top