Warden love...Finally!

Joined
Apr 26, 2007
Messages
2,114
Ahhh now that's better!
It...Took...Hours! I spent probably 2.5 hours on it? Crazy. The blade is a little less "satin" but the edge is darn near perfect. Shaves and push cuts paper, stabs into pineapple juice cans, and shaves. Good to go!
Now off to Rainwalker for a sheath. :cool:
Thanks to tomthebaker for the pointers and the patience, and thanks to Bark River for their little pointer page.
attachment.php
 

Attachments

  • GWII.jpg
    GWII.jpg
    28.1 KB · Views: 400
I'm in the process of convexing all my satin user GW's.

Nice job! :thumbup:
 
What was the process that you used? I spent far more than 2.5 hours doing my OJ warden using 320/600/1500 grit sandpaper and a mouse pad, and my edge is very good but not perfect (some parts sharper than others, won't 'whittle' hair, etc.)

Looks great!
 
Thanks hogs! Thanks tom, I'm glad you like it!
This process here spells it out pretty well
http://www.barkriverknives.com/convex.htm

I just use 60 grit, 150 grit, 600 grit and 2000 grit sandpaper. The 60 and 150 does the majority of the reshaping. It also does the majority of the damage IE scratching of your knife if you're not careful. I wasn't but oh well, this is a user.

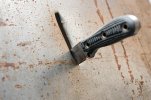
Anywho, I used a piece of box cardboard with a chunk of the carboard that came in the sandpaper pack to make the base. A mousepad should do the same.
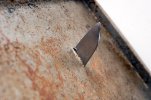
Put the sandpaper on and drag the knife across in a stroping motion keeping the spine elevated about 1/4 inch or so. I think this part varies depending on the thickness of the knife.

It takes a while at the 60 and 150 grits to shape the blade (again, depending on blade thickness). I'd say 45 minutes or so to get it where you want it. You may notice a burr on one side when you get to the "right" point. You can also test the edge you're getting with the 150 grit paper. It'll be toothy, but it will give you a good idea still of where it's heading.

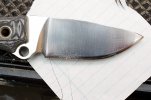
Once you've got you edge shape the rest is just elbow great. The 150 grit will start acting like 220 so you can reuse that, then move to 600 for a polish and then 2000 for a final polish.

After I was done I have two leather belt sections screwed to 5 gallon paint mixer sticks. One is loaded with Ryobi 1-5 micron metal polish, the other is loaded with Fitz metal polish. Voila, done.

Lessons learned...
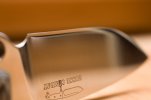
60 grit is fine, but tape your blade so you don't get deep scratches. I think you should keep the blade taped if you want to keep it mint. I got careless a little bit that's why my blade is more mirror polished now than satin.
Be patient and don't force it. Don't apply pressure, the weight of the blade is fine. Also, with the start of each new step, the blade gets sharper. You'd be amazed when even the final step with the Fitz polish makes the blade sharper.
Practice first on a user blade!

I'll get some pics tomorrow. I was hoping for action pics, but I've got no tomatoes or stuff of the sort that would make for good cutting.

WHEW!
 
Thanks, I'll have to use a much coarser starting grit the next time, and that's good advice about taping the blade.

Did you use pressure with the coarse grits to speed up shaping, or just the blade weight there too?
 
I did use the SLIGHTEST amount of pressure, partially due to the grip. I rested my thumb on top of the talon hole. You don't really want to speed anything up, although it can be time consuming and frustrating.
Also, test for flat spots on a marker or something like they mentioned in the bark river article. Just when you think you might have it, the flat spot test will tell ya you got more work to do.
I also taped the pad to my counter with duct tape and taped the sandpaper to the pad with scotch tape (for easy removal). The prevented slipping and kept my other hand free for guidance.
For an OJ warden I think all the shaping could be done with 120/150, I just used what I had though!
 
More pics - an old cookie sheet was found and put down. One punch through.
attachment.php
 

Attachments

  • GWIII.jpg
    GWIII.jpg
    70 KB · Views: 234
And push down to slice, it actually went down pretty easy.
attachment.php
 

Attachments

  • GWV.jpg
    GWV.jpg
    83.7 KB · Views: 233
Afterwards, it's sort of whittle paper, sort of push cut, and sort of shave.
10 strokes each side of 2000 grit, 5 strokes each side of coarse polish, 4 strokes each side fine polish and it's back.
Not bad not bad. Heh, not sure I'd try this with my Ritter Grip...
attachment.php
 

Attachments

  • GWIV.jpg
    GWIV.jpg
    74.9 KB · Views: 232
MR. Clean,
You done er up right! It makes me want to get one of those. Satin and sharp! Thanks for the pics and how-to.
Lycosa
 
Thanks! I wish I would have not messed up the blade though, I do prefer the satin finish. It's partially polished now from trying to remove my mistakes.
I might just polish it all the way. Thoughts?
 
Back
Top