wilson 4jr hardness tester help

Joined
Jul 28, 2016
Messages
1
Hello all! I just recently picked up a wilson 4jr hardness tester. It came with everything included, all the weights, multiple tips, anvils, the works. However it is reading 1- 2 point low on the test blocks. I know nothing about these machines or how to calibrate them. So I was hoping one of you fine folks would know more. Or if anyone has a coppy of the manual that would be great! Any knowledge and help is appreciated!
 
I have the same tester and I believe I have the manual for it. I’m out of town right now and I’ll look for it when I get back.
 
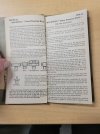
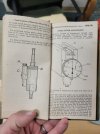
Here's a PDF of a manual for the JR and JS series. Lots of useful info in there:

And here's another instruction manual for older testers.

Just a couple quick notes off the top of my head: heavily used or even slightly damaged brales (diamond points) aren't going to read accurately. There are also different brales for different scales, so make sure you're using one for the "C" scale.

Temperature can affect accuracy. Make sure the machine is not too hot or cold.

Make sure the machine is clean, especially around the indicator stem. When I bought might, it was all gunked up and dusty and the needle was moving very slowly and erratically. You don't necessarily want to oil the stem or completely disassemble everything, but just check it out for any dust or gunk that might keep it from traveling freely.

I normally load/unload my machine a few times just to "warm it up" and get everything moving. (without any test blocks or blades under the brale.) Just make sure the brale doesn't hit the anvil. This probably isn't necessary, but just something I do.

Also, make sure your anvil is completely clean of dust and grime (above and below), as this can affect readings too. You also want to make sure that the surface contacting the anvil face is flat and clean (and doesn't have any dents or burrs from previous tests that area proud of the surface). Tests spots shouldn't be too close together either. Around 4 or 5 point diameters is a typical spacing, if I recall.

If your testing a heat treated blade, make sure the blade is clean and free of any scale/oxidation.

I will also add that I've found that I'll occasionally get closer results if I do a second test in the exact same spot, without touching anything but my load/unload lever. I know this isn't proper technique, but I get very consistent results on my test block this way. YMMV.
 
t I'll occasionally get closer results if I do a second test in the exact same spot, without touching anything but my load/unload lever.
Do you mean you put the diamond tip in the same indentation as the first reading? I've never tried that, always made sure the tip was missing the first hole.
 
I have 3JR, a JR/JS and Wilson Early Models manuals if anyone ever needs them! I took pics and put them into a zip file.

After transporting them, a tuning is needed usually, too. The index lever adjustment and dash pot adjustment will usually get it pretty close! Dash pot is supposed to be 4 seconds for the 3JR. Not sure if a 4JR is different?

3r dash pot.jpg3R lever 1.jpg3R Lever 2.jpg
 
Do you mean you put the diamond tip in the same indentation as the first reading? I've never tried that, always made sure the tip was missing the first hole.
Yeah, Or rather I leave it in the same indentation. I don't mess with pre-load (minor load) or anything, I just take my first reading, (I.E., set minor load, then set major load for the indent, then unload for my reading), and then I just move my lever back to major load position, and unload it again, all without touching my test piece.

I'm sure there's some minor adjustment I need to be making somewhere so that it nails it on the first time, but I've tested this with my test block about a dozen times and it's always within a 1/4 point or better of my expected reading. Also, if I do it a third time, it always stays on that second reading (or very very close).
 
Back
Top