- Joined
- Sep 29, 2008
- Messages
- 10,394
I have two different ideas I'm working on. Up first is a kiridashi-inspired box cutter. I wanted a splinter picker tip, just enough handle to pinch or pencil grip, and something I could reasonably start out with. The second design is a full-blown knife with handles and a double sided grind. That will be harder, so I'm practicing with the single edged smaller knife first.
I'd welcome any questions, feedback, advice, or suggestions. My primary objective here is to learn. Secondary objective is to make something hard and sharp! This post has the design, the next will have heat treating and finishing, and the third will be some sort of conclusion/learnings.
Tools
I'm currently using or planning to use a drill press, bench vise, an assortment of hand files, and some miscellaneous fixtures. To be clear, I'm not shunning cost or machinery. I think it would yield a better knife. However, for the space I have on hand I absolutely do not want to be grinding metal. I also think this is something achievable with the tools I have at the tradeoff of time and elbow grease.
Knife Design
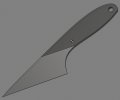
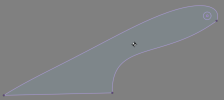
Here's what I'm hopefully looking to make. Note this is modeled in reverse for a lefty. This was designed in Fusion 360 and rough modeled on paper and cardboard before I settled on the shape. Fusion was particularly approachable for me and they have excellent tutorials for quickly learning the basics. I did some drawing initially on pen and paper, took a picture, and then started modeling lines around it. The rear hole is 5/32" and I plan to enlarge that to 3/16" with some carbide. Here's the model and the outline.
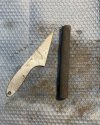
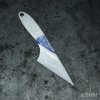
And spoiler, this is how the (second) knife is shaping up.
Roughing Blanks
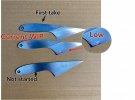
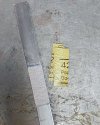
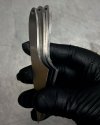
I'm bound by some limited tooling. I first looked into raw stock, tracing a template, and then hitting it with a hacksaw (ugh) or a cutoff wheel (messy, hot). I found someone who will laser cut blanks in 1/8" D2 at around $35/ea. The input is a DXF (digital outline) and the output is a clean and accurate cut profile. Here are three blanks in various stages of work. The top is untouched, the middle has the edges cleaned up, and the bottom was my first stab at putting a primary bevel on. It looks like a mess because it is.
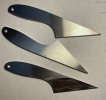
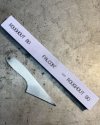
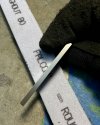
First mistake: I forgot to account for the HAZ removal. I didn't resize the outline before I sent the file. This means the profile is exactly correct, but I still have to take off about ~0.01" of heat affected edge. The handle hole would be great at 5/32" but now I have to clean it up and drill it a step size larger. On the left you can see a clean edge I made with some 80 grit silicon carbide sandpaper stuck to a piece of 1" thick flat stock. I'm not sure I actually removed all the HAZ here. On the next one I plan to scribe a line and check the bite with a file.
Workholding
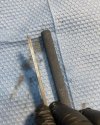
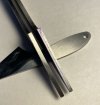
With the edges cleaned up (mostly) I need to clamp this down so I can cut the primary bevel. My first take was done clamped to a 2x4. While this worked it caused the edge to warp slightly because of the pressure and soft backing behind the thin edge. I had a piece of ¼" aluminum flat stock so I profiled the blank and installed some 2-56 socket head screws to keep it in the same place. There's a rear hole that I intended to tension some wire behind, but a clamp works better. This whole fixture is rudimentary and I will be thinking about how to improve this if I cut more of this profile.
Cutting the Primary Bevel
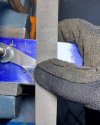
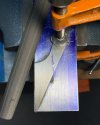
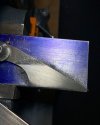
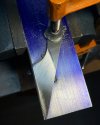
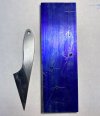
I took a number of pictures throughout this second piece but unfortunately I changed the clamping situation up so it doesn't tell a good story. I started this one the same way as the first one: cutting a sharp 45° ish chamfer on the front until I hit about the ballpark of the final edge thickness. I was using a new file, this 16" double cut hogs metal much faster than the 10" one I was using before. I'm so much happier with this one! However, it means I left the edge a tad thicker to account for taking it down to size with a finer file.
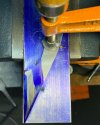
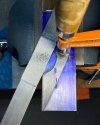
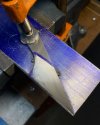
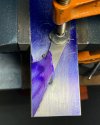
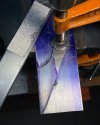
Once I hit that edge I blued everything back up and started working on the top shoulder until I had removed all the blue. This let me file fairly indiscriminately by simply watching how far away from the blue I was. As I moved further up the bevel I started being more careful and approaching high spots specifically. For example, the heel is hard to draw file here since the teeth can grab that sharp edge and gouge it. I mixed techniques, either push filing (from the top of the bevel down towards the edge so everything was well supported) and draw filing (heel to tip) to make sure everything was flat.
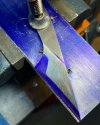
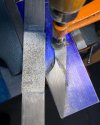
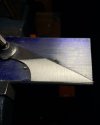
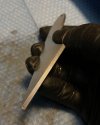
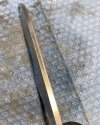
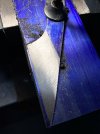
About every 3-5 minutes I would clean everything off with a brush, re-blue the blade, and make some light scratch passes draw filing. This would tell me where (in one direction) the blade was uneven. I would then decide on how to approach flattening things out. Eventually I got to a point where everything was fairly flat on a scratch pass *and* I was hitting the primary bevel scribe line. This is a picture freshly finished with the 16" file. You can see some scallops on the edge near the heel where I messed up. I almost got rid of those completely in later finishing stages, but if I run a fingernail I can feel them. I think this will come out a bit when I put an edge on it, but it's still a flaw.
At this point I cleaned everything up, re-blued, checked the edge thickness, and started working with the smaller 10" double cut file. This removes a lot less material but is less likely to grab. Once everything was smoothed over I progressed down to a 2nd cut file and then to a single cut 8" file. I may grab a finer single cut file to pull this even tighter on the next one.
I'd welcome any questions, feedback, advice, or suggestions. My primary objective here is to learn. Secondary objective is to make something hard and sharp! This post has the design, the next will have heat treating and finishing, and the third will be some sort of conclusion/learnings.
Tools
I'm currently using or planning to use a drill press, bench vise, an assortment of hand files, and some miscellaneous fixtures. To be clear, I'm not shunning cost or machinery. I think it would yield a better knife. However, for the space I have on hand I absolutely do not want to be grinding metal. I also think this is something achievable with the tools I have at the tradeoff of time and elbow grease.
Knife Design
Here's what I'm hopefully looking to make. Note this is modeled in reverse for a lefty. This was designed in Fusion 360 and rough modeled on paper and cardboard before I settled on the shape. Fusion was particularly approachable for me and they have excellent tutorials for quickly learning the basics. I did some drawing initially on pen and paper, took a picture, and then started modeling lines around it. The rear hole is 5/32" and I plan to enlarge that to 3/16" with some carbide. Here's the model and the outline.


And spoiler, this is how the (second) knife is shaping up.

Roughing Blanks
I'm bound by some limited tooling. I first looked into raw stock, tracing a template, and then hitting it with a hacksaw (ugh) or a cutoff wheel (messy, hot). I found someone who will laser cut blanks in 1/8" D2 at around $35/ea. The input is a DXF (digital outline) and the output is a clean and accurate cut profile. Here are three blanks in various stages of work. The top is untouched, the middle has the edges cleaned up, and the bottom was my first stab at putting a primary bevel on. It looks like a mess because it is.

First mistake: I forgot to account for the HAZ removal. I didn't resize the outline before I sent the file. This means the profile is exactly correct, but I still have to take off about ~0.01" of heat affected edge. The handle hole would be great at 5/32" but now I have to clean it up and drill it a step size larger. On the left you can see a clean edge I made with some 80 grit silicon carbide sandpaper stuck to a piece of 1" thick flat stock. I'm not sure I actually removed all the HAZ here. On the next one I plan to scribe a line and check the bite with a file.

Workholding
With the edges cleaned up (mostly) I need to clamp this down so I can cut the primary bevel. My first take was done clamped to a 2x4. While this worked it caused the edge to warp slightly because of the pressure and soft backing behind the thin edge. I had a piece of ¼" aluminum flat stock so I profiled the blank and installed some 2-56 socket head screws to keep it in the same place. There's a rear hole that I intended to tension some wire behind, but a clamp works better. This whole fixture is rudimentary and I will be thinking about how to improve this if I cut more of this profile.

Cutting the Primary Bevel
I took a number of pictures throughout this second piece but unfortunately I changed the clamping situation up so it doesn't tell a good story. I started this one the same way as the first one: cutting a sharp 45° ish chamfer on the front until I hit about the ballpark of the final edge thickness. I was using a new file, this 16" double cut hogs metal much faster than the 10" one I was using before. I'm so much happier with this one! However, it means I left the edge a tad thicker to account for taking it down to size with a finer file.
Once I hit that edge I blued everything back up and started working on the top shoulder until I had removed all the blue. This let me file fairly indiscriminately by simply watching how far away from the blue I was. As I moved further up the bevel I started being more careful and approaching high spots specifically. For example, the heel is hard to draw file here since the teeth can grab that sharp edge and gouge it. I mixed techniques, either push filing (from the top of the bevel down towards the edge so everything was well supported) and draw filing (heel to tip) to make sure everything was flat.
About every 3-5 minutes I would clean everything off with a brush, re-blue the blade, and make some light scratch passes draw filing. This would tell me where (in one direction) the blade was uneven. I would then decide on how to approach flattening things out. Eventually I got to a point where everything was fairly flat on a scratch pass *and* I was hitting the primary bevel scribe line. This is a picture freshly finished with the 16" file. You can see some scallops on the edge near the heel where I messed up. I almost got rid of those completely in later finishing stages, but if I run a fingernail I can feel them. I think this will come out a bit when I put an edge on it, but it's still a flaw.

At this point I cleaned everything up, re-blued, checked the edge thickness, and started working with the smaller 10" double cut file. This removes a lot less material but is less likely to grab. Once everything was smoothed over I progressed down to a 2nd cut file and then to a single cut 8" file. I may grab a finer single cut file to pull this even tighter on the next one.

