1st Knife Advice - KABAR Tanto

Joined
Mar 25, 2013
Messages
24
Hello fellow Bladesmen & women,

My name is Orion. I'm taking a Damascus Bladesmithing course @ Massachusetts College of Art & Design under J.D. Smith. If you don't know him, he's a Master Bladesmith with the American Bladesmithing Society. Check out his work online.

I've fallen hard for Bladesmithing! MassArt doesn't have a Bladesmithing major program so I'm majoring in Sculpture at the school because the curriculum allows the flexibility to learn and create Blades.

Anyway, our semester long assignment is to finish one complete Damascus knife.

I had no prior experience to bladesmithing and any of the tasks one must perform in the building of a knife. I've learned a lot, but of course I have much more to learn.

I want to share my design so far and would greatly appreciate any advice for how to see my vision to the end. Your knowledge will assist me to make the blade with confidence and hopefully on time! I hear the process takes 100s of hours!

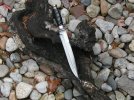
I am combining the traditional knife designs of the Tanto and KABAR together. It will be double-edged with a fuller (commonly known as a blood groove).

Steel: Damascus - 1095 and 15N20
Blade Length: 8"
Overall length: 13"
Handle material: Carved wood (any suggestions for the wood to mimic the color in the below KABAR picture?) that looks like the leather KABAR handle. Scabbard/Sheath/Saya: Same carved wood as handle to be shaped similarly to the KABAR sheath and the last image.
Other Parts: Habaki, Seppa (spacers) & Tsuba (hand guard). Definitions found here: http://en.wikipedia.org/wiki/Japanese_sword_mountings. I'm deciding whether I want to have a Kashira instead of traditional KABAR Pommel. All other metal parts will be made from the same Damascus Steel of the blade.

I'm looking for comments, suggestions, specifically things I haven't considered. I've never made a blade before and know next to nothing about it. All the knife knowledge I've accumulated since February from my research and my professor and classmates.

Thanks so much :) I'll be sharing photos of everything from start to finish a little later :)

Orion "Red's Edge"


1st Drawings
KABARTANTO%CC%84.jpg


1st Design on right page
KTDesign1.jpg


Final Design, for now...
KTDesign3.24.13.jpg
 
1. kabar does not have wood handles , it uses stacked pieces of leather
2. buy some mild steel and play with it in the forge at length before you touch a piece of damascus.
3. buy some real knife steel and play with it and try to forge as close to your final shape as possible , repeat until you get satisfactory results. Then practice heat treating.
4. forge your final knife


and some extra advice , choose to take it with a grain of salt or what you will as its just an opinion from somebody who has been through it personally. Unless you absolutely love sculpting with every fiber of your being and know you will be doing it for the rest of your life and plan to make enough money off of it to support yourself and a potential future family (and know how you will make money off of it with a detailed plan)

run , dont walk, away from paying any more money for an art degree. Not only is it tantamount equal to showing up to an employer and showing him a certificate from summer camp. But 90% of artists never went to art school. Save the money before our economy crumbles.
 
Last edited:
I don't want to be a buzz kill but, what you design and what you will be able to make look decent on your first build have to be considered. You have probably picked one of the hardest grinds to do, you will have a hard time grinding that.
I would recommend a flat grind to the spine with a gradual taper to the tip.
If you still have a hardon for that design practice on a piece of scape before you destroy a chunk of Damascus.
Good luck, and post some pics of your work in progress.
 
That is a pretty ambitious project. I am quite new to this, but I agree with the above posts. On the other hand, if you have a lot of metal working history outside of bladesmithing, transferring skills from other areas shortens the learning curve.
 
Thank you JZKnives, Meat Robot & Willie71.

Glad to hear more people agree with what I've heard elsewhere.

I am aware that KABAR handles are made with leather discs. My friend owns 3 of them. I want to make one out of wood that resembles the leather, because Tanto handles and scabbards are made of wood, but the style will resemble the KABAR handle and scabbard.

I would have practiced on mild steel first, but the 1095/15N20 Damascus combo is our assignment. As I said, I am completely new still and that's why I refer to & expect assistance from my professor throughout every step.

I'm sorry to disagree about MassArt. Being here is proving to be an incredible experience. Though of course costly, I am able to explore life in a way previously unavailable to me. I would never have gotten into Bladesmithing if I had not come here. I do agree that a detailed plan is a necessity.

It is likely I will change my design to a single edge out of necessity since time is not on my side here. Maybe I'll do the Double-Edge KABAR-Tanto in the future.

Thanks for all your advice. Keep it coming :)
 
Design looks great. You can do it. Definitely make a couple others in easy to work and cheap material so you can get a feel for it before you do the Damascus. If the grinds prove too difficult as planned then you can opt for a more simple grind for the final project. Last thing you want is an accident at the last minute so make sure to have a backup plan!

edit: another thing to think about, grinding those bevels freehand is gonna be all muscle memory , that is why you will need the practice (on 1084 or something similar). Also keep careful to have a consistent setup so your prior practice will still apply on the final piece.
 
Thank you JZKnives, Meat Robot & Willie71.

Glad to hear more people agree with what I've heard elsewhere.

I am aware that KABAR handles are made with leather discs. My friend owns 3 of them. I want to make one out of wood that resembles the leather, because Tanto handles and scabbards are made of wood, but the style will resemble the KABAR handle and scabbard.

I would have practiced on mild steel first, but the 1095/15N20 Damascus combo is our assignment. As I said, I am completely new still and that's why I refer to & expect assistance from my professor throughout every step.

I'm sorry to disagree about MassArt. Being here is proving to be an incredible experience. Though of course costly, I am able to explore life in a way previously unavailable to me. I would never have gotten into Bladesmithing if I had not come here. I do agree that a detailed plan is a necessity.

It is likely I will change my design to a single edge out of necessity since time is not on my side here. Maybe I'll do the Double-Edge KABAR-Tanto in the future.

Thanks for all your advice. Keep it coming :)
Im thinking if you tried to carve the wood similar to a kabar leather stack (thick and thin peices giving a honey ladle look) , the small wooden parts would snap or break on the handle in higher stress situations. But if you were going to do it , i would do it without carving it out of one peice and instead use stacked wood.
 
People tried to talk me out of working with damascus on my early projects too. Yeah, to be sure my early work sucked compared to what I can do today, but sometimes you just have to do what you have to do. If the damascus is required for your project, don't worry about it.

Personally, I think your design is ambitious. That can be good or it could be a problem. The way it becomes a problem is when you try to move too quickly or take things out of sequence. The problem is your instructor may not be prepared to give you the proper sequence for something that complicated.

I don't know anything about your course or your instructor. My recollection of college is that it is better to hit a less ambitious target squarely in the bullseye than it is to attempt a more ambitious project and hit it well off center of the target. I recall that you get more points for execution than for concept. With that in mind you might think about how you could simplify the design to keep it within reason for the time and talent you have.

One other suggestion... take your piece of damascus and stare at the pattern for a while. Using a pen or pencil, draw the blade design on the steel and get a sense for how the pattern will look on the completed blade. Some patterns lend themselves to particular blade designs and other patterns might look atrocious on that design. If you are committed to the design, pick a pattern that works with your design. If you have to use a particular piece of damascus, make sure the design works for that pattern.

- Greg
 
Thanks JZ. Could you clarify your idea a bit more? Are you saying the smaller receded black discs would fracture under stress or are more prone to fracture if it was one wood piece instead of stacked pieces just like the compressed leather pieces? What method do you think is best to bind the stacked wood discs?


Thank you Timos. I'll be asking around here, but any ideas where I can get some mild steel/knife steel in and around Boston, MA? It would be wise to practice, also more Damascus pattern welding.


Thanks for the encouragement Greg. Wise words. I completely agree with taking my time to do things right the first time. I'm new, so some mistakes are inevitable, but I will learn from them. That's a great idea drawing on the pattern. Unfortunately, I have absolutely no clue what exactly it will look like. I forged a "Firestorm" pattern, with a few extra folds, so I'm not 100% sure what it'll end up being, but I will look into how to view it now before moving on.
 
Making a nice looking K-Bar handle out of wood is easy. I pulled a old picture of one of my knives from my photo album. It has a k-bar handle carved from blackwood. Easy Peasie! All carefully done with a small flat file.
 

Attachments

  • Gallery Pictures 038.jpg
    Gallery Pictures 038.jpg
    102.2 KB · Views: 42
Thanks JZ. Could you clarify your idea a bit more? Are you saying the smaller receded black discs would fracture under stress or are more prone to fracture if it was one wood piece instead of stacked pieces just like the compressed leather pieces? What method do you think is best to bind the stacked wood discs?


Thank you Timos. I'll be asking around here, but any ideas where I can get some mild steel/knife steel in and around Boston, MA? It would be wise to practice, also more Damascus pattern welding.


Thanks for the encouragement Greg. Wise words. I completely agree with taking my time to do things right the first time. I'm new, so some mistakes are inevitable, but I will learn from them. That's a great idea drawing on the pattern. Unfortunately, I have absolutely no clue what exactly it will look like. I forged a "Firestorm" pattern, with a few extra folds, so I'm not 100% sure what it'll end up being, but I will look into how to view it now before moving on.
Im saying the larger red pieces that "Stick out" would be under the most stress and the smaller black disks would amplify that stress. If you are going to use wood make sure its a very strong wood.
 
Ive been ordering steel from New Jersey Steel Baron. 10$ or so for a 1.25 x .125 x 48 inch bar of 1084. Shipping would be about 13$ bucks though.
 
In the Beginning... 2/26/13

I drew it out and squared it. Then quad fold. Crushed Ws. Double fold. Then Bias forged crushed Ws, before twist.

IMG_2117.JPG


IMG_2118.JPG
 
2 inch twist (2 twists per inch of steel). 3.12.13

IMG_2174.JPG


Detail
IMG_2175.JPG


The dark brown is where I had burned the steel. I had too much oxygen and my eyes weren't used to viewing the steel through green welding lense. Live and learn.
IMG_2176.JPG
 
Twist squared. Then folded over along the short side (bias). If you look deeply, you'll see the cracks in the middle. Unfortunately upon my professor's inspection, found the weld was not sound. 3.19.13

IMG_2183.JPG


IMG_2185.JPG
 
After much Design thought, needed to reshape steel. Tried to weld short side again. It failed. 3.26.13

IMG_2301.JPG


Opposite side
IMG_2302.JPG
 
Current Pictures 4.2.13

After belt sanding each side to 90 degree angles, same weld failed. Professor helped keep it together better.
IMG_2312.JPG


Still view through (white at bottom half). I have til 5.21.13 to make this a full knife, yikes!
IMG_2311.JPG


I'm thinking of easing my design for the sake of my deadline. Making a full tang, short blade length survival knife with a nice carved wood scales.
 
Thanks for the pic David Stifle. Your knife is very similar to my design. Very encouraging :)

JZKnives, a friend of mine suggested I carve out a Red Oak dowel from home depot. There weren't any Red Oak dowels, but there was Poplar (which I would stain appropriately). Is Red Oak and/or Poplar strong enough wood? I apologize that I ask so many questions, but as I mentioned, the knowledge I have so far is not much.

Timos, great suggestion. The site is very well organized, informative and just what I was looking for. I'll mention your name when I make my first order :)

Thank you all again for your very helpful and informative advice. Because of my timeline, I've decided to simplify my design.

I'll post my design at the next opportunity. It will be a full tang survival knife with a +3" blade, +7" overall. It'll have a drop point, choil, and jimped thumb rise. The scales will be Poplar with a simple carved pattern for extra grip, likely with a stain for color, though I may add these finishing details after the semester ends.

Now, I need to purchase some important tools for the finishing work. Wood and steel tools to shape and form and polish. Perhaps a vise grip? Any ideas what and where I can find these tools for finishing the knife?

THANKS TO ALL! I really appreciate the kindness and knowledge you are all willing to share with me as someone very new to bladesmithing. :)

Red's Edge
 
If you look at this chart you'll discover that Red Oak is much more suitable for use as your handle than Poplar:
http://workshopcompanion.com/KnowHow/Design/Nature_of_Wood/3_Wood_Strength/3_Wood_Strength.htm

I see, thank you synthesist. The info on the webpage is invaluable :)

Here is my new design. It changed because of my deadline and current issues with my billet. It will now be a full tang survival knife with a +3" blade, +7" overall. It'll have a drop point, choil, and jimped thumb rise. The scales will be Poplar (or another hardwood if time permits) with a simple carved pattern for extra grip, likely with a stain for color, though I may add these finishing details after the semester ends.
IMG_2364v2.jpg


Here is my current progress. I ground the uneven side of my billet, although I did not do a great job. More to learn :)
IMG_2360.JPG


IMG_2361.JPG


IMG_2362.JPG


Thanks again for your advice. Please keep it coming :)
 
Back
Top