-
The BladeForums.com 2024 Traditional Knife is available! Price is $250 ea (shipped within CONUS).
Order here: https://www.bladeforums.com/help/2024-traditional/
You are using an out of date browser. It may not display this or other websites correctly.
You should upgrade or use an alternative browser.
You should upgrade or use an alternative browser.
1st Knife Here, Any advice is appreciated. WIP
- Thread starter Talesin
- Start date
- Joined
- May 23, 2011
- Messages
- 139
As promised here are the pics of the 3d mock-up I made. Sorry for the crappy cell phone pics. I promise I'll use my wife's digital camera next time.


Also, I just ordered the last of the stuff I needed from Texas Knife Supply.
I went ahead and ordered the brass rod and tubing from them since it was pretty cheap to my inexperienced eyes, and because I had to buy other stuff there anyway. I got the 30 min epoxy, a 12" x 5" piece of micarta for the handle and the 30 minute epoxy. The most expensive part was the shipping. Ouch.
The good news is, all that stuff I just ordered should be enough to make 4 knives total at least, but let's just focus on getting the first one done.
Couple of questions though, when I am filing the bevels in, as I understand it I make a rough cut at the blade edge with the file to about 45 degrees, and then I draw file in the rest of the bevel. Is this correct? Or do I do more of the rough filing to make the bevel and then draw file to finish out the bevel before moving on to the sanding?
I've done quite a bit of searching lately and I have not been able to find any videos of someone doing the blade grinding by hand with a file. All the videos I've found are by guys who have at least a 2 x 42 if not a GIB or a KMG. Any ideas on where to find a video that talks about hand filing the bevels?
Check the library. You can probably find several books that explain the process. I suggest Wayne Goddard, he'll get you to the point of making knives better than the average knives made 1800 - 1900 and beyond. I like Wayne and when I ask him if a certain chisel from an old farm drill would make a good knife, he said (I'm paraphrasing) with a smile in his voice, "You won't know until you try." Other books are suggested on this forum that will take you into the 20th and 21st century. Buy some mild steel and make a mockup using pine or fir for the handle. Practice filing your bevels to see what works and what doesn't.
Hopefully I'll put together a forge next year or the year after and find out if that chisel will make a good knife. If I am lucky, the chisel will be made out of 1077 or 1086 and it will have the potential of making a good knife. If not then it is the same as using mild steel for a mockup.
Hopefully I'll put together a forge next year or the year after and find out if that chisel will make a good knife. If I am lucky, the chisel will be made out of 1077 or 1086 and it will have the potential of making a good knife. If not then it is the same as using mild steel for a mockup.
- Joined
- May 23, 2011
- Messages
- 139
I took Bo T's suggestion and checked out the knife making books thread that was on here. I read a couple of the ones by Loveless and "Step by Step Knifemaking" by Boye or Boyd. All three books were really helpful. After doing some more looking around online I found several good videos on youtube going over the process of hand-filing bevels. There aren't many of those videos out there compared to "How to Bevel with a Belt Grinder" but they do exist.
Friday I finished getting my work area ready and put my tools together to cut out the knife blank. By Saturday I had started cutting on the steel to get my blank out. I learned a couple of lessons pretty quickly with this.
1. Do not buy 24 TPI bimetal blades for the hacksaw to cut annealed tool steel. It is frustrating and much harder than it should be. Once I bought the 18 TPI for "large metal" the cutting went much faster. Think comparing using a dull wood saw on 2 x 4 to a hot knife through butter. That is how much difference I saw.
2. Clamping the paper stencil to the steel and doing an outline in sharpie looks great. Unfortunately, the maker came off quickly when it came into contact with the 3in1 oil I was using to facilitate cutting.
3. Using oil while using the hacksaw makes things much easier. The saw was less likely to bind and snag on corners.
So Saturday I finished cutting the blank after making another trip to the hardware store for the 18 TPI blades, and going grocery shopping, and going to a party with my wife.
Today I started trying to profile the blade with my files. Notice I said try. I worked at it for about an hour and the file hadn't taken but maybe 1/8" off on the back of the blank. Back to the internet. Know what I found? Pretty much everyone either glazes over this particular step or they use a power tool of some sort. Even Greenpete who made that cool video of making a scandi grind bushcrafter used an angle grinder for this step. Seriously, he had a car battery, an inverter and a transformer to run this thing. That right there told me I had to try something else.
Well, I thought to myself. I have a 25% off coupon to Harbor Freight, only good today. So off I went and bought a 1 x 30" belt sander. It works great. I bought some of the 80 grit Zirconia belts they had and used the stock Aluminium Oxide belt that came with it. One problem I did have was that the first Zirconia belt I put on it was about 1/8" too long so it was tracking all over the place. That particular problem took me about 45 minutes to diagnose and rectify with the other belt in the package that was the correct size.
Here are some pictures that my wife took when I was finished using the HF belt sander.
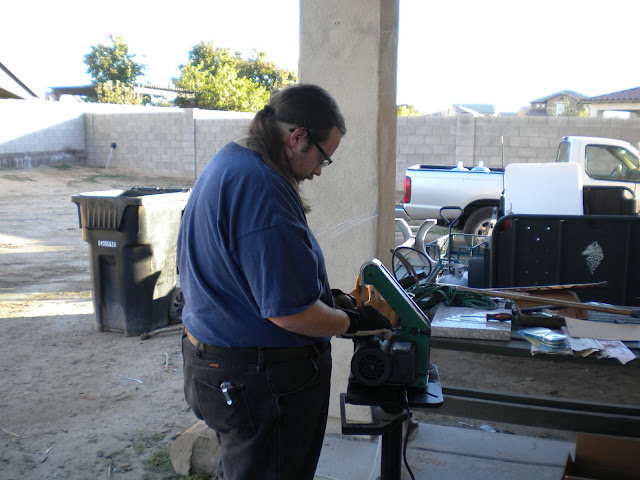

Notice that there is a little rust spotting here. This is from the water bucket that I was dunking the blank into as I was grinding it. This is now clean and rust free.


I did have a couple of things I wanted to ask about. The first is marking the blade blank. I noticed a lot of guys here suggested using a sharpie or other permanent marker. This didn't work out so well for me. The marks faded several times throughout my process. Most notably during the rough cutting and again during the profile grinding. I tried marking the steel with a drill bit, but the scratches just wouldn't take. I thought that next time I would try gluing the stencil I had made to the steel. Do you guys have any other suggestions for this issue?
The second thing is sanding drums for a power drill or drill press. I went to Home Depot and they didn't have any for some reason. At Harbor Freight the only ones they had were a set with the smallest being 1 x 3" and the largest being 3 x 3". These seem to be way to large for me.
The last one is that tomorrow I am going to try finishing the profile on the choil using my Dremel and a grinding wheel. This should work right?
And the last lesson I learned was why people said not to buy one of the swivel vises. Even cranked down as much as I could, it still has a bit of wiggle to it. This is extremely annoying. I'm thinking of having a friend of mine who does welding put some spot welds on it. It'll take away the swivel feature, but I can always just unbolt, turn and rebolt it down if it bothers me that much. If I can find a machinist vise for cheap I am picking one up.
All in all I have had a blast doing this so far. This is proving to be a very enjoyable thing to do. Especially the grinding on the 1 x 30. That was just too much fun.
Friday I finished getting my work area ready and put my tools together to cut out the knife blank. By Saturday I had started cutting on the steel to get my blank out. I learned a couple of lessons pretty quickly with this.
1. Do not buy 24 TPI bimetal blades for the hacksaw to cut annealed tool steel. It is frustrating and much harder than it should be. Once I bought the 18 TPI for "large metal" the cutting went much faster. Think comparing using a dull wood saw on 2 x 4 to a hot knife through butter. That is how much difference I saw.
2. Clamping the paper stencil to the steel and doing an outline in sharpie looks great. Unfortunately, the maker came off quickly when it came into contact with the 3in1 oil I was using to facilitate cutting.
3. Using oil while using the hacksaw makes things much easier. The saw was less likely to bind and snag on corners.
So Saturday I finished cutting the blank after making another trip to the hardware store for the 18 TPI blades, and going grocery shopping, and going to a party with my wife.
Today I started trying to profile the blade with my files. Notice I said try. I worked at it for about an hour and the file hadn't taken but maybe 1/8" off on the back of the blank. Back to the internet. Know what I found? Pretty much everyone either glazes over this particular step or they use a power tool of some sort. Even Greenpete who made that cool video of making a scandi grind bushcrafter used an angle grinder for this step. Seriously, he had a car battery, an inverter and a transformer to run this thing. That right there told me I had to try something else.
Well, I thought to myself. I have a 25% off coupon to Harbor Freight, only good today. So off I went and bought a 1 x 30" belt sander. It works great. I bought some of the 80 grit Zirconia belts they had and used the stock Aluminium Oxide belt that came with it. One problem I did have was that the first Zirconia belt I put on it was about 1/8" too long so it was tracking all over the place. That particular problem took me about 45 minutes to diagnose and rectify with the other belt in the package that was the correct size.
Here are some pictures that my wife took when I was finished using the HF belt sander.
Notice that there is a little rust spotting here. This is from the water bucket that I was dunking the blank into as I was grinding it. This is now clean and rust free.
I did have a couple of things I wanted to ask about. The first is marking the blade blank. I noticed a lot of guys here suggested using a sharpie or other permanent marker. This didn't work out so well for me. The marks faded several times throughout my process. Most notably during the rough cutting and again during the profile grinding. I tried marking the steel with a drill bit, but the scratches just wouldn't take. I thought that next time I would try gluing the stencil I had made to the steel. Do you guys have any other suggestions for this issue?
The second thing is sanding drums for a power drill or drill press. I went to Home Depot and they didn't have any for some reason. At Harbor Freight the only ones they had were a set with the smallest being 1 x 3" and the largest being 3 x 3". These seem to be way to large for me.
The last one is that tomorrow I am going to try finishing the profile on the choil using my Dremel and a grinding wheel. This should work right?
And the last lesson I learned was why people said not to buy one of the swivel vises. Even cranked down as much as I could, it still has a bit of wiggle to it. This is extremely annoying. I'm thinking of having a friend of mine who does welding put some spot welds on it. It'll take away the swivel feature, but I can always just unbolt, turn and rebolt it down if it bothers me that much. If I can find a machinist vise for cheap I am picking one up.
All in all I have had a blast doing this so far. This is proving to be a very enjoyable thing to do. Especially the grinding on the 1 x 30. That was just too much fun.
- Joined
- Sep 6, 2010
- Messages
- 706
Really enjoyed reading this thread and look forward to your progress. Making a knife is on my to-do list this year so I'll be frequenting this sub-forum often.
- Joined
- Jul 13, 2009
- Messages
- 21,855
For marking I use something like this
http://www.walmart.com/ip/Radnor-AG810C-1-8-Tungsten-Carbide-Scribe/15789635
I just use the tips
Lay the steel and the tip on a flat surface like a thick glass scrap.
You can create the double lines with a bit of feeler gauge, or a few layers of paper under the scribe.
http://www.walmart.com/ip/Radnor-AG810C-1-8-Tungsten-Carbide-Scribe/15789635
I just use the tips
Lay the steel and the tip on a flat surface like a thick glass scrap.
You can create the double lines with a bit of feeler gauge, or a few layers of paper under the scribe.
- Joined
- May 23, 2011
- Messages
- 139
Thanks Count. I really appreciate it. My wife gave me a $50 gift card to Walmart for Christmas so that works out great.
That is also the perfect size for my stock if the point is centered. I'm using 1/8" O-1 that I got from a local supplier here in town. For a flat surface I have a marble block that I use for leather working. I should be at that step probably Wednesday. Assuming I can fix my lack of lighting in the garage.
That is also the perfect size for my stock if the point is centered. I'm using 1/8" O-1 that I got from a local supplier here in town. For a flat surface I have a marble block that I use for leather working. I should be at that step probably Wednesday. Assuming I can fix my lack of lighting in the garage.
Sounds like about the same path I took a couple months ago. Makes ya appreciate a fella like tryppr who is either saintly patient and ripped like a gorilla or a masochist.
I use a sharpie for the profile and a scribe for the centerline. I also mark up the bevels with a sharpie periodically to show me high spots when working on a flat grind.
Your probably still going to have to file the plunges in it you want them nice and clean.
I am sure you saw it and turned the dial but just in case - the tracking adjustment is on the back right of the grinder, and I never put that side black cover on- seems to just slow down belt changeovers.
Of course also always use gloves, eye protection and a respirator.
Finally I predict 2-3 knives before your on craigslist looking for a bigger grinder.
Have fun!
- Joined
- May 23, 2011
- Messages
- 139
I also mark up the bevels with a sharpie periodically to show me high spots when working on a flat grind.
Your probably still going to have to file the plunges in it you want them nice and clean.
I am sure you saw it and turned the dial but just in case - the tracking adjustment is on the back right of the grinder, and I never put that side black cover on- seems to just slow down belt changeovers.
Of course also always use gloves, eye protection and a respirator.
Finally I predict 2-3 knives before your on craigslist looking for a bigger grinder.
Have fun!
You caught me. I do have a mask and a respirator. I don't know why, but I didn't use them this time. I was probably too excited to use my new tool. From now on though, I will observe proper PPE. No sarcasm intended, I'm sincere.
Alright, time for the next installment here.
Last night I worked on cleaning up the choil area and drilling both the pin holes and the weight reduction holes in my blank.
Cleanup on the choil area was done with a bastard chainsaw file and 80 grit sand paper. The sand paper was from the loose belt that was giving me all that trouble on Sunday. For some reason or other I had a handle to a plunger lying around and that worked great for sanding that area with a little bit of that 1x30 belt wrapped around it. I then followed up with some 100 grit emery paper wrapped around a paint stick. I don't remember whose idea it was to use a paint stick for sanding, but they are a genius.
Next up was drilling the holes in the tang with my drill press. It is a 5-speed craftsman, so I used the lowest speed which is 620 for the drilling. The machine recommends a speed of about 1200 for metal, but I didn't want to break any bits just yet. I'll try a higher speed next time, unless anyone recommends against it.
By the way, tryppyr mentioned in someone else's thread about getting swivel clamps from harbor freight. Those things are great. I only have one right now, but I am definitely getting some more here real soon.
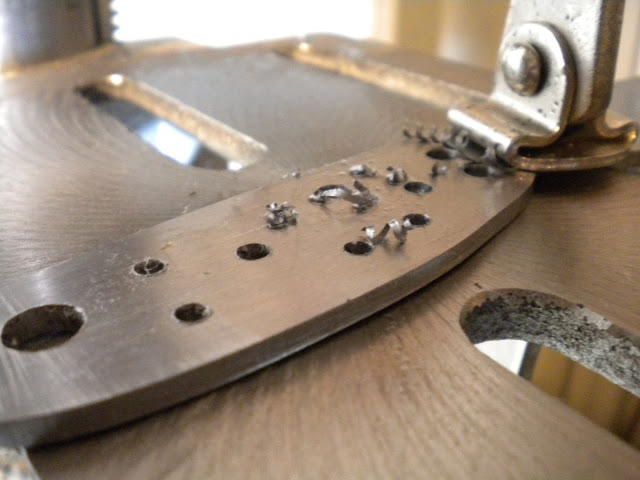
Here's some pics of the drilling.
This one was taken by my roommate as I was drilling.

Here you can see that I've clamped the blade to the work table with the swivel vise. This thing made it much easier to move the blank around when drilling multiple holes of the same size.

As you can see, when I started drilling any holes over 1/8" I began to get long curly pieces of steel.
Now for the lessons I learned while doing this. I haven't drilled this much metal before and the metal I had drilled before was about 14 gauge aluminum. Quite a different beast.
1. I knew this already, but I went ahead and tested it. Always drill pilot holes. I used a 1/16" bit for the pilot holes and it made things so much easier on the bits and my nerves. I did try drilling a straight 5/32" hole once. It made a hell of a screeching sound and the drilling was very very slow. Also, don't forget to center-punch your holes before drilling. I don't know if I could have gotten away with not doing it with the small pilot holes I drilled, but I didn't want to chance it.
2. Use some kind of oil for drilling. And use it like it's free. Drilling with about 2-3 drops of oil on the bit per hole made things very very smooth. In fact, with all the drilling I did, not one of the bits got too hot to touch.
3. Drill all of the same size holes at once. I was still learning as I was doing, so with the first three holes for the pins and lanyard tube I changed bits and finished out each hole one at a time. This is very slow, since the shaft of a 1/16" compared to 1/8" compared to 5/32" is quite different. I had to move the material rest between each bit change and then realign the blank with the bit. So 11 bit changes for three holes and I probably spent well over an hour just drilling those three.
When I started doing the weight reduction holes I drilled all of the pilot holes first, then moved up to the next size bit in the progression, drilled those holes, then did it again until I was finished. Total time on the remaining 8 holes was maybe 45 minutes.
4. There may be a better way of doing this and I will experiment some more on my own with it, but I found progressing the bit sizes incrementally seemed to be the best way to do it. I went from 1/16 to 1/8 to 3/16 to 1/4 on the weight reduction holes. It looks like I moved up 1/16 in size with each bit change. Anyone that has more experience, please feel free to tell me I'm wrong on this progression or if there is a better way. I'm still learning here.
5. Make sure to clean the material rest every couple of holes or so. I found that bits of steel were getting stuck under the blank so that it wouldn't sit level on the rest. This may or may not have affected my hole orientation, but I felt better with the stock flat.
6. Wear a full face shield when doing this. My drill press is mounted a little high at the moment and when I started using bits over 1/8" the bit would throw smoking pieces of metal at me like it was aiming. I don't know if it would have hurt or not, but I'd rather be safe than sorry.
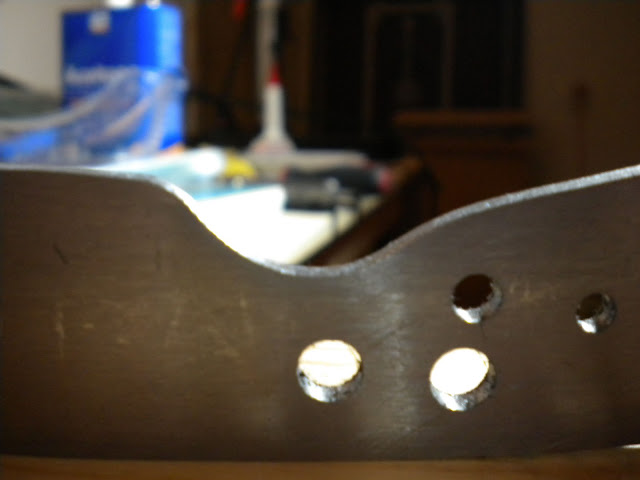
Now for the pics at the end of cleanup that night.
Drilled holes. The two holes with the sharpie on them are the pin holes. Also, I didn't quite eyeball the weight reduction holes right when I was center punching them, so two were a little to close together. I made them all 1/4" except on where I stopped at 3/16" since I thought that the metal in between would have been too thin. I still have plenty of room to drill more holes if needed. Any opinions on this?

And finished for the night.

Also, I found a scribe at Lowes for 5.98 with the tungsten carbide tip and a pretty strong magnet on the other end that is pencil shaped.
I do have one question about the plunge line for the bevel. In one of the books I have on knife making, the author suggest filing the plunge cut with the edge of a mill file. He also says to file halfway through the metal on one side of the blank and then flip it over. This doesn't seem quite right to me. Could someone give a little more explanation about how to hand file the plunge line and about how far I should go while doing it please. I checked Stacy's "How to make a knife" thread in the stickies, but he seemed to have skipped that part in his explanation. The plan at this stage is to do a full flat grind, but that may change since this is my first time.
Thanks guys for the chance to share this with ya and for the advice you've given. Looking forward to starting on my bevels next with the files.
- Joined
- May 23, 2011
- Messages
- 139
I finished the filing on the bevels last night. I figured out a couple of things during this process.
1. I cannot draw file the bevels in. I suck at it, really suck at it. I had filed in my plunge line and had been draw filing for about 8 total hours when I noticed that the area near the plunge line wasn't getting filed evenly. It seems that because it was further away from me than the point, I was putting more pressure as the file traveled down the blade and not keeping even pressure overall. It was also a total bear when it came to keeping a consistent angle on the file, because it removed so little metal with each stroke I had kinda stopped checking as often as I should have and ended up with some very uneven lines.
2. Once I accepted that I couldn't draw file to save my life, I attacked the blade with the old push filing method. This actually worked really well. But once again, I realized that I had cut the plunge line way to deep and by the time I was finished matching things up, the edge at the plunge was way thin. Probably .01" or less. I was afraid to check it with my micrometer.
After I finished with the bevels I drilled 3 more holes in the tang to lighten things up and proceeded to start sanding. Well, attempted to anyway. I learned another important lesson here. Don't ever, and I mean ever, use sand paper from HF. It stinks, and I mean that literally. I started with some 60 grit emery paper, the kind that you can use wet or dry and I started wet sanding the tang on a piece of marble tile that I have. The abrasive came off like mud. And it stank.
I cleaned up the blade and got a new piece and decided to do this one dry. 10 minutes in and I was getting absolutely nowhere. Not even scratches on the steel to show for all my effort. I found some old 80 grit Norton paper I had and that worked much better.
Today I got some more of the Norton sandpaper in grits from 60 to 400 to sand the rest of it.
My question is, how to I bring the edge back up some so that the edge is thick enough for heat treating? I have a HF 1x30 that I can use, but I'm not keen on that idea. I've also thought about just running the edge back and forth on sandpaper. I could file the edge back I think, but I would like to know what someone more experienced would suggest. Thanks.
I know this is hard without a picture to see but my wife has the camera right now. Later when I get it I'll throw up some pics so that you all can see what I am talking about. I'm just gonna work on sanding the knife a bit to get the file marks out.
- Joined
- Jan 2, 2010
- Messages
- 337
Look on youtube for "plunge line tutorial part 1" and obviously there is a part 2. Should get you started.
As for the edge, just take a lillte off via file or your 1x30 until it is the appropriate thickness.
I also think stepping up by 1/16ths is a little tedious when drilling. Pilot hole then real hole.
Post some bevel pics!
As for the edge, just take a lillte off via file or your 1x30 until it is the appropriate thickness.
I also think stepping up by 1/16ths is a little tedious when drilling. Pilot hole then real hole.
Post some bevel pics!
- Joined
- May 23, 2011
- Messages
- 139
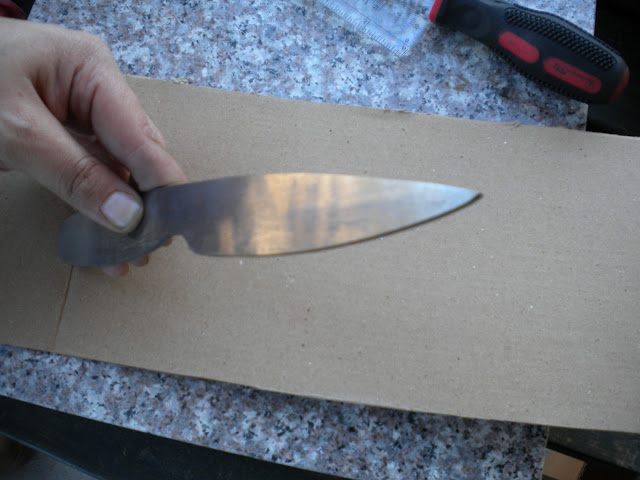
Here are the pictures as promised.
Here you can see that the edge thickness near the plunge is way too thin. It thickens a little toward the point but not much.

Here is the bevel on the left side of the knife. The number 2 is to help me keep track of which side of the tang I sanded first. The tang here is sanded to 60 grit. There were some nasty scratches and it took me a while to get them out.

Right side now. The tang on this side has been finished to 120 grit so far.

Here is a close up of the left side. You can see near the plunge that the steel looks bent. This is because it isn't perfectly even and with how thin the metal is there is has a little bit of an angle. It's also hard to see here but near the spine there is a low spot from when I was draw filing. I could fix this with even more filing, but with the edge as thin as it is I really don't want to remove much more metal.

I'm thinking that after I bring the edge up, still debating on how to do that, I'll use my actual chainsaw file to put in a Spanish Notch. This should help with the transition from plunge to edge looking more even. It is hard to see but I nicked the corner of the deepest part of the plunge with the edge of the file once or twice. I'm thinking that I should round the corner a little to make it so that it doesn't look so much like I messed up there.
For the sanding I used some spray adhesive to stick sand paper to the granite block I have, but I'm having a tough time holding the knife while sanding. I wrapped the blade in tape and used a piece of scrap leather for my thumb on the blade, but the 90 degree edge of the tang is biting into my thumb right now while I'm moving the tang over the sand paper. The only thing I can think of at this point is to tape my thumb because the gloves are too big and get snagged by the sand paper when I tried that. It's a little difficult to hold the tang with just fingertips to move it around on the sandpaper but I haven't come up with anything better yet.
Here you can see that the edge thickness near the plunge is way too thin. It thickens a little toward the point but not much.
Here is the bevel on the left side of the knife. The number 2 is to help me keep track of which side of the tang I sanded first. The tang here is sanded to 60 grit. There were some nasty scratches and it took me a while to get them out.
Right side now. The tang on this side has been finished to 120 grit so far.
Here is a close up of the left side. You can see near the plunge that the steel looks bent. This is because it isn't perfectly even and with how thin the metal is there is has a little bit of an angle. It's also hard to see here but near the spine there is a low spot from when I was draw filing. I could fix this with even more filing, but with the edge as thin as it is I really don't want to remove much more metal.
I'm thinking that after I bring the edge up, still debating on how to do that, I'll use my actual chainsaw file to put in a Spanish Notch. This should help with the transition from plunge to edge looking more even. It is hard to see but I nicked the corner of the deepest part of the plunge with the edge of the file once or twice. I'm thinking that I should round the corner a little to make it so that it doesn't look so much like I messed up there.
For the sanding I used some spray adhesive to stick sand paper to the granite block I have, but I'm having a tough time holding the knife while sanding. I wrapped the blade in tape and used a piece of scrap leather for my thumb on the blade, but the 90 degree edge of the tang is biting into my thumb right now while I'm moving the tang over the sand paper. The only thing I can think of at this point is to tape my thumb because the gloves are too big and get snagged by the sand paper when I tried that. It's a little difficult to hold the tang with just fingertips to move it around on the sandpaper but I haven't come up with anything better yet.
- Joined
- Feb 6, 2011
- Messages
- 171
woooo buddy i really like your style
im working on my first ones right now so ill be checkin what came of this beauty for encouragement
ooo
im working on my first ones right now so ill be checkin what came of this beauty for encouragement
ooo
- Joined
- May 18, 2009
- Messages
- 1,831
countersink your holes for the pins/bolts