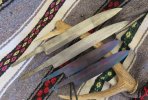
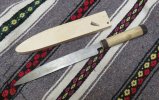
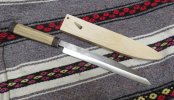
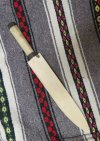
A Yanagi Ba for a friend

As to the blade shape.
If you look at Brock's link, you see the spine tapers down more gradually to the tip, instead of a rapid drop like yours.

The bevel rises higher, and the tang has no machi ( shoulders). The bevel should be 50-60% of the blade at the heel.

The blade you have is wider than needed because of the ricasso being wider than the tang.

Normally, the bevel rises to meet the line of the tang bottom, and the tang top is the extension of the spine lines.

These changes are not too late to make.
Grind the ricasso up to the tang bottom and grind down the sine to the tang. If you want to keep the machi, make them half as deep.
Make the spine drop more gradually to the tip.
You also need to taper the tang a bit.
Once the profile is cleaned up, continue grinding your bevel up to the new line.
 
And the advantage to all of that work Stacy suggests is that you you will have a nicer blade, and will be digging a smaller trench for the ura. :)
 
Great stuff Mark, I looked at your link and despaired, WOW! and Stacy, thanks for all the advice and tips. Think I'll keep a smaller Machi though since that's what I'm used to. I made the shoulders thinking the handle at the spine and choil transition to ricasso would be smooth, but I see that the handle is supposed to be bigger than the ricasso in nearly all the examples I've downloaded.

I'll be doing the modifications as soon as I can, but other priorities loom so it'll be a bit.
 
Sup guys :)
To not making the same thread...

I'm in the process of making 2 Yanagiba blades from Bohler K460 aka O1 3mm thick.
250mm blade, tapered on the 1/3 lenght from the tip to 1mm. Urasuki made on 10" wheel soo this taken some time to make this properly.
Now I'm on the hand-work part... Grinding on stones...

I was thinking about Wa handle made from black G10 and polished.

What do you think ?

 
They look pretty nice! That ura is deep. I can't think of a reason that would be a problem, it's just deep. It will clean up nicely with a wood block at the same diameter if you have a mind to.
What were your challenges making these? There isn't a lot of discussion on this type of grind, probably because it's a bear to do.
Sharpening is the next bear to face.
 
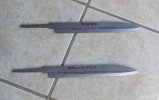
OK, Here's the before pic:
IMG_1347.JPG

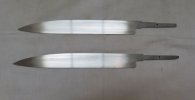
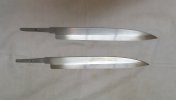
Here's after pics: I had another curved sanding block that was a 16" diameter (the other was 9"), then I made a curved block with a 36" diameter per Brock's idea. If I do a urusaki again via hand sanding I'll start with the 9" for initial depth, then 16" and the 36 for blending. The front spine and front edge modified per recommendations, less pronounced curves. Currently finished at 320 on the bevel, 1200 on the flats and 320 on the left urusaki side, and it's still straight!. The edge is about .035" so I'll still have a lot of grinding post HT.
PreHTL.JPG PreHTR.JPG
Touch points are rounded very slightly and I'll take the left side to 400 grit before HT. Am I missing anything or any other suggestions?
 
Last edited:
OK, Here's the before pic:

Here's after pics: I had another curved sanding block that was a 16" diameter (the other was 9"), then I made a curved block with a 36" diameter per Brock's idea. If I do a urusaki again via hand sanding I'll start with the 9" for initial depth, then 16" and the 36 for blending. The front spine and front edge modified per recommendations, less pronounced curves. Currently finished at 320 on the bevel, 1200 on the flats and 320 on the left urusaki side, and it's still straight!. The edge is about .035" so I'll still have a lot of grinding post HT.
Touch points are rounded very slightly and I'll take the left side to 400 grit before HT. Am I missing anything or any other suggestions?

Looks pretty good John. There is not much doubt if you were to make another it will improve. That's just they way it is when you strike out in on a new knife design. That's also what makes this hobby so interesting, the learning...
I would be very interested to know how your HT goes and how it affects the blade. I've always done pretty much what you are doing, but not taking the edge bevel quite that far.
When I get them back there is a slight lengthwise arch. I leave enough meat that I can take this out, but it is a peril. This has to be a product of the bevel, the ura, or both. If I were to make another I would not do any grinding except perhaps flattening the sides.
 
Very nice Kosa… but you really need to clean up the urasuki.;)
 
Last edited:
Nice job Kosa_PL Kosa_PL Yes please share some experiences. Mark Brock mentioned sharpening and everyone's mentioned bending in heat treat. Were these challenges in your case and how did you address them? I've still got a long way to go myself.
 
OK, Here's the before pic:
View attachment 978762

Here's after pics: I had another curved sanding block that was a 16" diameter (the other was 9"), then I made a curved block with a 36" diameter per Brock's idea. If I do a urusaki again via hand sanding I'll start with the 9" for initial depth, then 16" and the 36 for blending. The front spine and front edge modified per recommendations, less pronounced curves. Currently finished at 320 on the bevel, 1200 on the flats and 320 on the left urusaki side, and it's still straight!. The edge is about .035" so I'll still have a lot of grinding post HT.
View attachment 978763 View attachment 978764
Touch points are rounded very slightly and I'll take the left side to 400 grit before HT. Am I missing anything or any other suggestions?

I'm not sure if it's just the pictures, but it looks like your blade gets wider towards the tip. On a yanagiba the bevel gets taller (shinogi line raises) towards the tip, but the heel is still the widest part of the blade.
 
Wow Tenebr0s, good eye, I never thought to mic the height. One of the 2 is about .0025 narrower at the heel, likely happened when I rounded the heel just because I like that look. The other is +\- .002 all the way, about 1.29 OAH. The shinogi should rise higher as I finish the grind post HT.
 
haha, well I'd love to think my eyes are that good, but it must just be the photo. In general, yanagibas are pointier than yours. The tip is higher (edge gradually raises). Since you already starting grinding the bevels, you might just want to grind the spine area a bit to make the drop of the point start a bit further back. To me, anyway, that would look better. Give Japanese Knife Imports a look: that site has tons of detailed photos of yanagibas, with measurements too.
 
welp, here it is, November already! Got these back from HT about 3 weeks ago, dead straight thankfully. This is 52100 and HRC right at 60. But I couldn't start til today, been out of town, then catching up at work and man I missed the workshop! I told my friend I'd be done by Christmas. The first one has "carbon bubbles" from HT but I'm gonna leave them on, I think it looks cool, just etched in vinegar and 1200 grit sanded. I'll finish it first (for the wife to use it in her restaurant) and the second will be for the friend.

So today I took the bevel from about .035 to .012 at 80 and 150, I'll stick with 150 most of the way til .005 or so, then finish at 240 and hand satin the bevel to around 1200 grit. Working slow, the blade stayed cool enough to the touch but I dipped often anyway. Any comments on this work plan or advice going forward greatly appreciated.

The handle will be copper, ebony, red spacer, vitex for the main part, then red spacer and ebony on the back. There's a lot of shaping left to do. OAL currently at 17" but it'll lose a little. ETA that the Wa shape isn't really, it has 8 sides but the bottom is narrower, echoing the egg/oval shape that's well liked. What do you think?

The roughed in saya is hard white maple with a basswood core. I've got enough for all four blades shown.

IMG_1400.JPG Post HT.JPG
 
Last edited:
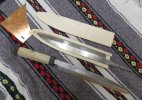
Made some good progress on the handle and saya this week. The handle is fully assembled and epoxied. Joints are very tight but it needs final sanding. The saya's assembled and at 320 grit while I decide what finish to put on it. The pin is a deer tine. Suggestions welcome on any aspect. No new blade work, it gets dark early and I grind outside, so that's pretty much weekend work but I don't have too far to go, just slower as the edge gets thinner. Then I need to buy Waterstones, there is a local source, and review Stacy's and others mega-wips and some video's I found for sharpening. Starting to get excited!

IMG_1403.JPG IMG_1404.JPG IMG_1405.JPG
 
Last edited:
Hello again, I could use some guidance as I finish the grind. It's currently about .005" +\- .001", (.007" at the tip), and I started the 240 grit (currently my finest grit) for the last few passes. There has been no overheat cause I'm checking by touch every pass or so and air cooling.

My question is how far to go with the belt before switching to hand work to finish out to the zero edge? I've never ground any edge this fine and consider myself lucky so far and don't want to blow it at the end.
 
Back
Top