Good job on getting one finished up. And for the record, I don’t know many knife makers that see their finished knife without seeing things they want to improve. But kudos to you for asking for feedback.
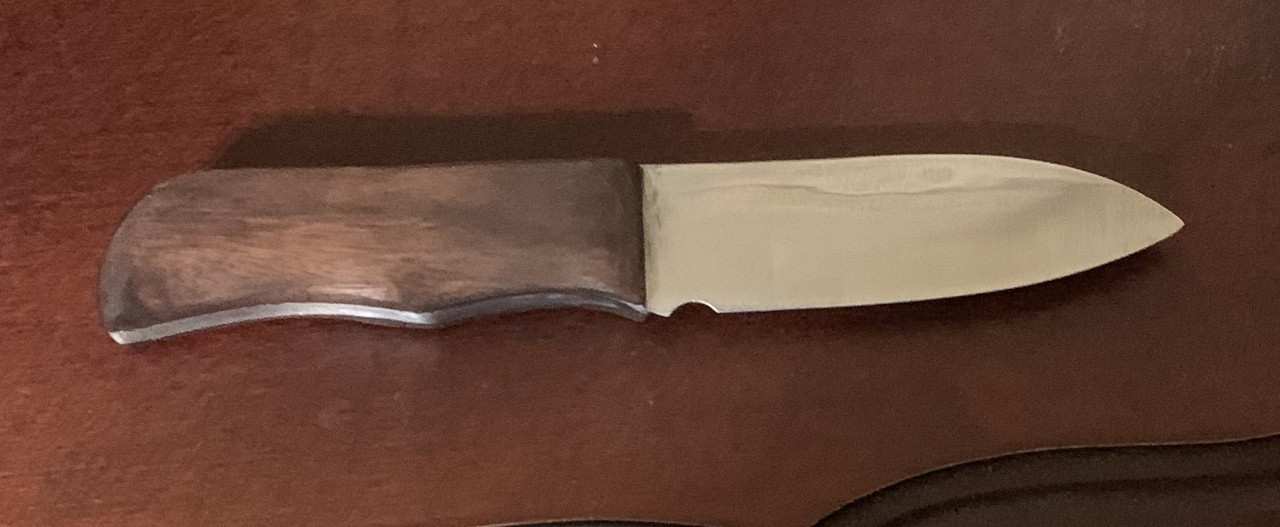
-I like the blade shape for utilitarian tasks. Your grinding will get better the more blades you do along with having the various grit belts you want that aren’t worn out
")
.
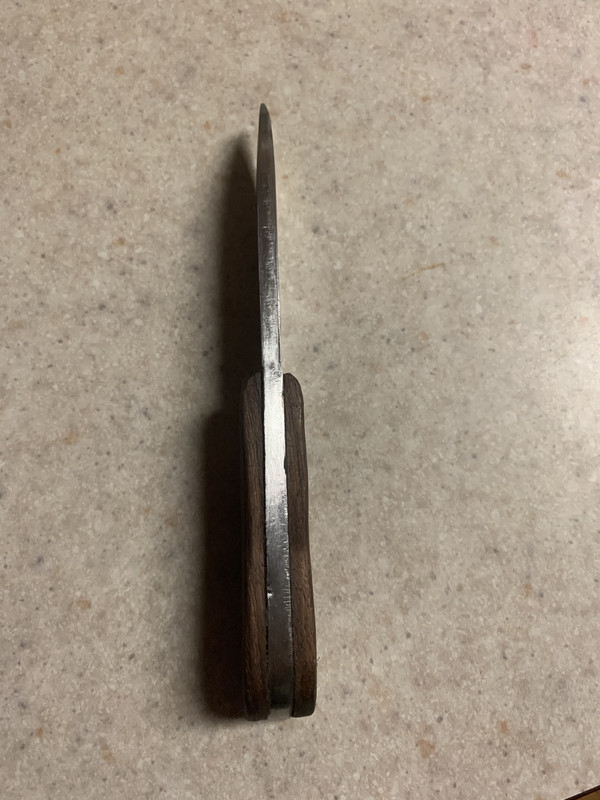
-I can’t see a lot in the picture as to your plunge lines, but making those areas nice and symmetrical are all things that come with practice. It looks like there may be some marks or gunk in front of your scale on the steel. If it’s from trying to sand/shape the front of the scale after it was on your knife, the best bet is to sand/finish the front of your scale before you epoxy it on. There’s no good, effective way to shape it after it’s on without accidentally marking up the steel. If it’s epoxy squeeze out, a friend told me a trick once. After you’ve finished the front of the scale and have the placement figured out on the knife, put a little glob of Vaseline in front of that line on each side. Apply your epoxy and scales and once it’s clamped, wipe up the squeeze out. Use a little denatured alcohol if you want on a folded blue paper towel or q-tip right at the front of the scale. Once you’re fairly satisfied, push the Vaseline up to the front of the scale. This helps keep epoxy from being able to adhere to the steel very well at the front of the scale. When it’s all dried, wipe away the Vaseline and clean it all up. A little brass rod with a point ground into it can be used to carefully pick away any epoxy right at the front of the scale without marring your steel blade.
-With good surface prep and the right epoxy, you can certainly get away with no pins in your handle, but it can be risky. Especially depending upon the intended use of the knife and what sort of environment/tasks it’ll be in and used for.
Use the knife for whatever stuff you can. See how it feels in hand when actually using it. See how it reforms and how long it takes before you need to sharpen it. I’ve made my best discoveries on what I want to change on the next knife by using the ones I’ve made. From blade length, shape, steel thickness, handle shape, etc-it all might seem good in my head, but there’s no substitute for putting it to work and seeing if theory and practice match up
. Oh, and if possible, get your hands on other maker’s knives. Especially towards the beginning, seeing and handling other knives gave me really valuable starting points on changing some of my handle designing, shaping, etc. Hope some of that was helpful and thanks for posting your knife up. It sure is satisfying working on a project like that and having a useful tool at the end.
Jeremy
") WATCO Danish oil is for wood finishing...There are a few youtube videos on how to use Danish oil to seal the wood and my own personal experience is it's a High Quality easy to use finish that hand buffs to a nice finish. A small can of Danish oil will finish many knife handles...Good Stuff
WATCO Danish oil is for wood finishing...There are a few youtube videos on how to use Danish oil to seal the wood and my own personal experience is it's a High Quality easy to use finish that hand buffs to a nice finish. A small can of Danish oil will finish many knife handles...Good Stuff