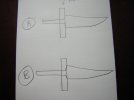
There are a few tricks that make fitting a bolster or guard easier.
1) The only part that needs to be a flush fit is the very front face. Behind that, there can be more open area. Cut the starter slot with a jewelers saw so it is about 75% of the width and length desired. Use a burr in a Dremel or flex shaft to enlarge this from the back side. Take the enlargement up to about .1" from the front face. Make the enlarged area wider and longer than the tang at the shoulders. Now, al you have to file and shape is a .1" thick area. It can easily be filed and adjusted as needed for a snug fit.
2) While soldering a bolster/guard is a great way to attach it, it isn't the only way. JBweld and other strong epoxies will seal the joint quite well.
3) Use slow set epoxy!@ The amount of work time with 5-15 minute epoxies is often only one or two minutes. That isn't enough time for alignment and proper fitting. Use at least a one hour resin, or for the best choice, a 24 hour cure resin. These allow up to one hour work time. The cleaning solvent for wiping the excess resin off your handles and blades is denatured alcohol. It is a much better solvent for uncured epoxy than acetone.
4) Don't attach the bolster block to the handle after fitting it to the blade. Leave the two separate. They can be glued on at the same time, or in two steps, as the build requires. Apply the glue to the bolster and slide it in place. Make sure the fit is right, and then apply the handle with the cavity filled with epoxy. Clamp them together in a handle jig and wipe off the squeeze out with a paper towel, then again with a towel wet with denatured alcohol. Check again after a few minutes and wipe off again to check alignment. A last check and wipe down is done just as the glue post shows the resin is gelling. From that point on, set the jig and knife aside for 24 hours to fully cure.
5) Choose your bolster/guard material with some thought. Certain materials are used traditionally for many reasons. The most likely one was availability, and the second was that it was a good choice. Buffalo (water buffalo) horn, reindeer antler are great choices. The work well, sand/saw/file and carve easily, and hold up quite well in use. They are also very easy to finish along with the handle, as they sand and polish at the same rate. Metals usually sand slower than the wood and can stain the wood while finishing. For a carving knife reindeer is a very good choice. Both buffalo and reindeer are also very reasonably priced. Buying a quantity makes it even cheaper and the larger supply on hand will allow consistent builds. If choosing a metal, consider the workability and such. Brass and nickel silver cut/sand/grind/polish fairly easily. Stainless steel can be much tougher. The softer metals will heat up a fair bit in grinding and buffing, but stainless can get very hot and burn the adjoining wood. This is a big problem with stainless rivets. There are different grades of most metals, and some are alloyed for easier machining, which makes them a better choice for bolsters and guards.
6) Consider a ferrule as a bolster. A ferrule is a tube to strengthen the end of a handle. It is probably the most traditional end on a woodworking tool handle. Some tools and knives have a ferrule on both ends.
Often one end of the ferrule is closed to fit snugly with the blade tang.
They can be made easily by fitting a thin sheet of metal to the blade like it would be a guard, and soldering or brazing a collar on the sheet. The collar should be the shape and size that the finished handle will be. A very low cost ferrule can be made from copper. Slit a piece of pipe and flatten out into a pieces of sheet, or just purchase some 1/16" copper sheet and a piece of pipe. Cut some 1/2" to 3/4" rings from the pipe. For small tools, like carving knives, 1/2" pipe works well. Copper pipe comes in grades, and the thickest grade is K, then L, and the lightest is M. In many retail hardware stores, L and M are called Blue and Red. If you buy your copper pipe online, get the thicker type, as it makes a better ferrule. The pipe can be annealed by heating to a red glow and then quenching in water. It will be very soft then. Shape on wooden or steel mandrels to the desired shape. A quick and easy mandrel for a certain handle shape can be ground from 3/4" round mild steel bars. Just shape one end of a 3/4"X8" bar to the desired handle shape (an ovoid shape, for example). Then continue that shape up the bar, making the starting end smaller as you go. This will make a tapered mandrel in the shape desired. You slide on the annealed pipe ring and hammer it until it gets to the size and shape needed. Pre made tapered mandrels are readily available on ebay and from blacksmith supplies. They are used to make the drift holes for hawks and such. They are often sold under the name "drift".
Once the collar is made, flatten the end edge with a file and sandpaper to make it sit flat on the sheet with the fitted tang hole. Place over the slot accordingly and solder or braze on. I like using 1000° silver solder ( AKA silver braze). Trim up the excess sheet and file/sand the outside smooth. The ferrule is ready for fitting to the handle. The handle needs a shoulder cut on it to make the ferrule fit. Any online tutorial for making a chisel handle will ci[over that if it isn't obvious what to do.