Damascus Knife

Joined
Jul 15, 2016
Messages
61
I made this knife out of the steel from a coil spring, railroad screw (not a spike, a carbon steel screw), and 1084 steel. I flattened out the coil spring and the screw. I made 6 total layers (three of each kind). I forged welded this, shaped it into a round bar, twisted it three times, and flattened it back out. I then folded it one time. The resulting damascus was only enough to make the blade, so I welded on some mild steel for the tang.

To heat treat, I heated it to 1500 degrees (by color) and quenched it in 130 degree canola oil. Immediately after quenching, I clamped it between two steel plates to correct any warps. I then tempered it at 400 for two one-hour sessions.

I cleaned it up using buffing wheels with Eastwood Greaseless compounds in 220 and 320 grit. I set the bevel at 17 degrees.

I etched the blade in a 50/50 mix of Ferric Chloride and water for 15 minutes, and then sanded it with 400 and 600 grit sandpaper.

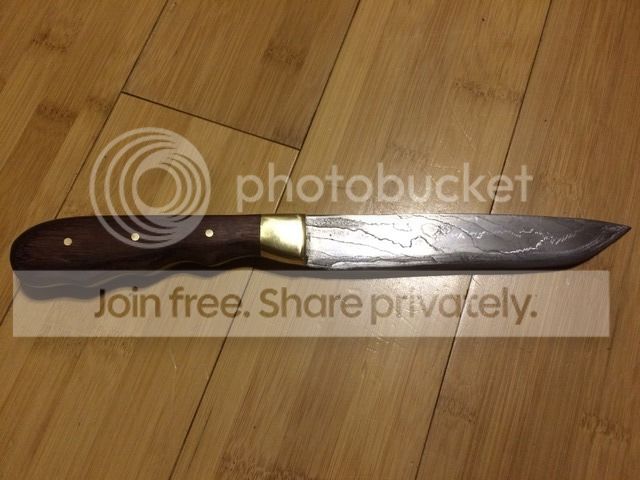
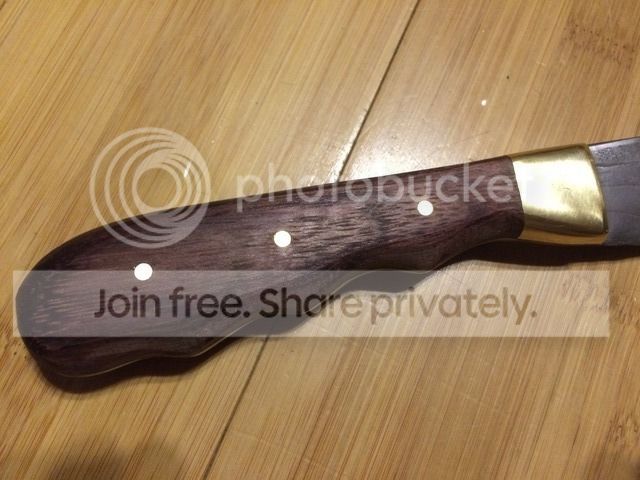
The bolster is brass and the handle is wood. Brass pins and 2 part epoxy hold the bolster and handle in place.


I always like to hear people's thoughts. I list out the process in case someone sees something that I'm doing wrong--much like you did in another thread where you told me to temper right after the quench and clean it up later.
 
OK.
Overall, it is a good chopper. The places that could use attention in the future are:

1) The handle has too many finger grooves. One at the front for the index finger and then a palm swell is far better. As it is it will be uncomfortable to use, and only an exact size hand would fit it. It also looks like you burned the handle along the edges by sanding with a belt running too fast. It is better to hand sand the final stages.

2) The damascus looks like it welded OK, but you should have cut and stacked it at least twice before twisting and forging out. That would have had a much more active and finer look.

3) The blade edge is rather angular as it rises to the tip. A more even curvature would look ad work a bit better.

Take a look at the knives in a copy of Blade, the Blade annuals, and in the Galleries here on BF to see how handles and blades are best shaped.

Thanks for all your help! As for number 2, this weld overall seems to be the best one I've done so far. Usually I will find some imperfection in it that I decide I must live with, but this one (as far as welds go) seems perfect. I appreciate the advice, and I will apply it on a billet that I've actually already started on.
 
Back
Top