Damascus/ Walrus D-Guard Dogbone Bowie WIP- Buddy Thomason Photo-Paul Long Sheath

Joined
Jun 23, 2007
Messages
2,142
A fellow BladeForums member commissioned a pair of Damascus Dogbone knives to feature Walrus handles from the same tusk, bought at Blade last year.

He asked me to keep him photographically informed as I worked, was able to visit the shop several times along the way, and suggested I share the results with our fellow members.

Here's an overview of the construction of the first of the two, a 4-bar/9-bar composite D-Guard Bowie, finer and more "Mosaic" appearing than my usual.

The second knife will be a matching Dagger. Both will have creamy Walrus scales with brown highlights, Damascus fittings, with Sterling Silver spacers, frame liners, and domed pins.

Here's a magnificent Buddy Thomason photo of the finished D-Guard and it's fantastic Paul Long sheath.

999fe18e.jpg
]

The blade began with two billets, a 15 layer "flat," and a 13 layer "W."

4bfc8250.jpg


Welding was done with a 25 lb, 1947 Moloch hammer, the 15 layer forged up to 60 layers. and the 13 layer 'W" to a "13 x 12"

7afd4ba2.jpg


Both billets were then drawn out on the Uncle Al press.

4f505697.jpg


to two, 9/16ths x 9/16ths bars.

7dd5b938.jpg


The bars were cut into matching six inch lengths, and arranged into a 9-bar billet. You should be able to see the arrangement, with a 60 layer "flat" in the center, and at each corner, and a "W" in the middle of each side.

bbac7a8f.jpg


Tacked together, welded to a handle,

844d20e1.jpg


the 9-bar was welded,

14f0a78a.jpg


drawn out to another 9/16ths x 9/16th bar, 32 inches long.

b3b96ce9.jpg


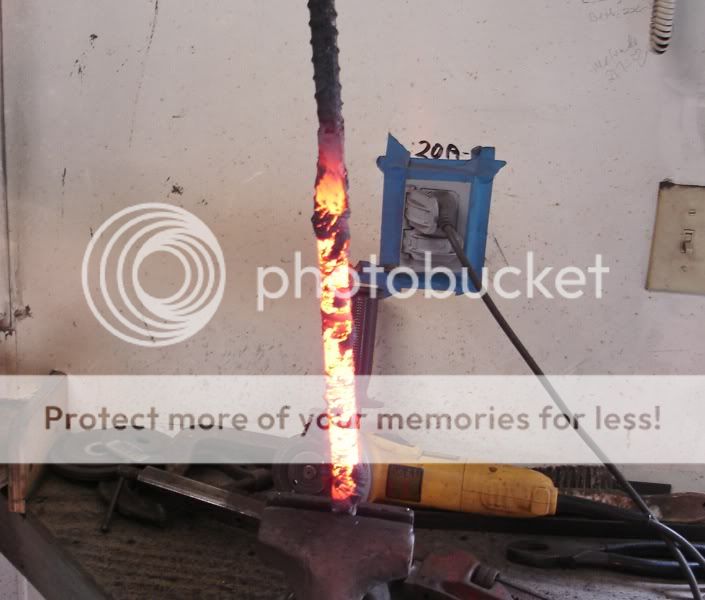
This 9-bar was then cut into four 8 inch bars, and twisted tightly, two right-handed, and two left handed.
e38b38b1.jpg


Here they are after re-squaring, grinding clean on the matching faces, and readied for welding into two right/left billets.

685df398.jpg


Next will come fabricating the 4-bar blade billet from the four 9-bars.
 
Last edited:
It always astounds me how much work it is even to get to this point. This is going to be a great thread!!
 
The two pairs of 9-bar billets are "Zippered" together with a MIG welder, to form an airtight "box" for welding.This eliminates flux trapping, and gives a much cleaner weld.

Excess MIG weld is ground off, as on the left-hand billet, to reduce the amount pounded into the billet when forge welding. Since the pattern will be in the center third of the finished 4-bar billet, all MIG weld will be ground off as the blade is ground.

87bbe5d9.jpg


The two pairs of 9-bars are forge welded into two 2-bar/9-bars, flattened and straightened,

44affa05.jpg


After cooling, each double bar has a curve cut in the end, out of what will become the welded center of the 4-bar blade billet.

2e2e594e.jpg


Follow closely, now. The tip curves are forged down to the center on each pair, pulling the weld lines down to meet each other, and the center ground clean for welding up the 4-bar.

42b5af9c.jpg


The two pair are then "Zippered" together, and the"cut-off" tips tacked back on the outside ends, so the billet can be forged welded like a straight bar.

e09d3434.jpg


In one long session, the billet is welded along it's center line, the "cut-offs" knocked off, and the blade forged to profile, at a constant 9/16ths inch thickness.

51056abb.jpg


After supper,( I'm a fast worker here!) I'll continue the post-up.

Buddy's photo is here, and I'll add that,too!!!
 
I can tell already this is going to be an awesome knife. Thanks for all the work that goes into sharing this with us. It is greatly appreciated!

Brian
 
That last photo showed the blade billet forged to profile, and cooling from a 1600 degree normalizing heat.

In one step, it went from a "MIG-boxed" pair of pointed bars, to a profiled blade, with curved clip, forged in ricasso, and drawn out tang, all at 9/16ths thick.

After normalizing, heat cycling for grain reduction, and spheroidal annealing, all in a digital oven, the profiled blade was ready to grind down to thickness.

That would be the time for a surface grinder! Instead, the outer thirds of the profiled billet were ground away on the platen, and the center section ground to final shape by stock removal.

Unlike a commercial damascus bar, however, two day's forging job on the 4-bar/9-bar billet gives us a blade whose complex pattern lines follow the profile, flow up into the ricasso and tang, and out the tip.

Here's a look at the ricasso area of the completed blade, and at the Spanish notch, cut in with jeweler's saw and needle files before hardening.

55a55a09.jpg


After the blade comes the D-Guard. Here's a double 9-bar billet, made in the same fashion as the blade billet, welded together and ready to forge into the D-guard profile.

03cff6d1.jpg


Here's that same double bar, rough forged to profile, ground to .140 thickness, ground to exact profile with the help of a D-Guard pattern. That's the finished blade, and the D-Guard mandrel for bending the bow.

d63e67d6.jpg


The slot is milled on the Taig Micro-mill,

257cd83f.jpg
,,

and cleaned up with a "safed" edge file.

142b0edf.jpg


Until the guard fits the blade shoulders perfectly.

93a13e82.jpg


The edges of the guard are "45'd"

f991da03.jpg


Contours are filed to a pleasing shape,

f5ef897f.jpg


and the guard sanded out to 1000 grit, ready to bend.

34a64f8f.jpg


Before the guard can be bent to it's bow, though, there's about a week's work to come on the handle pieces.

Later...
 
Thanks, guys. I've learned so much from viewing other maker's posts, it's always a pleasure for me to add my own take on the process.

Here's some more.

Before bending the D-Guard bow, it's best to finish out the handle, just to make sure of the length.

The granite plate and height gage allow marking thickness on damascus pieces for the collars. This same method was used to mark the profiled blade billet for thickness grinding.

d5ec9684.jpg


Three pieces of .032 Sterling silver, and two of damascus are cut to size for the collar-spacer assembly. The slots on collars are milled, and the ones in the silver cut with a jeweler's saw, so the scrap can be saved.

a7809ba7.jpg


4c97f7b5.jpg


The stack-up of silver accent spacers and damascus collars are fit to the tang over the guard bow.

Making up a knife like this is a constant process of fitting and dis-assembly.

601a69c2.jpg
 
Beautiful, impressive Bowie. And a very nice sheath.

Interesting to follow the progress on those WIP pictures, thanks for posting.

Usually I'm not a big fan of these dogbone bowies... but this one is really nice.

Kind regards,

Jos
 
John,

It is always great to see your WIP threads.

That is a beautiful D-Guard Dpgbone. I can't wait to see the matching Dagger. I'm sure that the future owner will be very happy with this set.

I have a question, how many Dogbones, either D-Guard or Regular have you made since the first one about 2 1/2 years ago?

Everyone of yours that I have seen was really beautiful.

Jim Treacy
 
Jim,

Including the first Dogbone that I made for you 2 1/2 years ago, I've finished five so far, two D-Guards, two Bowies, and one Dagger.

I have two more Dogbone Daggers on order, and one Dogbone Bowie.

Looks like you really started something. Also, I have a large/small pair of Persians on order.

Treacy the Trendsetter!

John
 
I love all your dogbones I've had the pleasure of viewing, John.
This one looks really special, great ivory, superb execution of design.
The WIP is the icing on the cake.
Thanks.

Doug
 
John,

I don't know about trendsetter, but I do great talent when I see it.
 
You do GREAT work John. It is a pleasure to follow your WIP's and the end result is always fantastic.

Thanks for taking the time to post them.

Peter
 
Oh yeah! These are SO good. Thanks again for doing one of your WIP threads John. Stellar bowie. :thumbup:

- Joe
 
Back
Top