How To Easier freehand sharpening

Status
Not open for further replies.
I'll start by saying I don't typically thin my knives. I may lay the edge bevel back but I'm generally not thinning out the entire blade.
,
I don't think anyone here is talking about thinning their entire blade, just the edge and behind the edge, if the knife needs it. I can't think of any reason I'd thin the whole blade on any of my knives. It would just make them weaker, at least for what I use them for. I believe we are just pointing out that there is more to getting the maximum slicing, cutting, chopping, etc., performance out of a knife than just a sharp edge.

I first try to buy knives with geometries that I like.

Exactly!

Me, too, but I usually end up tweaking them to some degree or other to get the best edge for the performance I want.
 
Mr.Wizard, I think you stated your main points concisely and explained them well. The diagrams were well done and were what was needed to assist comprehension. Good job! :thumbsup:

Thank you for your explanation regarding burrs. I've tried the reflected light technique (including de-stressing) but couldn't get it to work for me. The other thing is that if I need to sharpen knives in the wilderness the reflected light method wouldn't work, and I like to sharpen the same way all the time so I do it as well as possible.

I've read about some disadvantages of raising burrs, although I never understood how anyone could stop short of forming a burr without magnification of some kind, which I'm not interested in doing. At any rate, knowing for sure I have reached the apex because of burr formation outweighs any disadvantages of raising burrs.
 
M MtnHawk1 Thank you. Try the thumbnail test instead; it may be a little less precise but it seems close enough to me. There's no harm in raising a burr other than a bit more steel spent because—if it is a concern—you can always de-stress again (lightly!) and it takes but a moment. (At finer stages I do this de-stressing with a chunk of a broken 10,000 grit water stone; I'm not "bricking" the edge!)
 
Mr.Wizard, yes, checking for burrs with my thumbnail is how I do it. There are some advantages to being happy with simple, working knife edges. One is not being concerned with removing every last tiny bit of burr. Again, I am not advocating sloppy sharpening, but like to enjoy it and not get carried away sharpening edges to do more than what I need them to do.
 
Last edited:
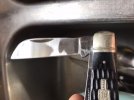
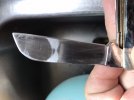
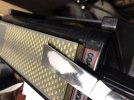
I sharpen my full flat grind pocket knives this way. Lay them flat on a stone working from the end of the stone I push the blade into the stone.

The first passes shows all the flaws that were hidden by the polished surface. It’s actually shocking. It looks perfectly smooth it’s really just shiny.

Almost every knife I’ve done this to had had high or low spots. And tooling marks. I get them to were I’m satisfied they are flat and thin enough then I go to the edge bevel.

Each time I sharpen the blade gets a couple flat passes, then the edge sharpened.

A word of caution the spines can become very sharp.

This all came to me while sharpening a carpenters wood chisel.
 
Last edited:
M MtnHawk1 I agree regarding working edges. When checking for burrs I slide the knife edge-trailing, feeling for a catch or scrape. (Do you do the same?) The method here is a little different; you gently set the knife edge onto your thumbnail, vertically, with the nail held at an angle of maybe 30° to 40°. A fully sharp edge will bite immediately. One de-stressed on a fine stone will slide immediately. An almost-apexed edge will start to catch, indicating you can move off of the coarse stone without actually raising a burr.
 
eveled eveled That's a slightly more extreme version of this method; one that will preserve the geometry of the knife throughout its life but as you noted it can take a lot of work to match the blade to the stones.

Referring to the image from the Juranitch book in post #3, I am doing the "Better" clearancing, while you are doing the "Best" I believe.
 
8F582C22-5963-4B23-A26F-9FC6E0839D53.jpeg 04738A6E-954A-4682-861A-18BC2A26CDC0.jpeg
Its hard to capture in a picture. This rough rider is in the beginning stage. The scratches across the blade is the factory surface in a low spot. The fine scratches tip to handle are mine.

I like to use diamond stones for this. It’s sometimes better to use a pane of glass and an Emory paper. It’s flatter than a stone. At the edge of the bench.
 
After I started doing this. I found this little paragraph on Randall Made Knives sharpening instructions.
view


I figure why wait until it has a thickened edge? A couple flat passes each time maintains the edge thickness.
 
Last edited:
7A1DE2AF-8569-4AEB-925D-AB5B9FBB770B.jpegHere is another again the marks across the blade are the factory tooling marks that were hidden by the polished surface.

As you work at it, that patch will slowly shrink in size until it is gone.

I’ll take my finely scratched perfection over their polished imperfection all day long.

Do as little or as much at a time as you feel like. It can take years if you just do a couple flat passes each time you sharpen. That’s ok.

For a beginner sharpener I’d recommend starting with a carpenters chisel. Keeping that big fat primary bevel flat on the stone is a good first lesson.
 
Last edited:
I sharpen my full flat grind pocket knives this way. Lay them flat on a stone working from the end of the stone I push the blade into the stone.

The first passes shows all the flaws that were hidden by the polished surface. It’s actually shocking. It looks perfectly smooth it’s really just shiny.

Almost every knife I’ve done this to had had high or low spots. And tooling marks. I get them to were I’m satisfied they are flat and thin enough then I go to the secondary bevel.

Each time I sharpen the blade gets a couple flat passes, then the edge sharpened.

A word of caution the spines can become very sharp.

This all came to me while sharpening a carpenters wood chisel.

I have a couple of knives that are FFG I do in this manner.

Yes, there are ALWAYS inconsistencies in the primary grind. They all have warps and waves, doing this is what led me to start doing full regrinds, first by hand and later by belt.
 
eveled eveled That's a slightly more extreme version of this method; one that will preserve the geometry of the knife throughout its life but as you noted it can take a lot of work to match the blade to the stones.

Referring to the image from the Juranitch book in post #3, I am doing the "Better" clearancing, while you are doing the "Best" I believe.

Ive never been “best” at anything before. Lol.

In this case especially for a beginner the best way is the easiest. It may take longer but it’s super easy to lay a blade flat and rub it on a stone.

The “better” example reminds me of a scandi grind.

And “No” I don’t want a thin edge on all my knives. Different knives get treated differently based on their intended use.

while I added to the conversation. I never gave you a review of your original post. It makes a lot of sense and is well done.
 
M MtnHawk1 I agree regarding working edges. When checking for burrs I slide the knife edge-trailing, feeling for a catch or scrape. (Do you do the same?)

Yes, but with a very slight variation. Rather than slide the knife I hold it steady and slide a fingernail toward the edge. I read a few interesting posts about information that can be gained about knife edges and burrs when slicing paper, so play around with that sometimes.

The method here is a little different; you gently set the knife edge onto your thumbnail, vertically, with the nail held at an angle of maybe 30° to 40°. A fully sharp edge will bite immediately. One de-stressed on a fine stone will slide immediately. An almost-apexed edge will start to catch, indicating you can move off of the coarse stone without actually raising a burr.

Yes, I use this method also. Sometimes I'll use a plastic pen for the same thing and Razor Edge Systems makes a cool little device called an Edge Tester.

Didn't know about your method for determining when a coarse edge is almost apexed, but sounds good! Thanks! :thumbsup:
 
Last edited:
I've got that Razor Edge "Edge Tester"...and even their "Folding Steel" from back in the day. Haven't used the steel in some time, but I keep the tester handy and it still gets use. Not as much as my thumbnail or fingerprints though.
 
Here I describe and illustrate what I propose as an easier approach to freehand sharpening—especially for beginners who will have trouble holding a consistent angle—compared to the "textbook" advice to follow the factory edge angle with every grit. I prepared this for @AlexSav but I am posting it for general consumption and critique.

Instruction
First the blade is thinned on a fast cutting abrasive. One does not try to actually sharpen (apex) the edge in this phase. Pressure is applied just above the original bevel shoulder with the knife nearly flat on the stone. (This obviously will scratch up the blade finish; hesitancy to do so can be a major hurdle of learning freehand sharpening.) Exact angle control is unnecessary; all that is important is never raising the spine too much which would round off the nascent edge. Firm pressure is used. A burr may be formed incidentally but it is not desired. If wet/dry sandpaper is being used for thinning strokes should be made away from the edge, at least toward the end of the process. (3M "ProGrade Precision with Cubitron II" paper works well for this if a suitable coarse stone is unavailable.)

The thinned area may be refined with finer grits after initial shaping both for appearance and reduced drag, but again the apex is not intentionally refined unless a burr was formed on the previous grit. If a burr was formed light pressure should be used to finish. The burr will remain but it will be less coarse, making the next phase easier.

A break should be taken so that the hands and mind are fresh.

Now the actual apex bevel is applied with care and focus. A wedge with a known angle appropriate for the blade type is used as a reference, and one tries to hold the blade to match while using light pressure and even strokes. (For building motor skill remember: slow is smooth, smooth is fast. Take your time.) If thinning was completed properly contact should be made only very near the apex; if not return to thinning. (Sharpie marker is used to monitor the contact area.)

A variety of sharpening and deburring methods may be employed in this beveling phase, but check sharpness often; this should not take long even with care. The mini-bevel you create can be anything from the width of a hair to about half a millimeter; if it becomes wider than that return to thinning, and try again. (More coarse apex bevels will tend to form wider.)

Explicitly this is not a complete description of sharpening; one needs technique to apply the mini-bevel successfully but it should happen quickly such that you are able to maintain care and concentration throughout. In the extreme this mini-bevel can be a micro-bevel, applied with deburring strokes alone if the thinning was taken to an apex, but treating it as a true bevel produces a better result. Among other reasons: a blade can be overly thinned without the extra "meat" of a small bevel, though it will take a beginner a lot of patience to actually manifest that problem.

Illustrations
This shall be a schematic view—proportions are not exact and differences are somewhat exaggerated. Pardon the large images; I could not seem to show what I wanted without them.

Here is a representation of the edge of a typical flat-beveled knife when sharp, in cross-section. The blade grind is where the blade finish (black coating, stone wash, etc.) stops. This profile in black will serve as a reference background in all following drawings, each in color and overlaid.

GgoV5eY.png


(blue) The same edge substantially dulled.
jNcMm88.png


(green) The textbook instruction of sharpening matching the existing bevel angle. Possible only with a guide. (Note that the bevel shoulder becomes slightly wider as it is cut farther up into the blade; after repeated sharpening performance deteriorates until the blade is thinned.)
9FcHmzh.png


(yellow) Instead what I believe most new freehand sharpeners produce. This results from a combination of angle variation and the fact that a stone cuts faster when pressure is higher, i.e. where it hits the shoulder or apex-area rather than the bevel flat. The effect is often compounded by using a slower cutting stone than ideal, as well as the instruction to use all grits at the same angle, resulting in fatigue or frustration and more wobble. The apex is further rounded because the new sharpener is unable to consistently hit it without raising the angle.
QRGa5U5.png


(red) The target geometry that I propose, formed through a combination of significant thinning with a fast cutting abrasive, and a new edge bevel a fraction of the size of the original formed with fine abrasives. Both zones show convexity due to anticipated wobble; in this drawing they blend together but they are worked independently.
INdBdy3.png


A magnified comparison of the edge of the last two illustrations.
D8y36K5.png


Great post. That is how i proceed to sharpen axes. For full flat grind knives i thin the blade from spine to edge. I do it if the grind is too thick or wavy.


I sharpen my full flat grind pocket knives this way. Lay them flat on a stone working from the end of the stone I push the blade into the stone.

The first passes shows all the flaws that were hidden by the polished surface. It’s actually shocking. It looks perfectly smooth it’s really just shiny.

Almost every knife I’ve done this to had had high or low spots. And tooling marks. I get them to were I’m satisfied they are flat and thin enough then I go to the edge bevel.

Each time I sharpen the blade gets a couple flat passes, then the edge sharpened.

A word of caution the spines can become very sharp.

This all came to me while sharpening a carpenters wood chisel.

Same approach for me but with a difference. I begin by setting the edge bevels (generally at 20-25 degrees inclusive). At this point of the process i can already see, from the shape and sizes of the bevels, if the grind is wavy or too thick. In a second time i eventually thin the blade from edge to spine until i get bevels not wider than 1mm. On the traditional american pocket knives i use the carbon steel or low alloyed tool steels we find on them are easy to grind and at the acute angles i set i don't have much steel to remove. It's easy to do and the cutting ability is really improved. Once it's done, each time i touch up the edge, i routinely make some passes to keep the edge geometry i've set.
An other advantage i see at beginning by the edge bevels is that it's easier to measure the edge angle with a gauge while the bevels are at their widest.

Dan.
 
Here I describe and illustrate what I propose as an easier approach to freehand sharpening—especially for beginners who will have trouble holding a consistent angle—compared to the "textbook" advice to follow the factory edge angle with every grit. I prepared this for @AlexSav but I am posting it for general consumption and critique.

Instruction
First the blade is thinned on a fast cutting abrasive. One does not try to actually sharpen (apex) the edge in this phase. Pressure is applied just above the original bevel shoulder with the knife nearly flat on the stone. (This obviously will scratch up the blade finish; hesitancy to do so can be a major hurdle of learning freehand sharpening.) Exact angle control is unnecessary; all that is important is never raising the spine too much which would round off the nascent edge. Firm pressure is used. A burr may be formed incidentally but it is not desired. If wet/dry sandpaper is being used for thinning strokes should be made away from the edge, at least toward the end of the process. (3M "ProGrade Precision with Cubitron II" paper works well for this if a suitable coarse stone is unavailable.)

The thinned area may be refined with finer grits after initial shaping both for appearance and reduced drag, but again the apex is not intentionally refined unless a burr was formed on the previous grit. If a burr was formed light pressure should be used to finish. The burr will remain but it will be less coarse, making the next phase easier.

A break should be taken so that the hands and mind are fresh.

Now the actual apex bevel is applied with care and focus. A wedge with a known angle appropriate for the blade type is used as a reference, and one tries to hold the blade to match while using light pressure and even strokes. (For building motor skill remember: slow is smooth, smooth is fast. Take your time.) If thinning was completed properly contact should be made only very near the apex; if not return to thinning. (Sharpie marker is used to monitor the contact area.)

A variety of sharpening and deburring methods may be employed in this beveling phase, but check sharpness often; this should not take long even with care. The mini-bevel you create can be anything from the width of a hair to about half a millimeter; if it becomes wider than that return to thinning, and try again. (More coarse apex bevels will tend to form wider.)

Explicitly this is not a complete description of sharpening; one needs technique to apply the mini-bevel successfully but it should happen quickly such that you are able to maintain care and concentration throughout. In the extreme this mini-bevel can be a micro-bevel, applied with deburring strokes alone if the thinning was taken to an apex, but treating it as a true bevel produces a better result. Among other reasons: a blade can be overly thinned without the extra "meat" of a small bevel, though it will take a beginner a lot of patience to actually manifest that problem.

Illustrations
This shall be a schematic view—proportions are not exact and differences are somewhat exaggerated. Pardon the large images; I could not seem to show what I wanted without them.

Here is a representation of the edge of a typical flat-beveled knife when sharp, in cross-section. The blade grind is where the blade finish (black coating, stone wash, etc.) stops. This profile in black will serve as a reference background in all following drawings, each in color and overlaid.

GgoV5eY.png


(blue) The same edge substantially dulled.
jNcMm88.png


(green) The textbook instruction of sharpening matching the existing bevel angle. Possible only with a guide. (Note that the bevel shoulder becomes slightly wider as it is cut farther up into the blade; after repeated sharpening performance deteriorates until the blade is thinned.)
9FcHmzh.png


(yellow) Instead what I believe most new freehand sharpeners produce. This results from a combination of angle variation and the fact that a stone cuts faster when pressure is higher, i.e. where it hits the shoulder or apex-area rather than the bevel flat. The effect is often compounded by using a slower cutting stone than ideal, as well as the instruction to use all grits at the same angle, resulting in fatigue or frustration and more wobble. The apex is further rounded because the new sharpener is unable to consistently hit it without raising the angle.
QRGa5U5.png


(red) The target geometry that I propose, formed through a combination of significant thinning with a fast cutting abrasive, and a new edge bevel a fraction of the size of the original formed with fine abrasives. Both zones show convexity due to anticipated wobble; in this drawing they blend together but they are worked independently.
INdBdy3.png


A magnified comparison of the edge of the last two illustrations.
D8y36K5.png
Very similar to how I sharpen my hunting knifes and produce a convex edge. Just start with more angle than I want and I will raise the spine as I go, usually coinciding with a stone progression. I don't end with a micro bevel though. Perhaps I should......
 
I don't end with a micro bevel though. Perhaps I should......

I don't think you need to change anything. There is a difference between a micro-bevel (as described by others) and what I am calling a "mini-bevel." A micro-bevel is barely visible, formed with a few feather light passes on a fine stone or ceramic rod. Instead the mini-bevel I advocate is a normal sharpening bevel with a width of half a millimeter or less. I find this more forgiving of pressure than a micro-bevel as ideally the stone is contacting more than just the apex.
 
Status
Not open for further replies.
Back
Top