propbuildervash
Gold Member
- Joined
- Jan 4, 2011
- Messages
- 540
Greetings BF members,
I just thought I would go ahead and write a honest review and post some photos of the process I went through with ordering an Expedition Cleaver and my thoughts and impressions regarding the blade.
This spring I decided to add a large chopper/machete to my camp pack as I find myself occasionally clearing branches around the campsite or processing wood for campfires. Most of my interactions with blades have been with either folding pocket knives or short fixed blades. Not having much experience on larger knives I set my journey I began searching online for a non-recurve blade that would be relatively easy sharpen vs a recurved fixed blade. That search led me to Kailash Blades, they had a selection of fixed blades designs with a thick heavy blades and were hardened using an oil quench instead of water resulting in a more consistent heat treatment from my research. Before placing an order for my first Kailash Blades knife I wasn't able to find much in the way of feedback on the Expedition Cleaver. I reached out to Kailash and talked to Bisnu, he answered what questions I had and gave me an ETA for the completion of the blade.
I went ahead and placed the order. Every couple of days I received an update email from Bisnu as the blade moved through the different stages of manufacturing along with photos of the blade as it progressed through each stage.
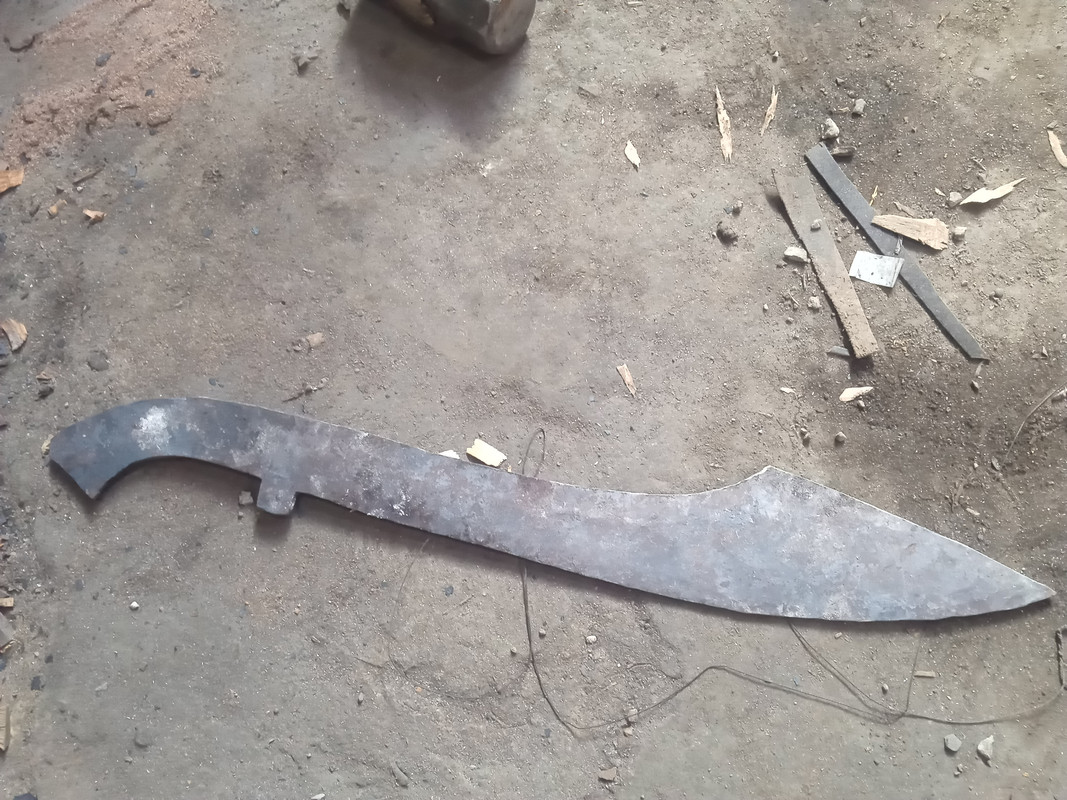
First was the initial shaping and forging.
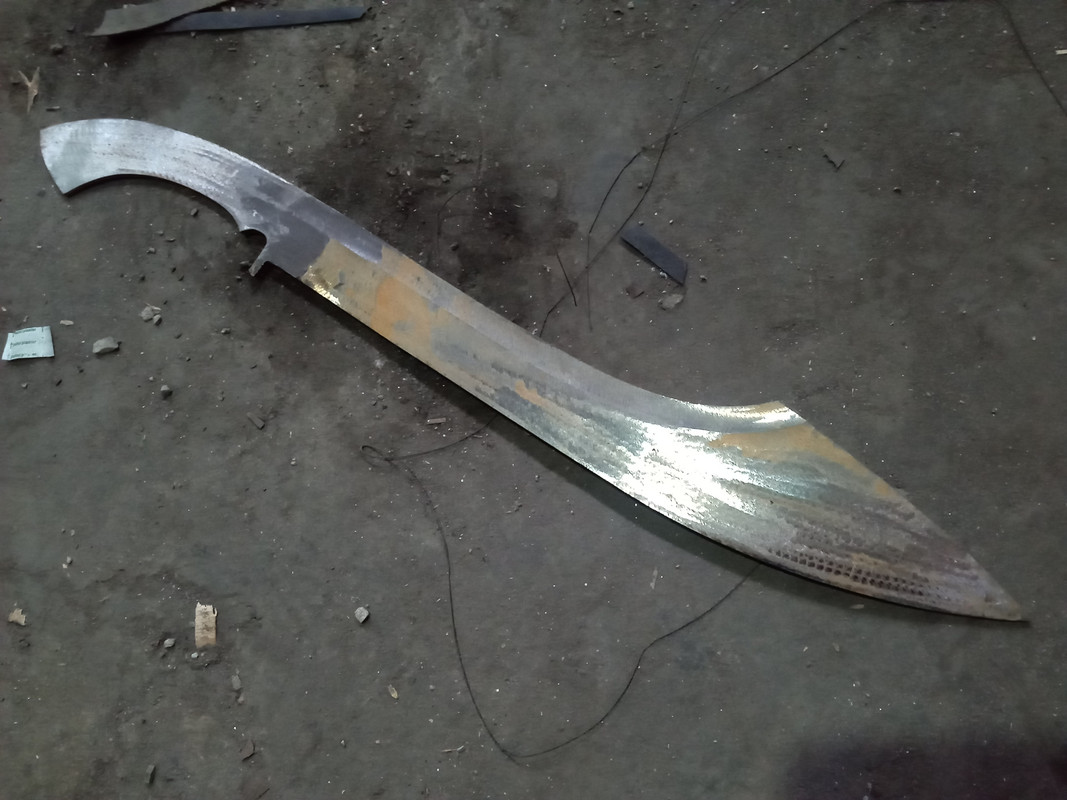
Then the blade was cleaned up and the lines refined and the fullers cut.
It was then quenched and heat treated.
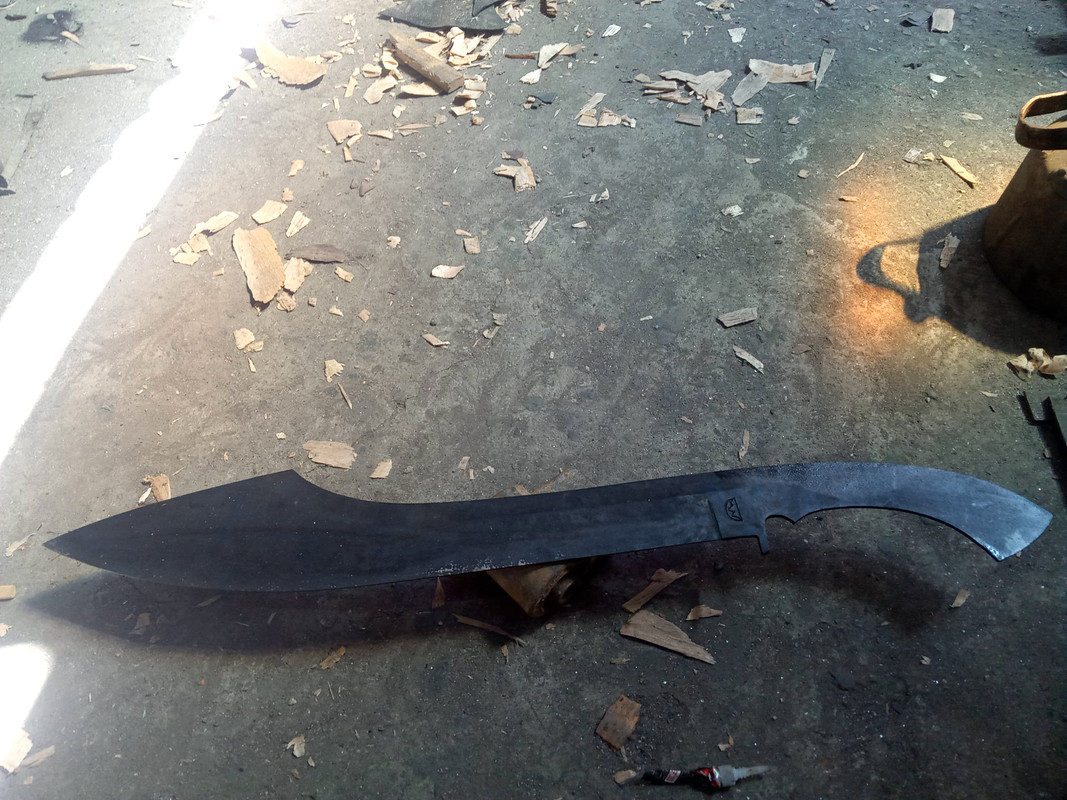
The blades was finished to a rough satin finish and the Micarta handles attached.
Then it went over to get fit for a Kydex holster.
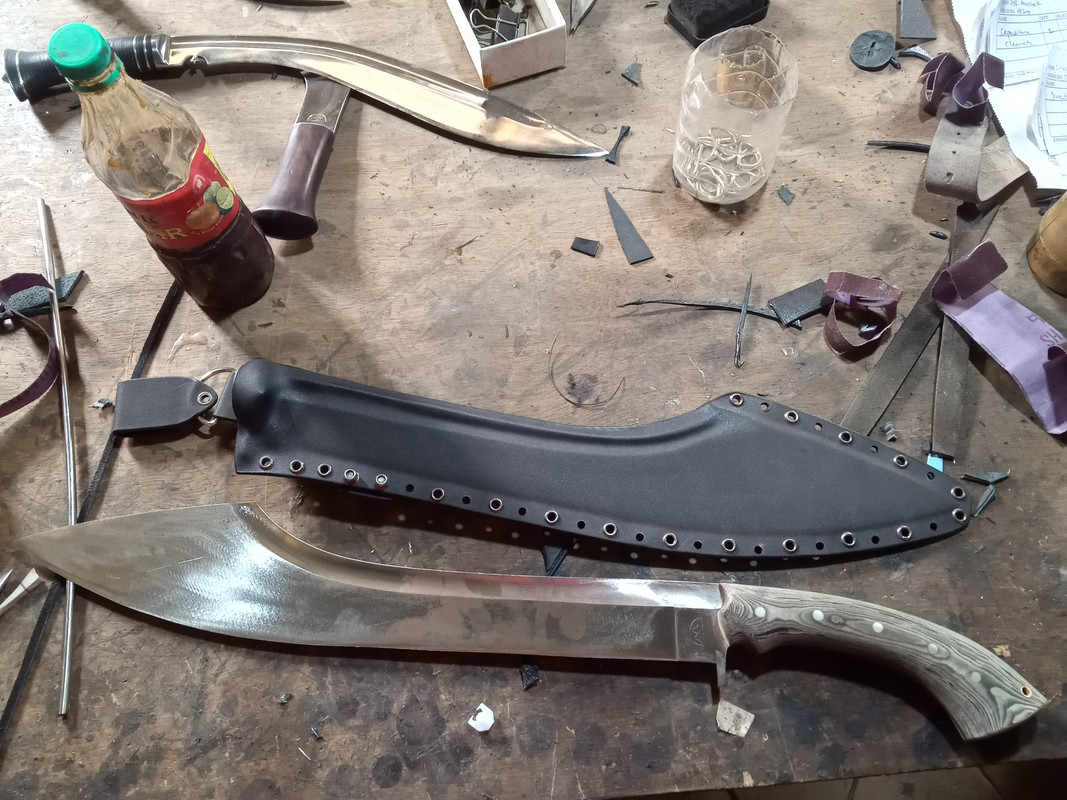
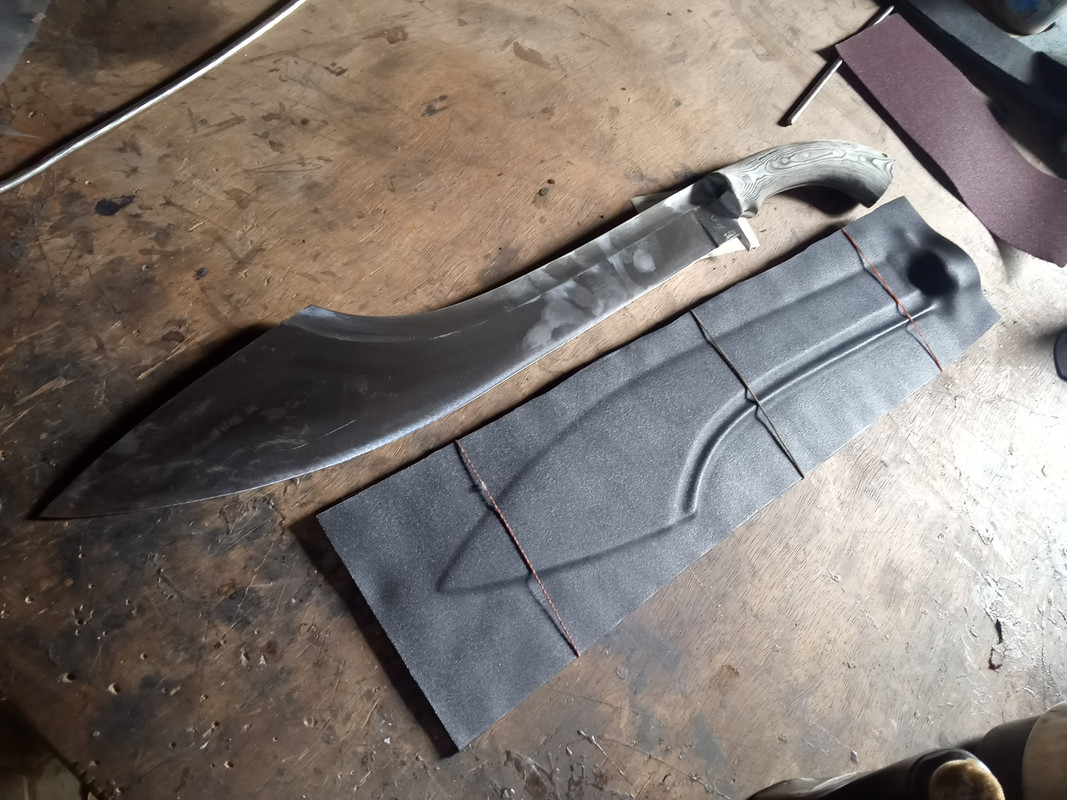
Finally it went over for a final satin finish and polish and sharpened.
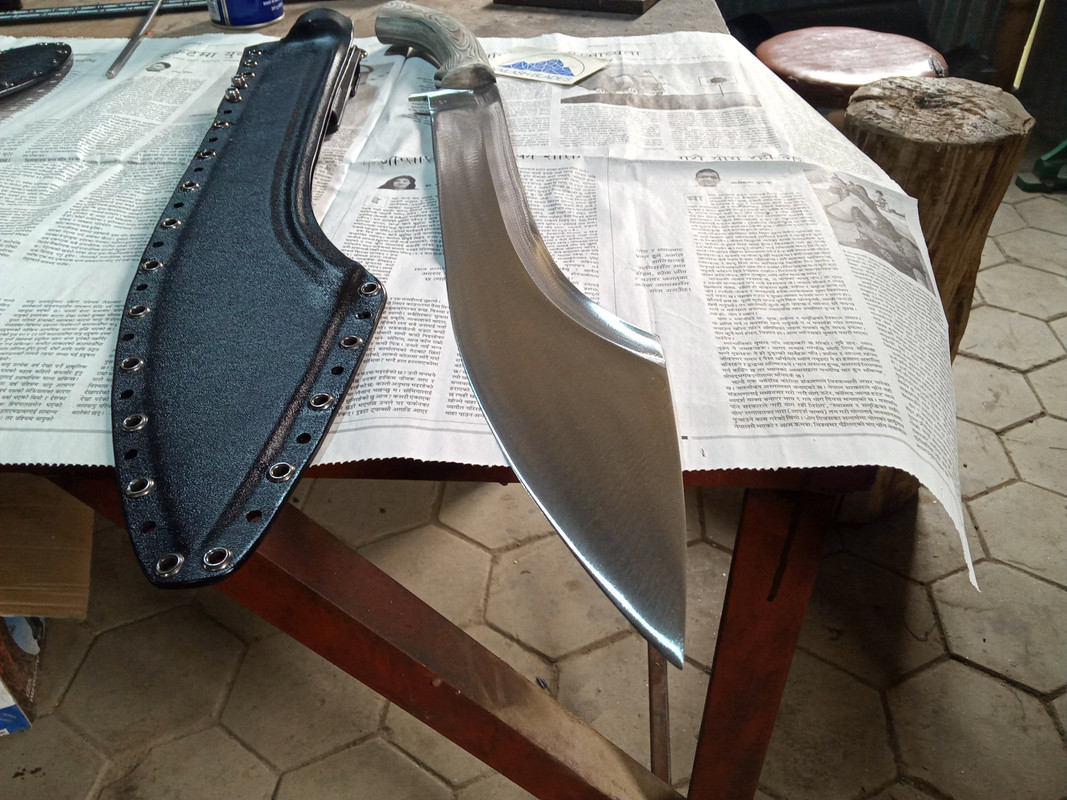
What really pleasantly surprised me was the shipping, it took a could days to get from its home in Nepal to Dubai via cargo and then it was handed over to FedEx and FedEx had it to me in less than 3 days. Totally shipping to the Northwest USA was under a week.
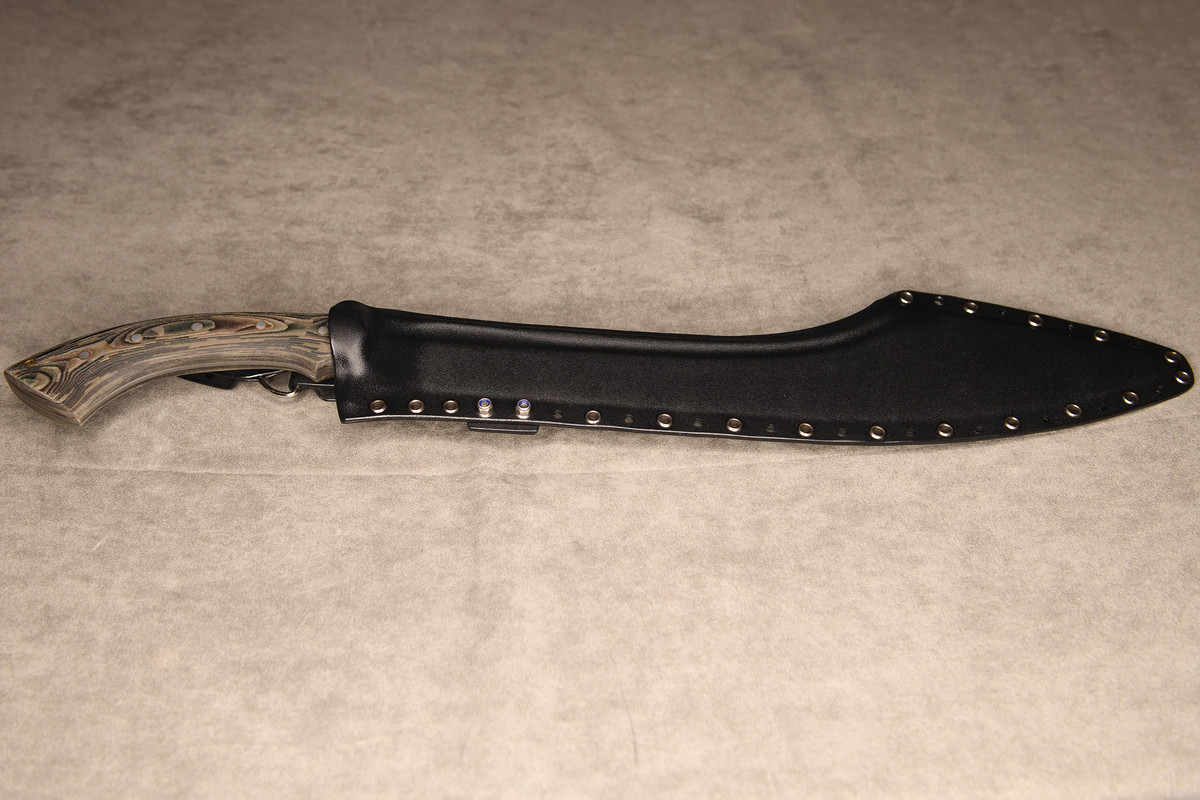
Now we can get into the discussion of the blade. The Expedition Cleaver arrived in perfect order, it was drenched in oil for transport and was to be carefully cleaned up as it the sheath was full of oil and did not have a drain hole at the tip to allow the oil to eventually drain out. But it had arrived and free of rust or cosmetic issues due to shipping. Here are some photos I took of the blade the day it arrived.
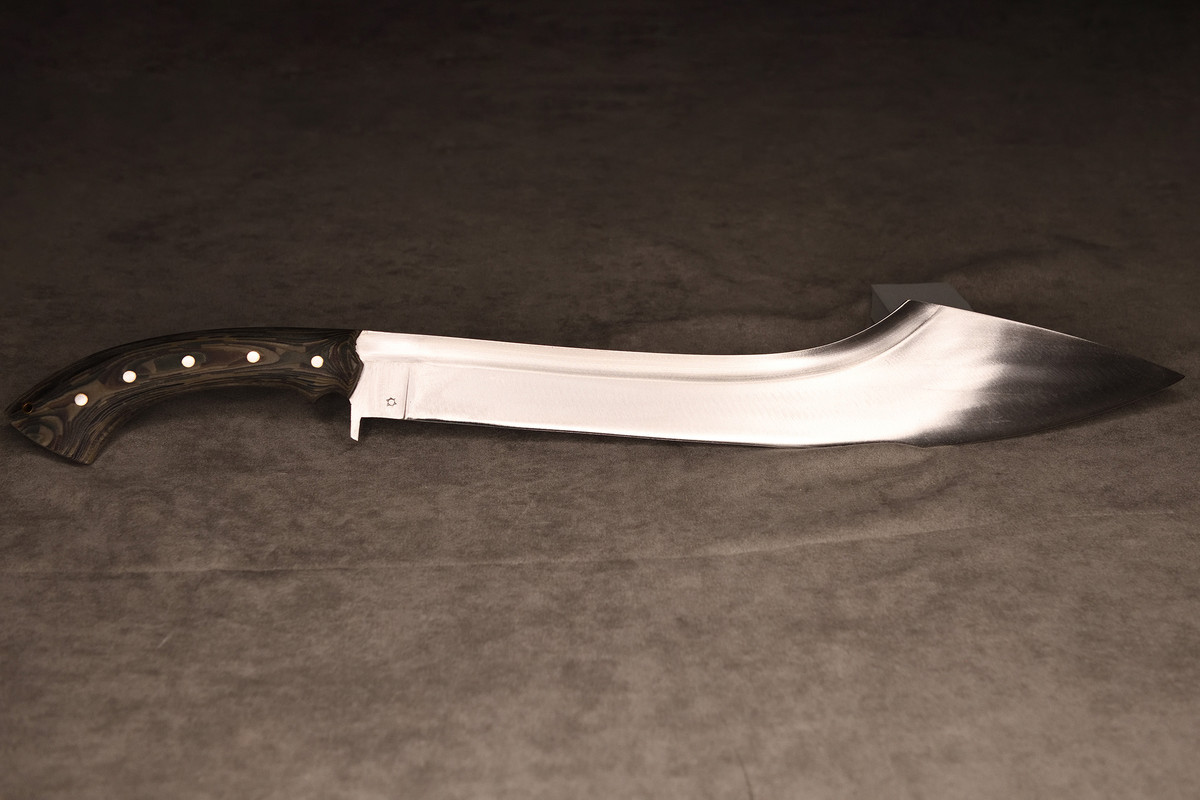
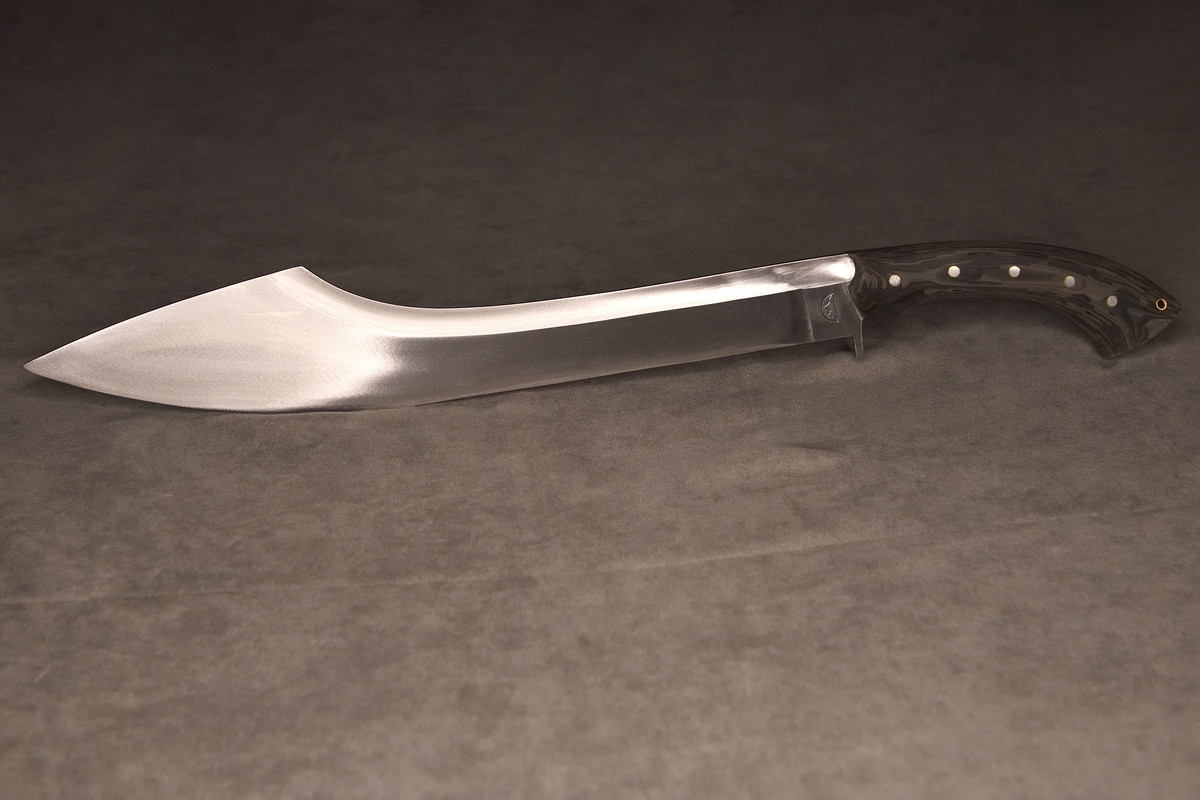
As you can see the handles came out very nicely, and the forest Camo Micarta was spot on. I went out to my favorite patch of the wild and did some test cuts with the blade. However, my first session was cut short very quickly. After the first two cutting swings I realized the front finger guard was still sharp as seen in these photos.
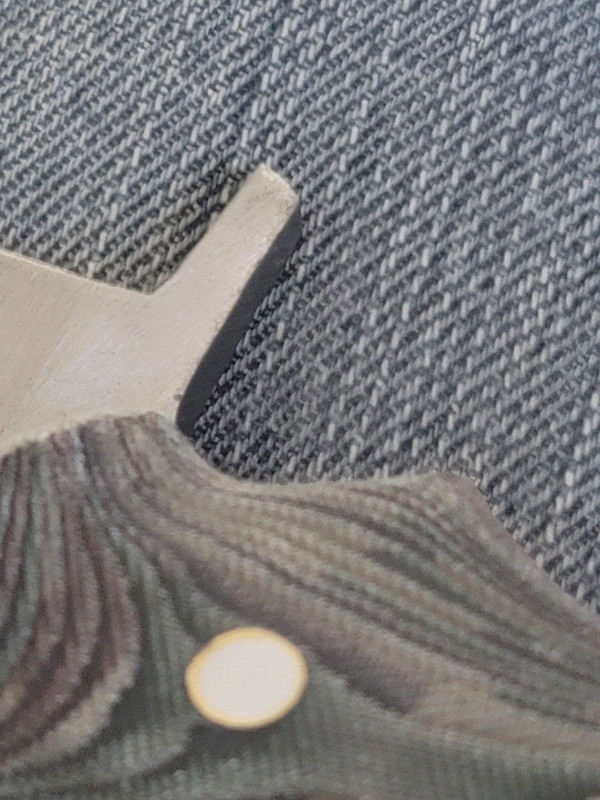
It was still cut at a 90 degree angle which resulted in edges that were sharp enough to cut. I emailed Bisnu and he apologized and assured me they would be more diligent about checking that in the future and was suggested that the edges would need to be filed down. I did not wish to freight it back to Nepal for such a minor job. I whipped out my file set and began to reshape the front guard and remove the sharp angles and get a nice rounded guard. Thirty minutes later the guard was finished. In the process I found the rear of the blade had a similar sharp edge. I pulled out my 200 grit stone and rounded the spine on both sides and finished it with a 600 grit stone. Now the guard and spine were smooth to the touch and did not have any catchy edges. I did not have time to return to the forest, but being spring my Quaking Aspen tree had some limbs to volunteer as tribute. My wife determined which limbs would need to be removed for this season and I sawed the limbs off and then propped them up on the fence. Multiple cuts were made on several two inch limbs and I was able to cut through several times with one swing. This time no cuts to the finger this time around. I am very happy with the blade.
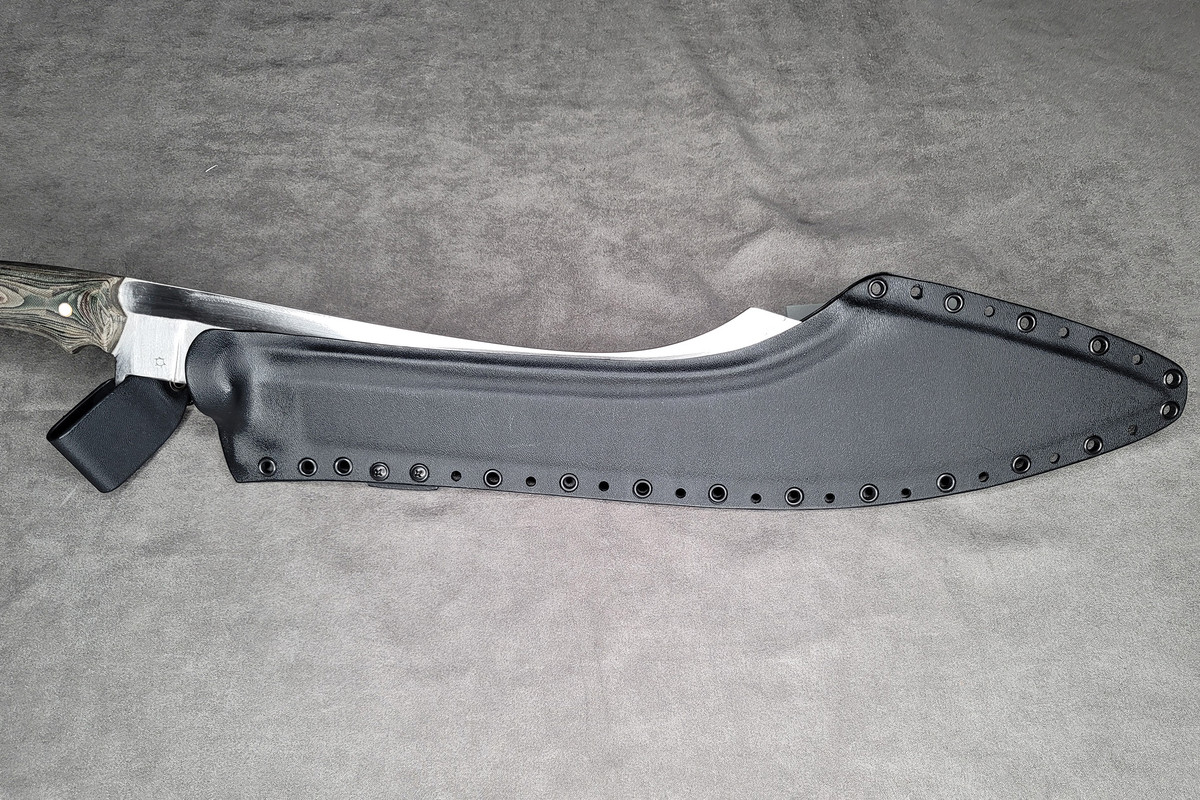
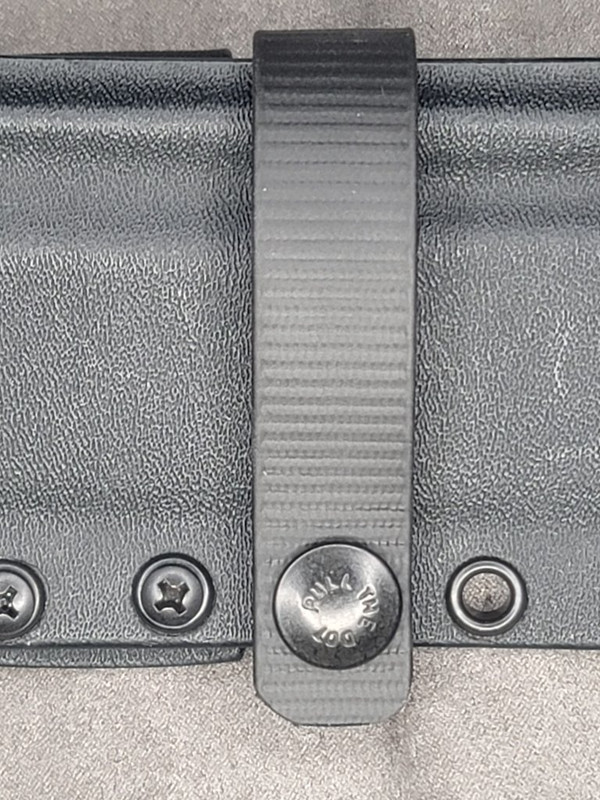
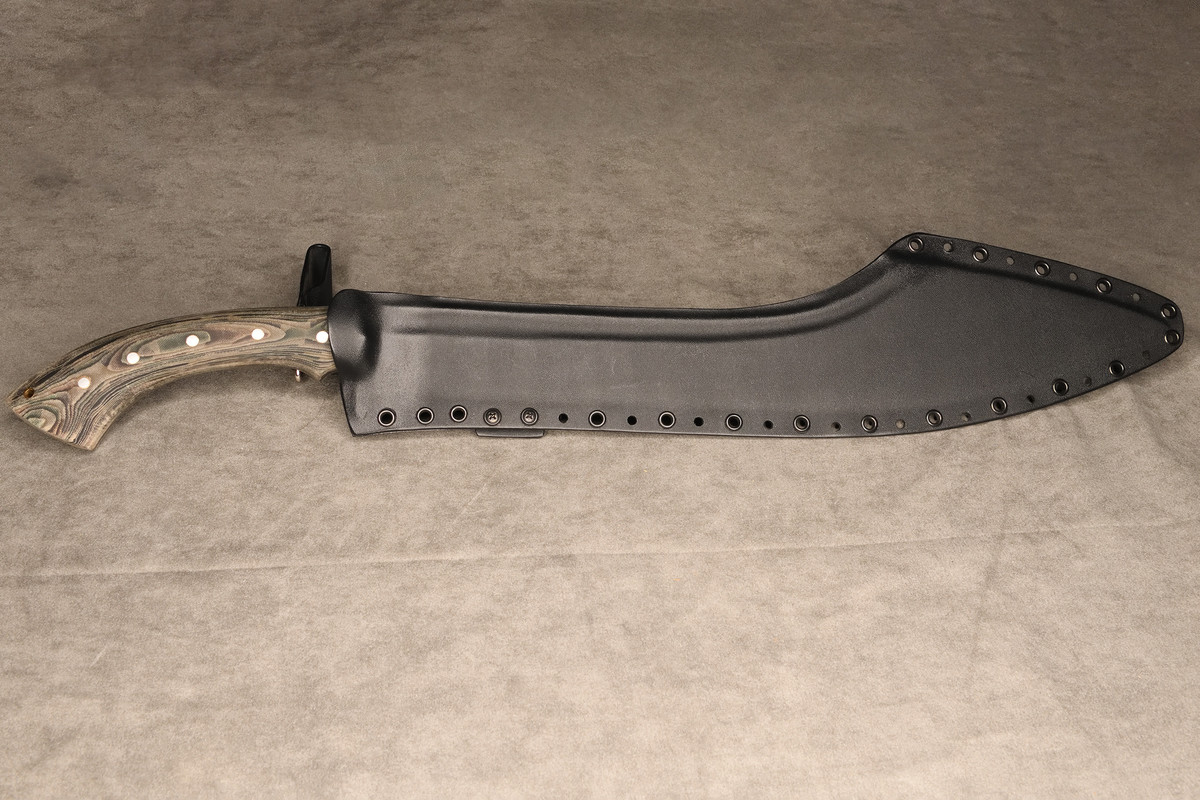
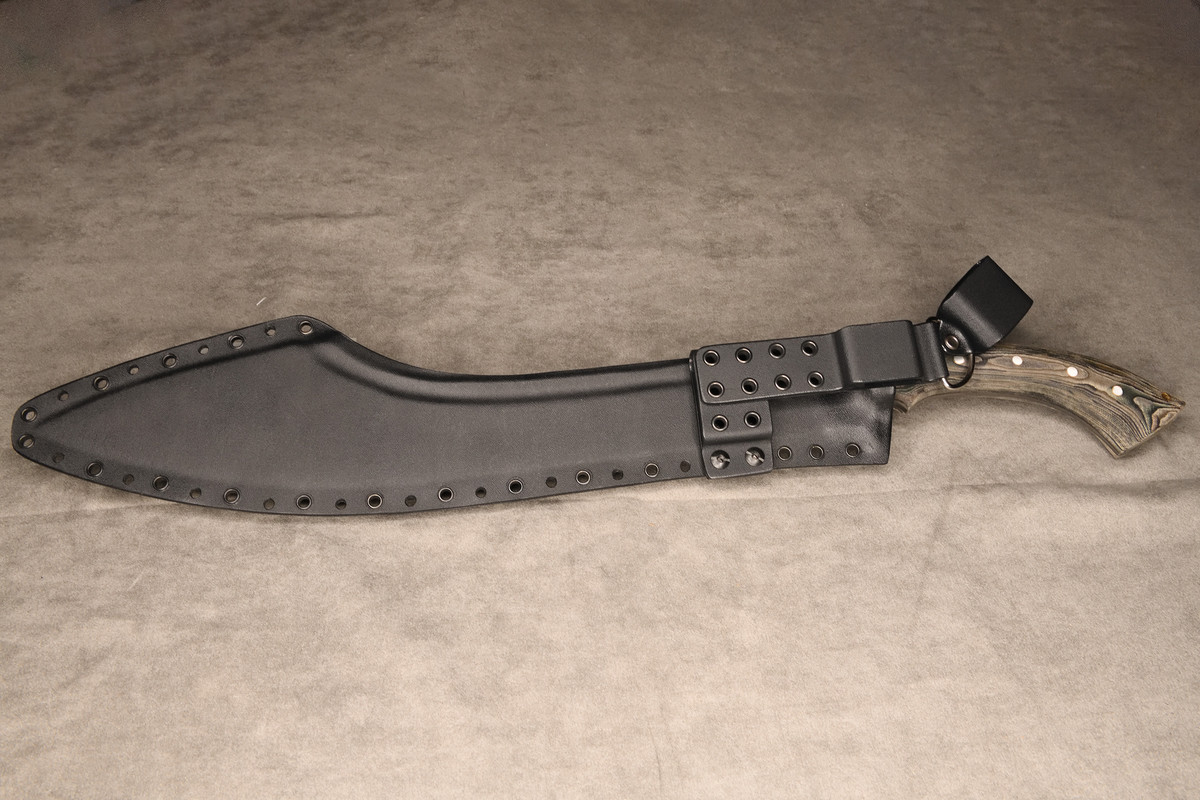
The sheath was very usable in its stock form.
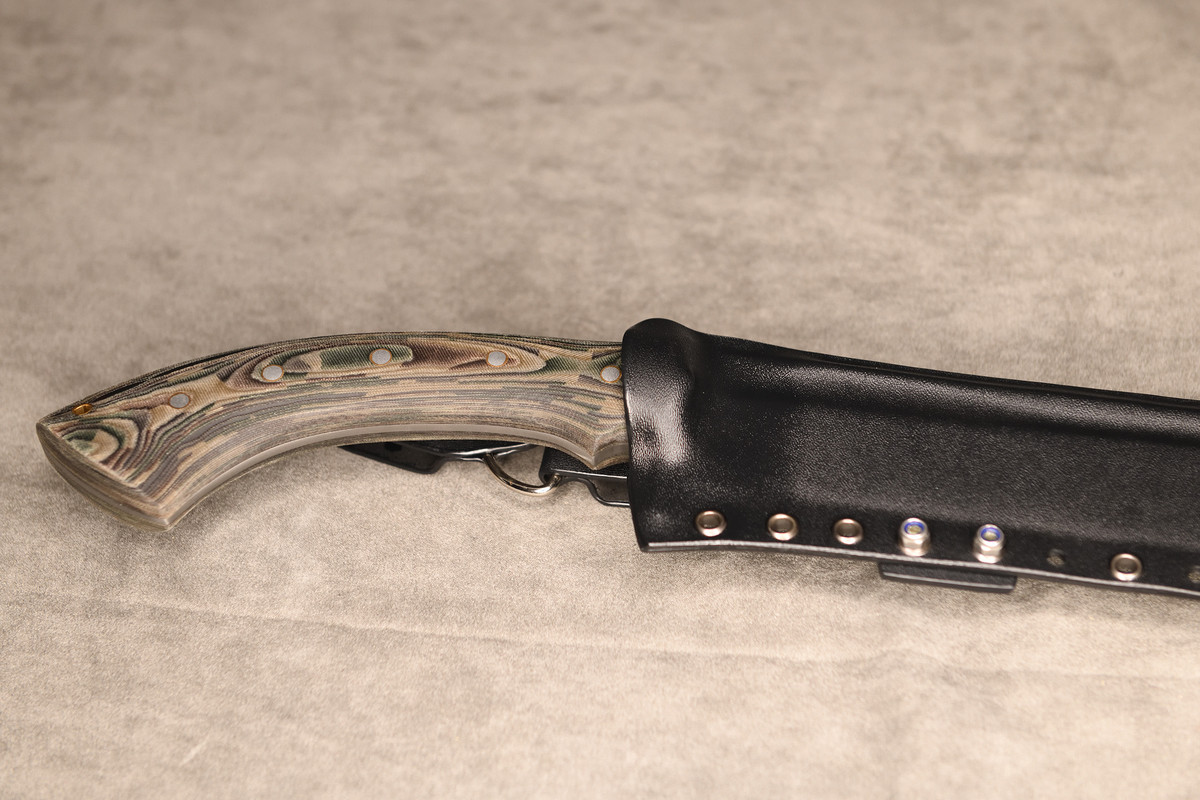

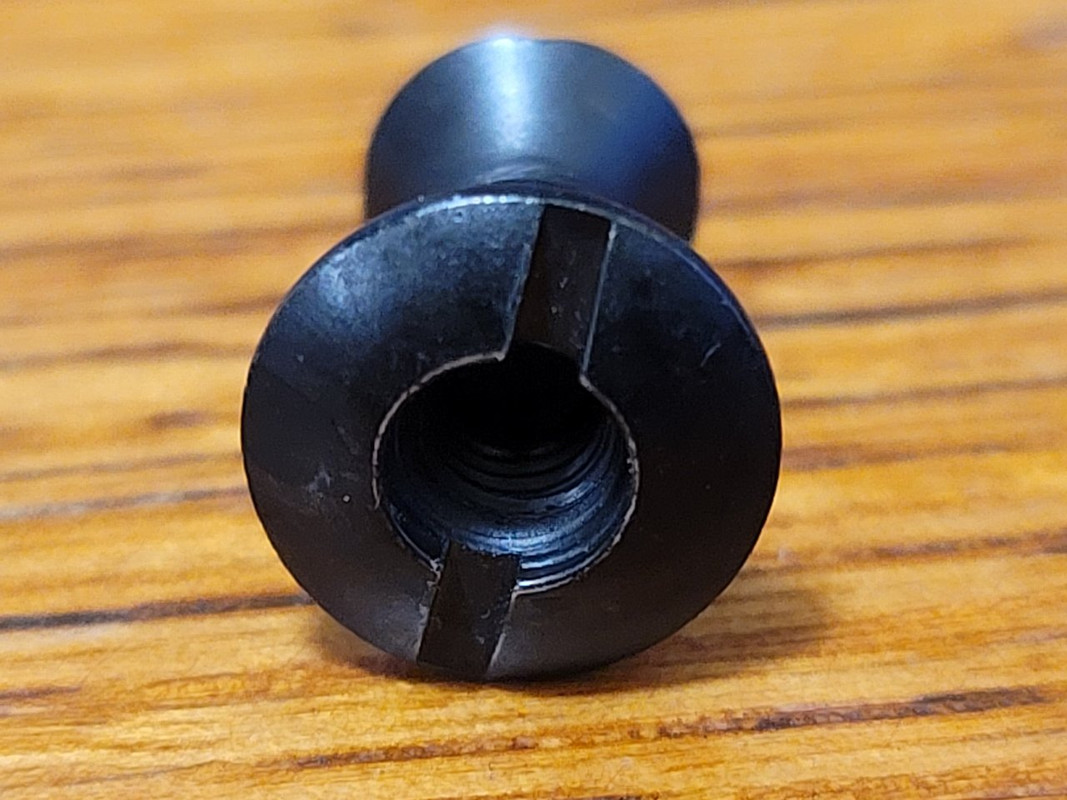
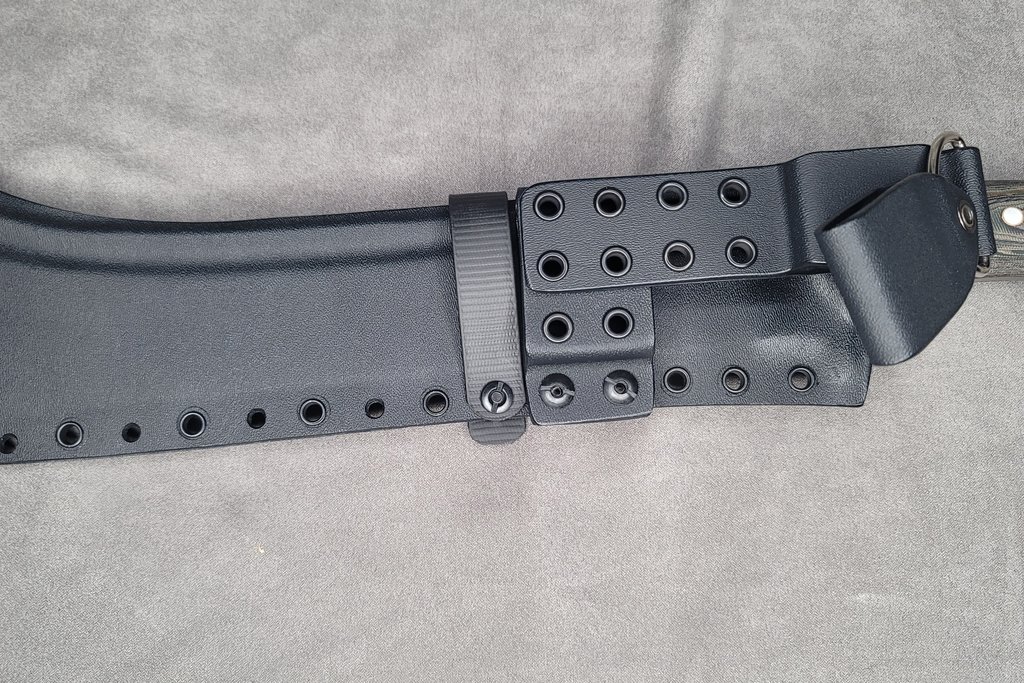
However, I wanted to be able to use standard 1/4 mounting hardware. The rivets used by Kailash are in a 1/4 inch hole but they are a two part press rivet which has an internal diameter of around 5mm or 3/16ths. I was not able to source 3/16 Chicago screws in the style I wanted, so I drilled out the original rivets and had my cousin use his arbor press to install standard 1/4 eyelets in both the sheath and the hanging hardware. Here are some after pictures.
All in all I would highly recommend Kailash Blades, they were definitely easy to work with, highly communicative and on time with their delivery estimates. Even with some of the small thing I had to fix the blade was a good value and a good cutter. I would suggest asking to have the spine rounded by them ahead of time as part of the order. The only other change I would make is to the handle. I wish the straight part was at least one inch longer before the curve started, right now its an hand and 3/4, it would be great to be able to get both hands full on the blade for a full power swing with both hands if needed.
Thanks!
Jeff
I just thought I would go ahead and write a honest review and post some photos of the process I went through with ordering an Expedition Cleaver and my thoughts and impressions regarding the blade.
This spring I decided to add a large chopper/machete to my camp pack as I find myself occasionally clearing branches around the campsite or processing wood for campfires. Most of my interactions with blades have been with either folding pocket knives or short fixed blades. Not having much experience on larger knives I set my journey I began searching online for a non-recurve blade that would be relatively easy sharpen vs a recurved fixed blade. That search led me to Kailash Blades, they had a selection of fixed blades designs with a thick heavy blades and were hardened using an oil quench instead of water resulting in a more consistent heat treatment from my research. Before placing an order for my first Kailash Blades knife I wasn't able to find much in the way of feedback on the Expedition Cleaver. I reached out to Kailash and talked to Bisnu, he answered what questions I had and gave me an ETA for the completion of the blade.
I went ahead and placed the order. Every couple of days I received an update email from Bisnu as the blade moved through the different stages of manufacturing along with photos of the blade as it progressed through each stage.
First was the initial shaping and forging.
Then the blade was cleaned up and the lines refined and the fullers cut.
It was then quenched and heat treated.
The blades was finished to a rough satin finish and the Micarta handles attached.
Then it went over to get fit for a Kydex holster.
Finally it went over for a final satin finish and polish and sharpened.
What really pleasantly surprised me was the shipping, it took a could days to get from its home in Nepal to Dubai via cargo and then it was handed over to FedEx and FedEx had it to me in less than 3 days. Totally shipping to the Northwest USA was under a week.
Now we can get into the discussion of the blade. The Expedition Cleaver arrived in perfect order, it was drenched in oil for transport and was to be carefully cleaned up as it the sheath was full of oil and did not have a drain hole at the tip to allow the oil to eventually drain out. But it had arrived and free of rust or cosmetic issues due to shipping. Here are some photos I took of the blade the day it arrived.
As you can see the handles came out very nicely, and the forest Camo Micarta was spot on. I went out to my favorite patch of the wild and did some test cuts with the blade. However, my first session was cut short very quickly. After the first two cutting swings I realized the front finger guard was still sharp as seen in these photos.
It was still cut at a 90 degree angle which resulted in edges that were sharp enough to cut. I emailed Bisnu and he apologized and assured me they would be more diligent about checking that in the future and was suggested that the edges would need to be filed down. I did not wish to freight it back to Nepal for such a minor job. I whipped out my file set and began to reshape the front guard and remove the sharp angles and get a nice rounded guard. Thirty minutes later the guard was finished. In the process I found the rear of the blade had a similar sharp edge. I pulled out my 200 grit stone and rounded the spine on both sides and finished it with a 600 grit stone. Now the guard and spine were smooth to the touch and did not have any catchy edges. I did not have time to return to the forest, but being spring my Quaking Aspen tree had some limbs to volunteer as tribute. My wife determined which limbs would need to be removed for this season and I sawed the limbs off and then propped them up on the fence. Multiple cuts were made on several two inch limbs and I was able to cut through several times with one swing. This time no cuts to the finger this time around. I am very happy with the blade.
The sheath was very usable in its stock form.
However, I wanted to be able to use standard 1/4 mounting hardware. The rivets used by Kailash are in a 1/4 inch hole but they are a two part press rivet which has an internal diameter of around 5mm or 3/16ths. I was not able to source 3/16 Chicago screws in the style I wanted, so I drilled out the original rivets and had my cousin use his arbor press to install standard 1/4 eyelets in both the sheath and the hanging hardware. Here are some after pictures.
All in all I would highly recommend Kailash Blades, they were definitely easy to work with, highly communicative and on time with their delivery estimates. Even with some of the small thing I had to fix the blade was a good value and a good cutter. I would suggest asking to have the spine rounded by them ahead of time as part of the order. The only other change I would make is to the handle. I wish the straight part was at least one inch longer before the curve started, right now its an hand and 3/4, it would be great to be able to get both hands full on the blade for a full power swing with both hands if needed.
Thanks!
Jeff
")