As said by all, first put a wash coat of clay (satanite seems to work best for me) over the entire blade. After that is dry, apply the hamon producing clay. It doesn't need to be more than 1/8", and can be as thin as 1/16". Some experimentation will determine your style and preferences.
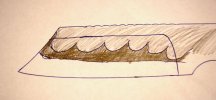
Looking at your sketch, showing a martensite ( hard) spine and a martensite edge with the darker pearlite (soft) between the two, makes me wonder if you coated the spine? Or if the spine clay split or popped off in the heating and soaking.
If you did not coat the spine, try it with clay on the spine. The tutorials that call for wiping then clay from the spine are usually for swords, to control the sori ( curvature).
If you did put clay on the spine, it may need to be a bit thicker there.
When designing a hamon, sketch the blade in two colors. The white color will be the hard martensite, created by cooling the 1095/W2 down below 900F in less than a second. The darker grey color will be the pearlite. The wispy clouds will be where the two mix at the hamon. These color differences are created by the etching in the final hand finishing. The use of various polishes ( red rouge, Flitz, Simichrome, and many strange Japanese words), and diluted etchants ( lemon juice, FC, hydrochloric/muriatic/nitric acid,etc.), create the color distinction. In grinding, and early polishing, the hamon may ( usually is) be invisible. A quick dip in the FC tank will be of use after quench, to see if the hamon is where you want it. Just give the blade a quick grind with a 220 belt to knock off the rind ( scale and decarb) before you do the temper, and stick it in the FC for a few seconds. The hamon should be visible, but the fine details won't be seen until final polishing and etching, often repeatedly etching-rubbing-etching for the final step.
A lot of grinding and metal removal after quench may remove a lot of the hamon's details. Hollow grinding after quench may move it or re-move it. Remember they call the steels that make the best hamons shallow hardening. So, do as much grinding as needed to get the blade surface prepared for quench. Leave the edge thick enough to prevent warp, but take the bevels to about 400 grit and near final shape.
Your soak time was proper, and the hamon may be fine when you get the blade done.
It is not unusual to have a large ( and painful) learning curve when first starting hamons. Eventually you just let them be what they want to be, and you become happier.
Stacy
")
