- Joined
- Jun 27, 2010
- Messages
- 402
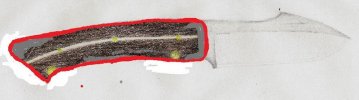
I found some of my kids' colored pencils and whipped this up, after weeks and weeks of changing it on paper and pencil and cutting cardboard. I won't ask if this looks like anyones, cause I'm sure there's 200+ knives just like it.
I wanted a carver that could possibly serve as a companion knife for a Beck WSK that I eventually want to do. I originally put the point on the spine for a possible gut hook in the future (when I figure it out), but I like the look and might just keep it there.
I plan on using 5160, sanding to a rough 800 grit, then doing the bevel up to maybe 1500-2000grit. The scales will be african blackwood with stabilized white holly. After seeing it in color, I might go with silver rivets and lanyard holes. I know the handle is complex, I'm not to worried about it, lots of learning to be had, haha.
Total length is 8 1/4", blade length is 3 5/8".
No blanks have been cut yet, so if anyone can offer criticism, and tips...I'm wide open.


") . I'd be willing to be a lot of makers have.
. I'd be willing to be a lot of makers have.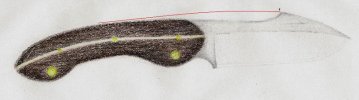

")