First time making a knife WIP

Joined
Sep 30, 2012
Messages
15,381
I thought id share my experiences while learning to make my first knife.

I ordered a craftsman 2x42,
But when it arrived it was defective. The belt rubbed on the casing a lot, and once i got the belt able to pass through it bounced around on the platen. Tracking wasnt great either. But i could of dealt with everything else except the belt bouncing all over the place. I returned it to sears, but i have to wait on the refund before i can order the new one.


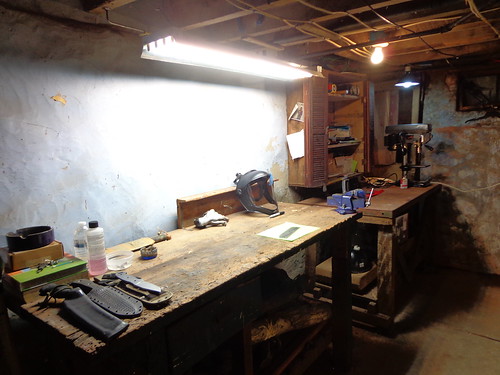
My work area. The grinder will go on the first table once it gets here.


15236926972_cd99e1e68e.jpg


Some tools, etching kit, and other odds and ends. Most of this i have received in the last several days to a week. I had to finance the majority of it, but its already worth it as im enjoying every minute of it.

15050538969_6393271a45.jpg


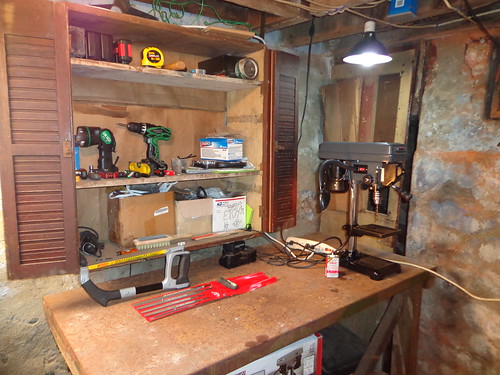
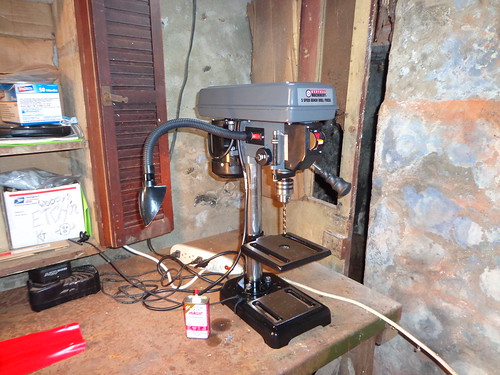
My new HF drill press and some Tap Magic oil

15236923422_d745dee686.jpg


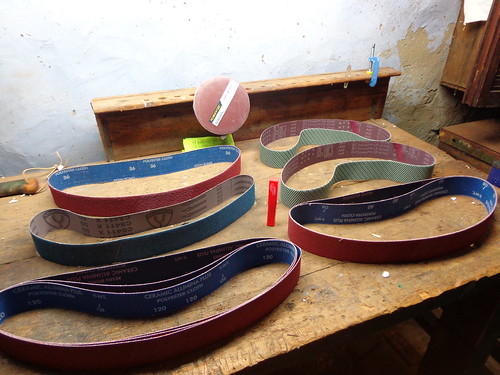
Some belts for the grinder. Ceramic, Zirconia, And Trizacts "gators"

15041272808_70b41af58b.jpg


I couldnt even wait on the new grinder to start, so im using a hacksaw, drill, and files to start my first small knife now... Nothing fancy but im enjoying the process even using mostly hand tools.

1/8" O1 tool steel, 8 1/4" OAL... I call it the "Woody Pecker"

Basic design drawn out,
15226224601_e58dfd2c28.jpg


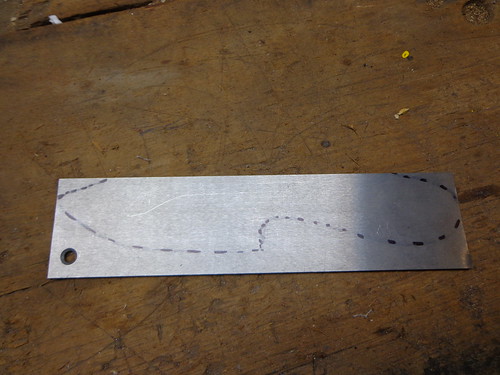
Added a little curvature to the spine and dropped the point a bit using files.
15050689818_727f900149.jpg


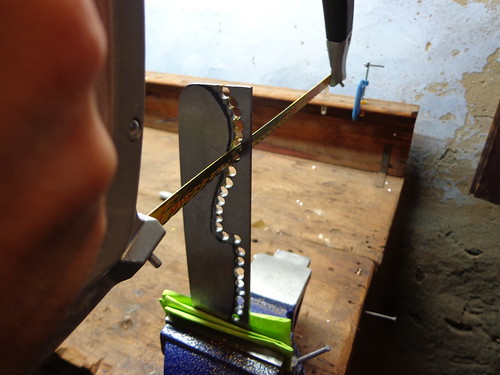
Drilled some holes and starting sawing with the hacksaw...
15052327619_39666b0486.jpg


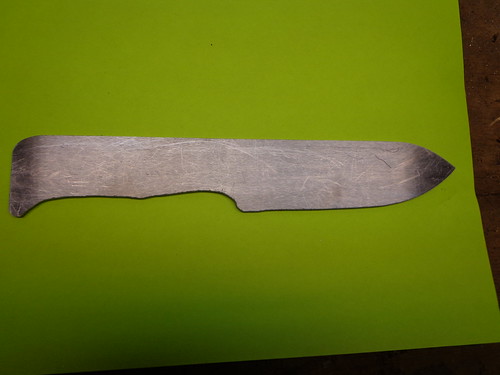
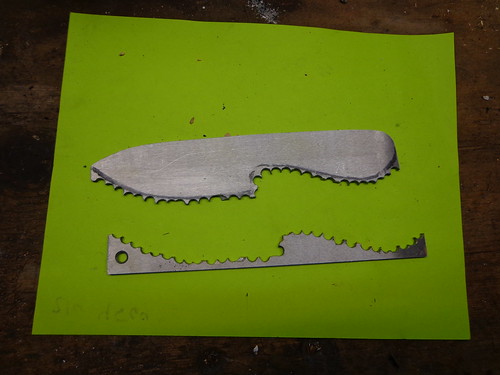
Got the bugger cut out...
15052401200_1d2616002b.jpg


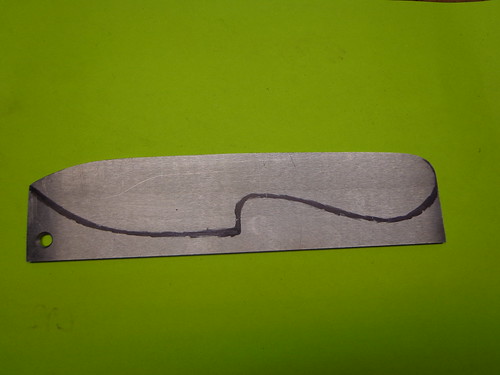
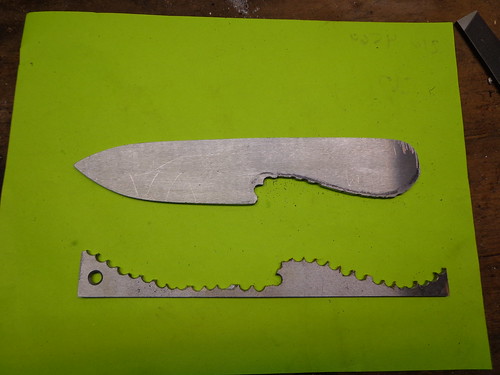
Started filing the ridges down and smoothing it out....
15240705605_c5ae5a12d7.jpg


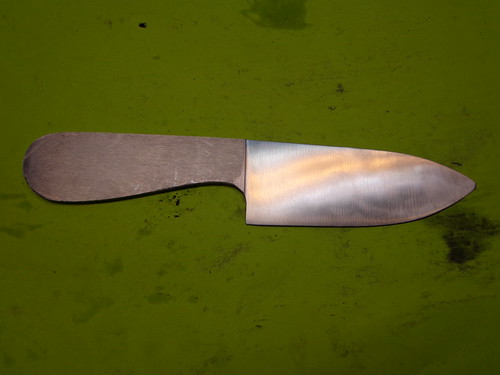
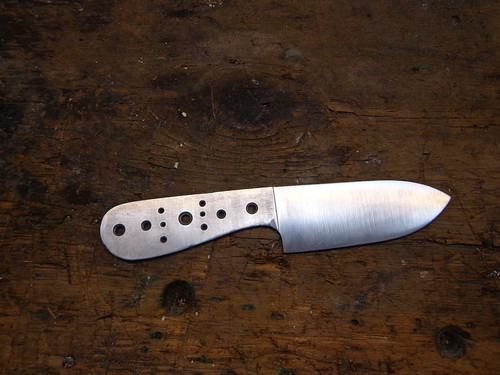
Had to reduce the palm swell to make it more comfortable in the hands. finished up the profile in 24 hours working on and off... Ok mostly on because i just couldnt stop until i had the profile shaped :D

15056354070_37f712277e.jpg


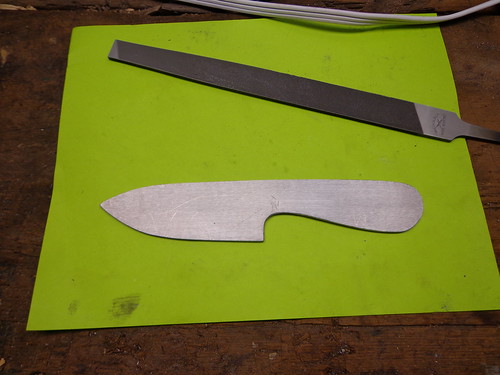
I know its nothing amazing, but i have to start somewhere!

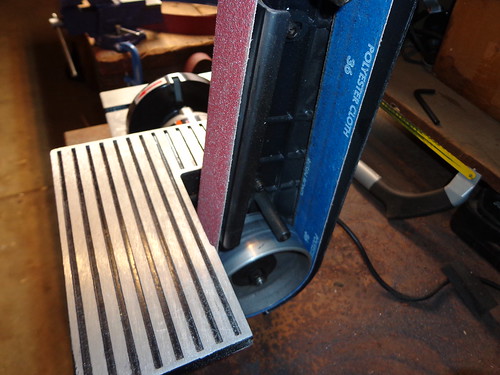
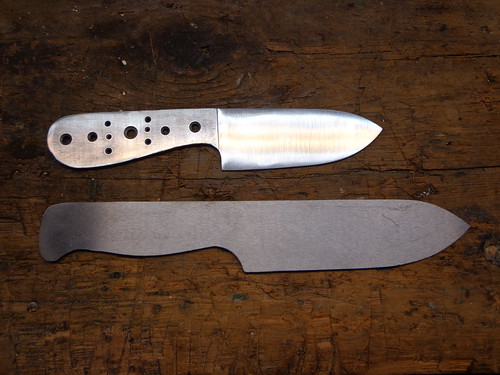
I may wait on the grinder to add the bevels and edge, i still need to get a center scribe as well. So it may take me a bit to progress further.

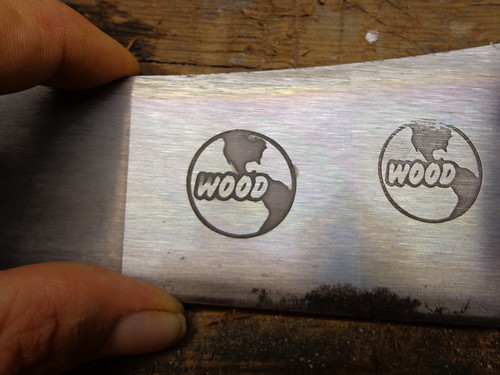
And here i am practicing etching my "logo". Im using electrical etching, but i may also try PCB soon as well and see if i can get it even better.

15195114095_2be5291d47.jpg


Id like to thank the guys here on BF for the encouragement, and all the helpful information they post that help make this easier on a newbie like me.

Thanks everyone for looking. I will update as i progress further.

Richard
 
Last edited:
Thank you Matthew!

I love how the makers mark looks, but its 1" in diameter, so on small-mid sized knives it will take up a good portion of the blade. For my first one i dont mind and ill probably use it... But i will eventually need to figure up a smaller one.
 
Yeah, that might be a bit large... The design would translate to a much smaller size, though - get a stencil made that's 3/8" diameter. Bet it looks just as good, and be easier to etch deep, too.

Do you have an edge scribe coming? You can always use a drill bit, in a pinch. If you're going to invest in a scribe, though, I'd suggest skipping over the conventional knifemaker's edge scribe and get yourself a height gauge and a flat plate to use it on. More money initially, but I use mine all the time for all sorts of stuff. Plenty to be had on ebay, too!!!!

Thank you for the suggestions!!

I will definitely try and have a smaller stencil made!

I dont have an edge scribe coming yet. I will probably have to use a drill bit for a while, but i will invest in one when money permits. Is this what your talking about to use as the scribe?

splate2.jpg
 
Yup! I bought a 12" Mitutoyo vernier height gauge for $60 a couple years back. No need to buy a crummy Chinese one if you can get old-school precision stuff for great deals. It's really easy to learn how to read a vernier device, and because everyone wants dial or digital, you can get a $250 device for a fraction of that! Always good deals to be had, you just have to look.

If you get stuck on the edge scribe, let me know - I'll see what I can do.

I just googled "12" Mitutoyo vernier height gauge" and my jaw dropped to the floor when i seen some of them prices. You got a hell of a deal on that thing!!

I can probably handle 60 bucks or so, just budget it in over the next couple months.. But several hundred i just couldnt swing unless i wanna sleep on the couch for the next year or so while the wife gives me the stink eye :D

Ill keep my eyes peeled though, ill look around on CL and stuff. I dont have paypal so that makes ebay a bit more difficult for me but i may be able to locate one not too far away if i keep my eyes open for a while!

I really appreciate all the help man!!
 
Just got an email with tracking number for the new grinder. Should have it tomorrow or Thursday. EXCITED!!
 
Got the new grinder in yesterday and its functional. Still a few issues with it but ill make it work.

Started the profile of a 2nd knife this morning and got the profile almost knocked out in about an hour. And its a bigger knife LOL.... Im going slow and taking my time.. Still MUCH faster than files and a hacksaw. However i'll be using files to clean up some of the handle area, just so i can go slow and get it just how i want without accidentally grinding off too much.

And here is where im at so far.

15278072462_bd5a589371.jpg


Ill get it all cleaned up and finish the handle with files, then start trying to put bevels/edges on them. I want to go FFG with the smaller one, and want to attempt a high saber on the larger.
 
I removed the plastic cover and cut the work table on the right side to make it easy to change the belts. Im still using the lower belt guard, but i just have to loosen it a bit and the belts fit through. Much easier than taking everything apart each time i want to change belts.

15280205292_f14453cb2f.jpg
 
When you do put the blade to the grinder, try to stop the grind about 1/8th of an inch from the spine. Do not chase the grind all the way up to the spine. It just looks so much better, and it shows you know what you're doing. Looking good so far:thumbup:
 
Well i really dont know what im doing yet... But thanks for the tip!! I will try it out as soon as i get some more steel to play with :D

So... Its definitely a learning experience... I didnt do so great.... I need to figure out how to do the plunge lines better and more evenly, and practice applying the same amount of pressure the entire time. I manged to grind the tip too thin and lost the very tip, not much of it, but enough to teach me to be careful how thin im going. And i didnt realize i was using different amounts of pressure but i guess i must have been.

The spine tapers from .111 down to around .020 at whats left of the tip

The edge starts off at .022 then goes up around .050 after about an inch then it drops all the way down to .015 at whats left of the tip

15282226902_78e361646a.jpg


Tips welcomed an appreciated on how to improve my mistakes.
 
File jig my father made for me out of some scrap oak, he added inserts so i wouldnt have to worry about messing up the threads taking the eyebolt in and out a bunch.

15112794940_6f80fc1ccd.jpg


Holes drilled and countersinked, they looked straight and even when i marked them with the marker.... now im thinking not so much LMAO

Need to clean up the edges around the handle still. will probably add wood handles after HT

15129636898_d20ff6d725.jpg


Thinned handle out on the 2nd knife and changed the pommel up a bit.

15316220625_8a295c6226.jpg
 
Thanks guys!

Im having a lot of fun with it. Its addictive, from the moment i started filing the first one its been on my mind non stop. I have so much to learn still but im enjoying every minute of it.
 
Back
Top