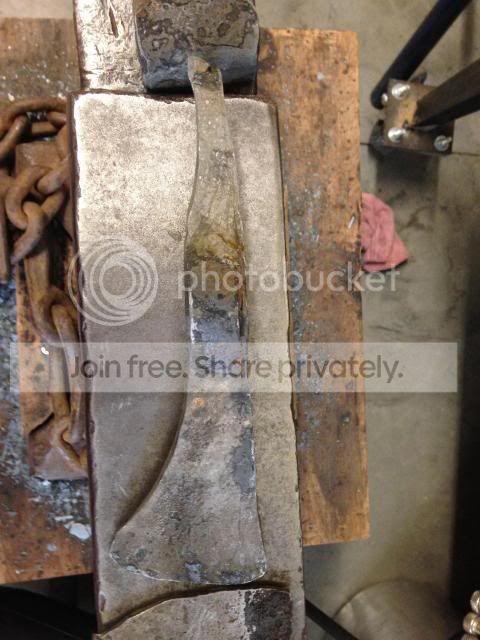
I was able to go to a friend's shop earlier in the week and he helped walk me through the various steps of forging some tomahawks. He also had a little hatchet that I really liked so I forged one similar to it out. The first here was made out of some cable Damascus I'd made a while back. The cable got thin enough that I welded together three pieces of it into a big blank which I used for a spike hawk:
After a little cleanup on the grinder:
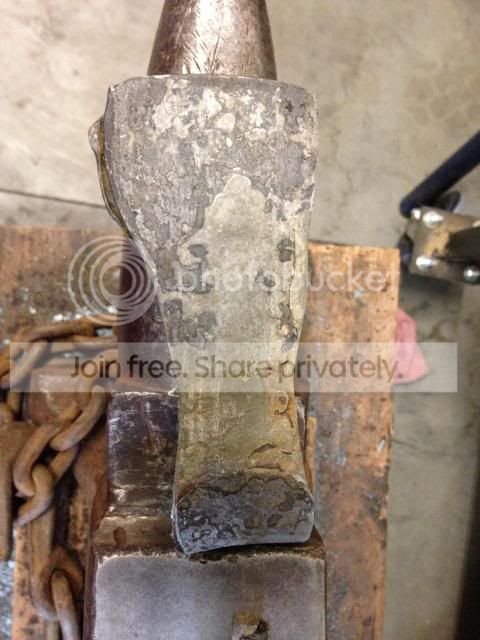
The next is something I've wanted to do for a long time. It's a wrought iron (wagon wheel rim) wrapped hawk with a piece of high carbon steel forge welded to the back before wrapping (for a hammer pole). Then another piece put in for the bit. It was definitely the hardest of the three to do. The wrought wanted to move faster than everything else and it is certainly the ugliest in the just forged stage... I also really tried paying attention to how many hammer blows I had on each side as I cross peened the blade to keep things even. But...it ended up a bit thinner for the wrought on one side, so when I grind then etch, it won't be even on both sides for where the wrought goes to. Oh, well-I guess worse things have happened. This one will need the most work of the three on profiling. I got to a point where I didn't want to try forcing things around anymore with how the wrought was going all over.
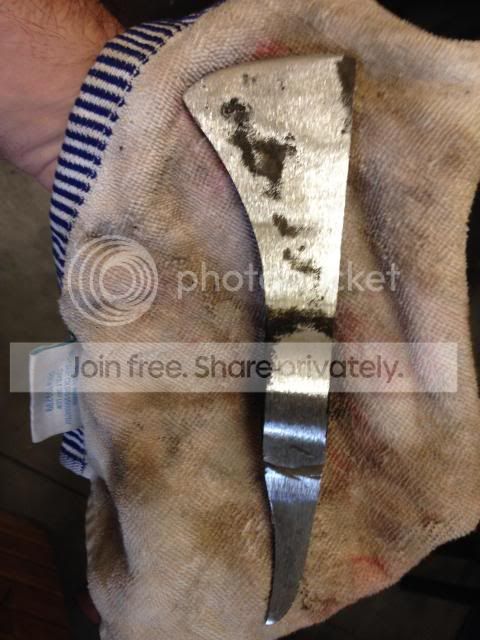
The last is a little hatchet that I'm pretty hopeful for. It started out as a 3/4" thick block of mild steel. Drilled a few holes to help with slitting and drifting (more on that shortly...) and a 1 1/2" deep cut in the end to put a bit in later. This was a bigger piece of steel than the others, but for some reason, the cross peening went better than either of the other two and quicker. I'm going to grind in a subtle curve up to the top of the edge and probably shorten the blade just a bit, which will also help get rid of the small area on the edge where the mild started going over the carbon bit.

I learned a LOT while doing these and took one more step towards having "man hands" after all that hammering") . Slitting and drifting is quite the skill-one which I don't seem to have yet. Even with holes drilled to help keep things straight, I still had difficulties. It was fairly frustrating as I'd see one side of the eye bulging out more than the other... Thankfully, my friend was there to keep giving advice on how best to proceed. Hopefully I can grind things back to even on the eyes, as we made sure the blade was at least centered with the drift. Lots of fun and looking forward to seeing how these finish out. Any advice or suggestions are very appreciated.
. Slitting and drifting is quite the skill-one which I don't seem to have yet. Even with holes drilled to help keep things straight, I still had difficulties. It was fairly frustrating as I'd see one side of the eye bulging out more than the other... Thankfully, my friend was there to keep giving advice on how best to proceed. Hopefully I can grind things back to even on the eyes, as we made sure the blade was at least centered with the drift. Lots of fun and looking forward to seeing how these finish out. Any advice or suggestions are very appreciated.
Jeremy

After a little cleanup on the grinder:

The next is something I've wanted to do for a long time. It's a wrought iron (wagon wheel rim) wrapped hawk with a piece of high carbon steel forge welded to the back before wrapping (for a hammer pole). Then another piece put in for the bit. It was definitely the hardest of the three to do. The wrought wanted to move faster than everything else and it is certainly the ugliest in the just forged stage... I also really tried paying attention to how many hammer blows I had on each side as I cross peened the blade to keep things even. But...it ended up a bit thinner for the wrought on one side, so when I grind then etch, it won't be even on both sides for where the wrought goes to. Oh, well-I guess worse things have happened. This one will need the most work of the three on profiling. I got to a point where I didn't want to try forcing things around anymore with how the wrought was going all over.

The last is a little hatchet that I'm pretty hopeful for. It started out as a 3/4" thick block of mild steel. Drilled a few holes to help with slitting and drifting (more on that shortly...) and a 1 1/2" deep cut in the end to put a bit in later. This was a bigger piece of steel than the others, but for some reason, the cross peening went better than either of the other two and quicker. I'm going to grind in a subtle curve up to the top of the edge and probably shorten the blade just a bit, which will also help get rid of the small area on the edge where the mild started going over the carbon bit.

I learned a LOT while doing these and took one more step towards having "man hands" after all that hammering
. Slitting and drifting is quite the skill-one which I don't seem to have yet. Even with holes drilled to help keep things straight, I still had difficulties. It was fairly frustrating as I'd see one side of the eye bulging out more than the other... Thankfully, my friend was there to keep giving advice on how best to proceed. Hopefully I can grind things back to even on the eyes, as we made sure the blade was at least centered with the drift. Lots of fun and looking forward to seeing how these finish out. Any advice or suggestions are very appreciated. Jeremy
")


