- Joined
- Feb 17, 2007
- Messages
- 3,375
I have the spring stock and lots of carbide drills, I will let you know how it goes if I don't have to work this weekend keeping America in cheap gasoline
The BladeForums.com 2024 Traditional Knife is available! Price is $250 ea (shipped within CONUS).
Order here: https://www.bladeforums.com/help/2024-traditional/

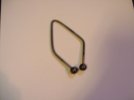
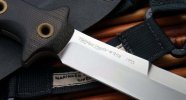
Has anyone tried this on brass tubing? I have some I've been using and flaring with a punch, but this technique is not that great. I would also like to compliment you on the knife itself. I love the look of an all black knife with just a small shiny edge.
I prefer screws. I tried balls for the first time and they split the tubing, the tubing also didn't flare evenly. ")