Summary: High-polish/Razorsharp-stropping can be done on the Ruixin and similar "GRSS" guided rod sharpening systems very precisely, effectively, conveniently/easily, and budget-friendly. How? By applying the compound on surgical tape. The holder material should provide minimal give: here, balsa wood serves better than leather or basswood.
As you will realize, users of almost any commercial GRSS could adopt my method; i am taking my modded Ruixin as application example. I've given this method a name and call it Paper Tape Stropping or 'to strop a knife/blade/edge with the PTS method' or 'to do PT-stropping' . Afaik I am the first to document it in specific detail.
Pro's:
Note: The PTS method is not to replace all of your freehand leather stropping activity, when working on a specific knife model or specimen. For example, after reducing the burr with my last Ruixin stone (RUIXIN1500), i sometimes proceed with 1min on my 1 foot long SiliciumCarbide-loaded leather strop to faster smooth out the zig-zaginess of the edge line, before i return to the Ruixin device for the PTS method. The PTS method does smooth out the edge line too, 100.0% perfectly so, it just takes longer. If time is not a factor, you won't need a leather strop during the entire sharpening session. I have been appreciating the PTS method so much that I always try to do it whenever a blade has gone dull and either would need touching up (usually done on a leather strop) or actual resharpening (usually done on a 1000+ grit stone). If you know what you're doing and have the proper set of compounds for the grit progression, then the PTS method can be extremely effective, hence also time-efficient.
Comparison: Stropping with disposable tapes is not a new idea per se. WickedEdge offers 'leather tapes' for 60$/pair, and EdgePro offers custom-cut dry grit tapes for 37$/set. If money isn't a factor, then these are awesome substitutes and superior to my PTS which is basically a budgeteer's DIY method; WickedEdge and EdgePro owners don't need to look any further, they already have the best (and most expensive). At the opposite end of the spectrum, people on a budget or Ruixin users should find my PTS method to be an attractive alternative to free-hand leather stropping.
What you will need:
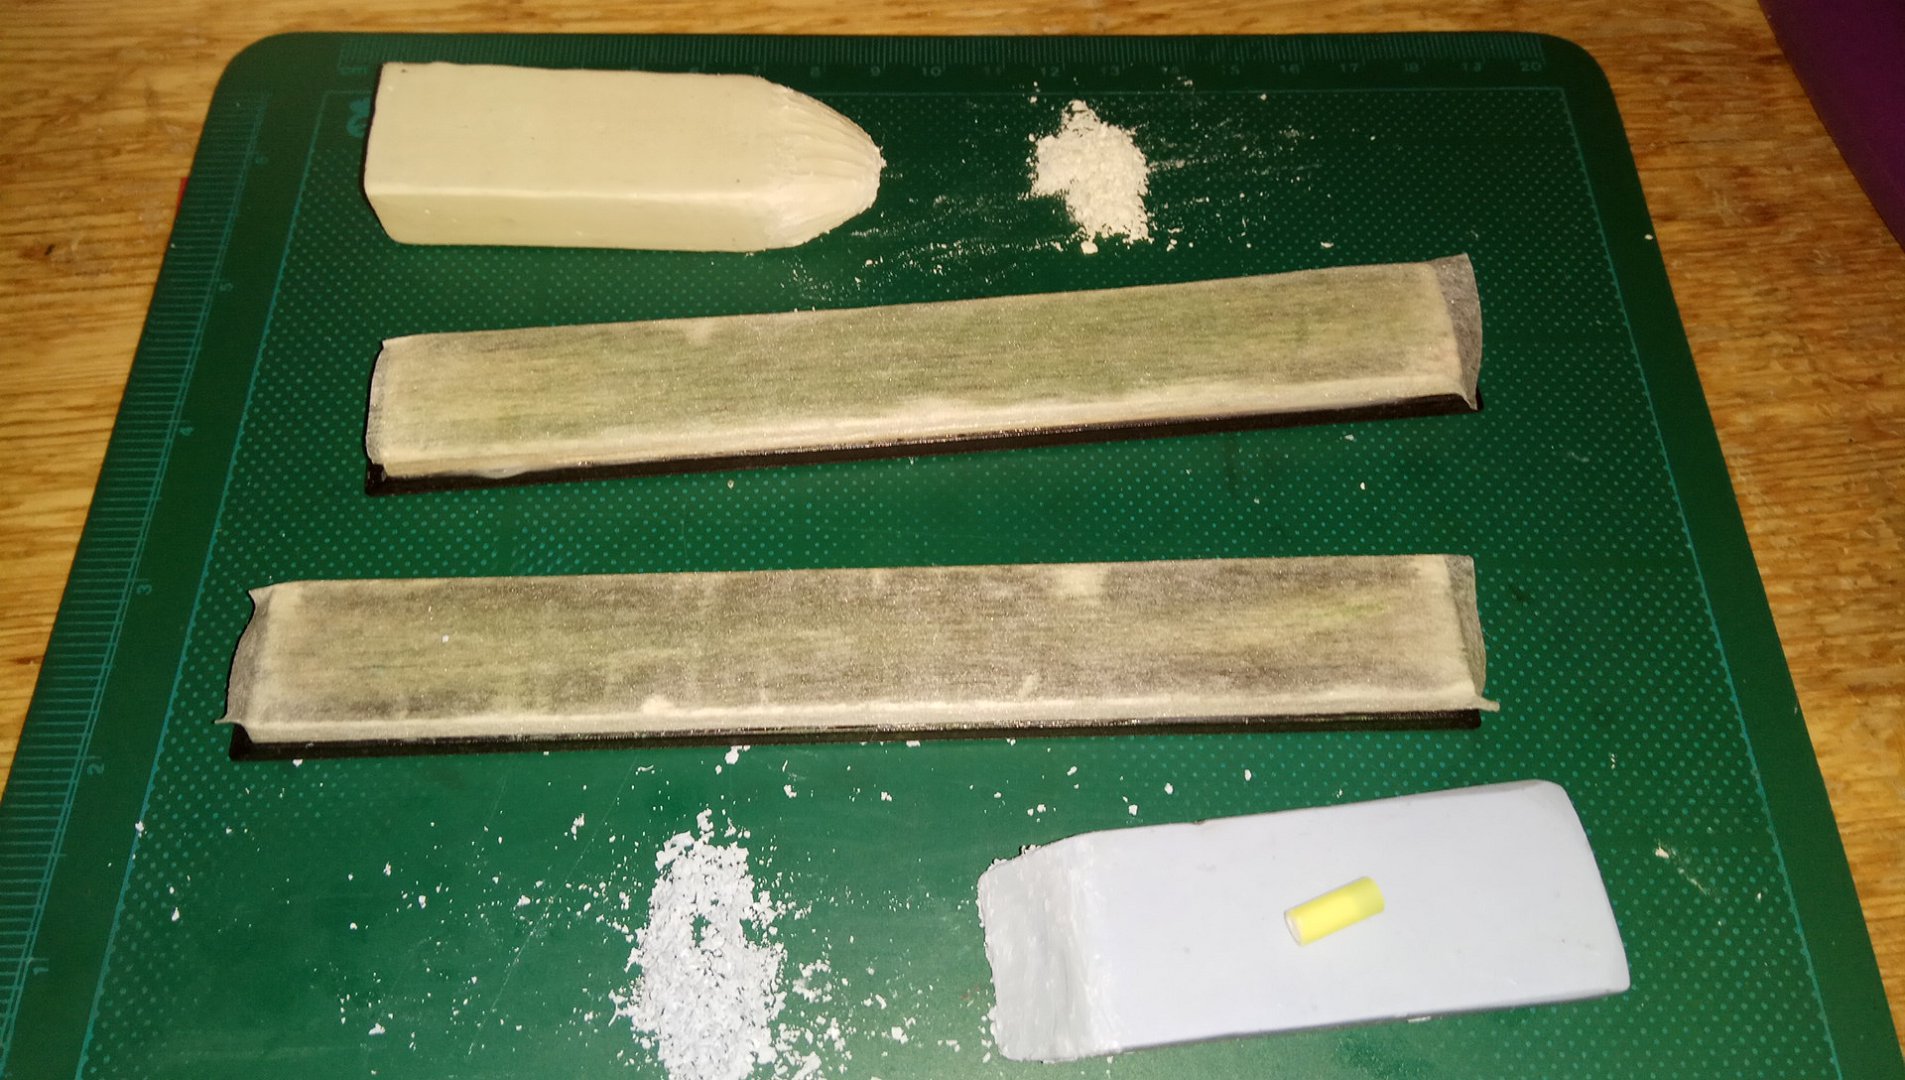
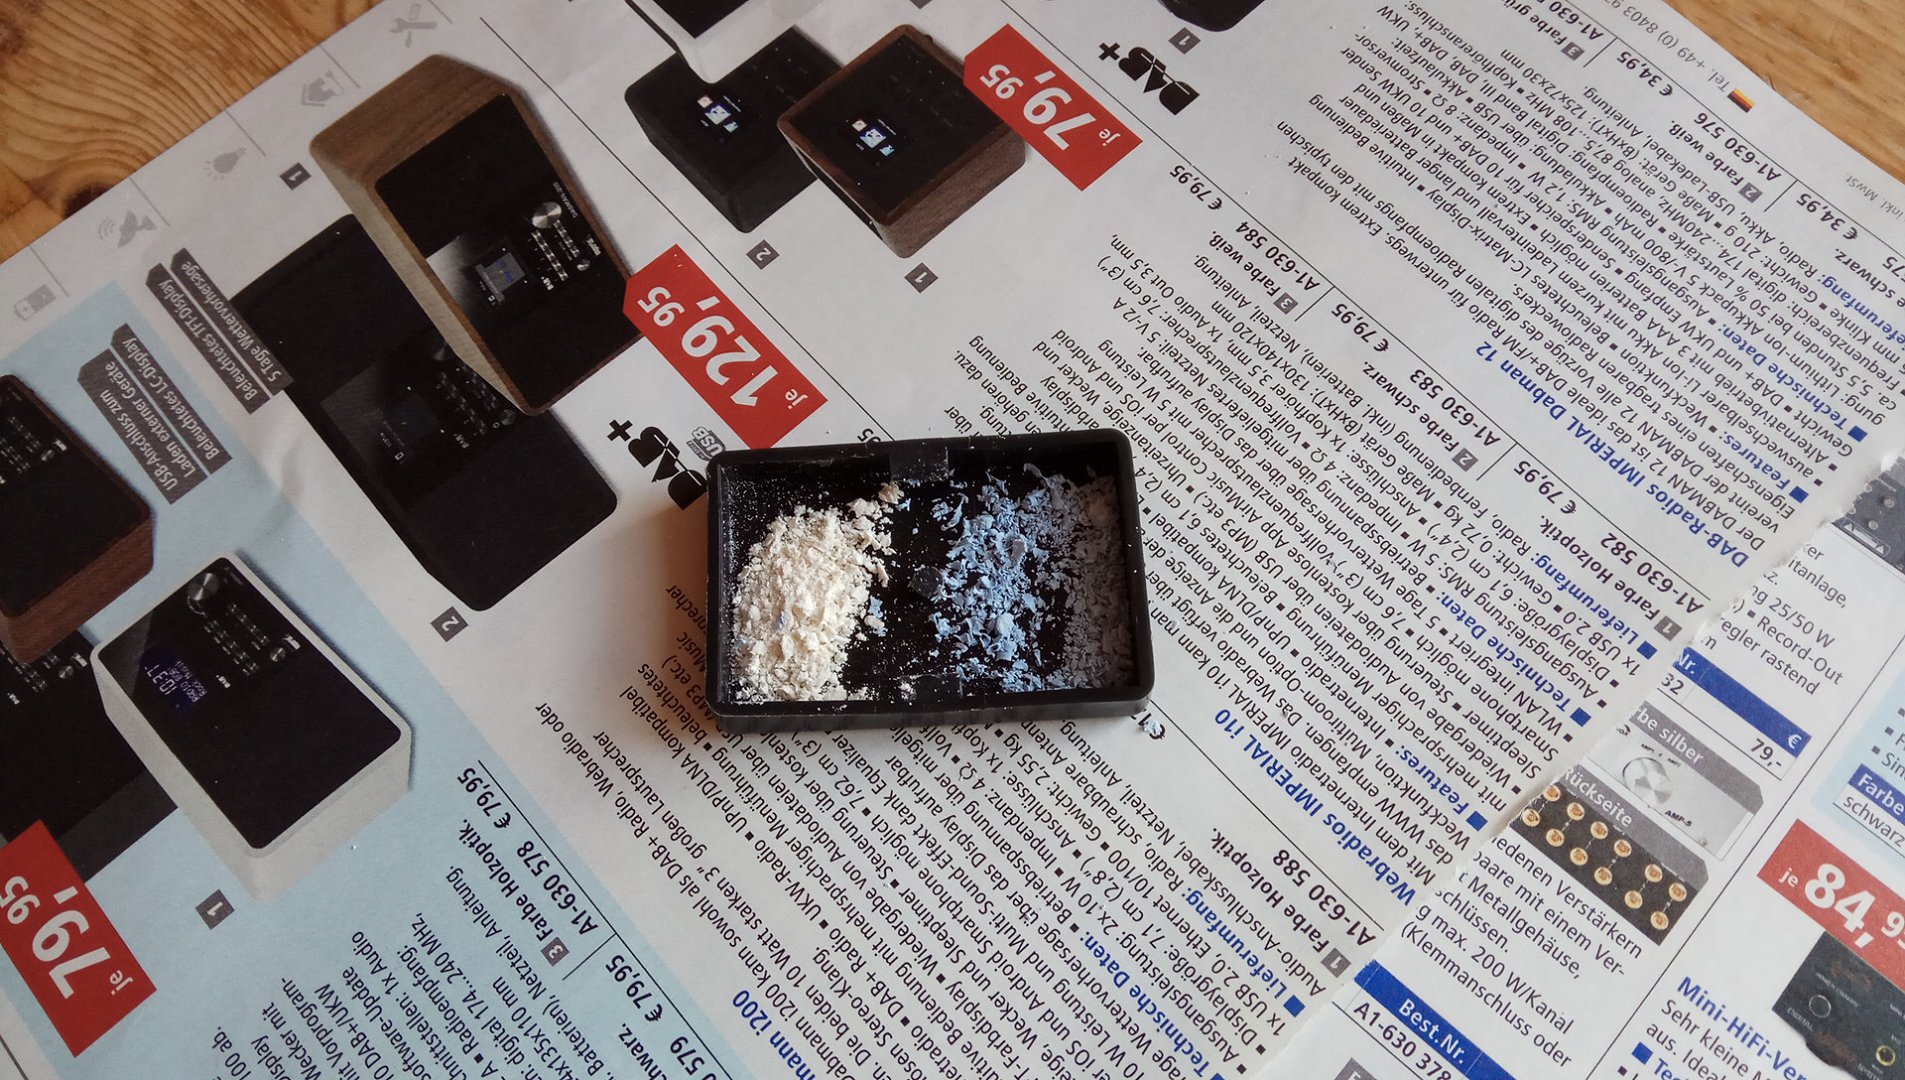
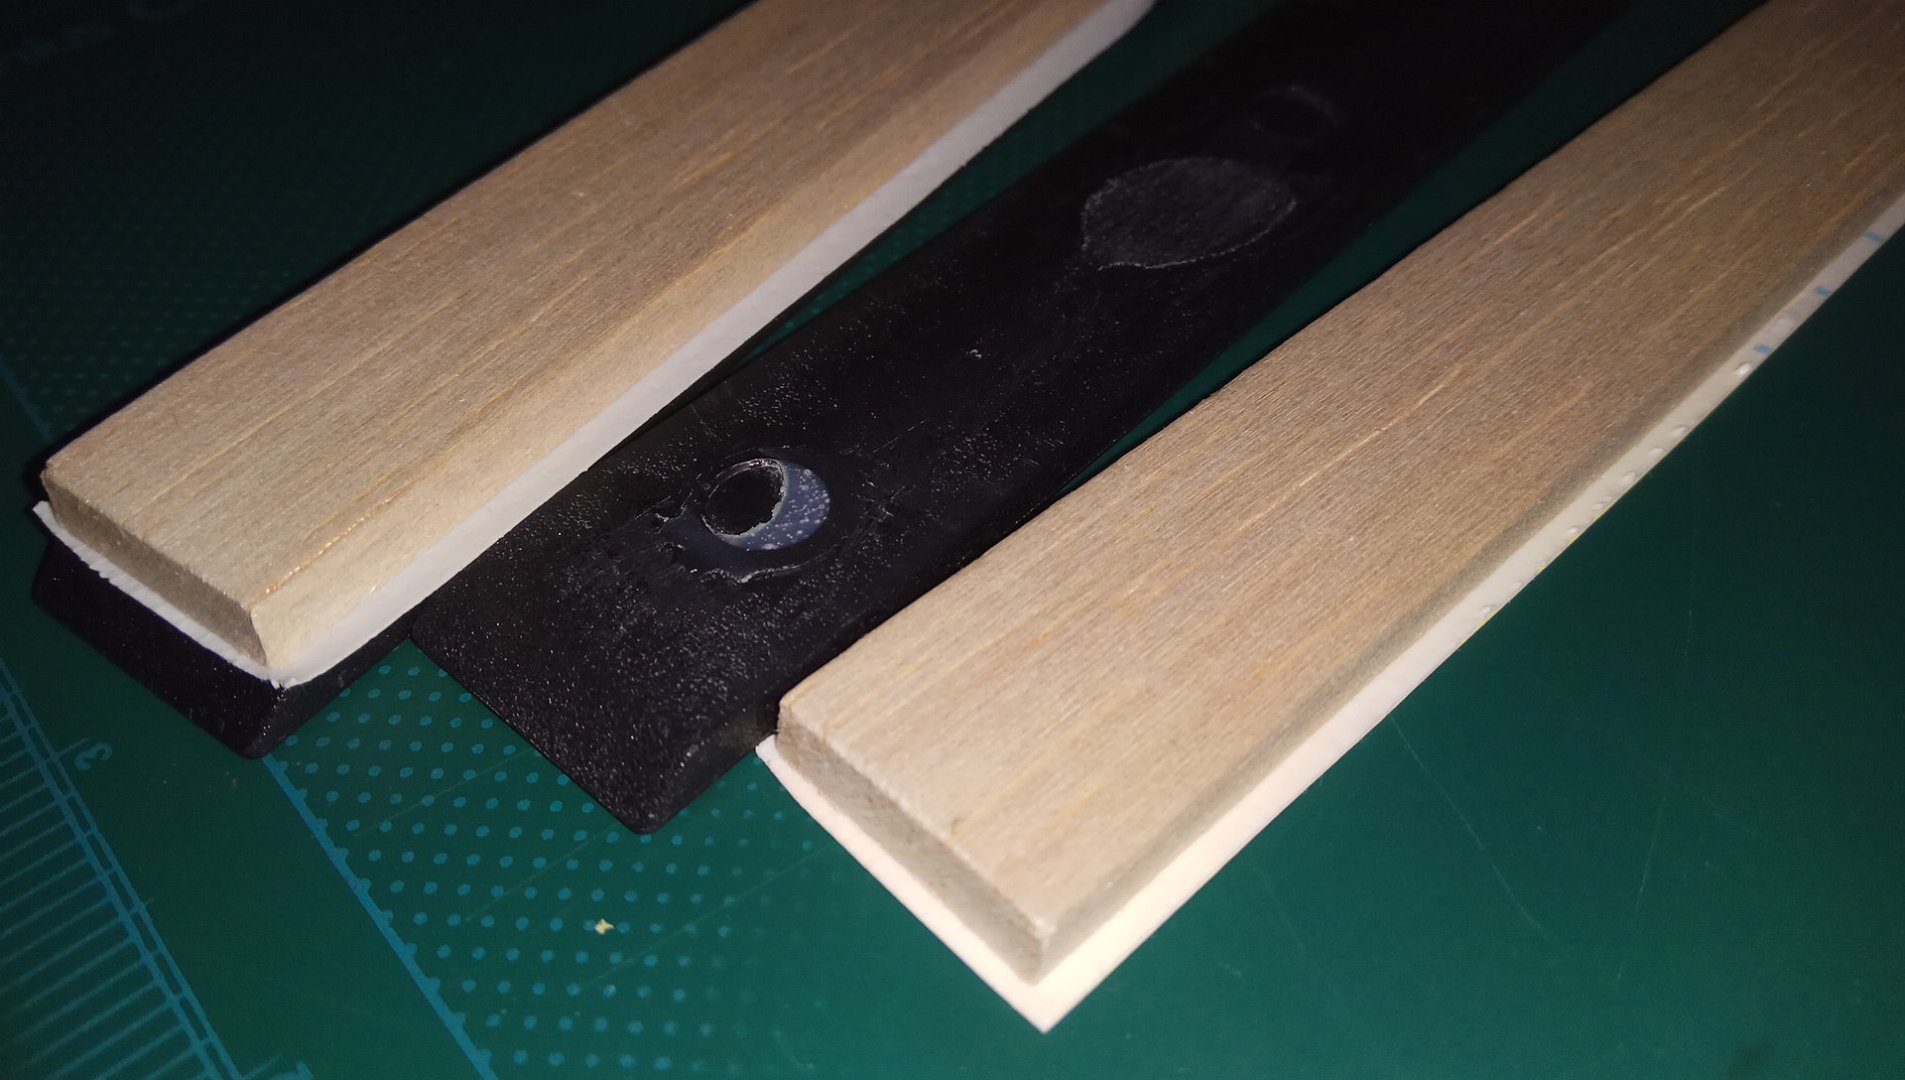
On the following pic you can see a total of 2pcs black plastic bases (1 blank, 1 in use, made in chinas), 3pcs balsa wood (2 not in use, 1 in use), 2pcs leather strips (both not in use, made in gemani), 1 roll of Micropore surgical paper tape (made by 3M), 1 set of solid wax compound BLUE and WHITE (made in gemani), 1 set of 12 syringes colorful polishing diamond paste (made in chinas, 1 syringe missing), 1 container of pure ChromeOxide GREEN powder (made in gemani), 1 syringe GEMAN polishing/stropping paste (SiliciumCarbide compound, made in gemani), 2 mini glass bottles (water, oil), 1 yellow bottle with leather oil (made in gemani):
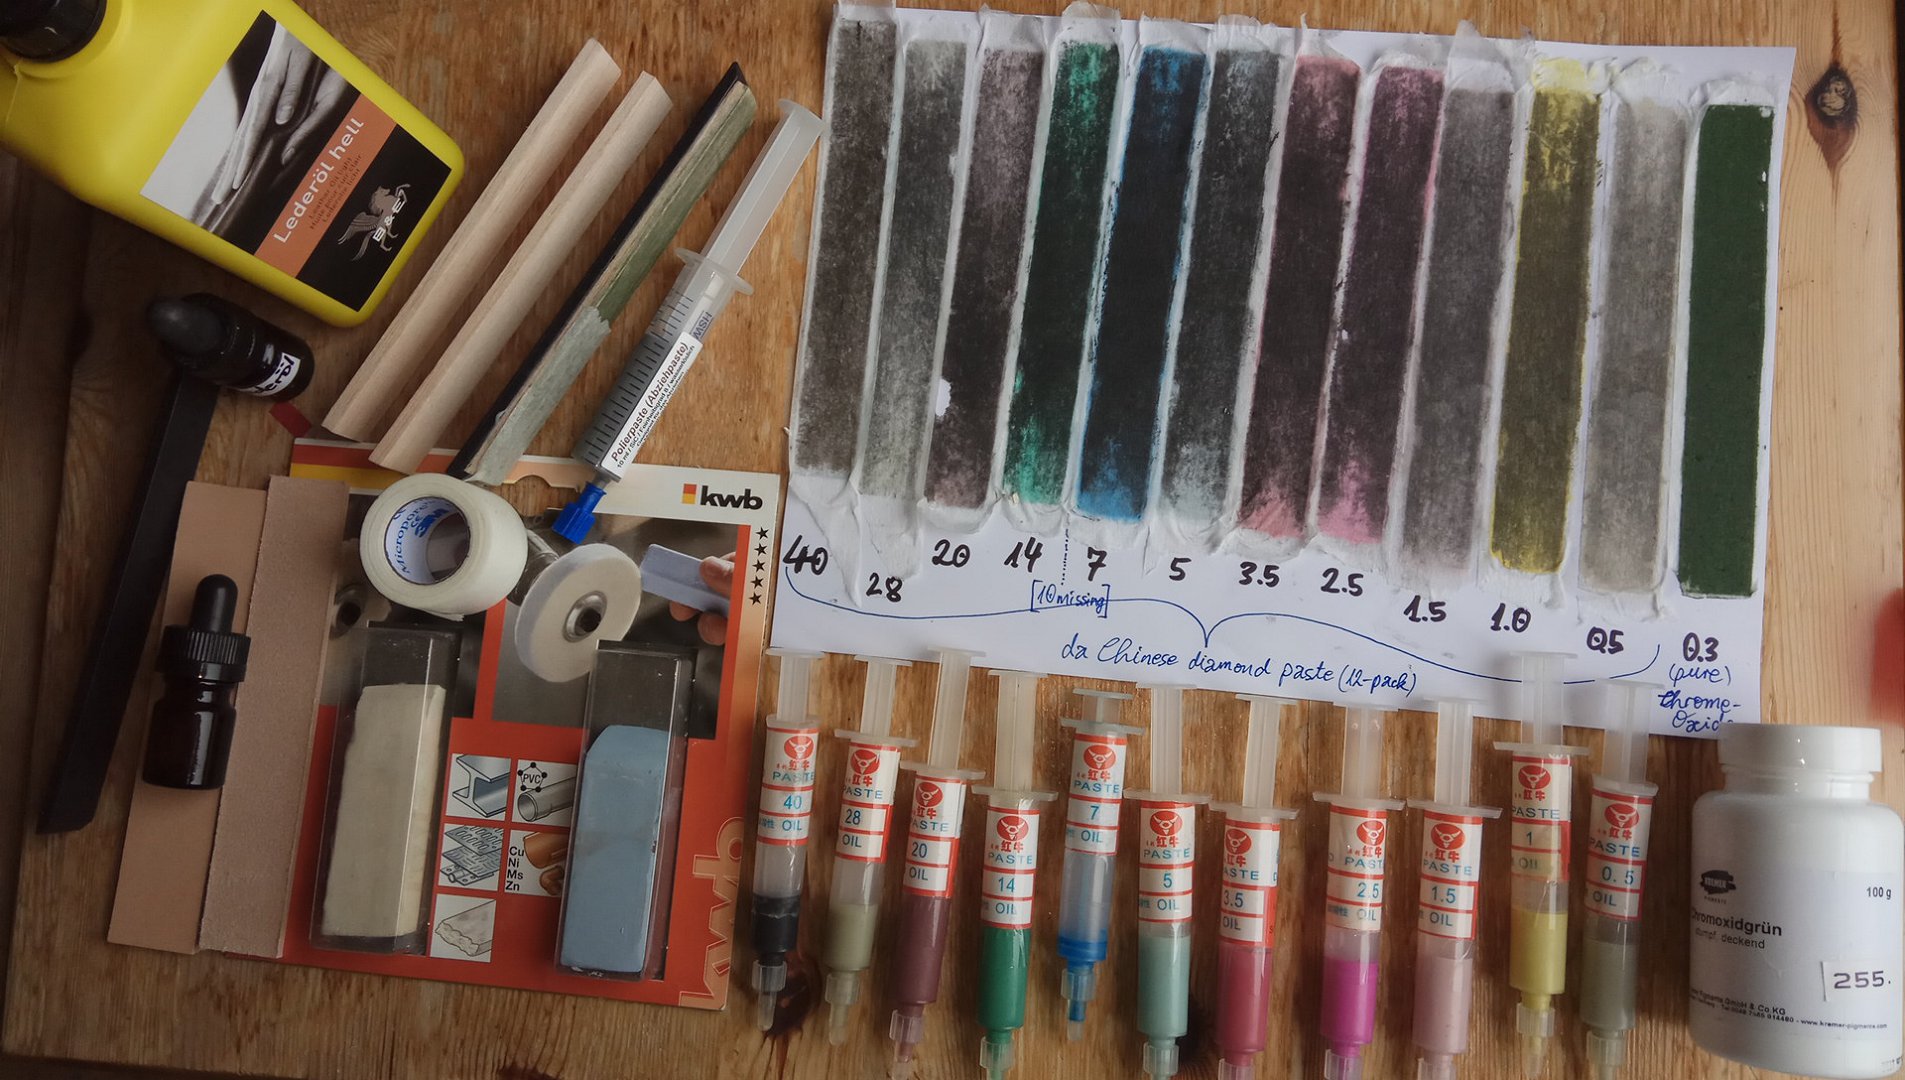
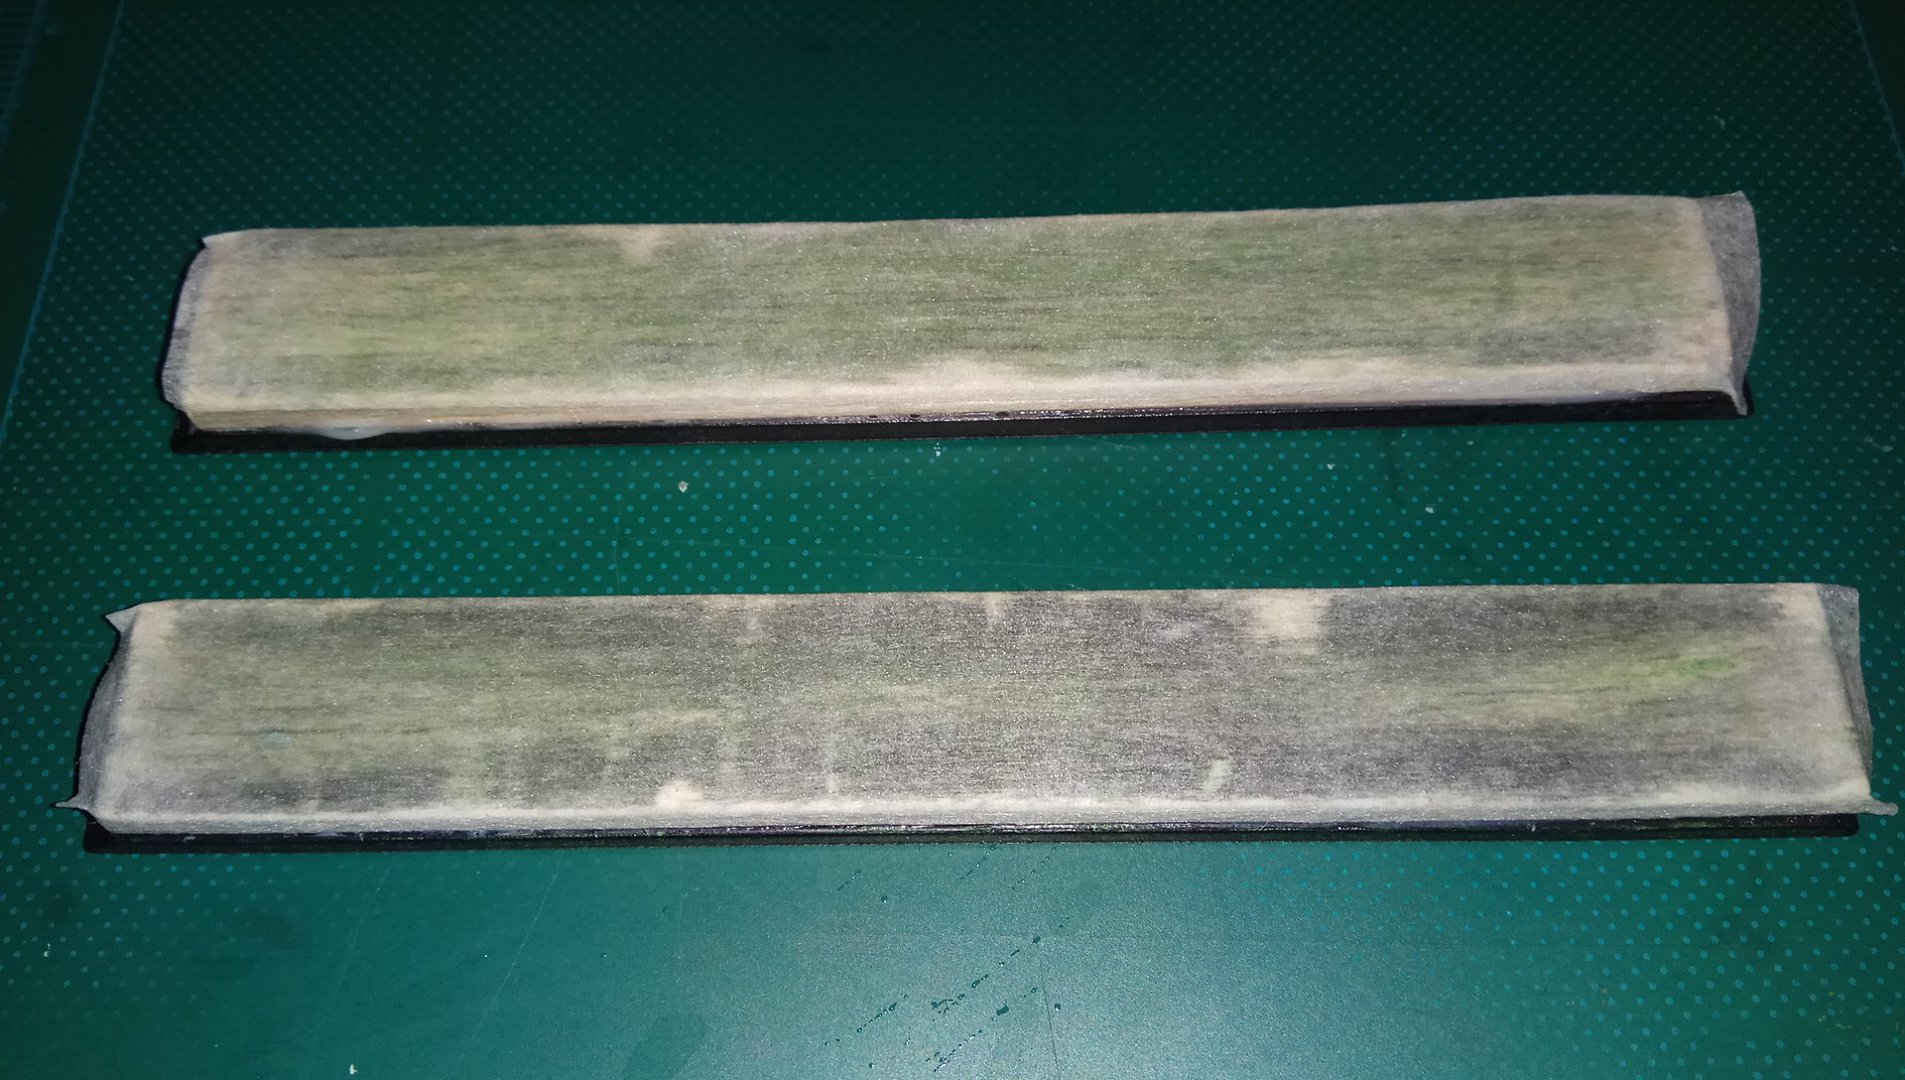
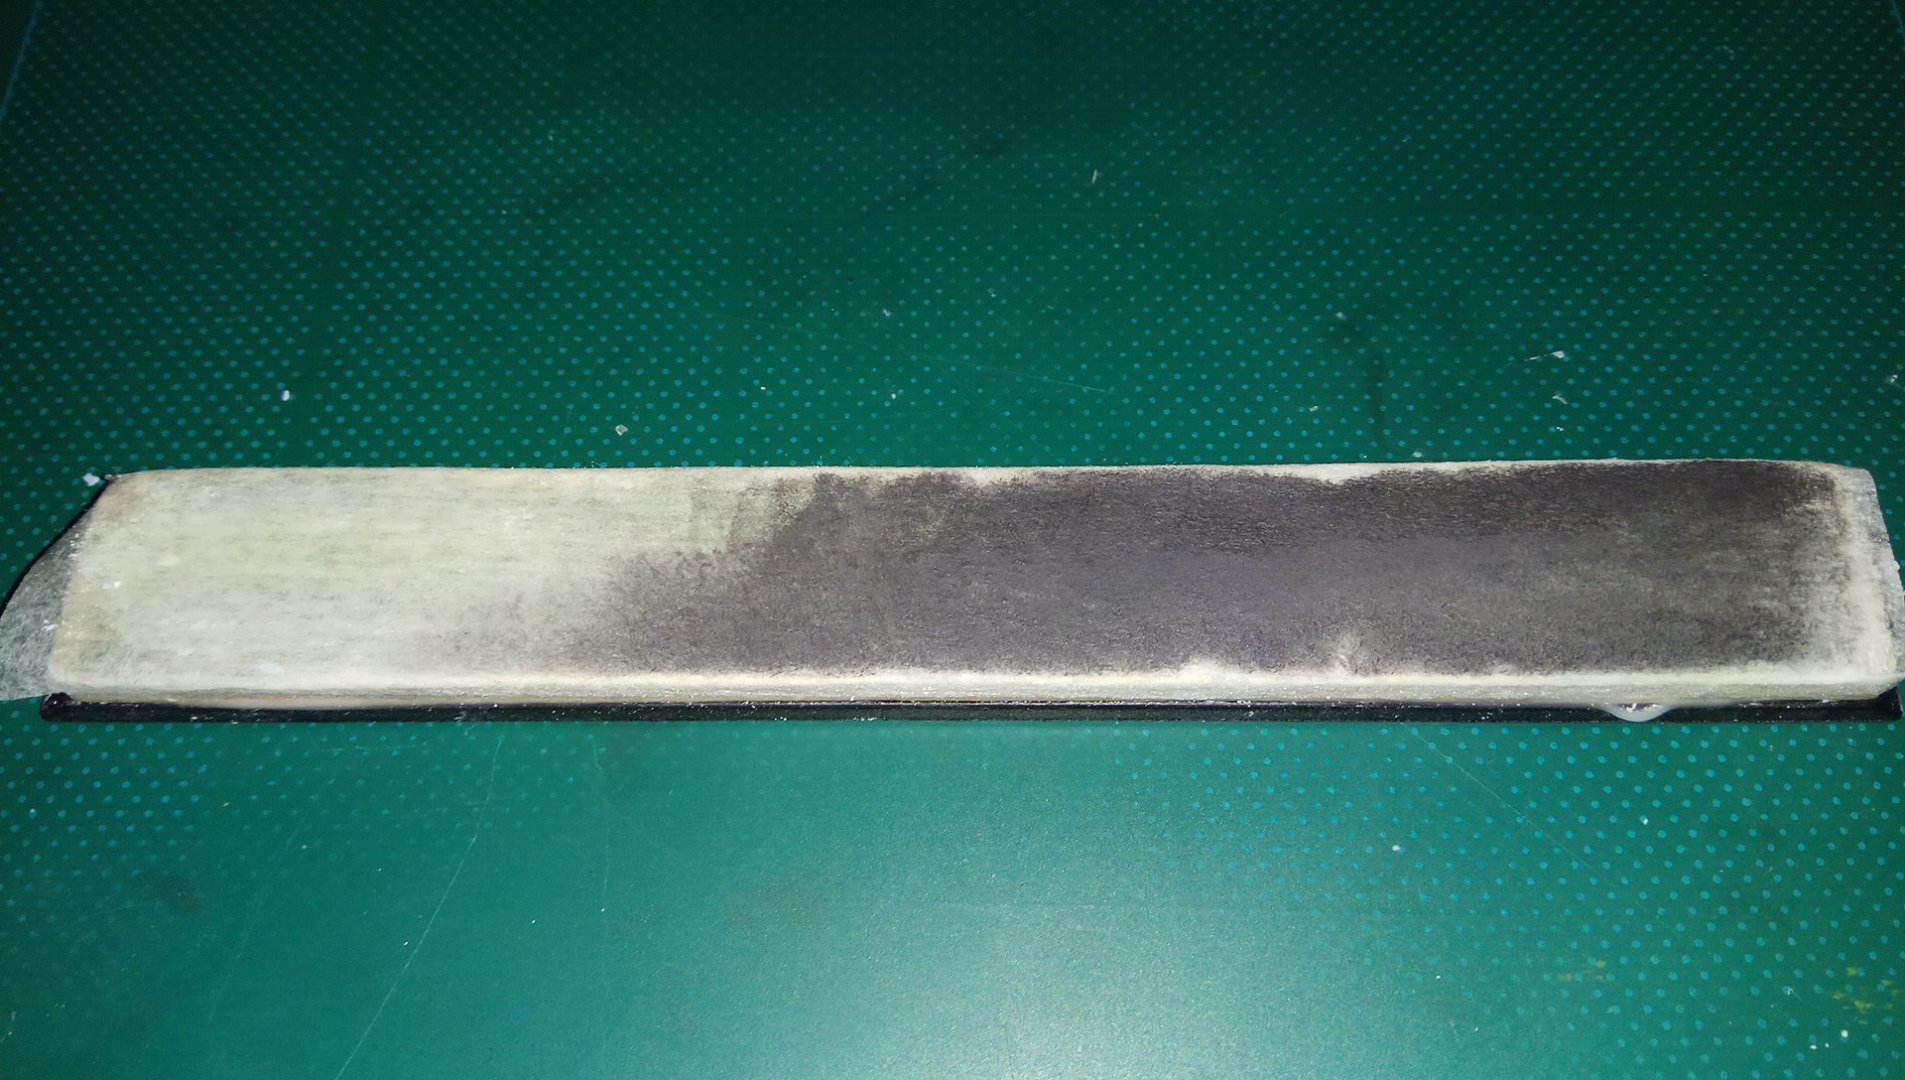
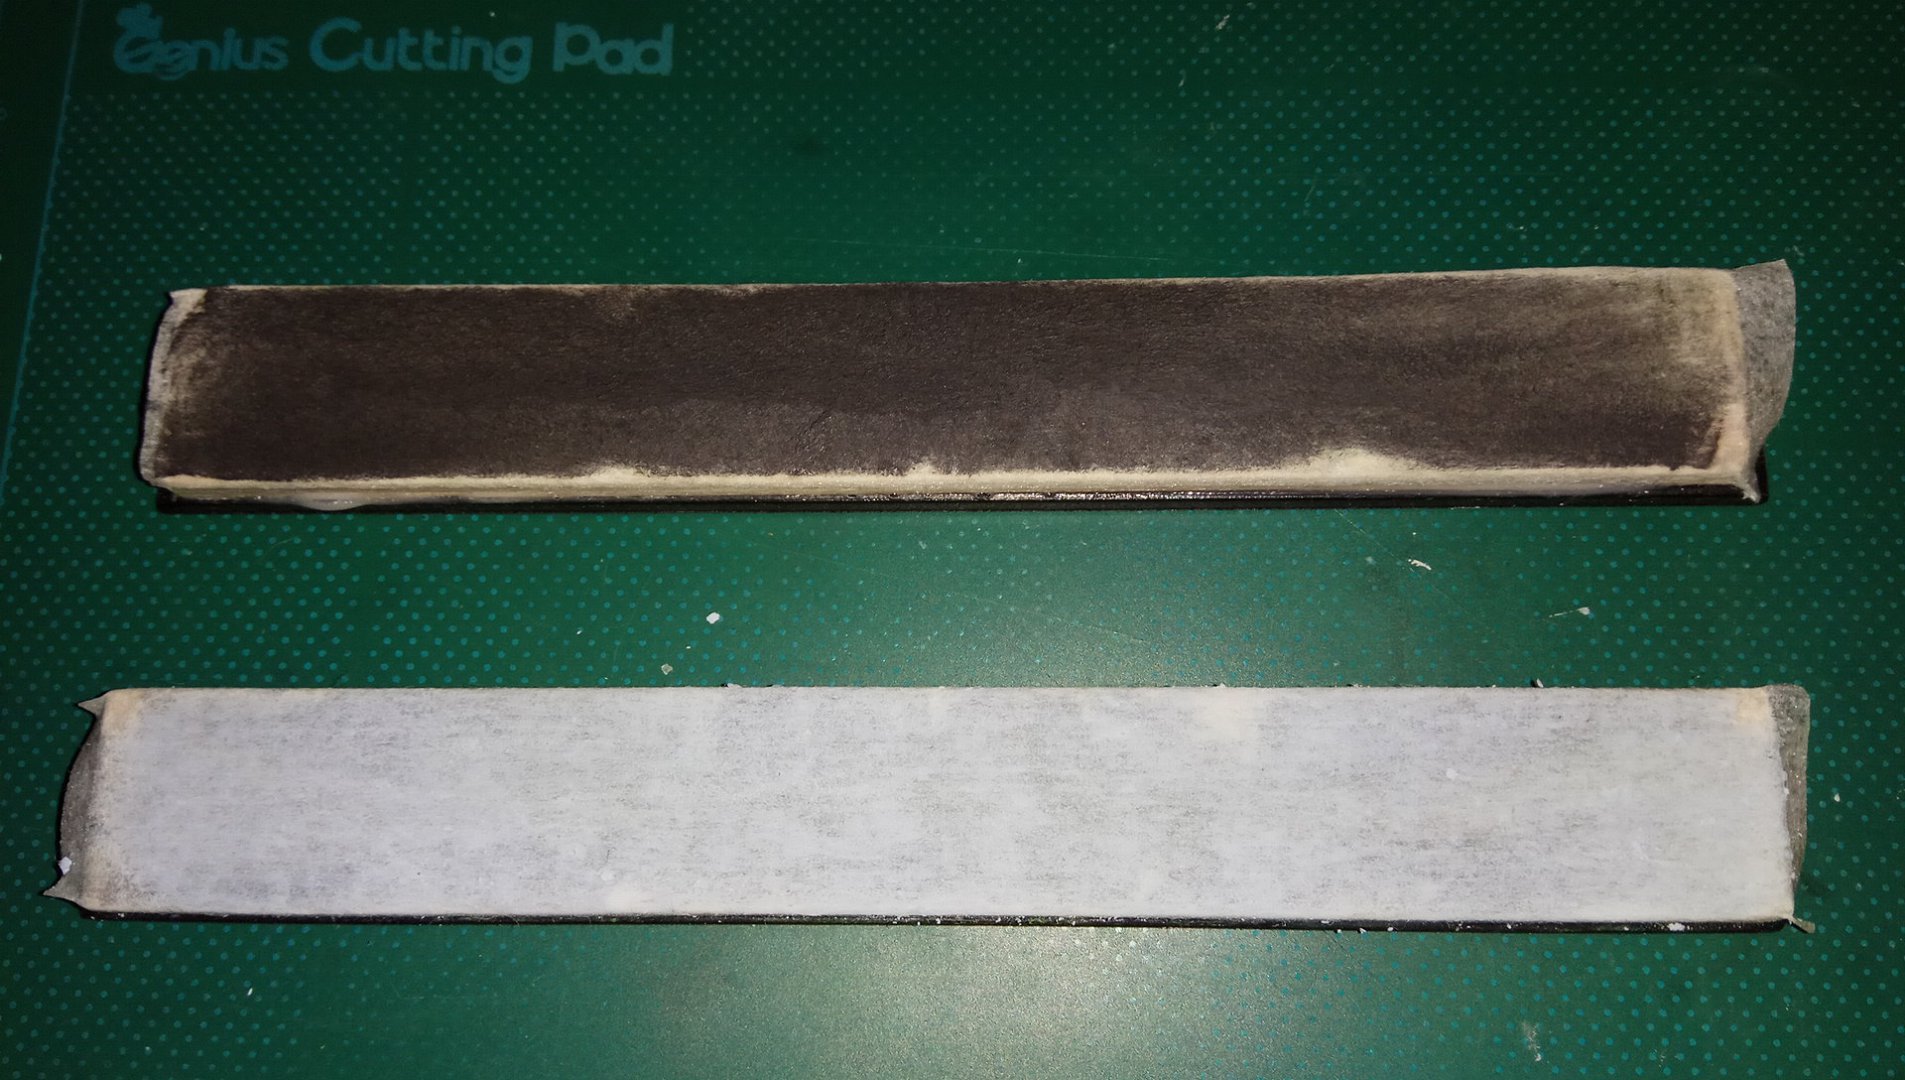
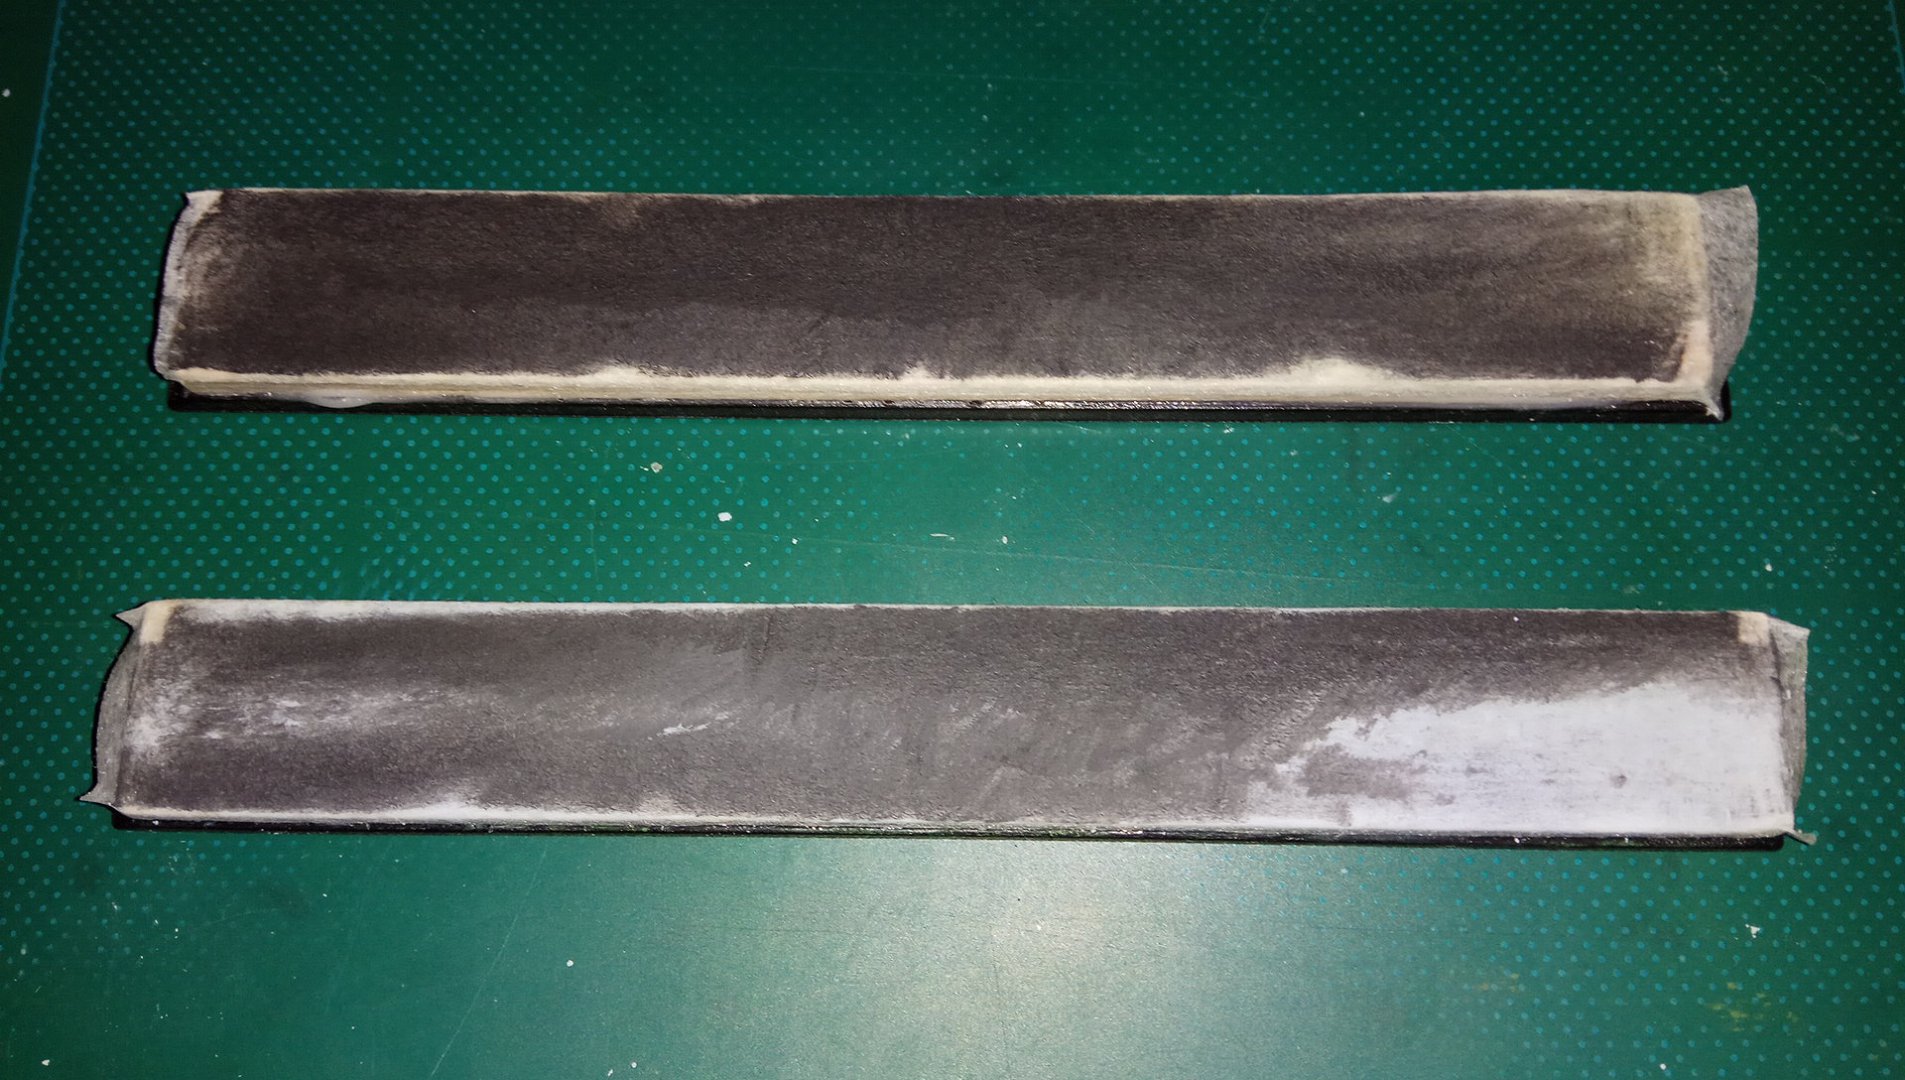
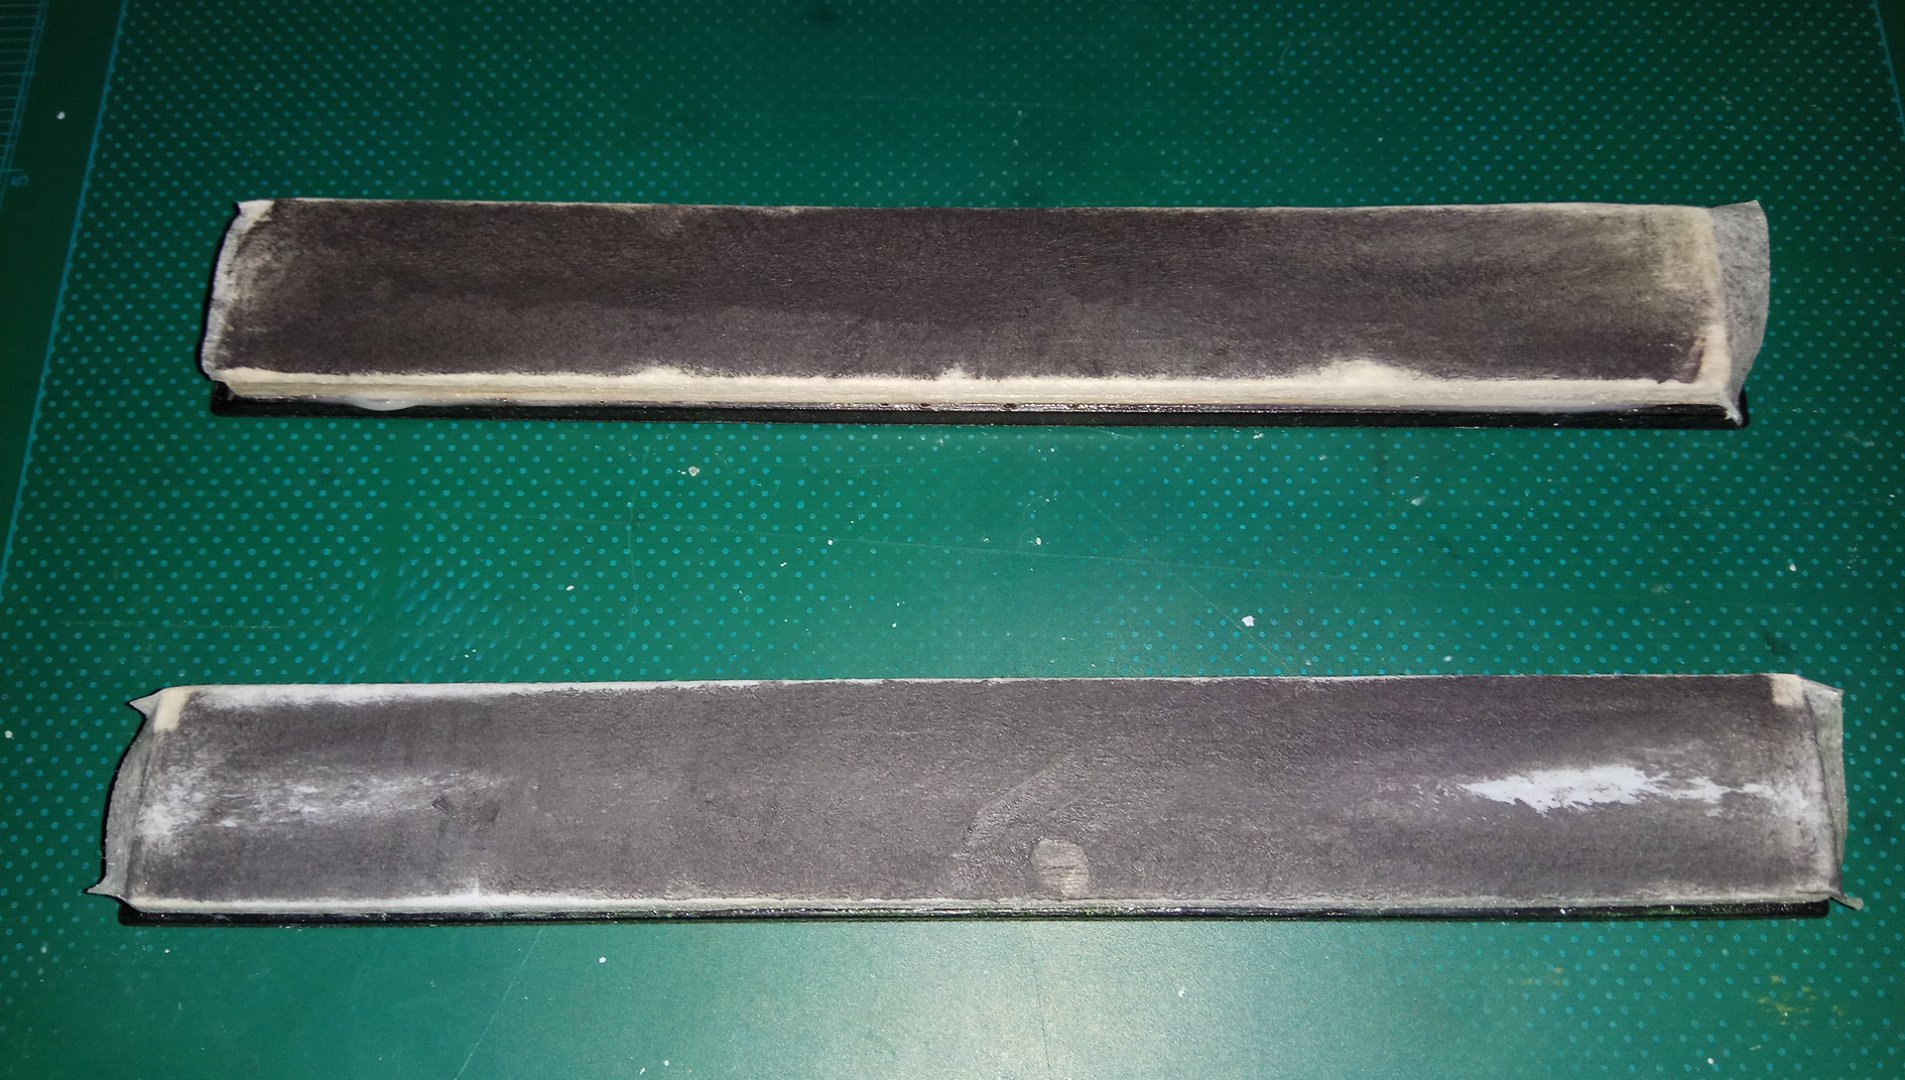
Chinese (CN) diamond paste can be found easily in sets of 3, 5, 6, 10, or 12 syringes on ebay, Aliexpress, BG, etc. 1 set costs maybe 6usd. Yes, 12 effing syringes for only 6 lousy bucks! CN diamond paste is for polishing metals and, due to its low(?) concentration of abrasives, not effective as stropping compound applied on leather: on a dry leather surface the creamy paste instantly turns waxy/solid rather than remains oily. Since, applied on leather or directly on wood, it didn't seem to cut steel effectively, I hated this paste … until i applied it on the paper tape. As you can see from the above photo, the (generously loaded) tapes turned black, the CN paste did its work, finally! And surprisingly fast! Now i am loving the CN paste and have almost used up the more 'popular' colors. My set of CN paste goes down to 0.5micron, other CN paste sets go down to 0.25micron. My ChromeOxide GREEN is said to be 0.3micron, here my razor-sharp kitchen chef knife finished with that 12-step series (the upper knife is for edge reference lol):
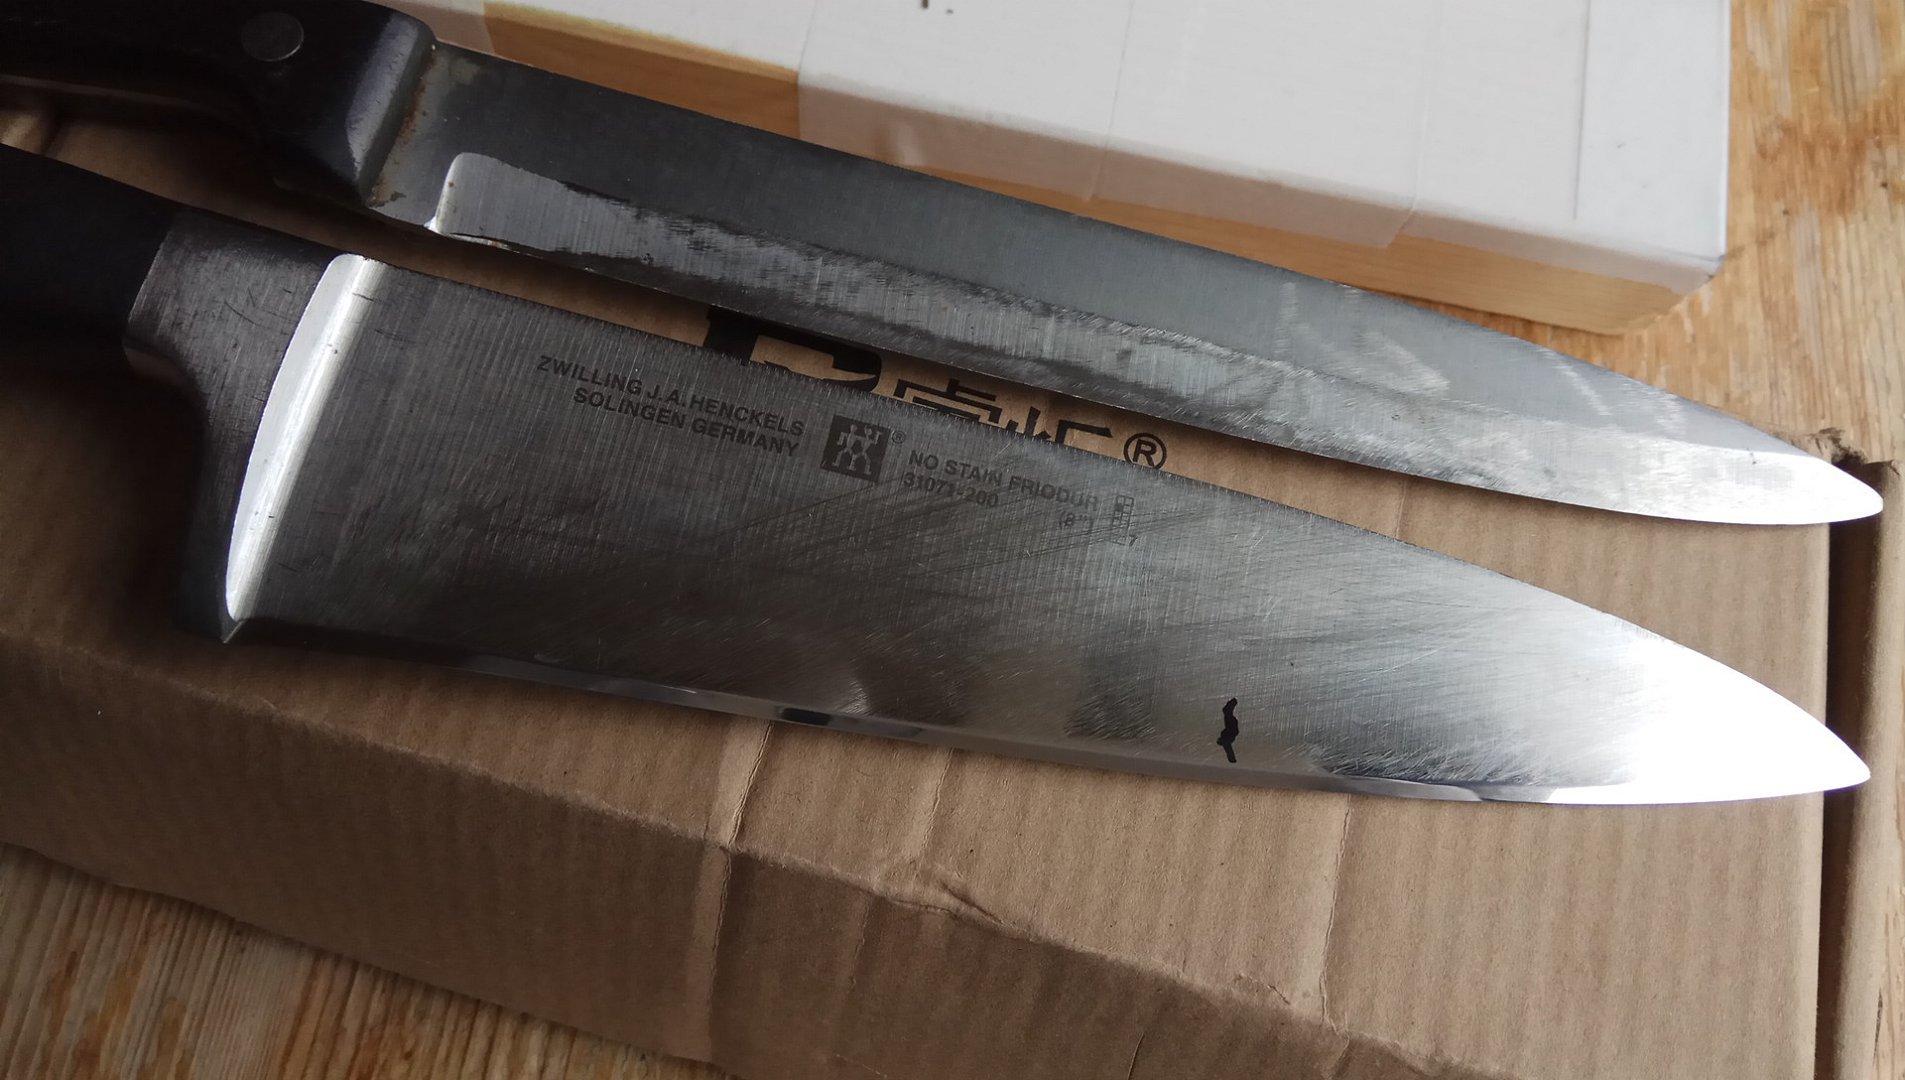
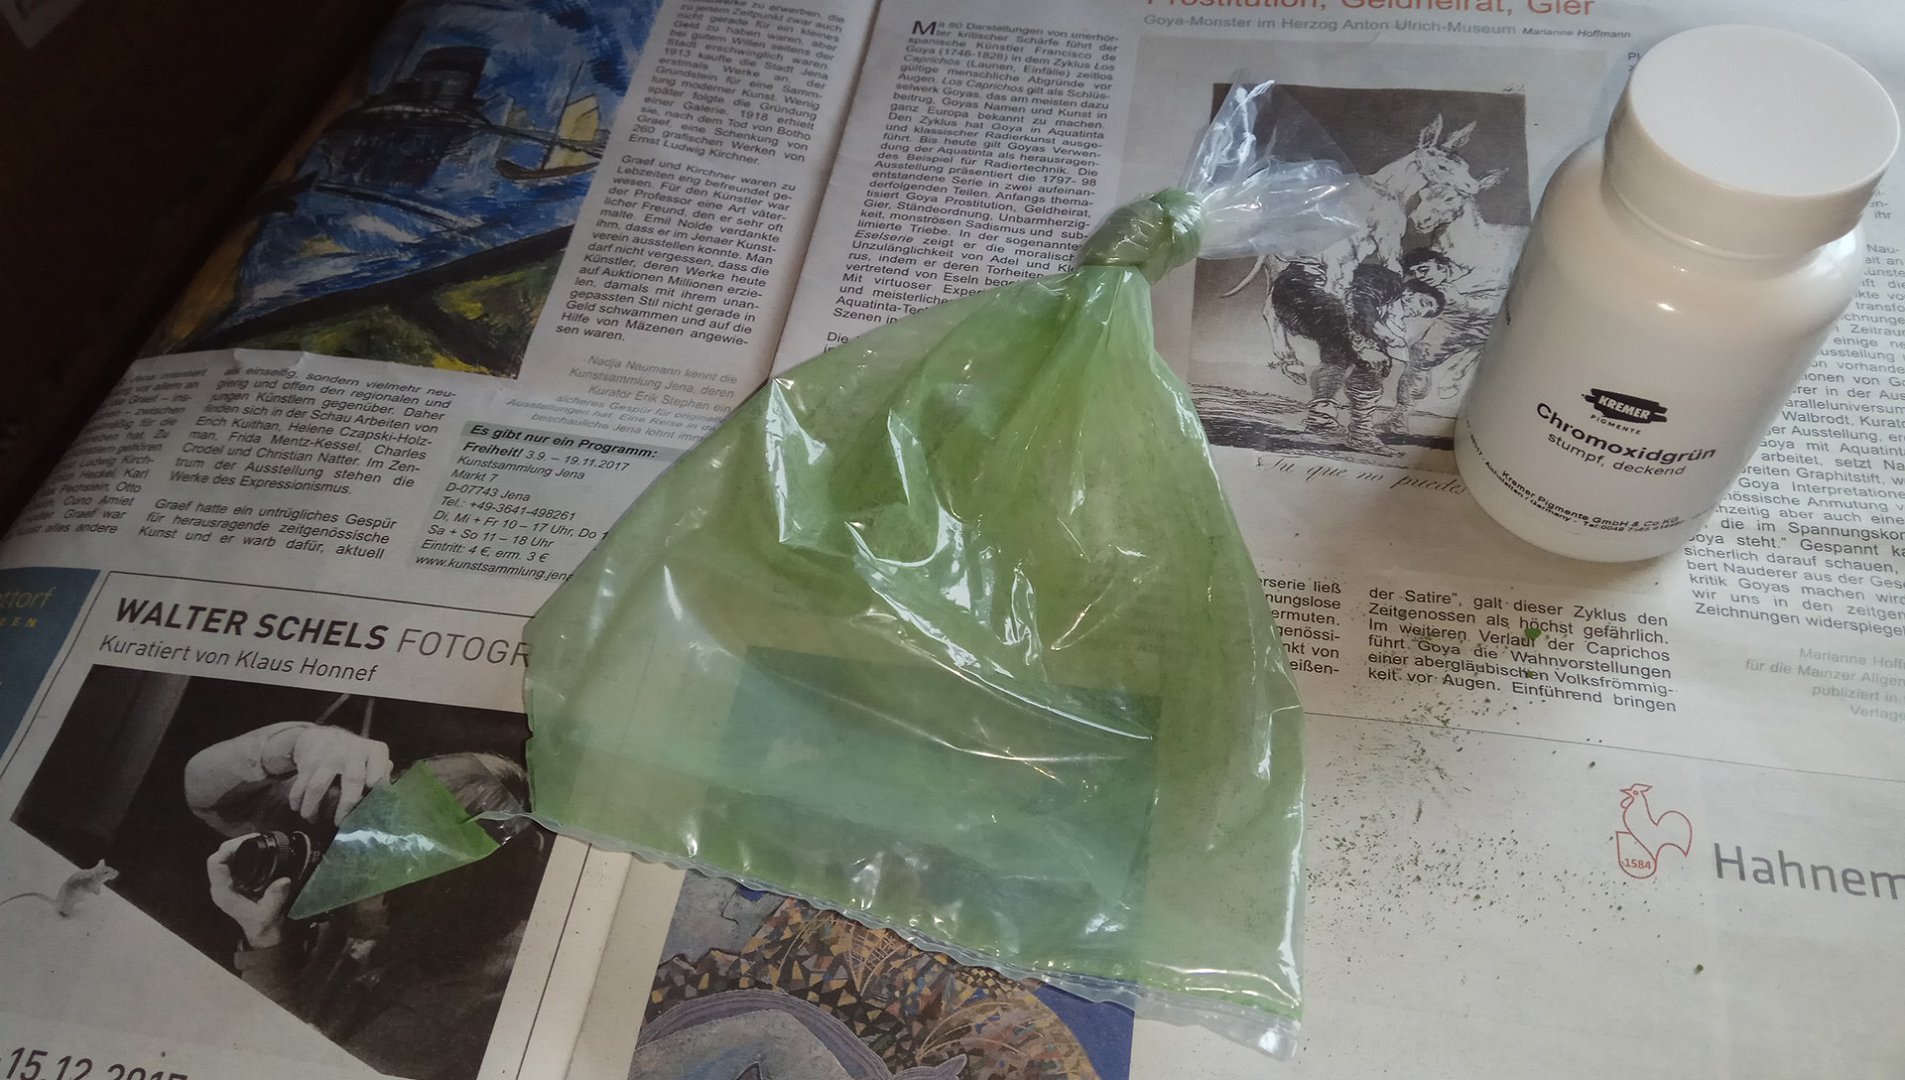
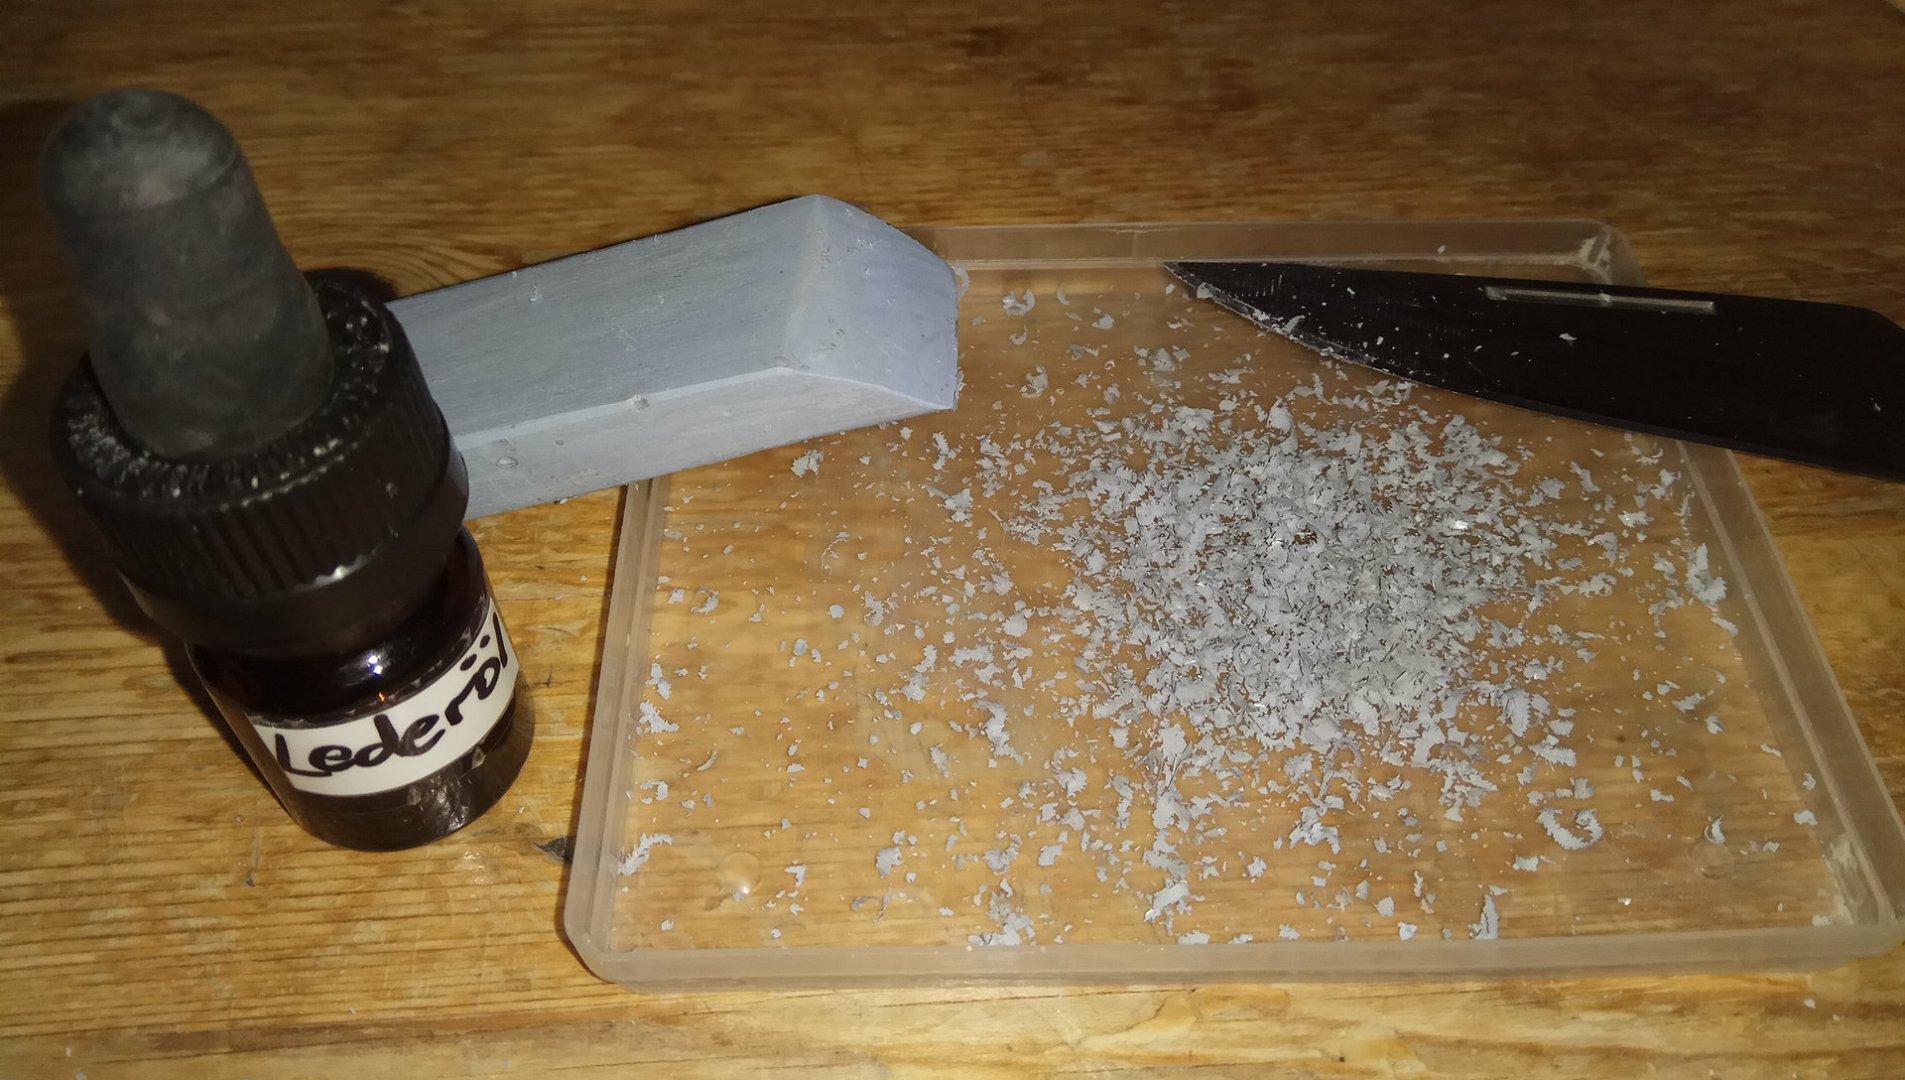
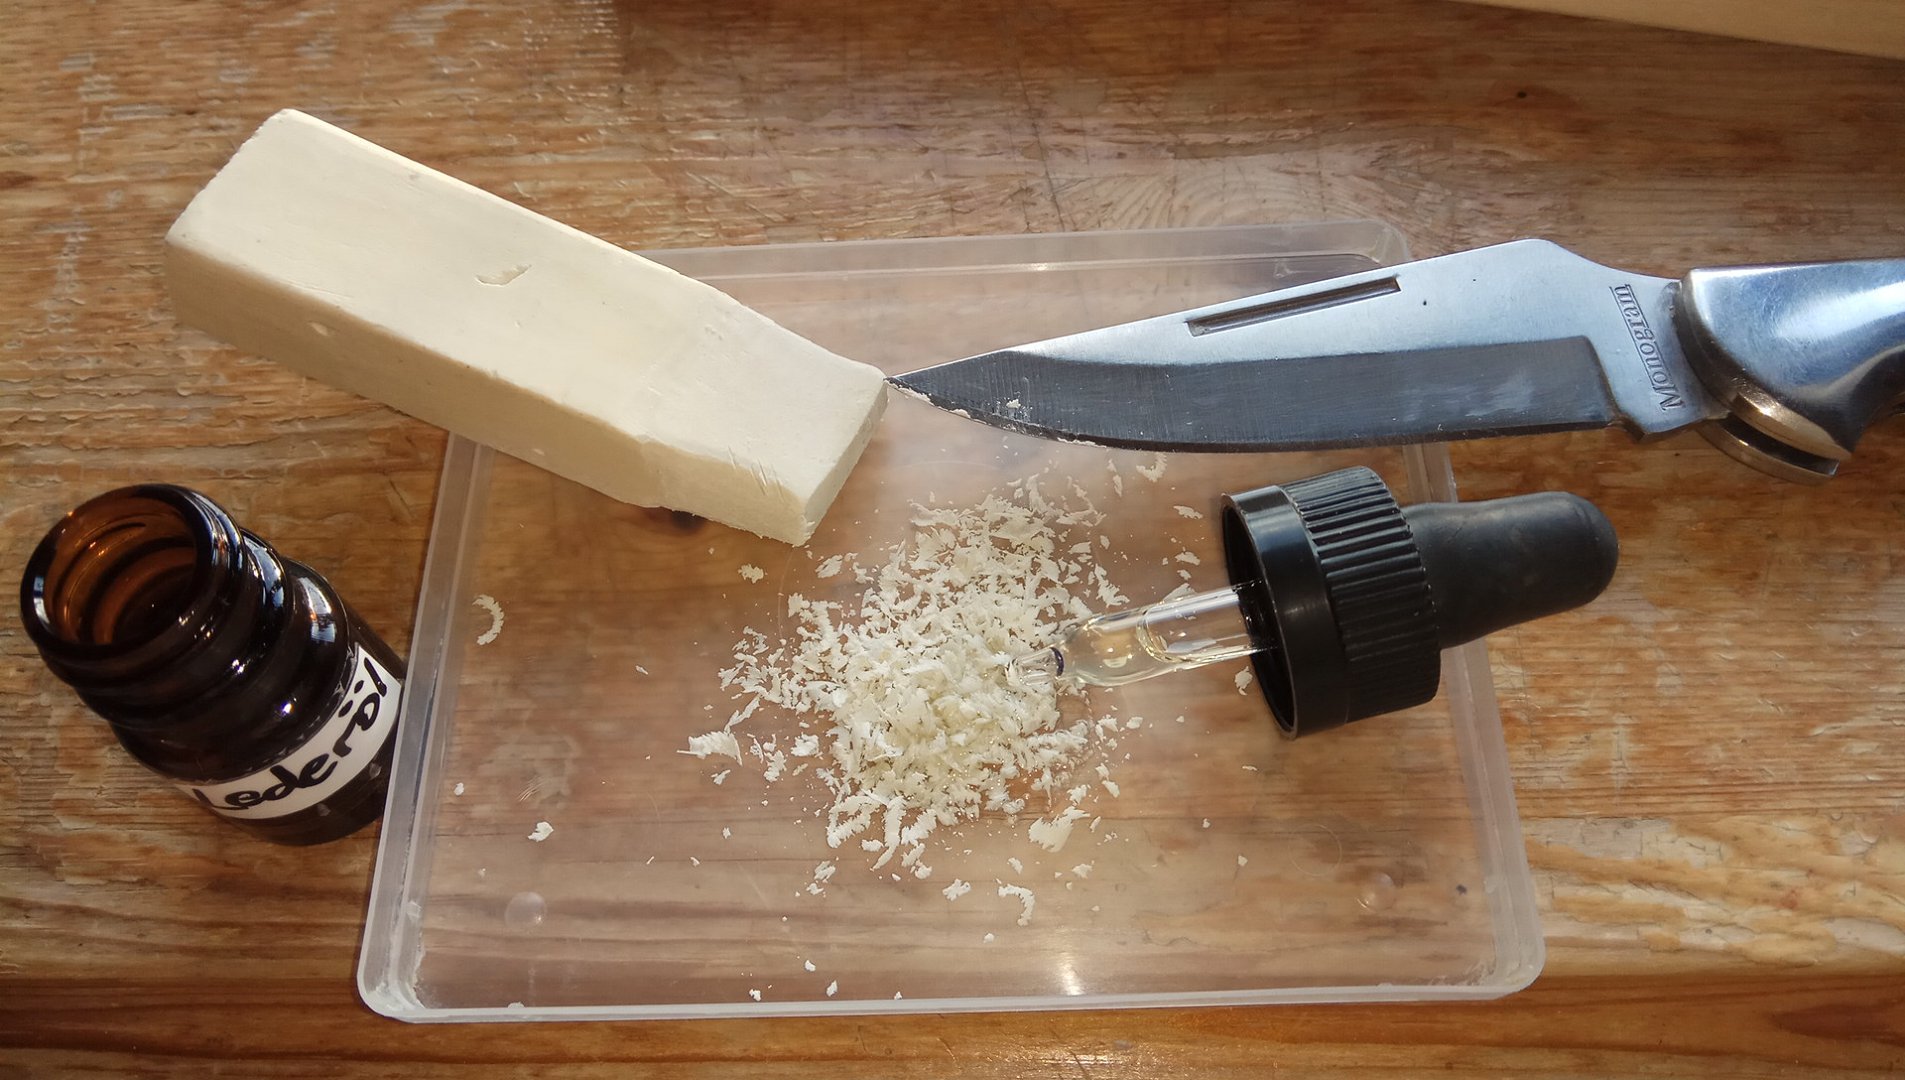
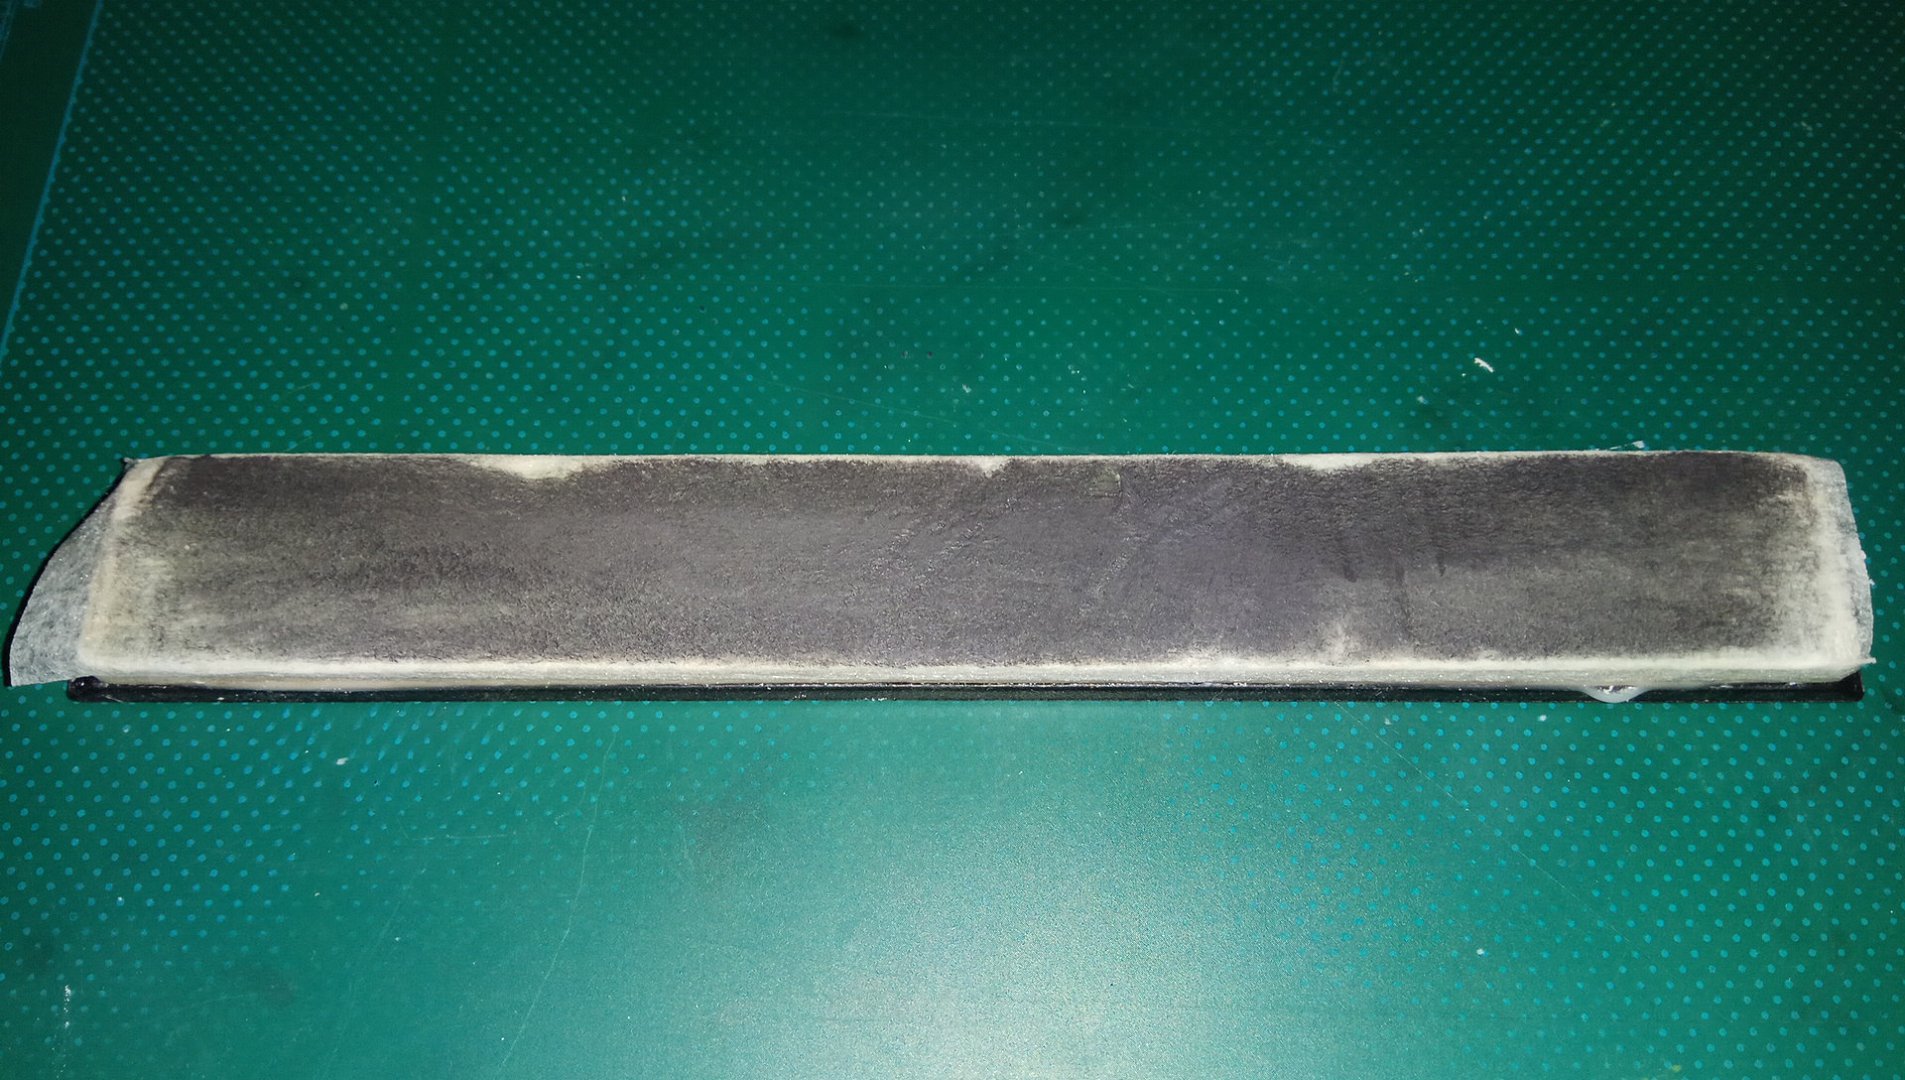
It took a long time to go through the full range of grit progressions of the CN paste, finishing with the ChromeOxide GREEN ( Chromoxid Grün ), and i wouldn't want to do it again in future, except for show edges like my multitool blades. chromeoxide or "the green compound" seems to be the most popular stropping compound on youtube, and youtubers end up with armhair-shaving sharp edges. I tried the GREEN compound in its pure form, powder, waxfree:
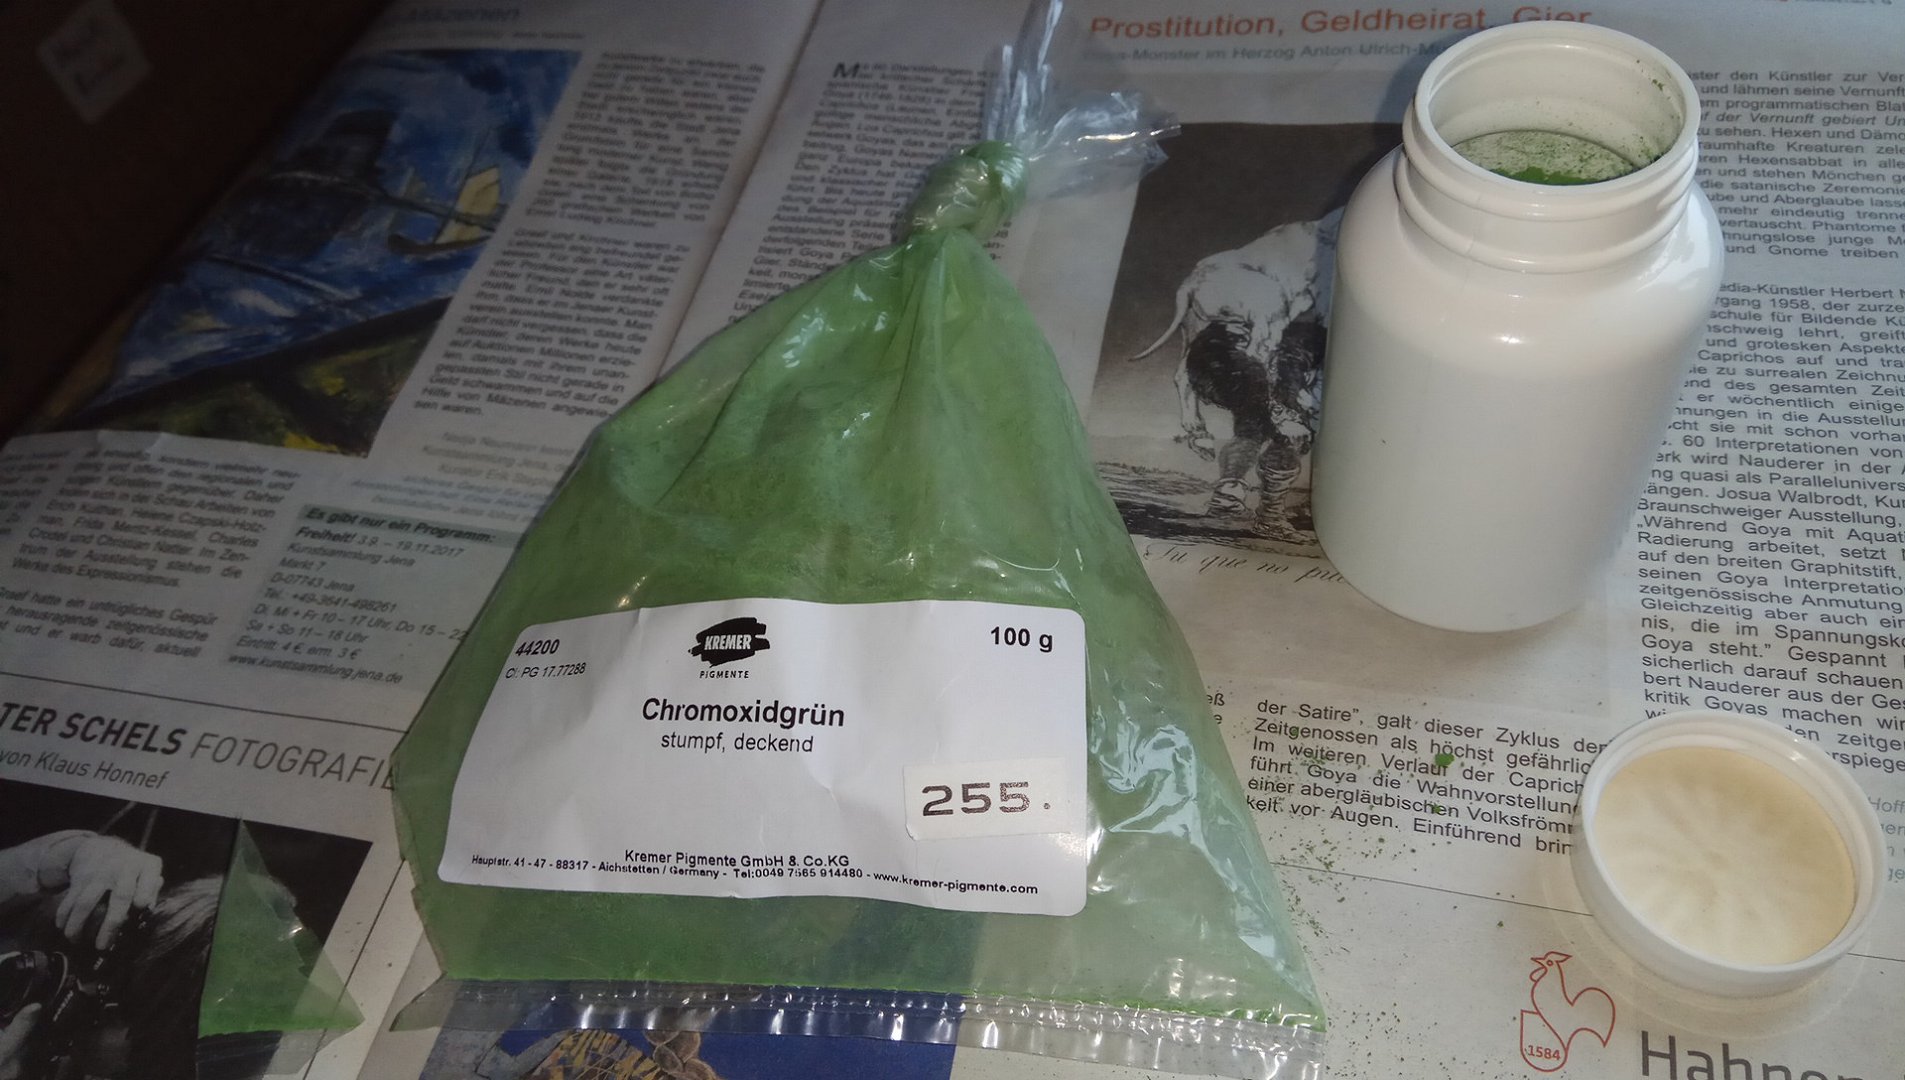
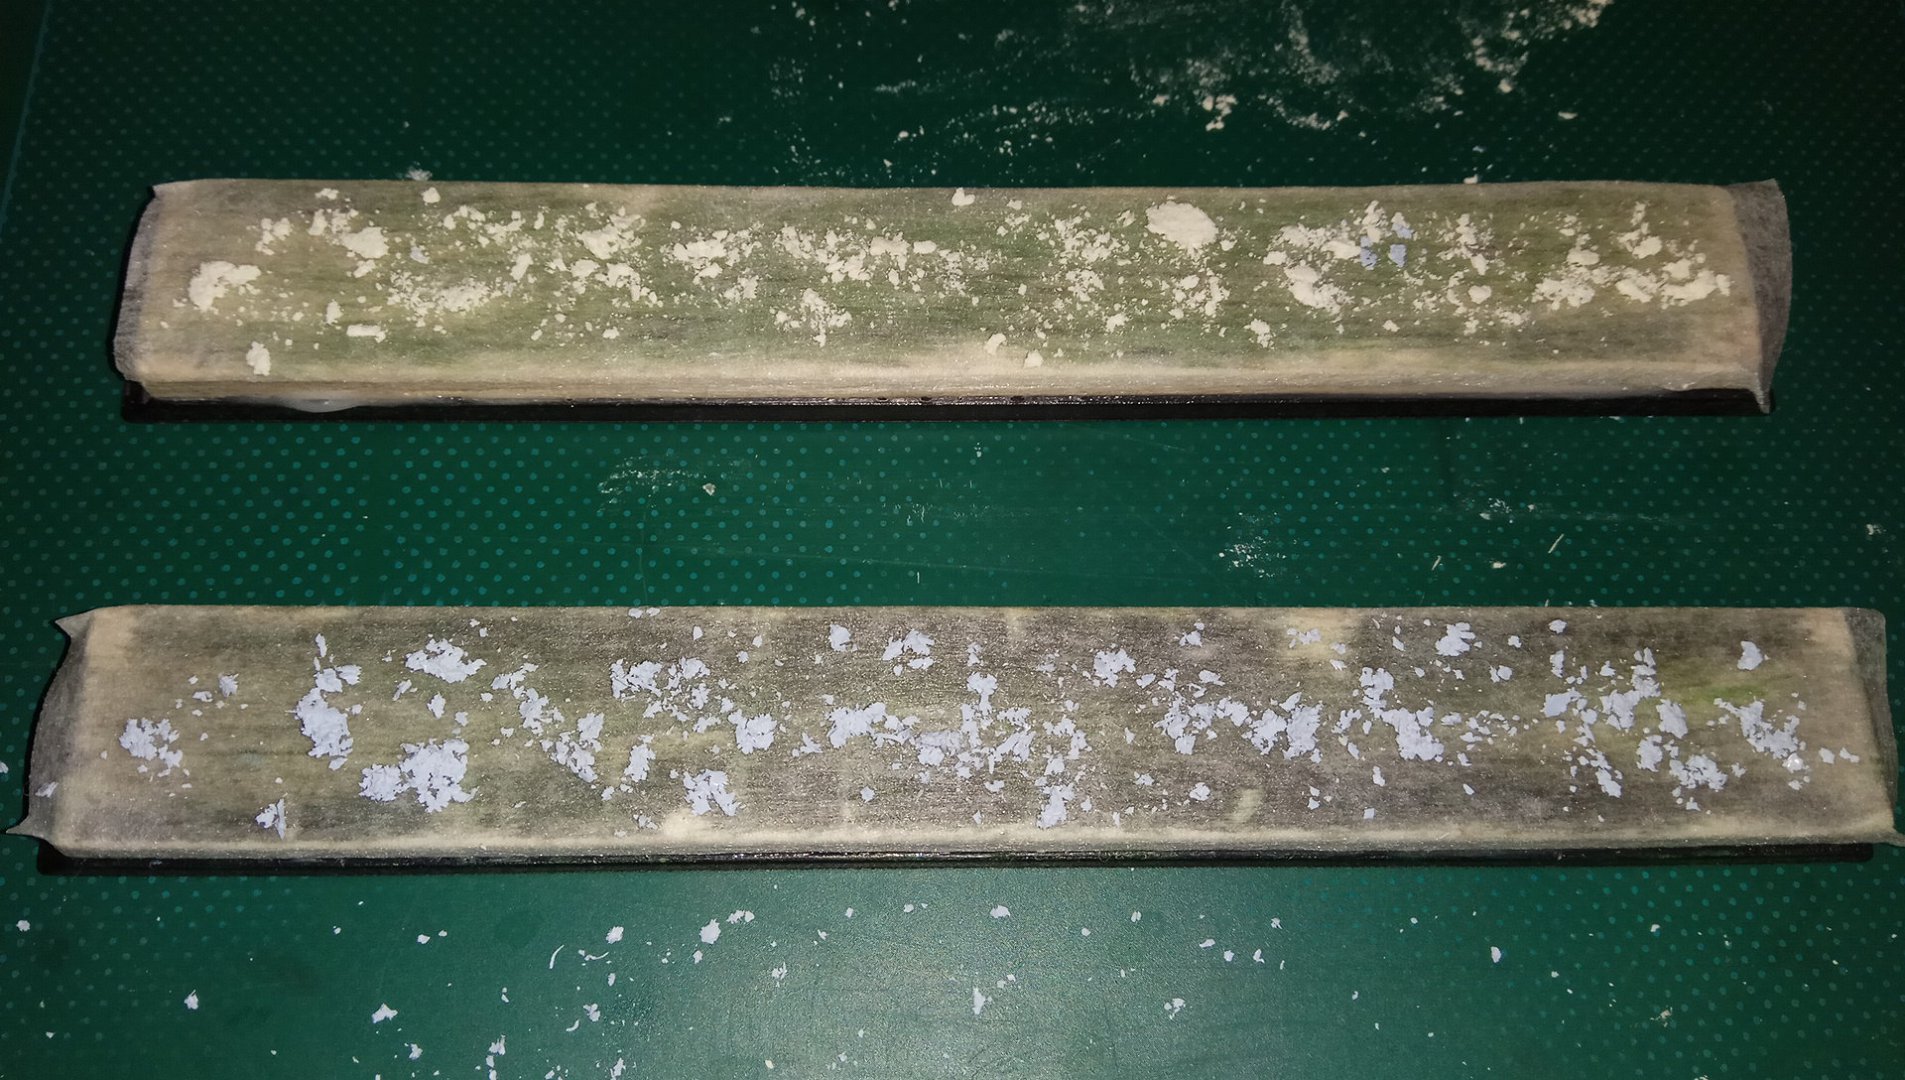
Really inexpensive, 2eur or so from the local painter's supply shop. According to the specs in the material data sheet PDF, the average particle size is "ca. 0,3μm"; by comparison, their IronOxide RED ( Eisenoxid Rot ) is 0.09 micron. Hilarious, it is sold in stupid plastic bags. Can you see what i did there? I feel like genius lol:
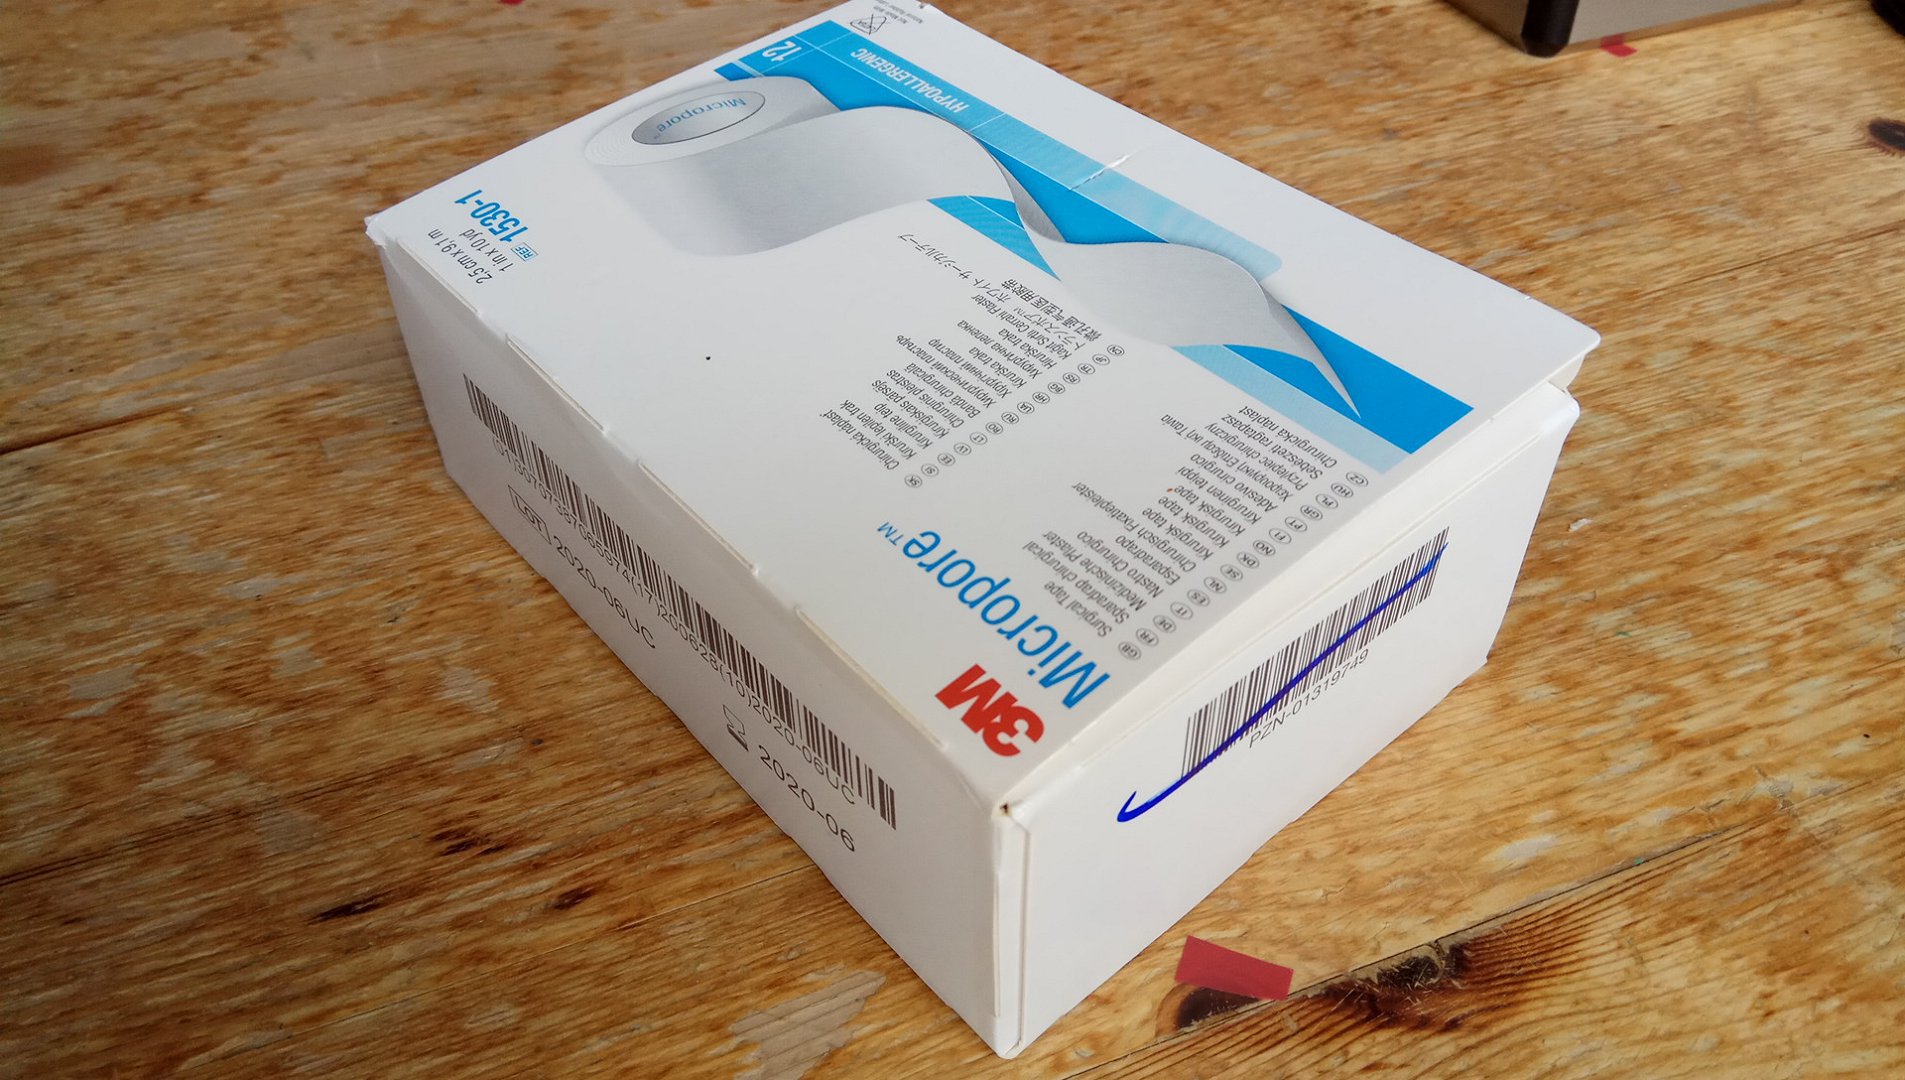
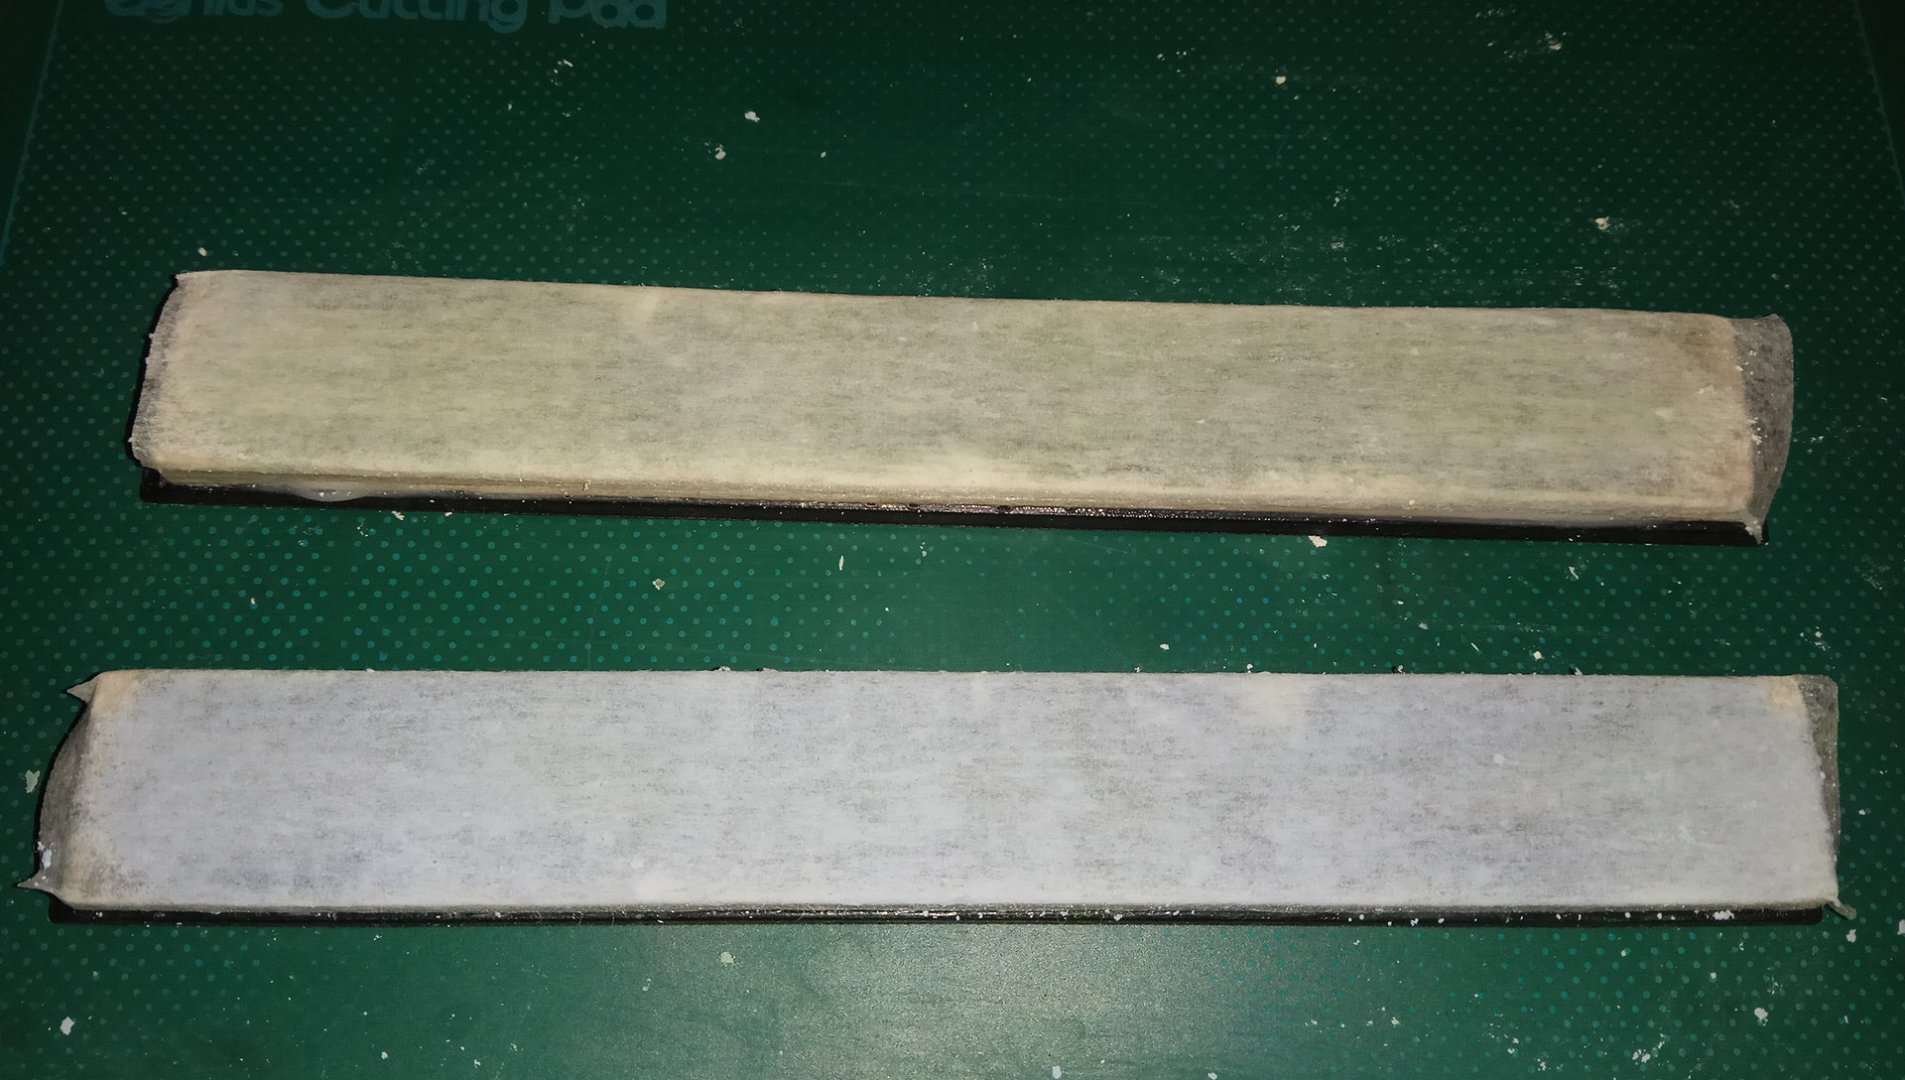
At first i didn't have 3M Micropore surgical tape in the household. Instead i found other make surgical tape, you may know the series < Leukoplast, Leukosilk, Leukotape, Leukomed, Leukofix, Leukoflex, Leukopor, Leukowtf, Leukoetc > from your last hospital visit. Anywho, even though this Leukowtf surgical tape stuff worked pretty well for stropping, it didn't work extremely well; so save your efforts and do not use that non-3M kind of surgical tape! If the tape product says Leuko- , you say -byebye:
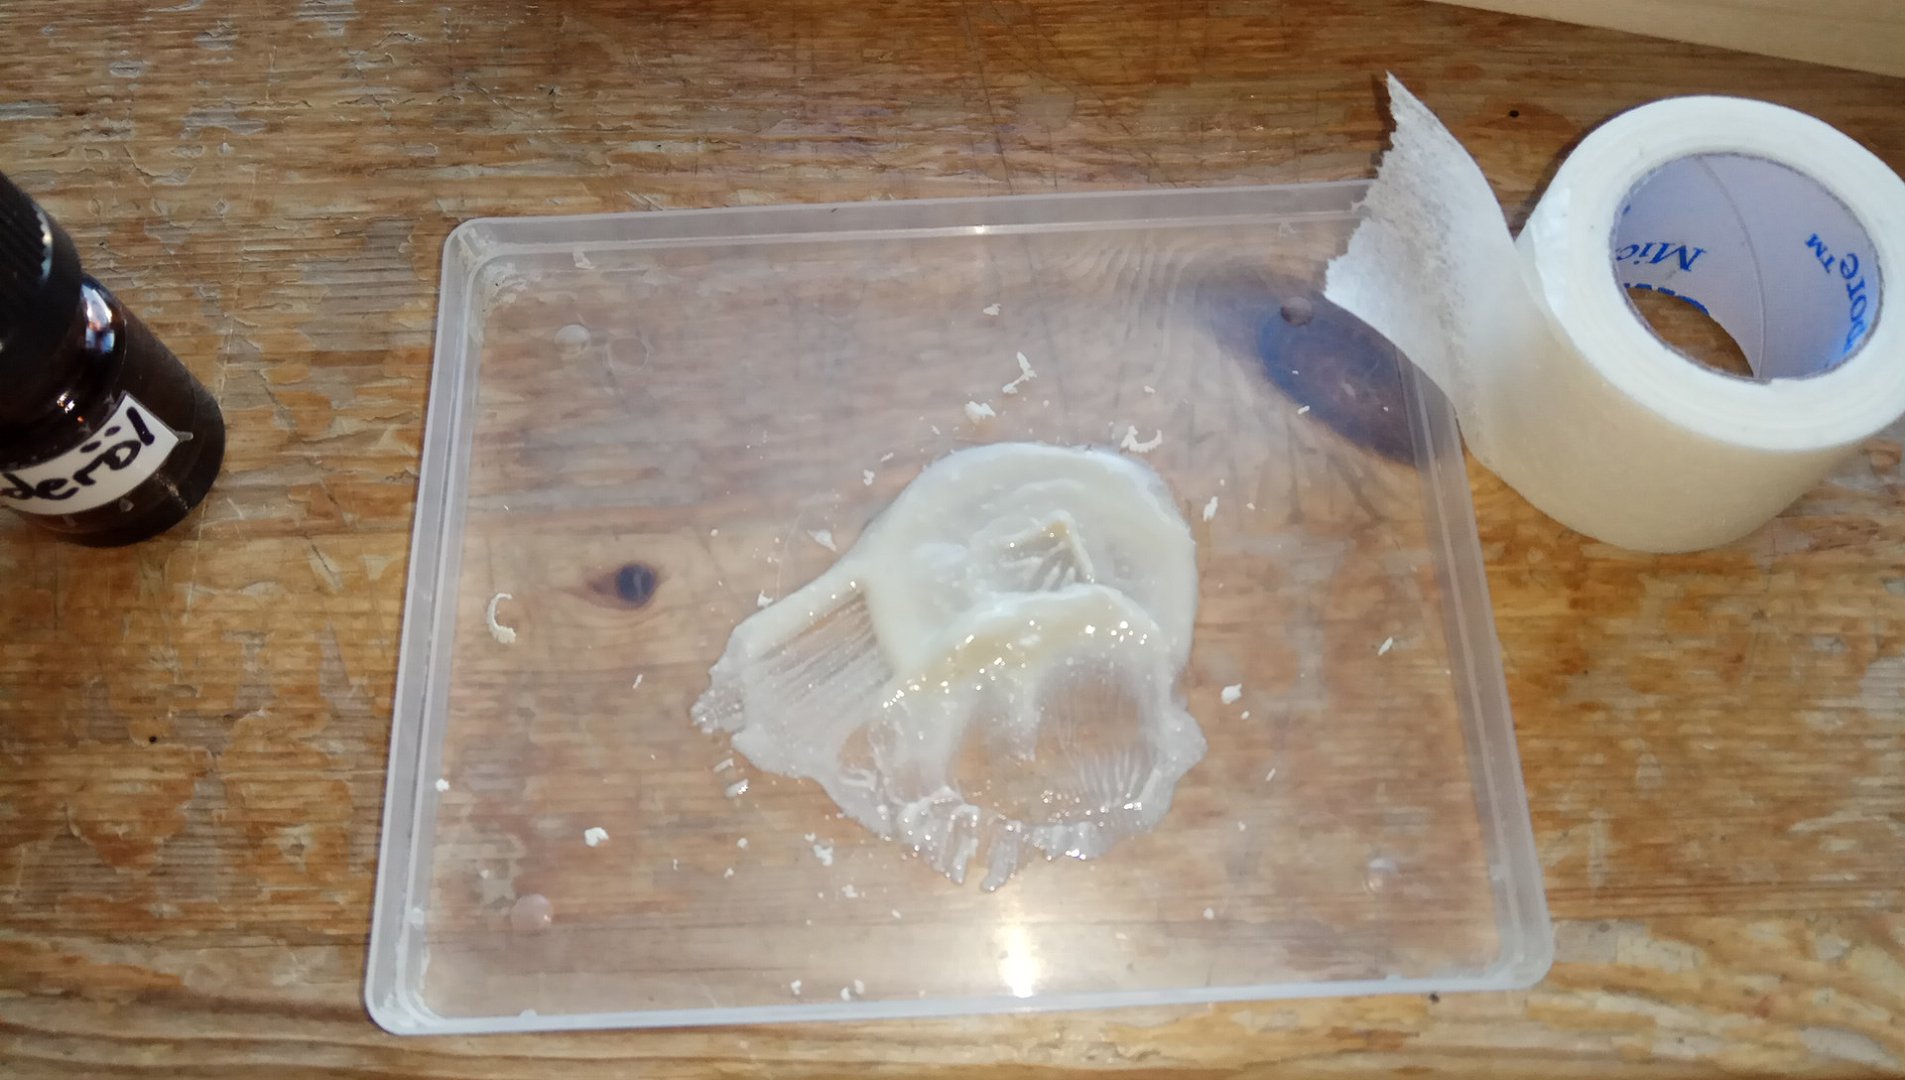
Another poor idea is applying compound directly on a whetstone, with or without oily solvent doesn't matter :
:
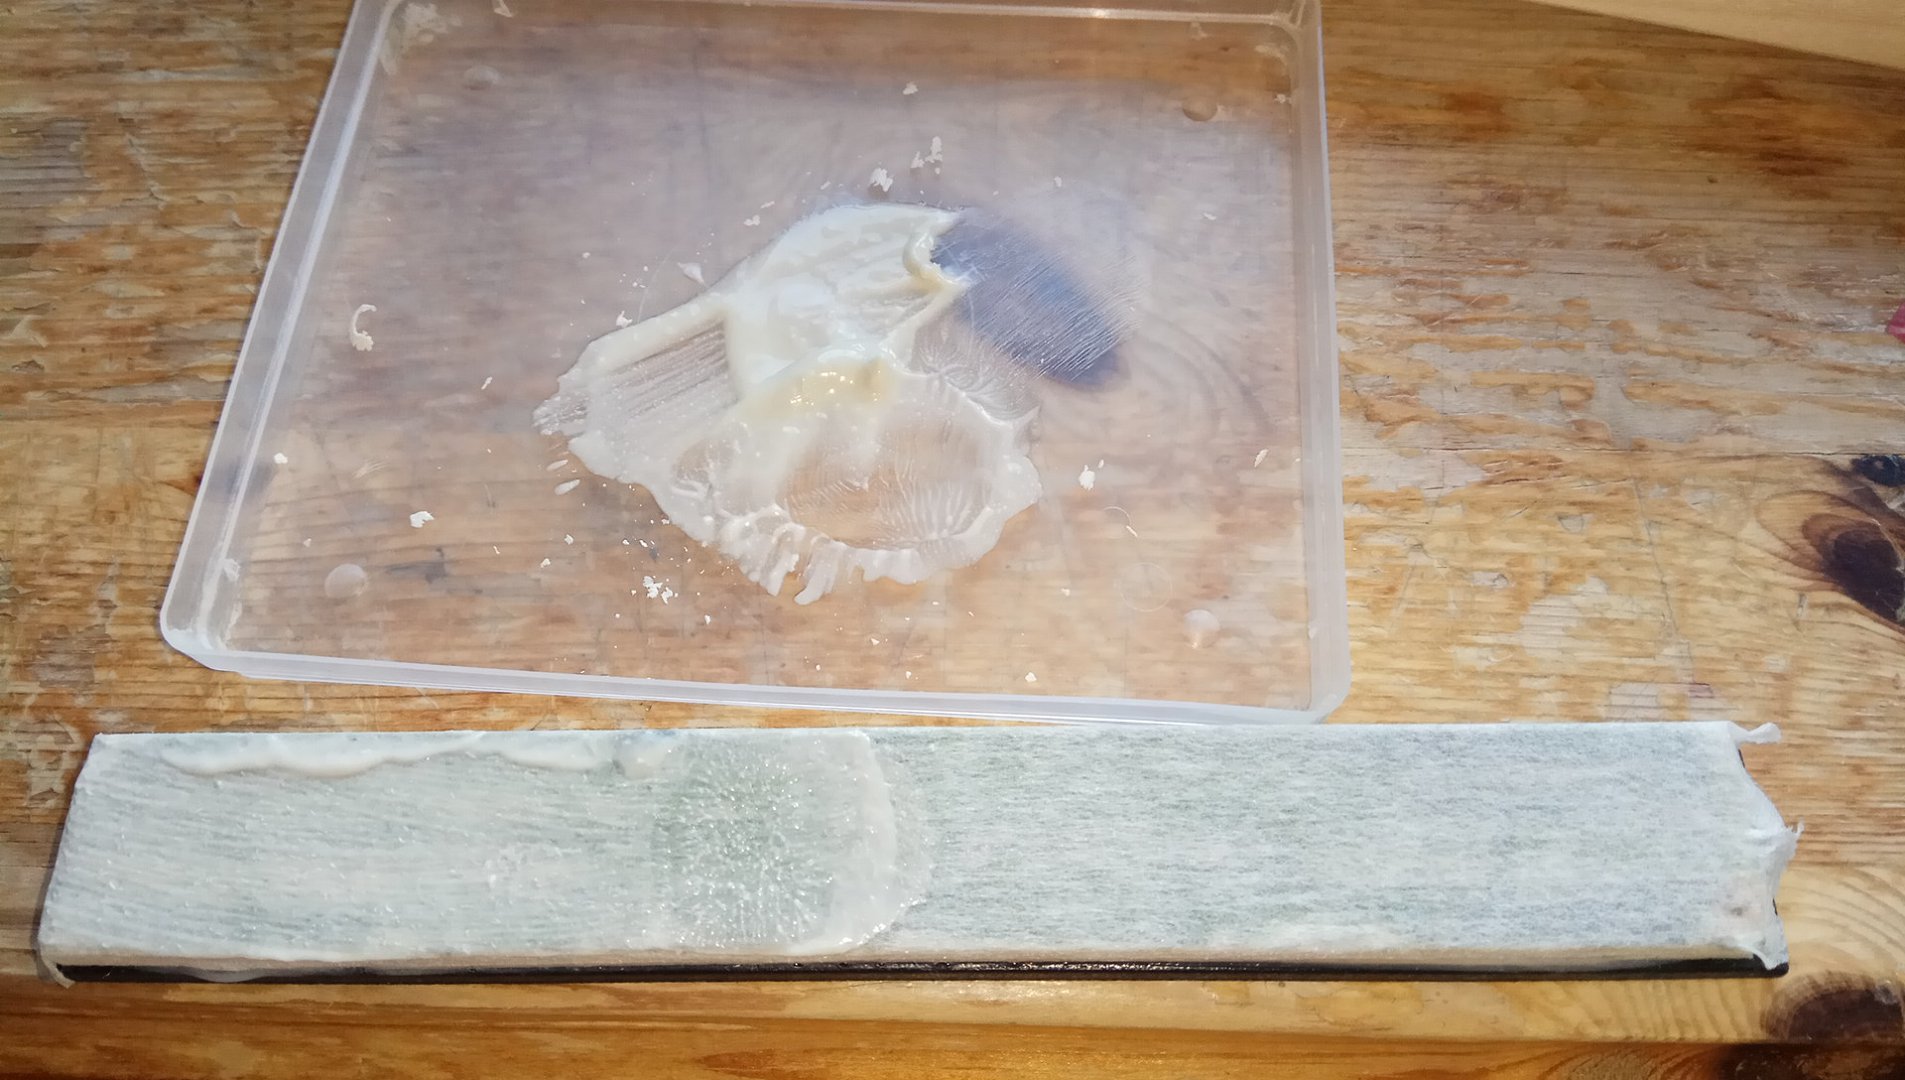
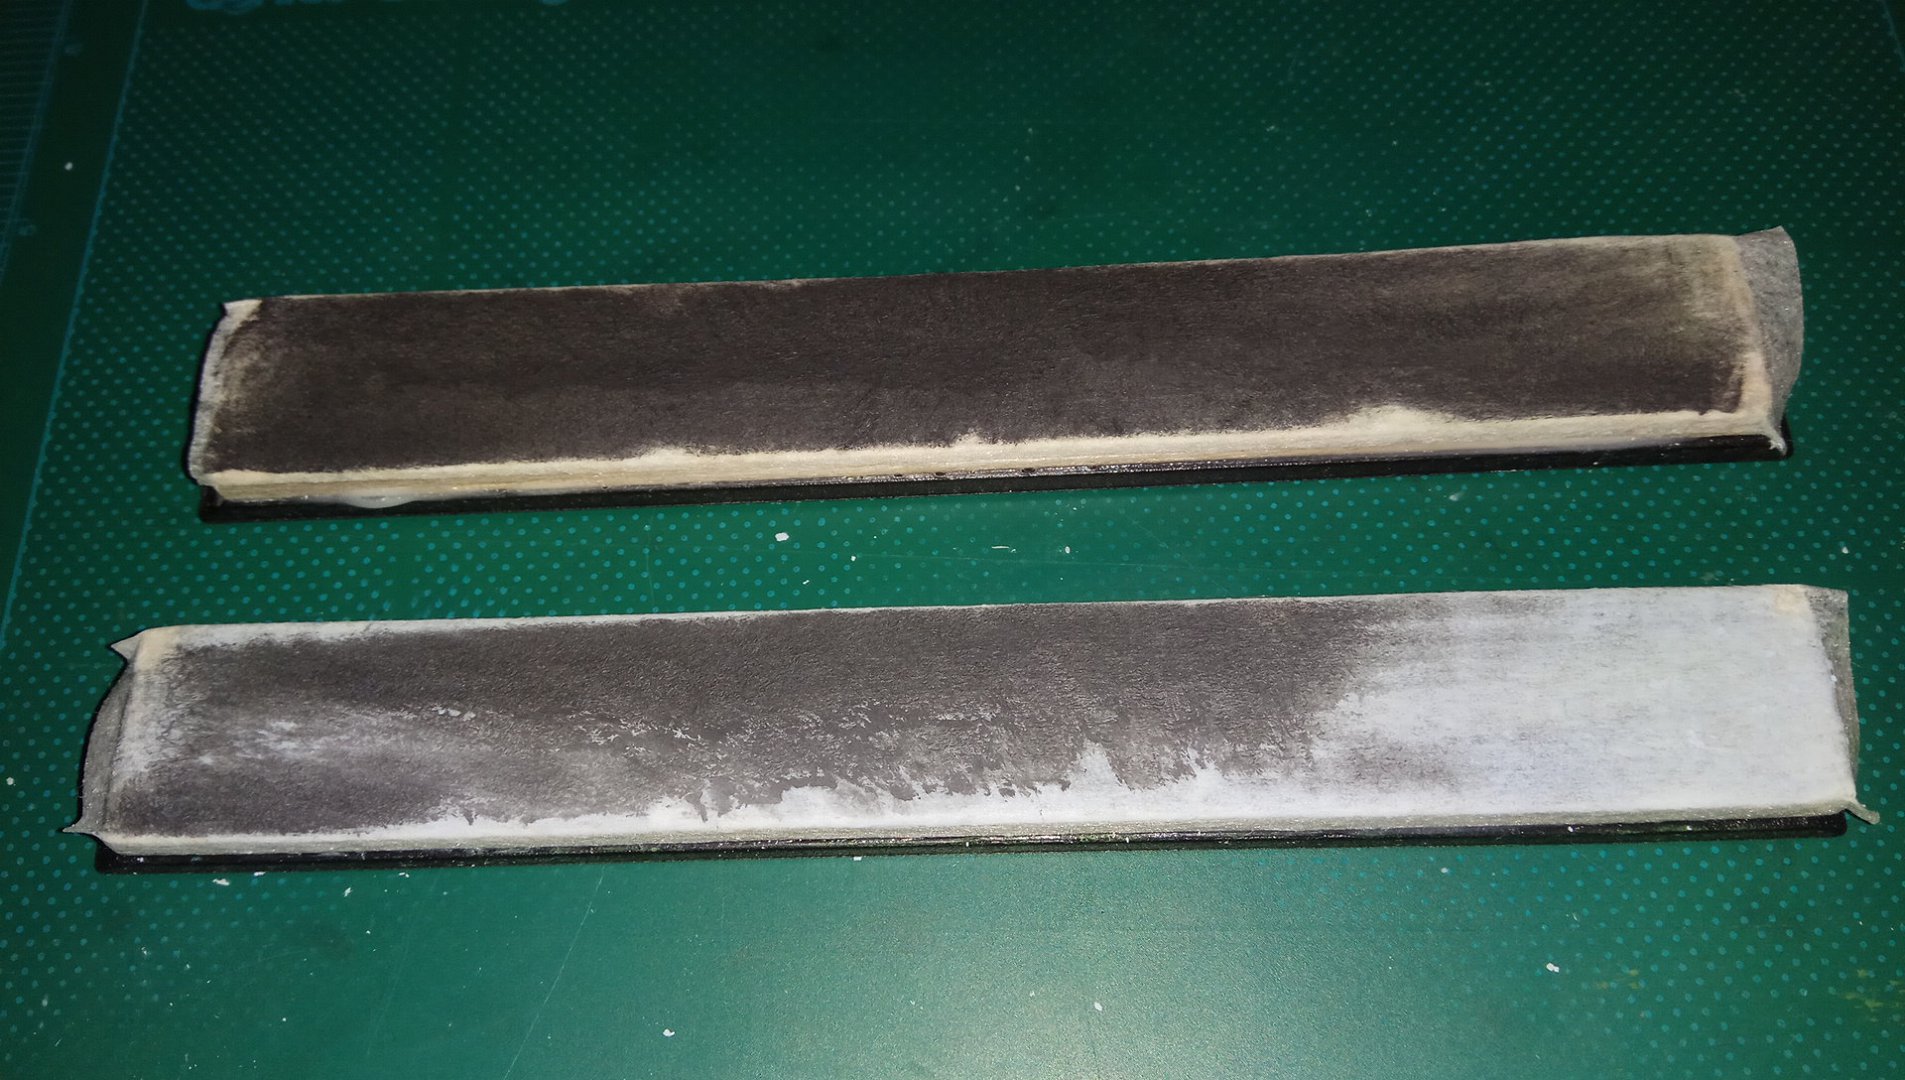
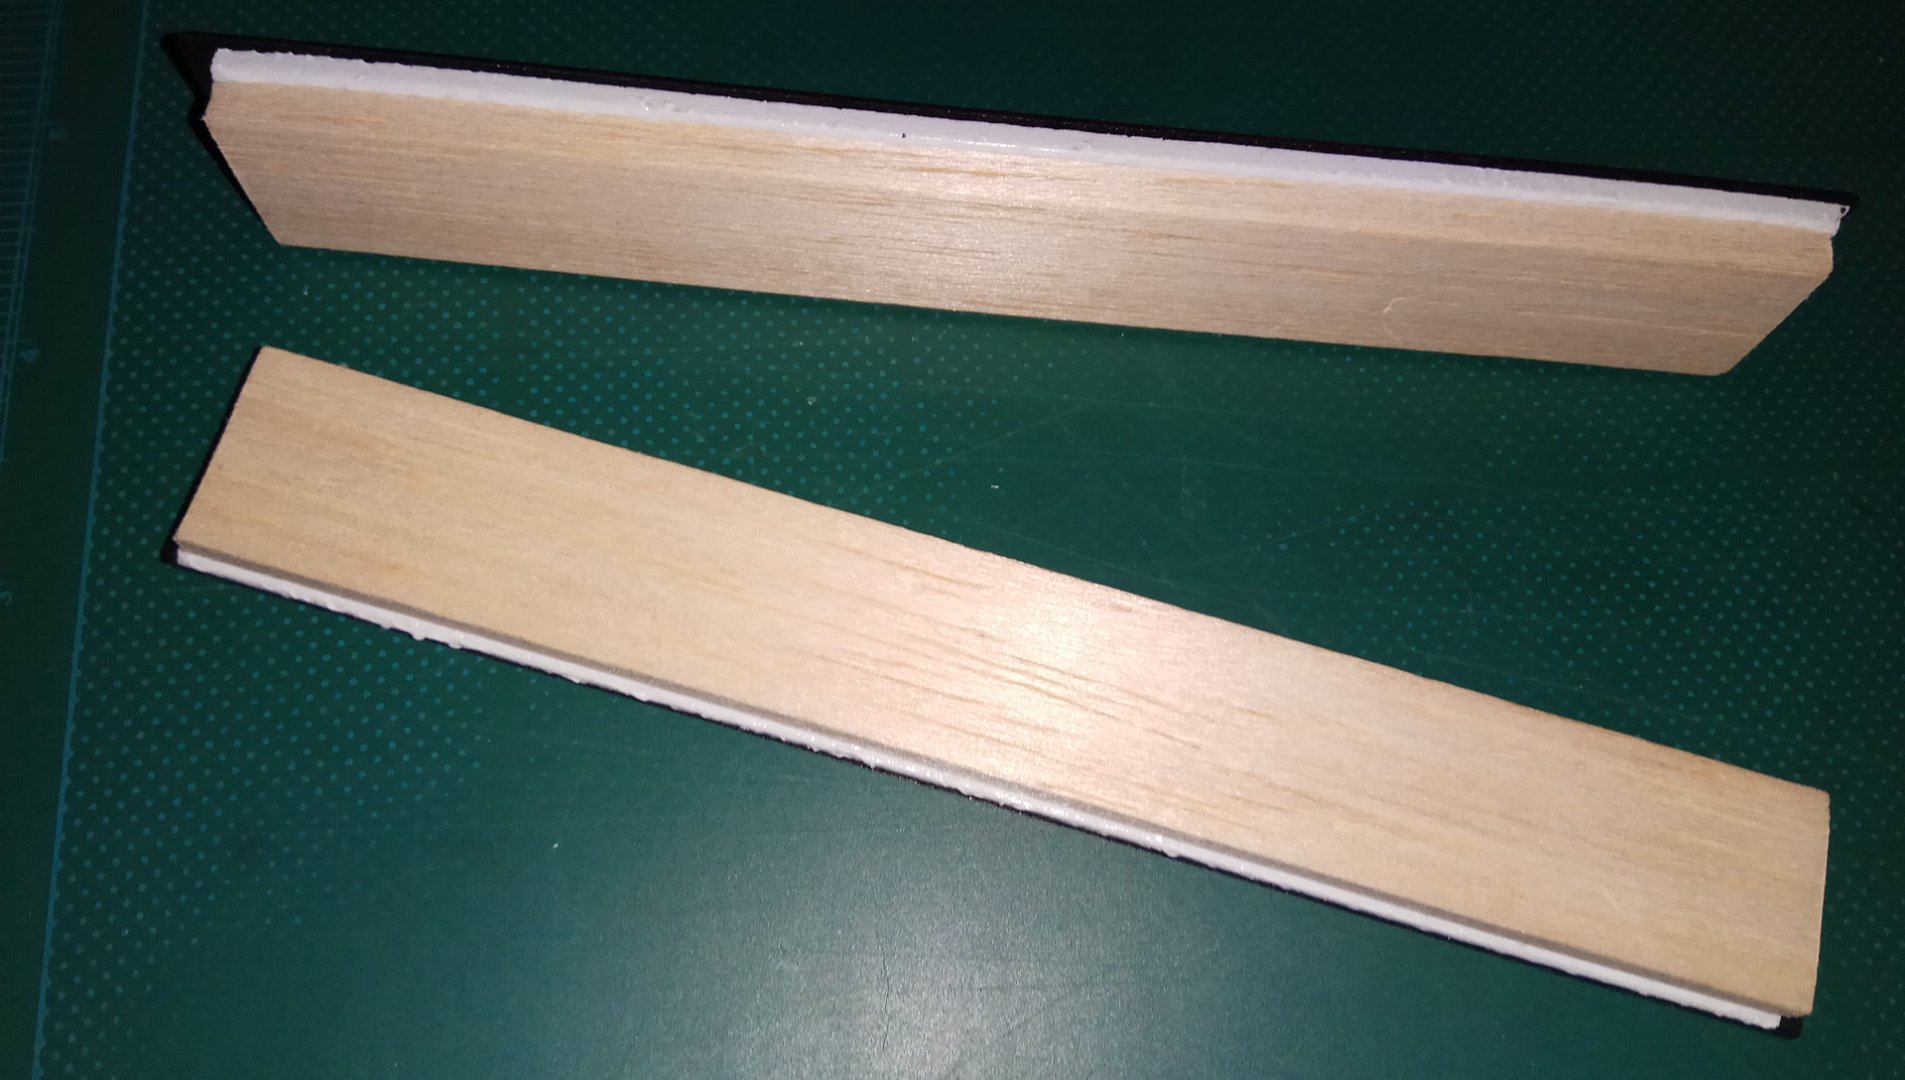
Yes real whetstones, aluminum, or glass are perfectly smooth and flat but they don't provide the minimal give which is desirable for effective stropping. Balsa wood is superior in this regard. In any case, in practice the idea of employing a (natural or artificial) whetstone or leather as tape holder doesn't work out satisfactorily, here the bad example with a natural stone (GREEN10000) as carrier for the tape:
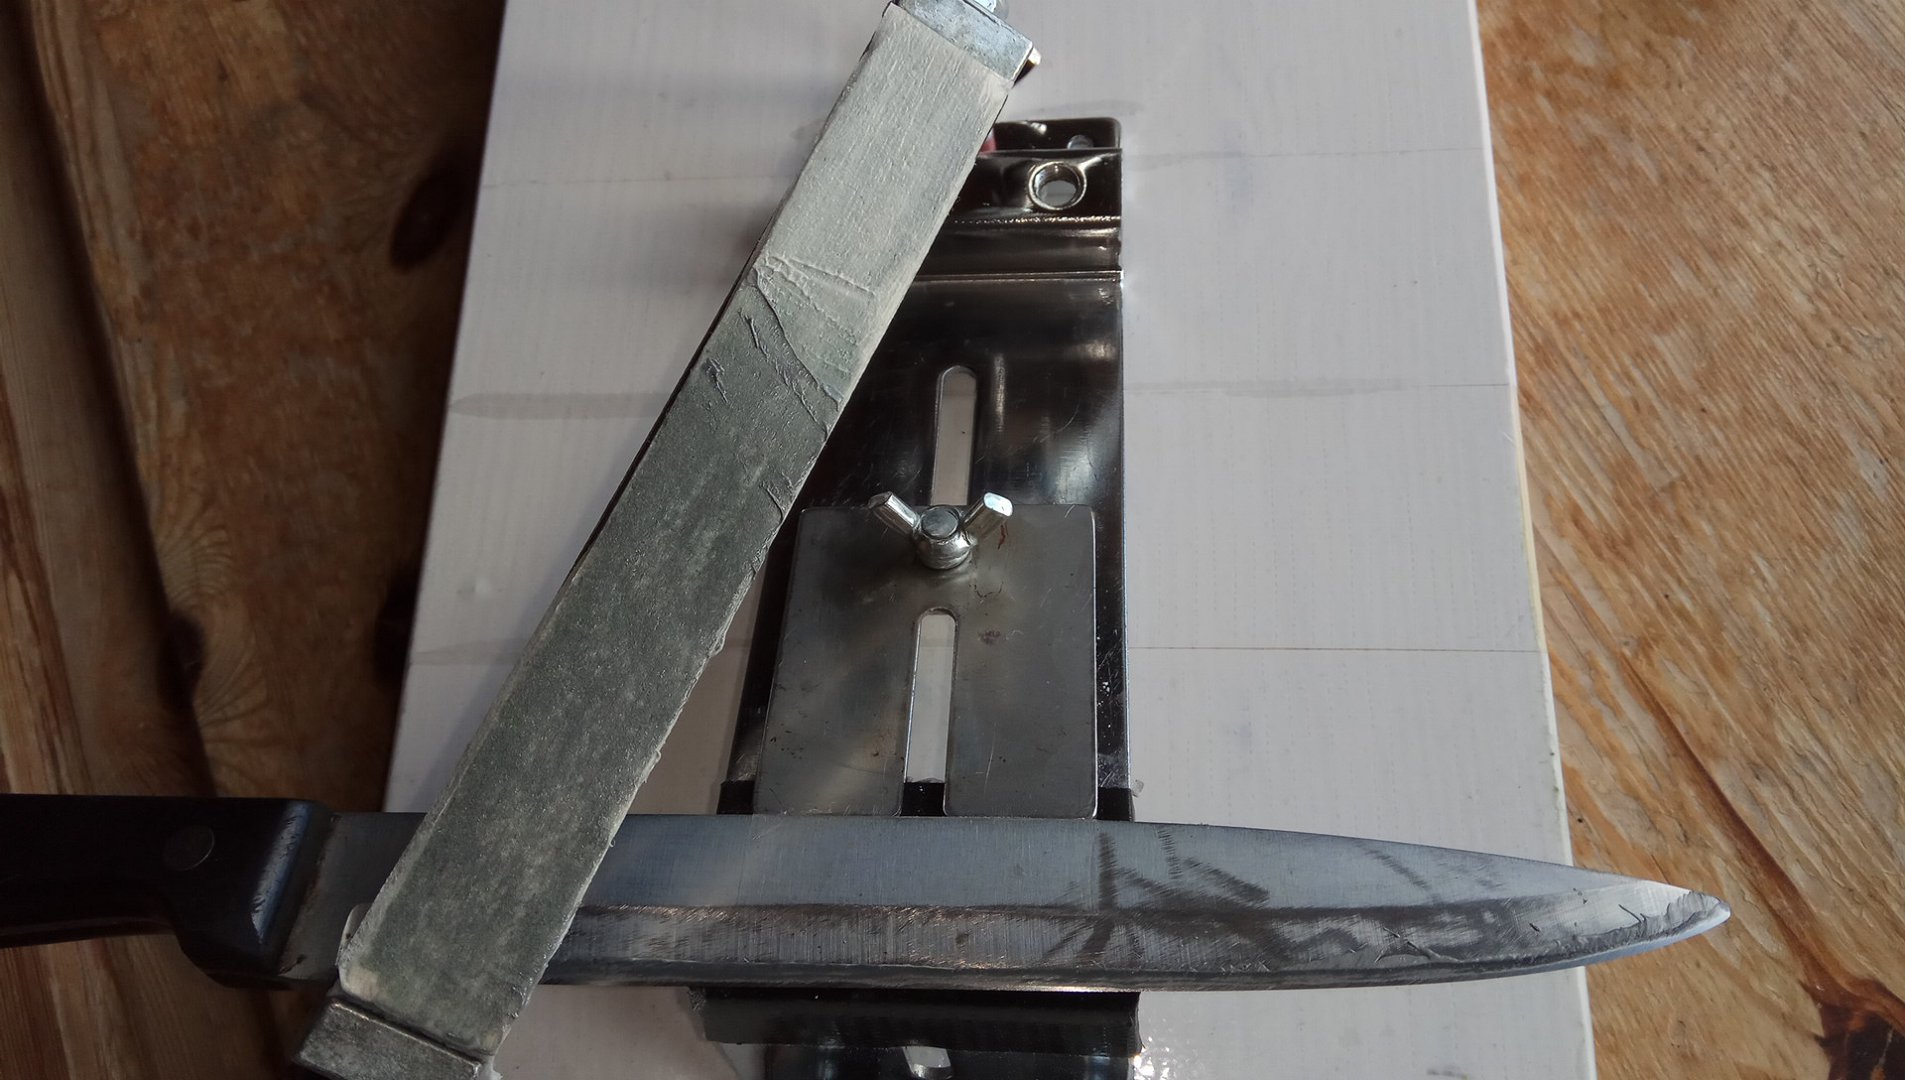
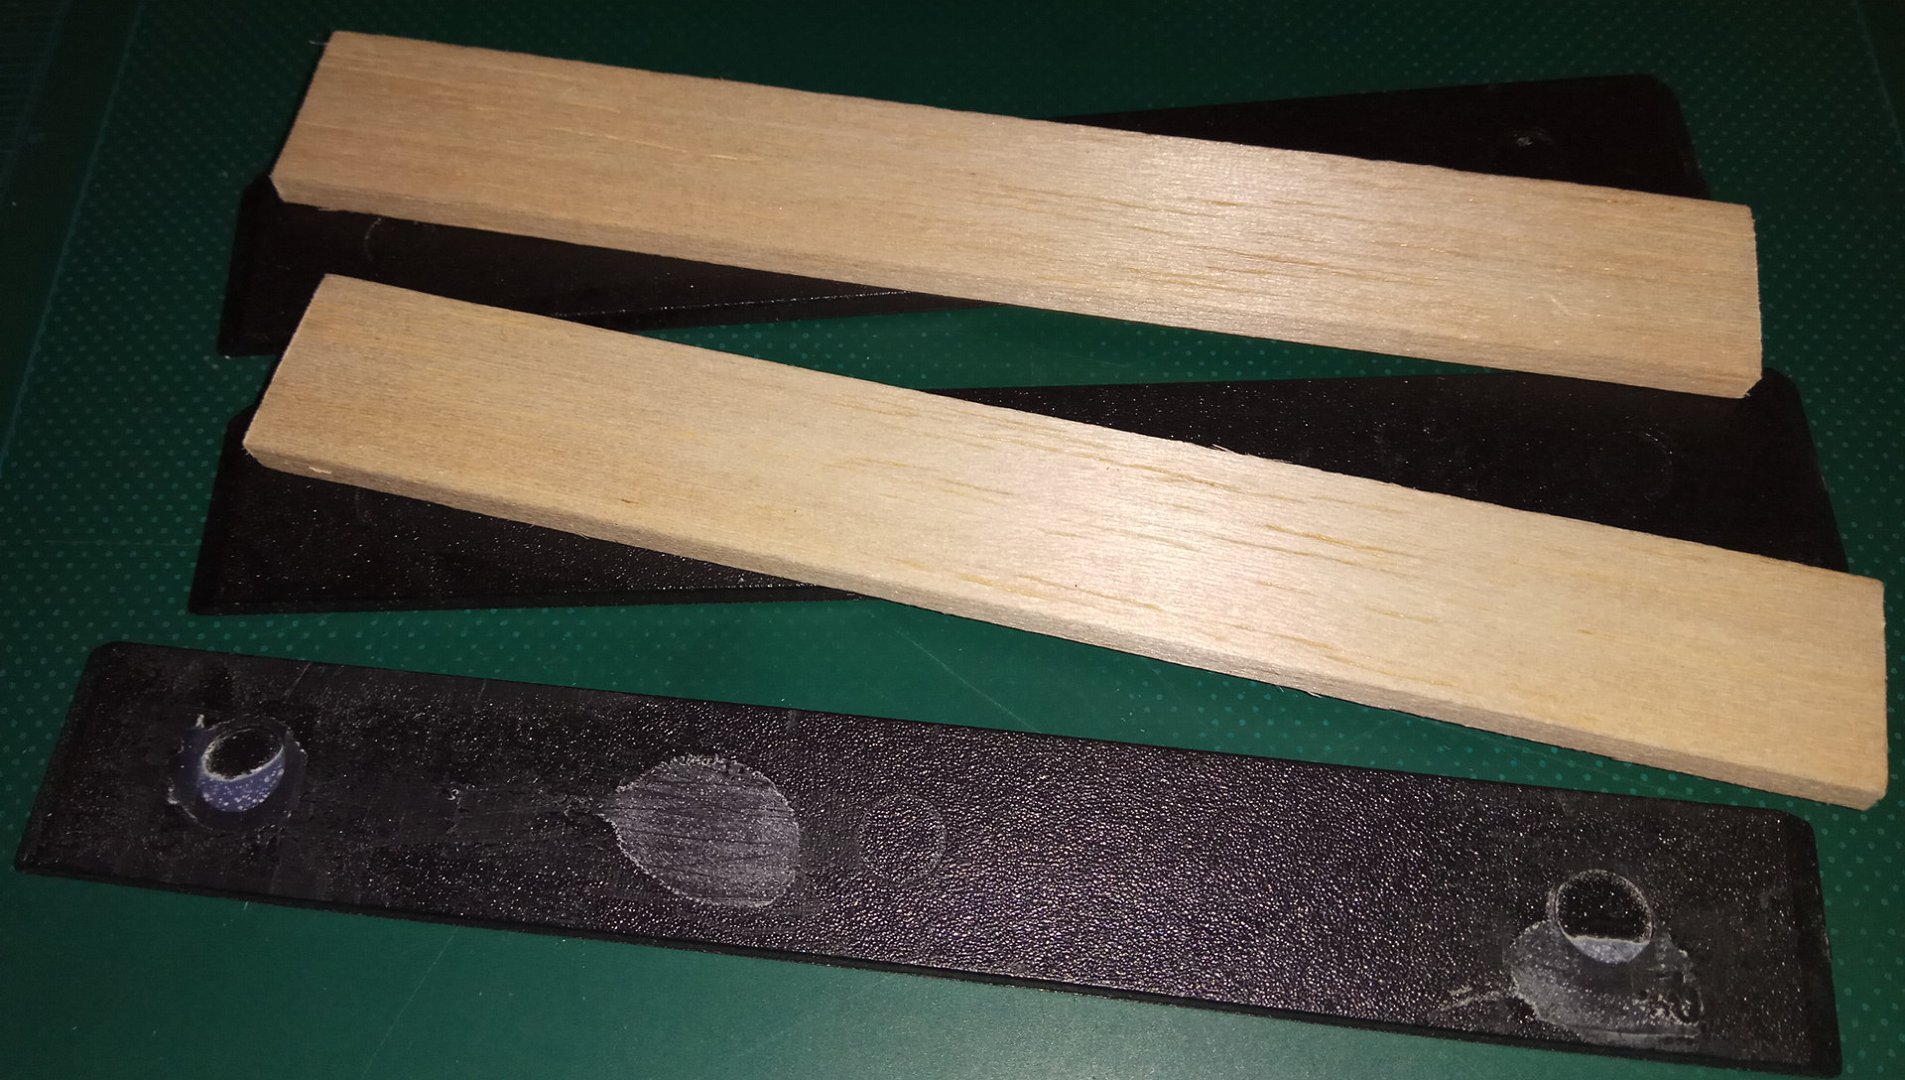
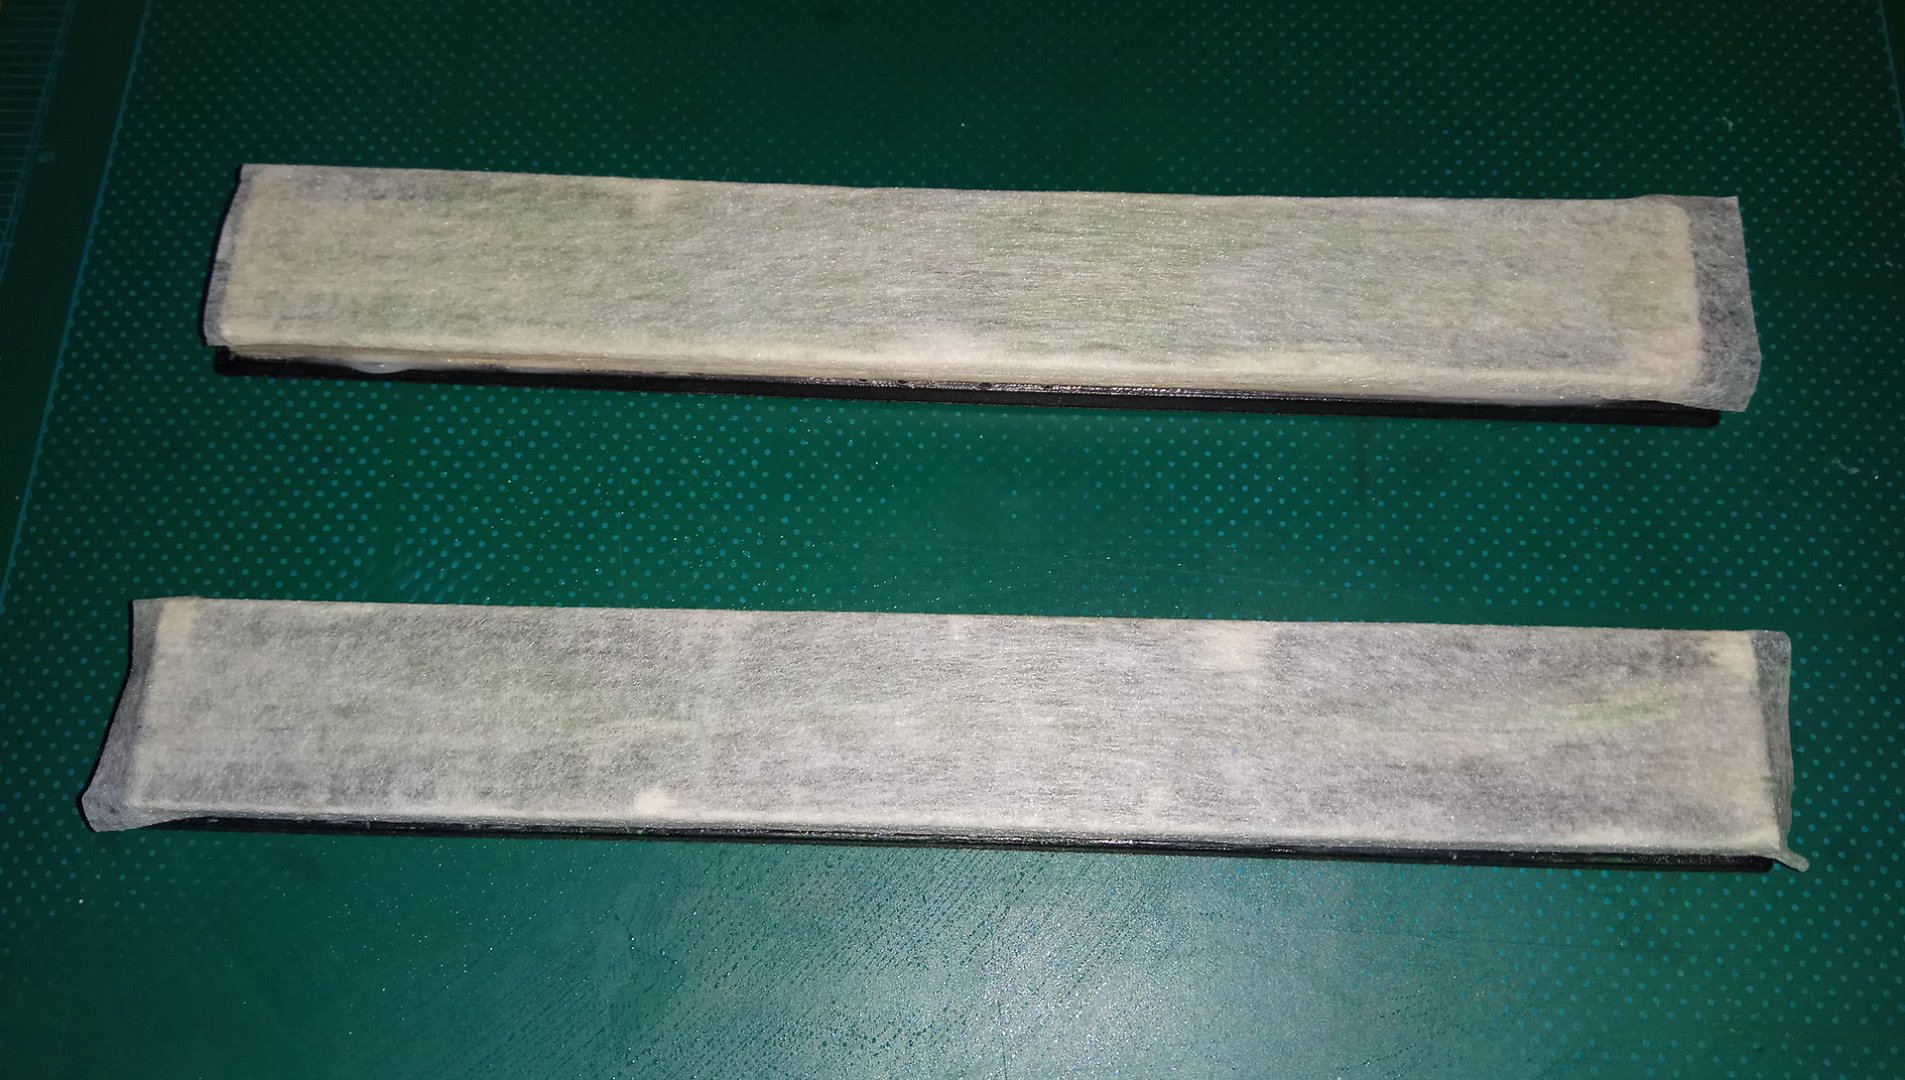
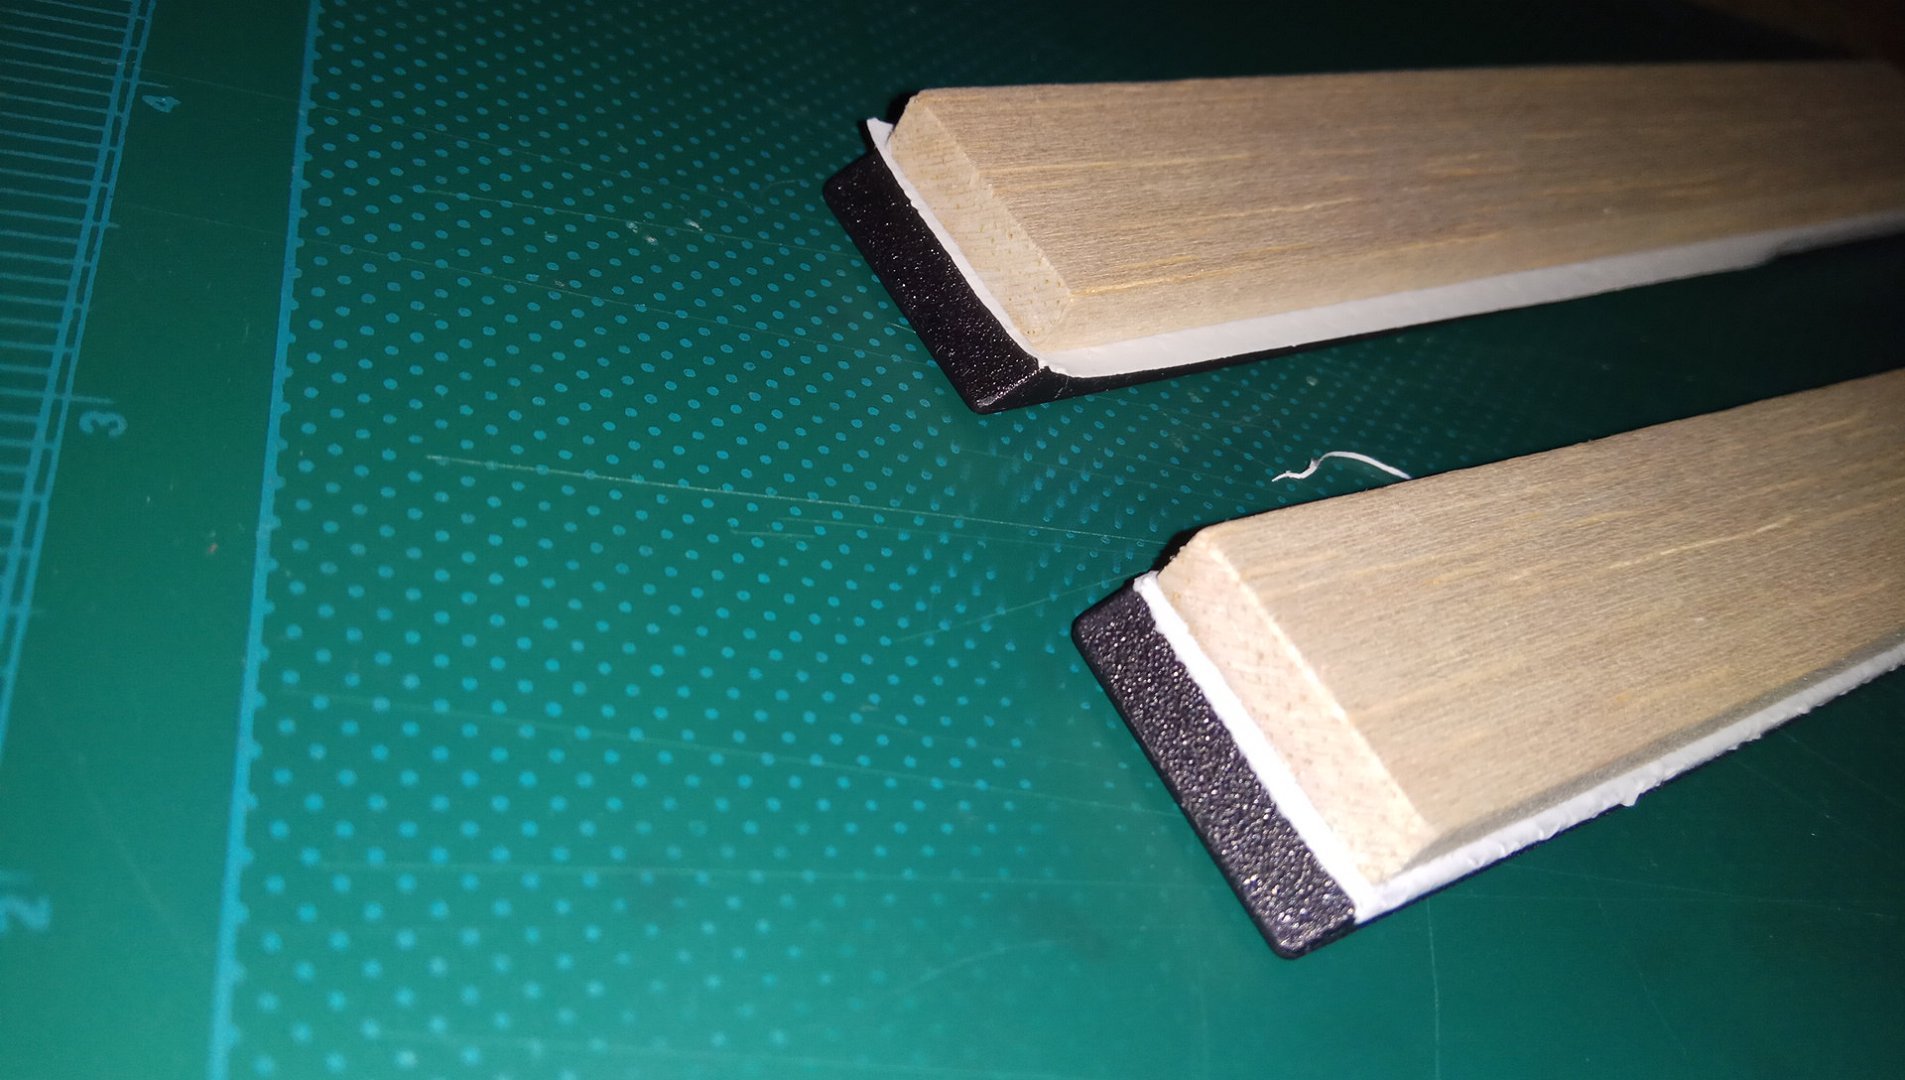
Another advantage of using balsa wood as holder is that you won't damage (micro-chip) the knife edge when you accidentally hit the PT-strop against it. The knife edge would not suffer any damage, cutting into the soft wood. Check out the four corners, you could see 2 corners with damaged wood underneath the tape:
As you will realize, users of almost any commercial GRSS could adopt my method; i am taking my modded Ruixin as application example. I've given this method a name and call it Paper Tape Stropping or 'to strop a knife/blade/edge with the PTS method' or 'to do PT-stropping'
. Afaik I am the first to document it in specific detail.Pro's:
- very precise, effective, convenient, and budget-friendly way of stropping
- very easy, also suitable for absolute beginners in the realm of stropping
- grit progression possible, if wanted; also inexpensive
- reliable reproducible results, perfect geometrical acuteness
- can replace free-hand leather strops
- goes easy on wrists, joints, muscles; it results painful to strop a Surge on leather

- does not produce convex edge profiles; dulling over-stropping is not possible!
- no strop cleaning/reactivation/maintenance needed; simply exchange the tape
- typically the PT-strops are prepared fresh, pure, uncontaminated
- may appear tiresome, time-inefficient, longer-taking, slower, less convenient than free-hand leather stropping
- for starters, may take some pita time to deploy your GRSS on the table desktop
- may take some time to prepare your series of PTS "whetstones"
- limited to the range/dimensions of knives which your GRSS accepts
Note: The PTS method is not to replace all of your freehand leather stropping activity, when working on a specific knife model or specimen. For example, after reducing the burr with my last Ruixin stone (RUIXIN1500), i sometimes proceed with 1min on my 1 foot long SiliciumCarbide-loaded leather strop to faster smooth out the zig-zaginess of the edge line, before i return to the Ruixin device for the PTS method. The PTS method does smooth out the edge line too, 100.0% perfectly so, it just takes longer. If time is not a factor, you won't need a leather strop during the entire sharpening session. I have been appreciating the PTS method so much that I always try to do it whenever a blade has gone dull and either would need touching up (usually done on a leather strop) or actual resharpening (usually done on a 1000+ grit stone). If you know what you're doing and have the proper set of compounds for the grit progression, then the PTS method can be extremely effective, hence also time-efficient.
Comparison: Stropping with disposable tapes is not a new idea per se. WickedEdge offers 'leather tapes' for 60$/pair, and EdgePro offers custom-cut dry grit tapes for 37$/set. If money isn't a factor, then these are awesome substitutes and superior to my PTS which is basically a budgeteer's DIY method; WickedEdge and EdgePro owners don't need to look any further, they already have the best (and most expensive). At the opposite end of the spectrum, people on a budget or Ruixin users should find my PTS method to be an attractive alternative to free-hand leather stropping.
What you will need:
- 1pc compatible base/holder; i use the cheap generic black plastic ones
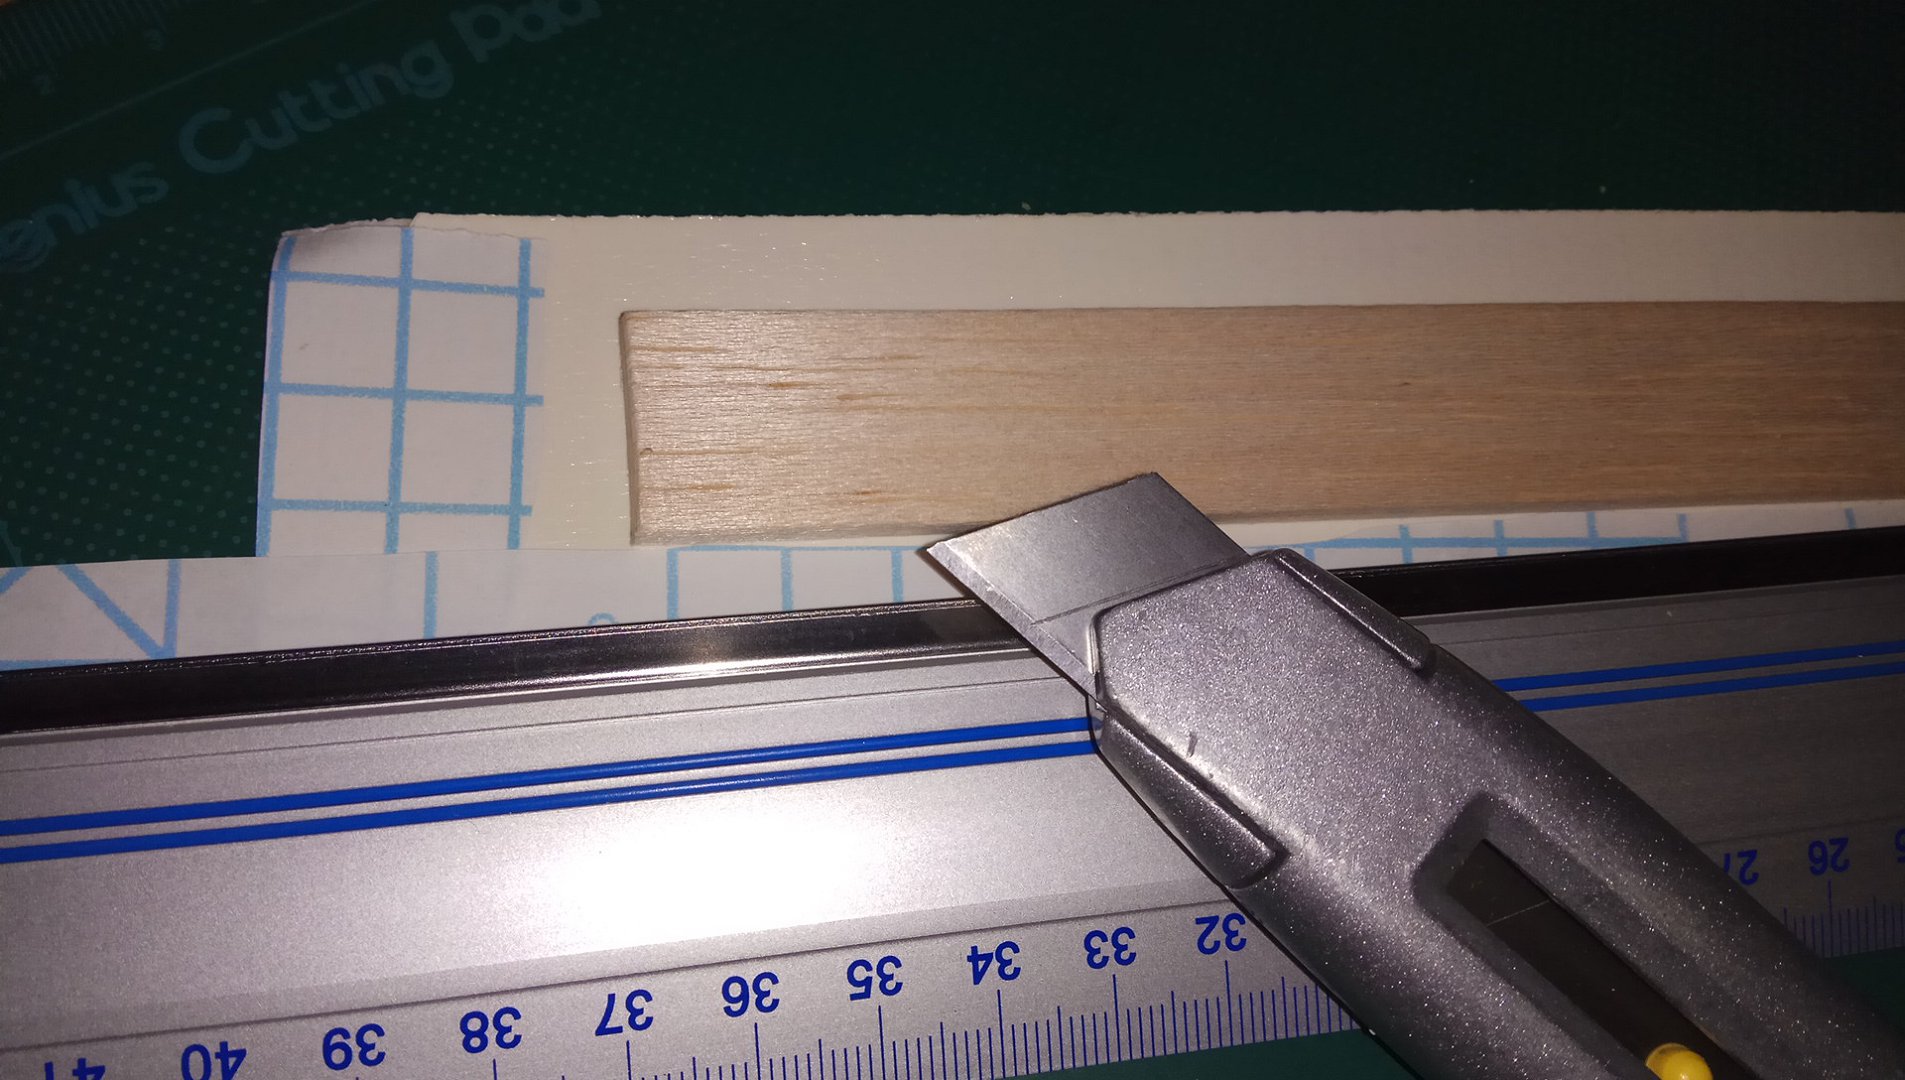
- 1pc balsa wood, cut to the identical dimensions of your Ruixin stone
- double-sided adhesive tape or special glue to fix the wood on the base
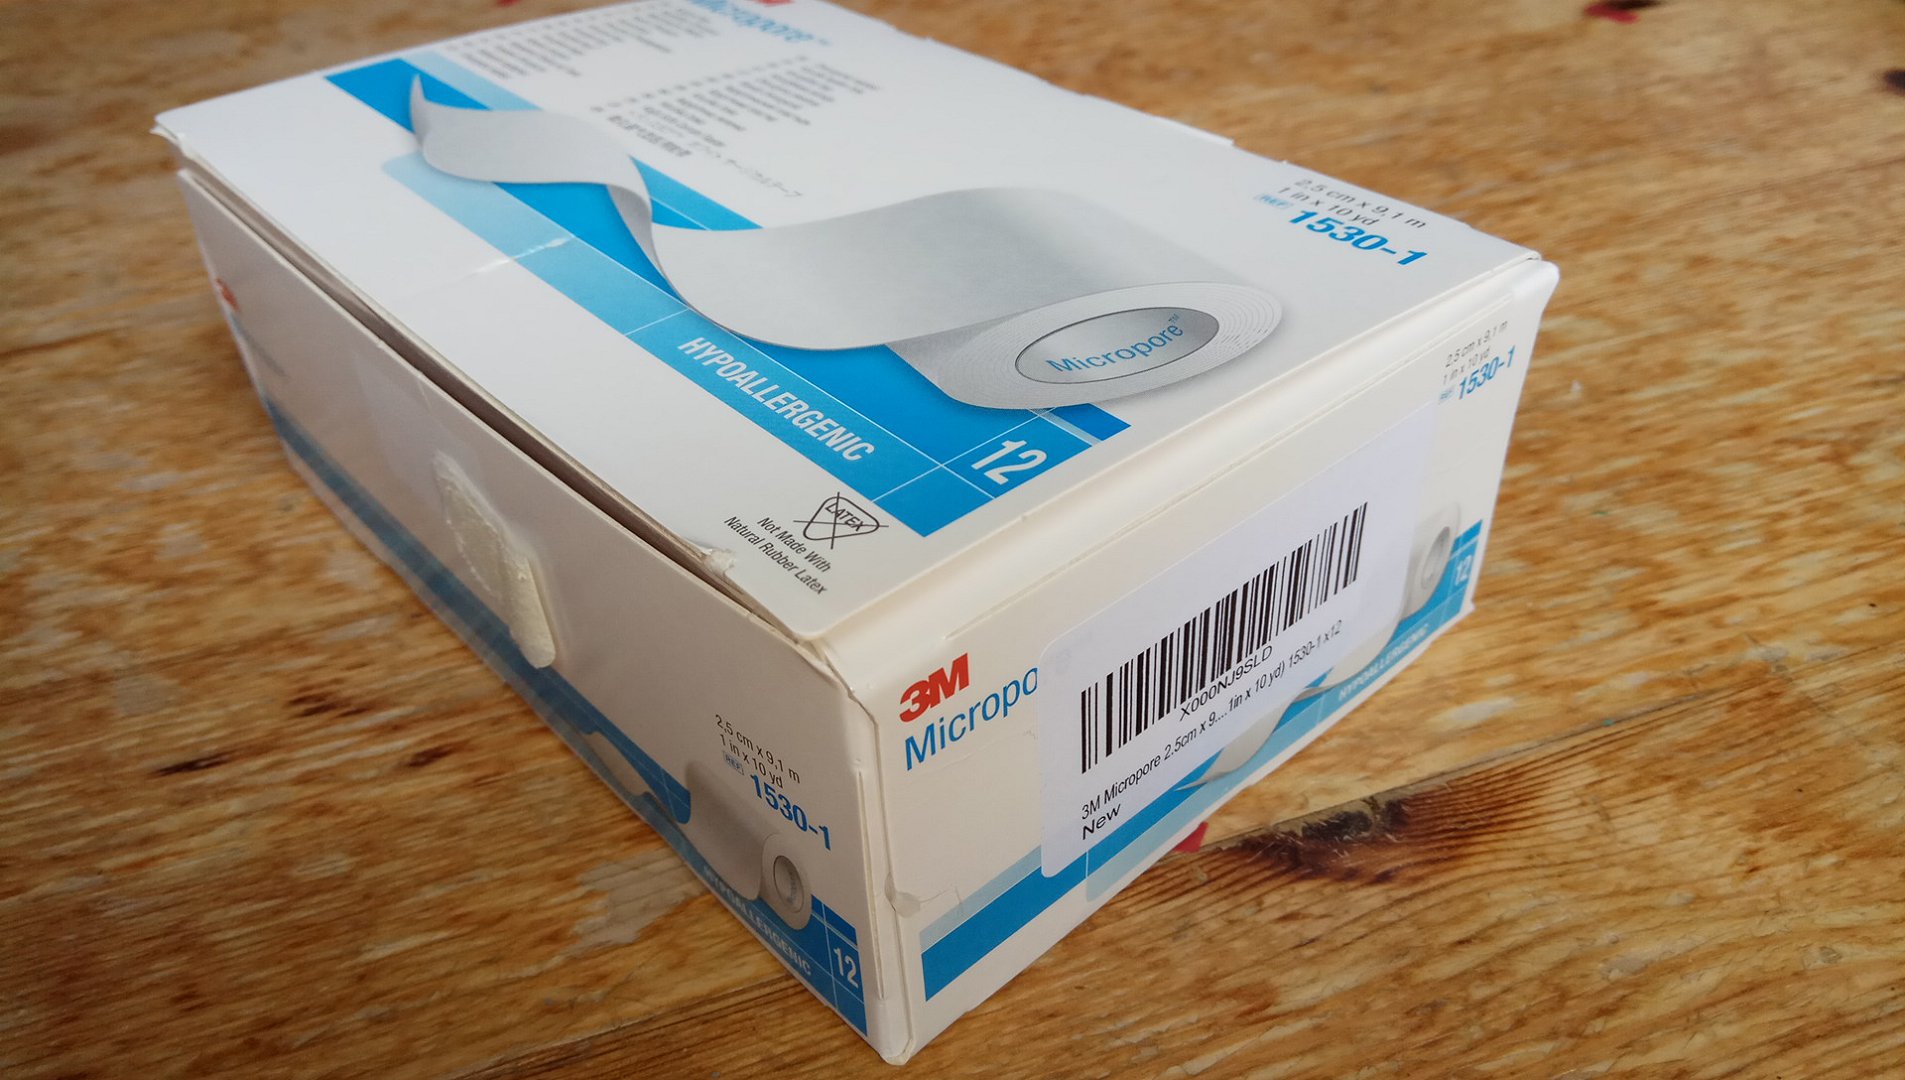
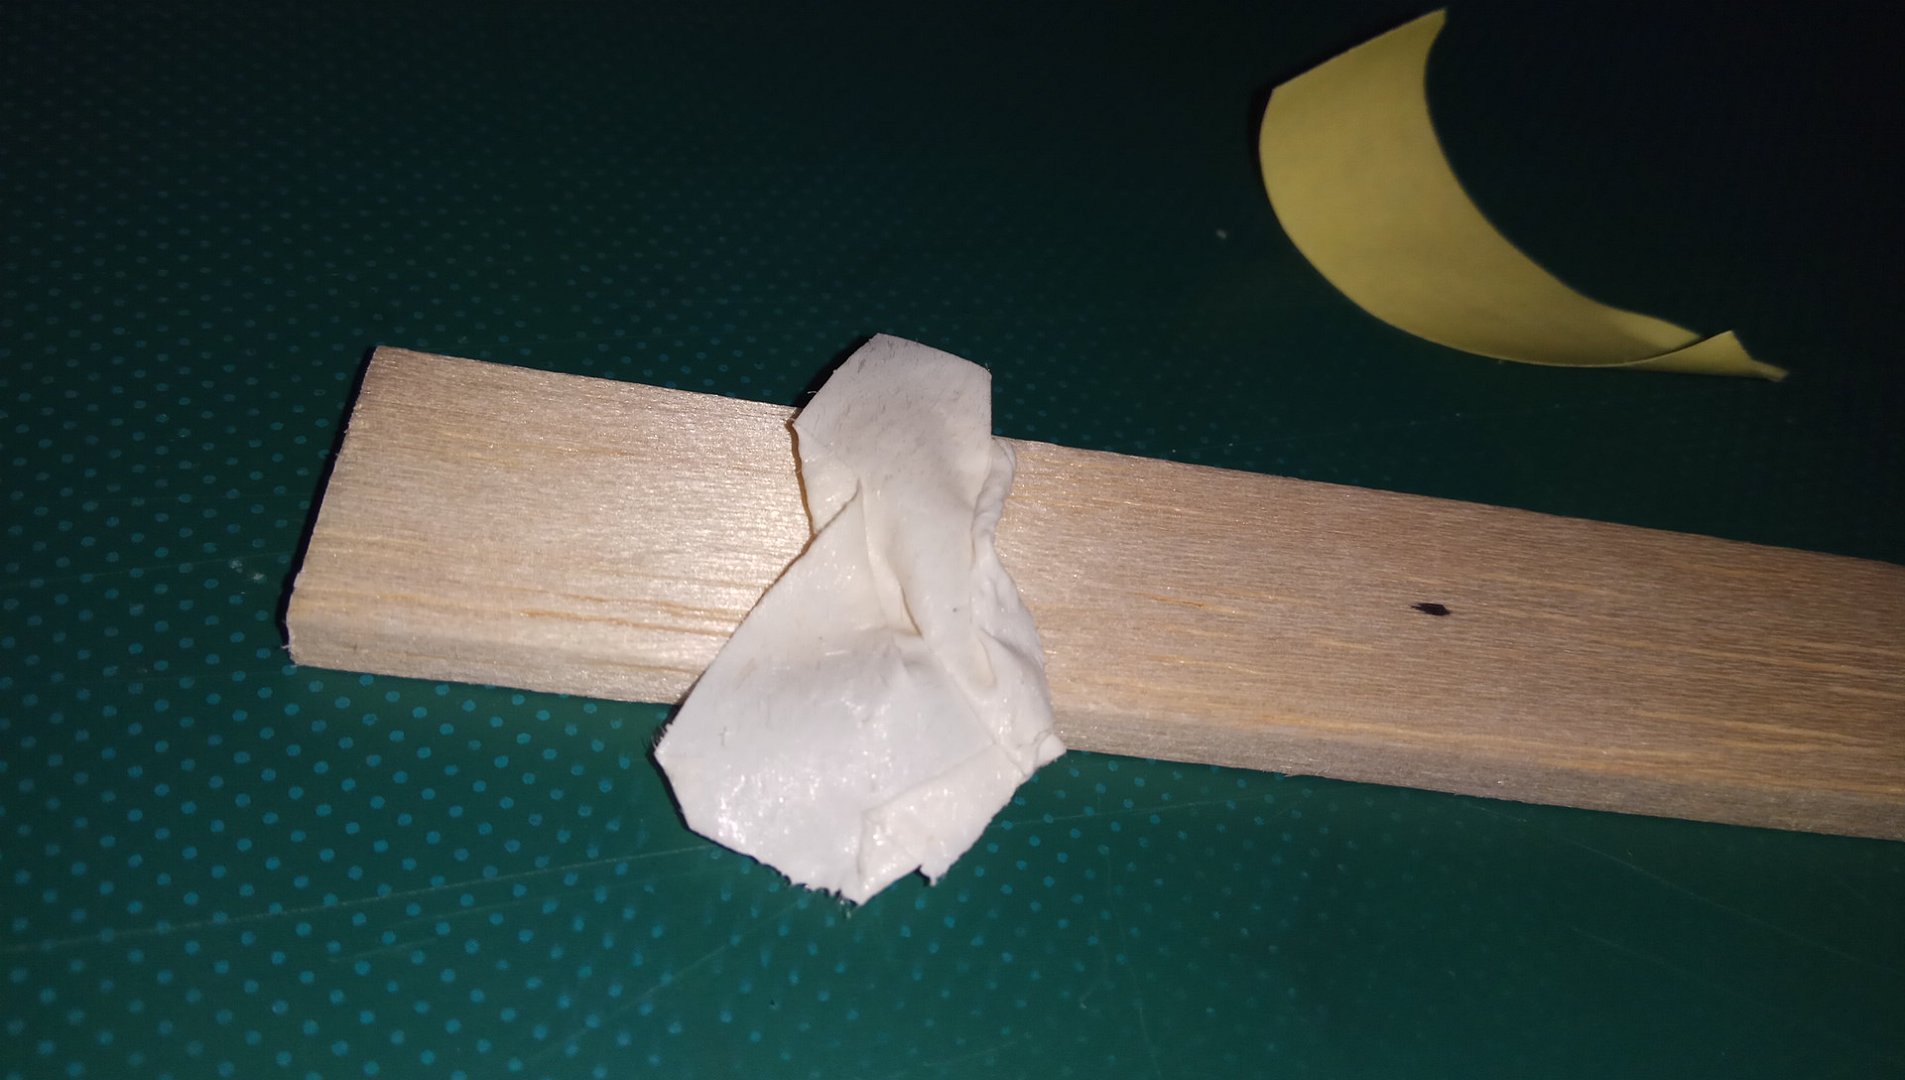
- 1 roll of original 3M Micropore surgical paper tape; for best guaranteed results don't use any other product!
- 1 set of cheap polishing compound; typically in form of solid wax, block, cream, paste, powder
- leather oil or other light oil for solving and dispersing your preferred stropping compound
- (optional) 1 pair of disposable rubber gloves; i don't use such a thing anymore, they are not really needed
- (optional) old newspaper to protect your desktop from spills, crumbs, dirt
On the following pic you can see a total of 2pcs black plastic bases (1 blank, 1 in use, made in chinas), 3pcs balsa wood (2 not in use, 1 in use), 2pcs leather strips (both not in use, made in gemani), 1 roll of Micropore surgical paper tape (made by 3M), 1 set of solid wax compound BLUE and WHITE (made in gemani), 1 set of 12 syringes colorful polishing diamond paste (made in chinas, 1 syringe missing), 1 container of pure ChromeOxide GREEN powder (made in gemani), 1 syringe GEMAN polishing/stropping paste (SiliciumCarbide compound, made in gemani), 2 mini glass bottles (water, oil), 1 yellow bottle with leather oil (made in gemani):
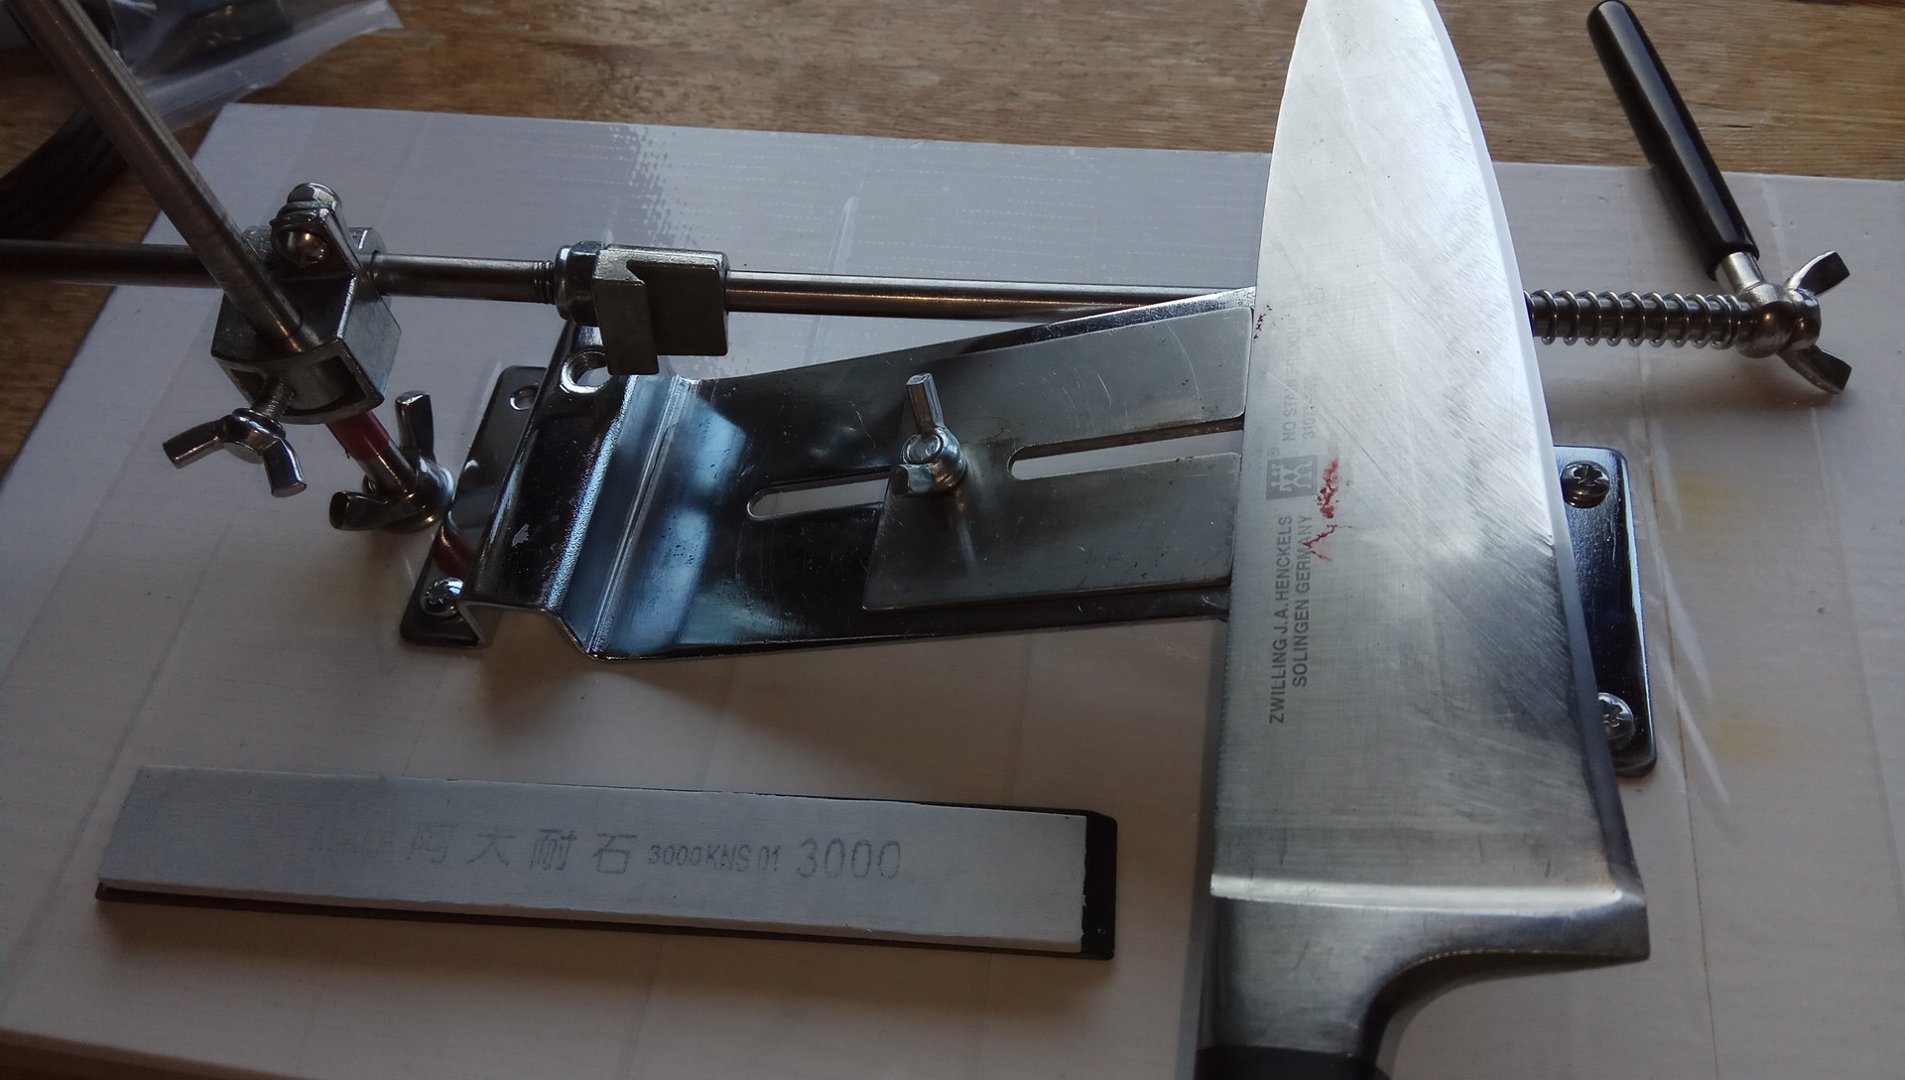
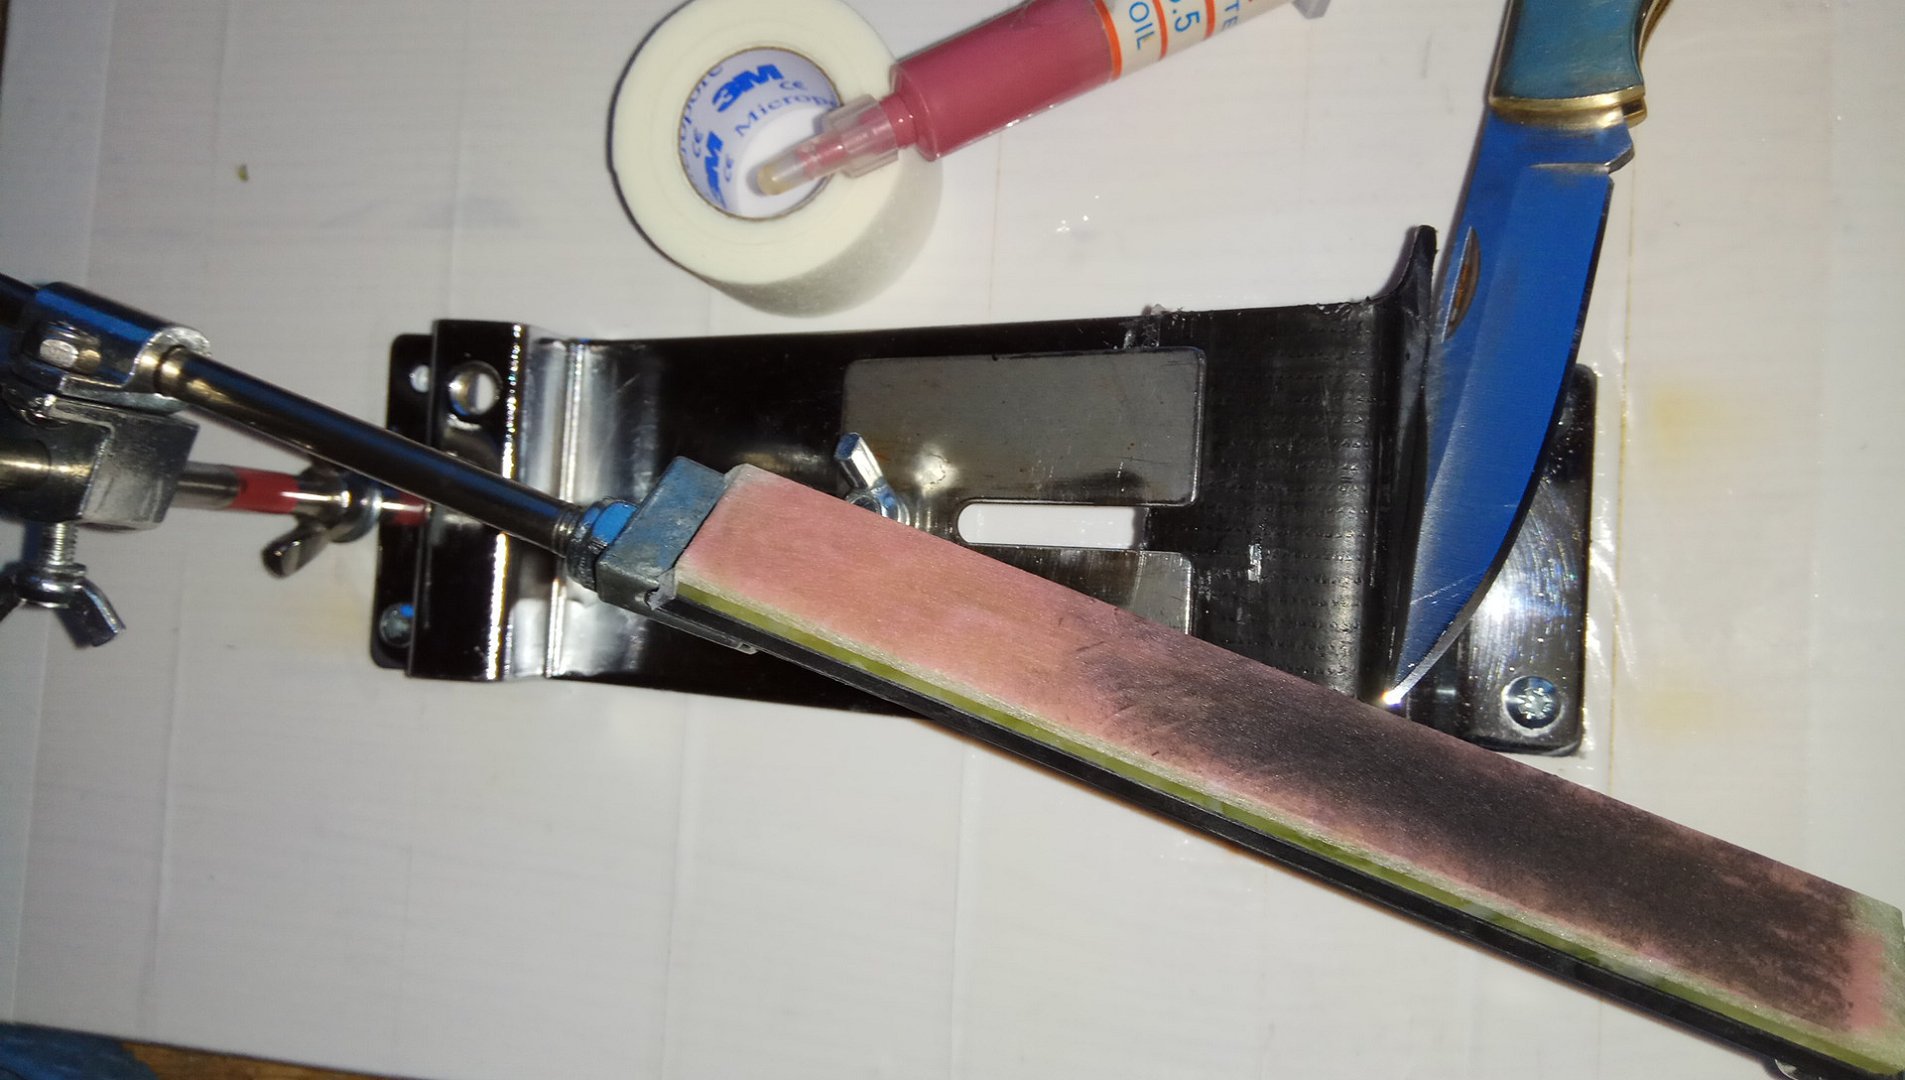
Chinese (CN) diamond paste can be found easily in sets of 3, 5, 6, 10, or 12 syringes on ebay, Aliexpress, BG, etc. 1 set costs maybe 6usd. Yes, 12 effing syringes for only 6 lousy bucks! CN diamond paste is for polishing metals and, due to its low(?) concentration of abrasives, not effective as stropping compound applied on leather: on a dry leather surface the creamy paste instantly turns waxy/solid rather than remains oily. Since, applied on leather or directly on wood, it didn't seem to cut steel effectively, I hated this paste … until i applied it on the paper tape. As you can see from the above photo, the (generously loaded) tapes turned black, the CN paste did its work, finally! And surprisingly fast! Now i am loving the CN paste and have almost used up the more 'popular' colors. My set of CN paste goes down to 0.5micron, other CN paste sets go down to 0.25micron. My ChromeOxide GREEN is said to be 0.3micron, here my razor-sharp kitchen chef knife finished with that 12-step series (the upper knife is for edge reference lol):
It took a long time
to go through the full range of grit progressions of the CN paste, finishing with the ChromeOxide GREEN ( Chromoxid Grün ), and i wouldn't want to do it again in future, except for show edges like my multitool blades. chromeoxide or "the green compound" seems to be the most popular stropping compound on youtube, and youtubers end up with armhair-shaving sharp edges. I tried the GREEN compound in its pure form, powder, waxfree:
Really inexpensive, 2eur or so from the local painter's supply shop. According to the specs in the material data sheet PDF, the average particle size is "ca. 0,3μm"; by comparison, their IronOxide RED ( Eisenoxid Rot ) is 0.09 micron. Hilarious, it is sold in stupid plastic bags. Can you see what i did there? I feel like genius lol
:
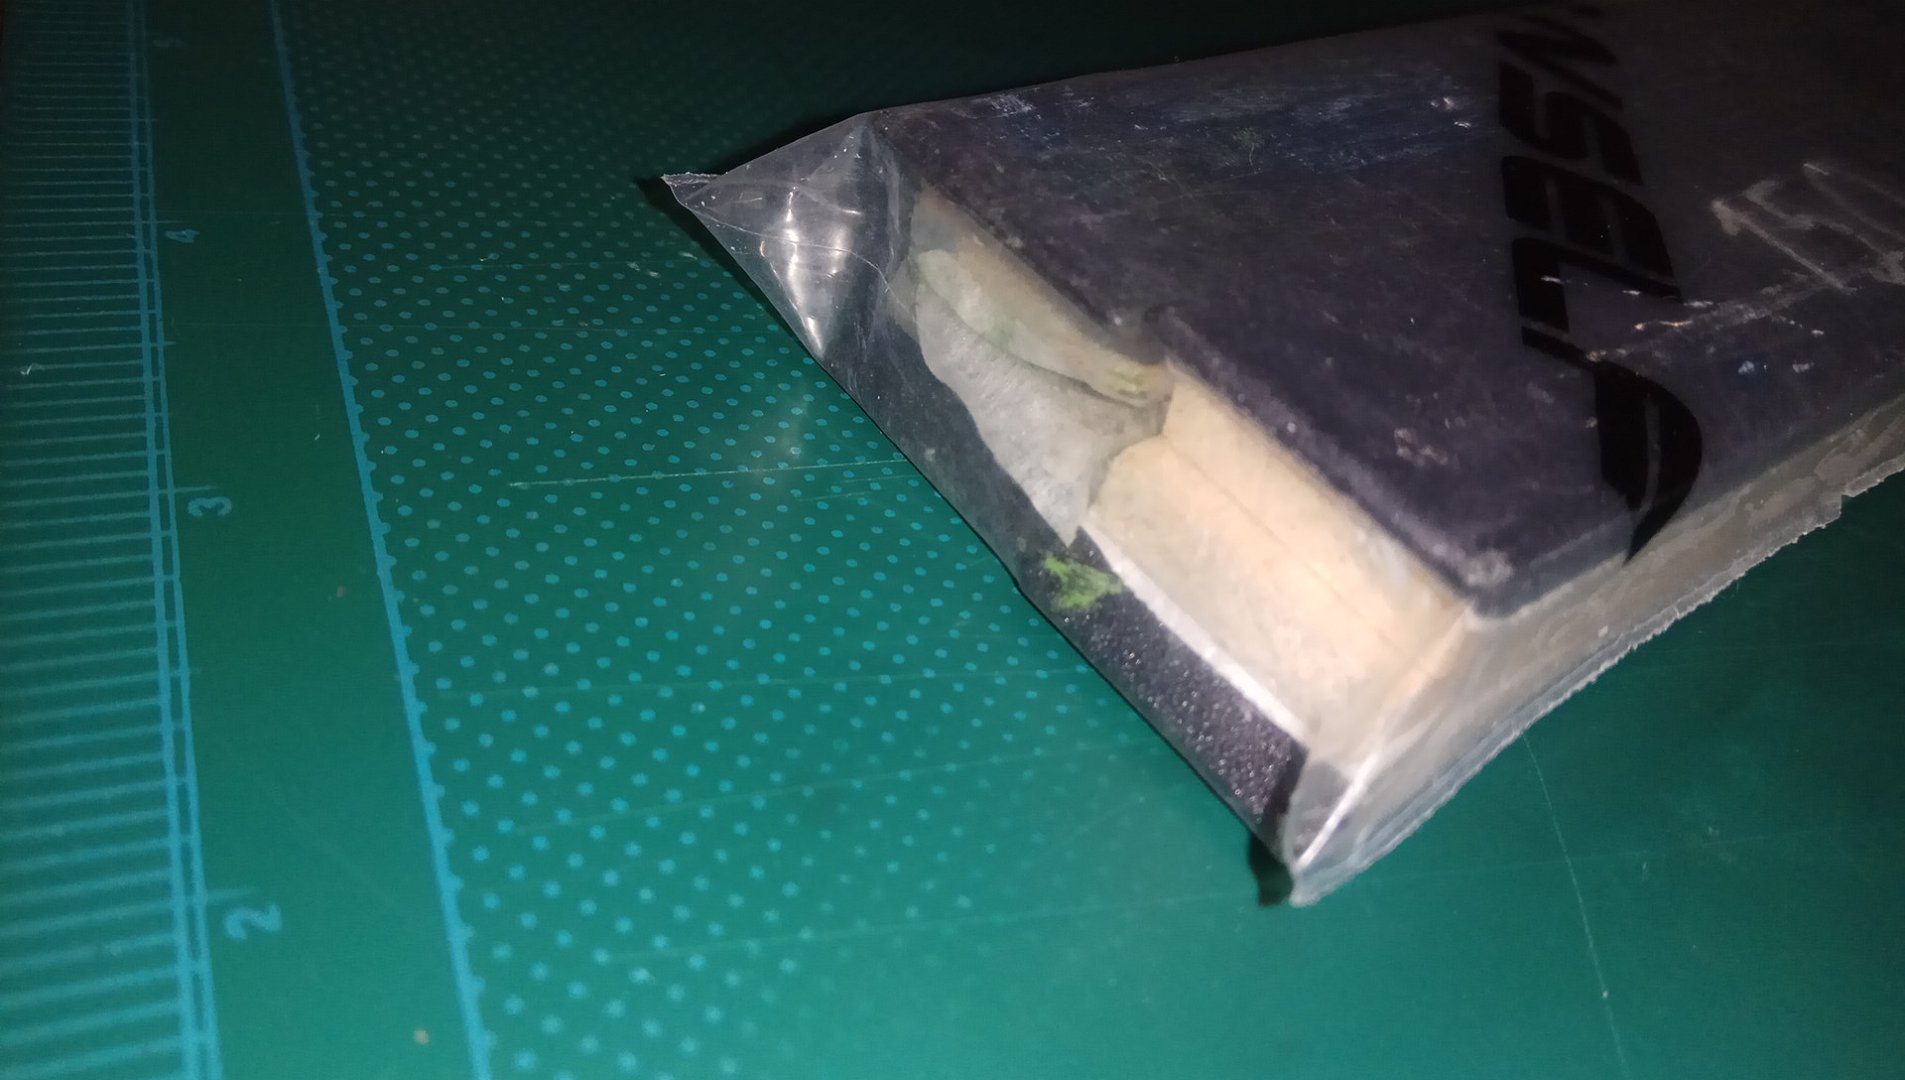
At first i didn't have 3M Micropore surgical tape in the household. Instead i found other make surgical tape, you may know the series < Leukoplast, Leukosilk, Leukotape, Leukomed, Leukofix, Leukoflex, Leukopor, Leukowtf, Leukoetc > from your last hospital visit. Anywho, even though this Leukowtf surgical tape stuff worked pretty well for stropping, it didn't work extremely well; so save your efforts and do not use that non-3M kind of surgical tape! If the tape product says Leuko- , you say -byebye:
Another poor idea is applying compound directly on a whetstone, with or without oily solvent doesn't matter
:
Yes real whetstones, aluminum, or glass are perfectly smooth and flat but they don't provide the minimal give which is desirable for effective stropping. Balsa wood is superior in this regard. In any case, in practice the idea of employing a (natural or artificial) whetstone or leather as tape holder doesn't work out satisfactorily, here the bad example with a natural stone (GREEN10000) as carrier for the tape:
Another advantage of using balsa wood as holder is that you won't damage (micro-chip) the knife edge when you accidentally hit the PT-strop against it. The knife edge would not suffer any damage, cutting into the soft wood. Check out the four corners, you could see 2 corners with damaged wood underneath the tape:
Last edited:


")

")


 . It's not a brand or company but the country from where it originates, the manufacturing site. Funny nobody on the various forums seems to get my forum name right, never mind lol.
