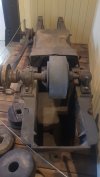
home built grinder 20 bucks

haha. I have a wood lathe :-) I finally managed to remove the flywheel (it took a gear puller and a lot of work, as it was not a screw on type).

Now I have a clear shaft to work with. It is a very funny size (14 mm, .55 inches or close to 9/16). I will make an mdf wheel (by gluing together round pieces, bore it in the lathe to the correct size, dish it and get the little fan from the flywheel attched to the wheel. It cools the dc motor).

I have decided to stick with the DC motor as I already have it, have the controller and will now build the wheel.

I am using the DC Knives plans.

Thanks so much. I will try to get ahold of Way-Barney. Always good to know the locals.

Cheers,
 
haha. I have a wood lathe :) I finally managed to remove the flywheel (it took a gear puller and a lot of work, as it was not a screw on type).

Now I have a clear shaft to work with. It is a very funny size (14 mm, .55 inches or close to 9/16). I will make an mdf wheel (by gluing together round pieces, bore it in the lathe to the correct size, dish it and get the little fan from the flywheel attched to the wheel. It cools the dc motor).

I have decided to stick with the DC motor as I already have it, have the controller and will now build the wheel.

I am using the DC Knives plans.

Thanks so much. I will try to get ahold of Way-Barney. Always good to know the locals.

Cheers,

Hi. I am a newbie here and to knife making. I have made 3 knives with hand tools and a 1x30 grinder. I am now finally building my own 2x72 grinder. Would you be so kind and explain how you built/attached the drive wheel (looks like a PVC pipe) to the flywheel of the motor. I would be much obliged. Thanks so much
If I was building a grinder, IT would not be wood, (see what I did there) we are dealing with hot metal and sparks everywhere a serious risk of high speed stuff dismantling itself and going everywhere. You should learn the metal working skills it will come in handy in the long run.
That being said if your determined to pursue that avenue then locking a wheel onto a shaft usually takes one of two forms, pushing the wheel against a shoulder and then sandwiching it or clamping to the shaft. In the first scenario its like putting a grinding disk onto a grinder where you push the disk against a shoulder and use a locking nut, the second is like a a drive wheel on a fan belt where there is a keyway and then a grub screw to fix against the keyway and prevent lateral movement. If you don't get a solid fixture to the shaft then it will not take long to elongate the hole and and have to clean up the mess and build another one,
 
Absorbing all the comments. I am actually building a full metal grinder. Honing my welding skills for sure. The only part of the grinder that will be wood is the drive wheel.

I have made a plywood wheel last night and will work on getting it attached to the flywheel tonight.

I will post some pictures soon. I am now thinking about how to enclose the treadmill motor somehow to protect it from dust...
 
Just to make sure you know how inexpensive these wheel kits can be - 43£ for all four aluminum wheels with properly installed bearings:

Belt Grinder 2x72 Wheel Set Fits For Knife Grinder 4" Drive 5/8" Bore 3" Track 2" Idler (4" 5/8-3" - 2")​

 
Hi,

Yes, I know. I bought a set minus the drive wheel (£50). All nice and shiny aluminum. I think that for now, I will just get this thing done with the dc motor / controller and a wooden drive wheel. The rest is metal.

I wont bother with an enclosure. Let the motor survive as long as possible. It will allow me to learn and develop at no further cost. When it conks out, I will replace it with a 3 phase motor / VFD. Then it will be trivial to then buy a proper drive wheel to fit the shaft (about £35), have it run in any direction and due to TEFC, not worry about dust :)
 
OK, but at least put a filter laying over it. Just cut out the filter media from an AC filter and wrap it around the open part of the motor. You don't want "conking out" to end up as a fire.

All the enclosure you need is a plastic storage bin that is big enough to cover the open part of the motor. Cut out the ends as needed and set it on top of the filter. Maybe put a brick on it to hold the filter down. As you say over there - Easy Peasy
 
Hi,

Yes, I know. I bought a set minus the drive wheel (£50). All nice and shiny aluminum. I think that for now, I will just get this thing done with the dc motor / controller and a wooden drive wheel. The rest is metal.

I wont bother with an enclosure. Let the motor survive as long as possible. It will allow me to learn and develop at no further cost. When it conks out, I will replace it with a 3 phase motor / VFD. Then it will be trivial to then buy a proper drive wheel to fit the shaft (about £35), have it run in any direction and due to TEFC, not worry about dust :)
wooden drive wheels
wooden drive wheels.jpg
 
I use flat drive wheels and a crowned tracking wheel.

It would have been best to attach the plywood pieces to the treadmill flywheel first and turn on the lathe as one piece to assure centricity.
 
Interesting. I hear from some people that the drive wheel should be flat. Then other people say it should be crowned. So I made it crowned to start. If it works good. If not, I can always flatten it out later.

You are quite right about turning the plywood when it is mounted on the flywheel. I did not have a large enough chuck and did not want to make a press chuck out of wood as the flywheel is so heavy. I think that the wheel is fine. I can always revisit if needed.

As always, thanks for the comments.
 
I think the things to do is have either/or when it comes to crowned wheels. Either the drive wheel, or the tracking wheel, but both is not ideal.
 
When I built my diy grinder, I found old time mechanic's book chart "pulleys for flat belt". I made drive wheel typ1 and tracking wheel typ3. Typ2 is just flat. According to table, you don't need much crown.
 
Continuing the saga! Finally got some time to continue with the grinder. Finished all the welding and components. Now will start working on mounting the motor and electronics onto the base. When all is working, disassemble and paint...

Very exciting :)

Cheers

PS Stick welding is fun but very frustrating! First time for me :)

 
Back
Top