Manix 2 Spring Rate Reduction?

I'm telling you guys, check it out. This sellar has reduced and medium springs and you can get a nitrogen ball also. I also tried cutting the bottom 2 coils and got good results but it does shrink the height of the coil which in turn makes the ball cage not come up all the way to lock. Check this link below.

eBay link removed, read the site rules please.
 
Last edited by a moderator:
UPDATE on my Manix 2 LW...
Rather than wrestle with the chore of disassembling a knife that is riveted together: I decided to try compressing the existing spring fully, and leaving it that way for about a week.
After I pulled out the hunk of metal I used for the chore: it has softened up nicely!
Nothing purchased, and only some time spent on the task...
 
The Manix 2 (non-LW) project:
After staring at the parts for a Month; and realizing that they're not going to install themselves: I've got my courage tightened-up enough to tackle the replacement of the spring, ball bearing, and ball-cup...
So the knife is sitting here with the scales and liner out of the way, and I can see what I need to start trying to lose on the floor... o_O
Does anyone have any advice on how to keep these parts as close as possible?
Any bets on how long it'll take me to lose them??
 
I use magnetic parts trays (little metal bowls) for short term work in progress, and zip loc poly bags of various sizes for longer term storage. I write any notes I might need about the parts on a slip of paper and drop it in the bag with the parts for future reference.
 
I'll actually disassemble directly on a rectangular magnetic parts tray a lot of times to help my odds of not launching anything lol

I cover the inside of the tray in masking tape to prevent scratches
 
Well... the knife is apart, and I've found every screw that I've dropped. (Long story...)
I'm ready to start stuffing parts back together; but getting the ball/cage/spring in place has me back on my heels.
Has anybody got a trick for doing this?
 

Attachments

  • IMG_01122021_124011.jpg
    IMG_01122021_124011.jpg
    312.9 KB · Views: 10
UPDATE: The process is working. I set the ball/cage down in place, pushed the spacer down to where it should be. I then fed the spring onto the cage "strut", held it in place with my thumb, and looked around for help.
When none came running: I carefully took my paws off the knife... Nothing came loose! I quickly cut a small plastic cover to fit over the end of the spring and strut, and gorilla-taped it in place. I took a deep breath, picked the knife up, pulled back on the lock, and prayed while jiggling the blade into place.
So far: so good! 👍 
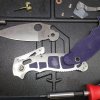
I need to remove all of the non-knife stuff, anchor the backer, add a washer, and get the liner and scales nailed back down.
I'm not yet out of the woods; but I can see greener pastures
 

Attachments

  • IMG_02122021_141304.jpg
    IMG_02122021_141304.jpg
    270.4 KB · Views: 6
EPILOGUE
As they say: "It's soup!"
I got the spacer in place and secured; once I carefully removed the tape and plastic chunk...
Once I had the liner in place: I started breathing normally again.
The Verdict: It's a smokin' hot WINNER!! The new cage gives you a lot better grip, and it is much easier to operate with just your thumb
 
Last edited:
Side by side with my lightweight model
 

Attachments

  • IMG_03122021_113909.jpg
    IMG_03122021_113909.jpg
    88.3 KB · Views: 9
  • IMG_03122021_113932.jpg
    IMG_03122021_113932.jpg
    61.7 KB · Views: 9
Thanks "THAT Guy...", I'm tempted to try it now (gotta buy a Manix first..).

Were you able to lube the pivot amidst all the other action?
 
Yup! I did all of the work from the presentation side... lifted the blade off the pivot, and it was easy-peasey!
(Look at the picture in 27...)
The pivot stayed in place.
Get that Manix: it's a GREAT knife! 👍
 
Last edited:
Thanks, "Bob the Enabler", it's on the list :)

I spent the current knife budget on my first Mule Team MT35P yesterday..
 
Bravo!! 😁👍
We'll need some pics...
 
Last edited:
Back
Top