BryFry
Gold Member
- Joined
- Jul 29, 2009
- Messages
- 1,722
So I customized my Junglas a while back, and posted a few pics...
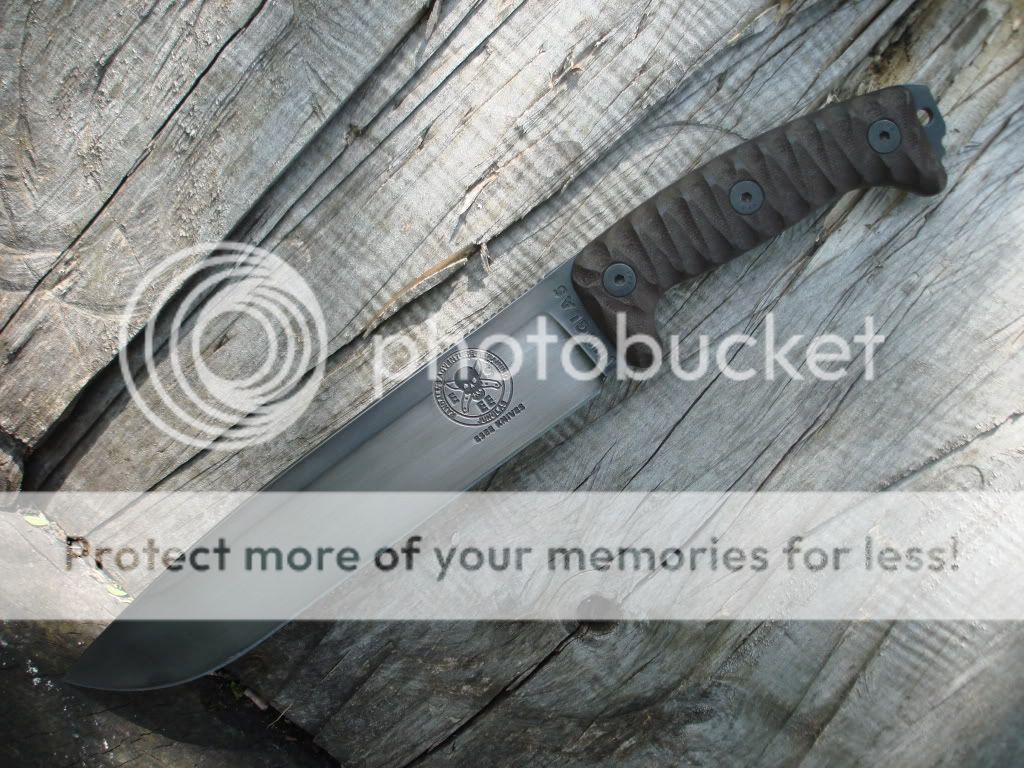

...And got lots of requests for and about it, many requesting pics and info on how it was done. Well, I just finished doing one up for forum member TXHC, and this time I took a few pics along the way. Thought I'd share 'em with you....
Here is a shot of some of the basic tools and chemicals I used...

First step was to remove the handle scales, clean up the blade with water and dish soap, dry, then clean with rubbing alcohol, cover the esee lettering and logos with painters tape, then apply several coats of paint to the exposed edge of the knife. (this is to protect the exposed metal of the edge from the etchant it will soon be soking in)

Ryan requested that I etch TXHC near the handle of the knife. So, that means that I have to draw, then hand engrave it into the paint, thus exposing the metal underneith to the etchant. I used small sharpened files for this. ...took a while to do, and I got some nice blisters on the tips of my fingers from it! LOL!

I then put duck tape over the edge to further protect the edge... Now it's ready for the etchant! For a knife this big I use 2 to 3 bottles of PCB etchant from Radio Shack. And the only non-metalic thing I had large enough to fit this knife was a 10 gallon aquarium! I tip the tank a bit to make the liquid a bit deeper on one side. Tied a string to the butt of the knife for easy extraction.... Then I soke it for a full two days, taking it out to rinse with water and gently clean with a tooth brush every four hours or so.... oh, and I probably should specify that I did not leave it in the position that it appears in the photo, it is only raised up like that so you can see it, otherwise it is unseen under the etchant.")
You may be able to see a piece of plastic in there with the knife too, that is to raise one end of the blade up just a bit because you do not want it laying completely flat on the bottom of the tank. The ethcant would be unable to get to the areas I need it to get to that way!
(by the way... PCB etchant is a liquid that has a strong acidic reaction to non-stainles carbon steel. But has little effect on non metals. So, any bit of metal left exposed to the etchant will be eaten away at by the liquid.)

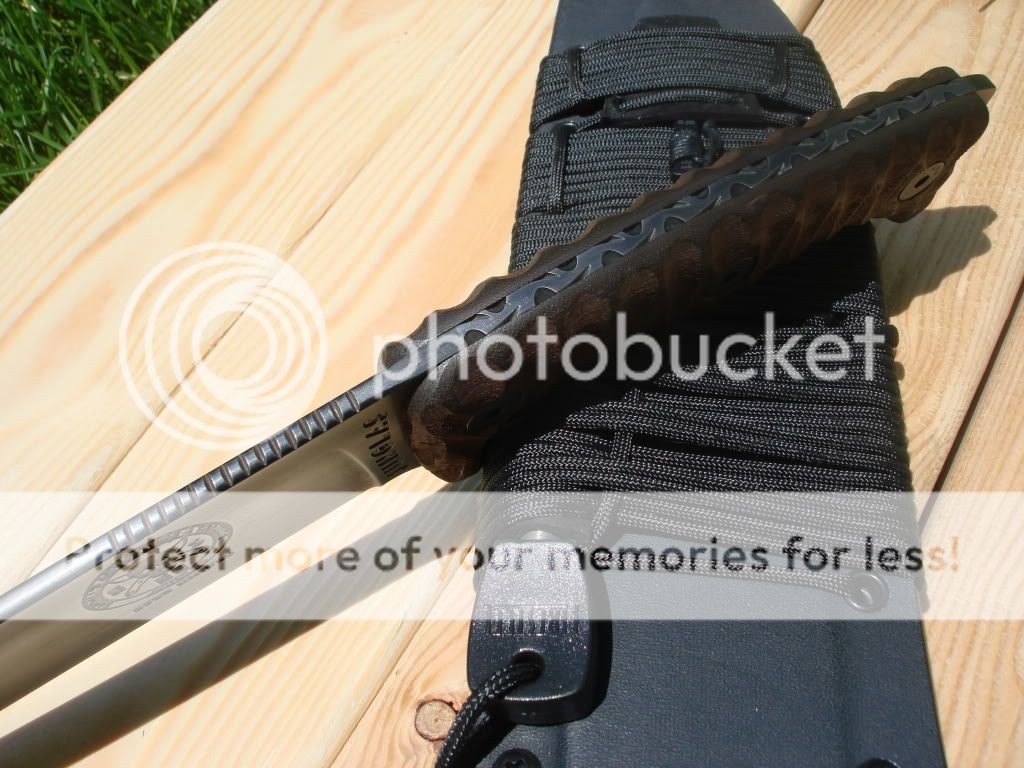
While the blade is soking in the etchant, I take the time to work on the handle scales. I clamp them down then freehand it with a dremel w/sanding drums. Then I hit it with a bit of 130 grit sandpaper to smooth it all out. ....On my other knife I then stained the scales and clear coated them, but Ryan likes the factory color, so I left these that way.

After the 2 day soke, the blade comes out, tape comes off, gets rinsed off, then I take it outside to apply the paint stripper..... This is NASTY stuff, so if you try it, get some thick rubber gloves and do it out doors!!! This stuff will eat right through thin gloves, and burns the skin on contact! You don't want to smell it either. .....Anyway, wipe it on, let it sit a while, then use a plastic scraper and rag to remove....

...And got lots of requests for and about it, many requesting pics and info on how it was done. Well, I just finished doing one up for forum member TXHC, and this time I took a few pics along the way. Thought I'd share 'em with you....
Here is a shot of some of the basic tools and chemicals I used...
First step was to remove the handle scales, clean up the blade with water and dish soap, dry, then clean with rubbing alcohol, cover the esee lettering and logos with painters tape, then apply several coats of paint to the exposed edge of the knife. (this is to protect the exposed metal of the edge from the etchant it will soon be soking in)
Ryan requested that I etch TXHC near the handle of the knife. So, that means that I have to draw, then hand engrave it into the paint, thus exposing the metal underneith to the etchant. I used small sharpened files for this. ...took a while to do, and I got some nice blisters on the tips of my fingers from it! LOL!
I then put duck tape over the edge to further protect the edge... Now it's ready for the etchant! For a knife this big I use 2 to 3 bottles of PCB etchant from Radio Shack. And the only non-metalic thing I had large enough to fit this knife was a 10 gallon aquarium! I tip the tank a bit to make the liquid a bit deeper on one side. Tied a string to the butt of the knife for easy extraction.... Then I soke it for a full two days, taking it out to rinse with water and gently clean with a tooth brush every four hours or so.... oh, and I probably should specify that I did not leave it in the position that it appears in the photo, it is only raised up like that so you can see it, otherwise it is unseen under the etchant.
You may be able to see a piece of plastic in there with the knife too, that is to raise one end of the blade up just a bit because you do not want it laying completely flat on the bottom of the tank. The ethcant would be unable to get to the areas I need it to get to that way!
(by the way... PCB etchant is a liquid that has a strong acidic reaction to non-stainles carbon steel. But has little effect on non metals. So, any bit of metal left exposed to the etchant will be eaten away at by the liquid.)
While the blade is soking in the etchant, I take the time to work on the handle scales. I clamp them down then freehand it with a dremel w/sanding drums. Then I hit it with a bit of 130 grit sandpaper to smooth it all out. ....On my other knife I then stained the scales and clear coated them, but Ryan likes the factory color, so I left these that way.
After the 2 day soke, the blade comes out, tape comes off, gets rinsed off, then I take it outside to apply the paint stripper..... This is NASTY stuff, so if you try it, get some thick rubber gloves and do it out doors!!! This stuff will eat right through thin gloves, and burns the skin on contact! You don't want to smell it either. .....Anyway, wipe it on, let it sit a while, then use a plastic scraper and rag to remove....
Last edited:


 Try and avoid chopping those rocks next time Ryan!
  ....I like to freehand sharpen my V edges on DMT diamond stones, and finish with a leather strop.


