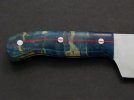
Model K2 Chef Knife Feedback

Sam Wilson

Knifemaker / Craftsman / Service Provider
Joined
Sep 3, 2012
Messages
3,090
I recently posted a thread about my first chef knife, and got some great feedback that helped me a lot. Here is my second set, and the link to the other thread I posted in Kitchen Cutlery instead of retyping everything: http://www.bladeforums.com/forums/s...ife-and-Matching-Utility-Wilson-Custom-Knives

I will post a pic or two here, though, and would like some constructive feedback on the chef knife. Thanks in advance for you help.

104_0540copy_zps88589994.jpg


104_0523copy_zps7aa8959a.jpg


104_0512copy_zpse9a560ab.jpg


104_0529copy_zps8af96358.jpg


Thank you,

Sam :thumbup:
 
Much Much better! I would say the last handle pin is a little off. How are the grinds? Thickness at spine, half, a half inch from tip? Also Distal Taper? Flat or blended convex and finally thickness behind edge? All those things greatly impact the performance of a kitchen knife.
 
Thank you for the input, JMJones. I answered some of those questions in the other thread, but I should have put them here too. Full flat grind, it is distally tapered, although I did not measure the spine after grinding. The edge was .010 before sharpening on the chef, and .015 on the utility. The spine is also radiused. I believe the pin just looks that way because the top half of the pin is beveled into the handle toward the butt, and the pics were shot at an angle. In the link to the thread in Kitchen Cutlery, there are some straight on shots and the pin looks fine. I could be wrong, and it's a little off, but I drew a line though all 3 when I marked them, and they were straight. Thank you again for the compliment and also the input.

Sam
 
Last edited:
Absolutely one of the better shaped pieces of kitchen cutlery I seen on here. thanks for listening. put a bevel of some kind in the front of your handle scales to ease the transition onto the blade and center you handle pins and you will have a very nice knife there. If you are going for a Japanese style knife drop the tip a bit more and take the flat area out of the last fourth of the blade. it should be nearly flat not completely flat.
 
Nice work, i like the blade and handle shape the wood is also very cool. Agreed the last pin needs centered on the handle.
 
Absolutely one of the better shaped pieces of kitchen cutlery I seen on here. thanks for listening. put a bevel of some kind in the front of your handle scales to ease the transition onto the blade and center you handle pins and you will have a very nice knife there. If you are going for a Japanese style knife drop the tip a bit more and take the flat area out of the last fourth of the blade. it should be nearly flat not completely flat.

Bill, thank you very much. I needed some good constructive criticism, and I got it here. I will have to be more careful in the future about pin alignment, but they didn't look off in person. I'm probably biased though, lol. I would like more information about the transition you were talking about. I made the plunge cut about 1/4" in front of the handle scale, and then blended it in so it would be invisible. Is this a bad idea? I really don't know much about the rules for kitchen cutlery to be honest. Thank you again for you compliments and help. Please keep it coming.

Sam
 
Nice work, i like the blade and handle shape the wood is also very cool. Agreed the last pin needs centered on the handle.

Thank you Burton. Well, the verdict is in then: I need to be more careful when drilling the pins :thumbup: Thank you guys for the constructive criticism. I would still be interested to know if I did anything wrong by blending in my plunge line. Thank you,

Sam
 
I would say no. Personally a plunge on thin stock to me doesnt look as good as one that is blended in. A thicker blade with a nice finished plunge looks good IMHO but on these guys a nice smooth transition looks good.
 
the way you did your plunge is fine. I don't think it is Ideal the way you cut into the spine and thinned the blade at the handle. Personally I would prefer that the spine was left at .105 and the blade was distal tapered from there. you can still blend in the plunges like you did but without the steps/plunges in the spine. I was talking about beveling the front of your handle scales from the blade up to the full thickness of the handle, like Nick did here.

medium800.jpg


spine shot,

medium800.jpg


Also notice how His plunges come up close to the spine but don't go all the way through it. you can go right up to the spine but not through it. if you want a thinner knife start with thinner stock.
 
I would say no. Personally a plunge on thin stock to me doesnt look as good as one that is blended in. A thicker blade with a nice finished plunge looks good IMHO but on these guys a nice smooth transition looks good.

Thank you quint. I like the way it looks without a plunge, myself. But, then again, I liked the last chef knife I posted on here too :D.

the way you did your plunge is fine. I don't think it is Ideal the way you cut into the spine and thinned the blade at the handle. Personally I would prefer that the spine was left at .105 and the blade was distal tapered from there. you can still blend in the plunges like you did but without the steps/plunges in the spine. I was talking about beveling the front of your handle scales from the blade up to the full thickness of the handle, like Nick did here.

spine shot,


Also notice how His plunges come up close to the spine but don't go all the way through it. you can go right up to the spine but not through it. if you want a thinner knife start with thinner stock.

Bill, thank you very much for the feedback. And I appreciate you going to the trouble to find and post the pictures. I like the idea of the bevels on the handle scales, and suggested that to the customer, but they wanted a larger shoulder there to make it easier to hold onto in the "pinch grip." I will have to try one with bevels and see, as I think it would be more comfortable to me.

I did take the grind all the way to the spine as you said. I couldn't figure out how else to make the plunge line invisible if I left some flat near the spine. What can I do about that? I would point out that I didn't thin the spine at the plunge, but it does look that way in the picture because I radiused the spine to make it very smooth and not dig in to the palm of the user.

104_0534copy_zps81045c0e.jpg


Thank you both for your feedback, and please keep it coming. I didn't realize how much there is to kitchen cutlery until I did this. I have quite a bit to learn.

Sam :thumbup:
 
The front of the handle is going to get real uncomfortable real quick if it's not rounded (profile) and/or beveled at least a bit. It's basically square in both dimensions now, and frankly if I were looking at that knife on a table I wouldn't even pick it up, simply because of that.

On the other hand, lots of knives with handle fronts like that sell for big bucks, so what do I know :p
 
I think when you round the spine and the bevel is that far up there that it acts like cutting into the spine with the bevel. Hope that makes sense. Basically leave the bevel slightly lower and round the spine and it should stay nice and uniform.
 
Sam, thanks for opening yourself up for feedback. I have learned a lot from these threads. :thumbup:
 
Bill, thank you very much for the feedback. And I appreciate you going to the trouble to find and post the pictures. I like the idea of the bevels on the handle scales, and suggested that to the customer, but they wanted a larger shoulder there to make it easier to hold onto in the "pinch grip." I will have to try one with bevels and see, as I think it would be more comfortable to me.

I did take the grind all the way to the spine as you said. I couldn't figure out how else to make the plunge line invisible if I left some flat near the spine. What can I do about that? I would point out that I didn't thin the spine at the plunge, but it does look that way in the picture because I radiused the spine to make it very smooth and not dig in to the palm of the user.

104_0534copy_zps81045c0e.jpg


Thank you both for your feedback, and please keep it coming. I didn't realize how much there is to kitchen cutlery until I did this. I have quite a bit to learn.

Sam :thumbup:

that is the picture that I looked at thinking you went through the spine. one way to make plunges less visible is to line the front of the handle scales/bolsters up on top of them so the handle drops right into the plunge. the rounded spine is a good thing. sometimes customers only think they know what they want.
 
Love these threads, I learn so much.
To me, pin placement looks best when they follow the curve of the top of the handle, and are slightly above the center line (closer to top of handle.) Just a squeak makes a lot of difference.
 
Sam, thanks for opening yourself up for feedback. I have learned a lot from these threads. :thumbup:

I'm a glutton for punishment, Willie, lol. :D Believe me, I have learned a lot too. I love to see my friends ooh and ahh over a knife I have made as much as the next guy, but it's hard to learn anything objective, since most of them don't know much of anything about knives. I showed a knife to a friend of mine and asked him what he thought. He tells me after examining it that it's razor sharp, and one of the sharpest knives he's seen. I didn't have the heart to tell him that I hadn't even ground the edge on there yet :rolleyes: .

But I thank everybody in this thread so far for the input. I know for sure a few things I will do differently in the future. I hope I haven't sounded like I'm arguing with anyone, as I just want to make sure that it's clear why I did things the way I did, and sometimes pictures can be deceiving.

Now, a couple of questions about pin placement. What I did on this one is I centered the middle pin between spine and edge, and then lined up the other two with it. Elementfe has mentioned running them just a hair closer to the spine, which sounds nice. Any other thoughts or general rules for doing it? Thank you in advance for the help.

Sam :thumbup:
 
I think the idea with the pins is rather than having them lined up with each other, they should line up with the curve of the handle.
Pardon the very crude MSPaint skills; the red line is a trace of the curve of the spine on the handle. This isn't exact but I think it's what people are talking about.
104_0529copy_zps8af96358.jpg
 
I think the idea with the pins is rather than having them lined up with each other, they should line up with the curve of the handle.
Pardon the very crude MSPaint skills; the red line is a trace of the curve of the spine on the handle. This isn't exact but I think it's what people are talking about.
View attachment 405825

Don't worry, that gets the point across. I think that would look nice, I had just always thought the pins had to be in a straight line. Personally, I think that looks better, but I don't know what the "rule" is on this. Thank you for the illustration.

Sam
 
i love this knife! the only changes i could think of would be purely aesthetic, not anything of function. looks great!
 
Now, a couple of questions about pin placement... Any other thoughts or general rules for doing it? Thank you in advance for the help.

Perfectly-centered and spaced pins/bolts look weird, and confound the human eye. Forget about straight lines. We are not making rulers, we're making knives.

Once you've established the basic profile of your handle, mark a point at the center of it, regarding both length and width. Then scribe a line following the top of the handle that nearly reaches the center, but never drops below center. It is always best to be slightly above center, rather than perfectly even or slightly below. Space your pins/bolts almost evenly along that line, but bias the spacing slightly towards the blade.
 
Last edited:
Back
Top