- Joined
- Mar 18, 2008
- Messages
- 176
Well this is my first forged knife (also Looks like my first time with a camera). Sorry the pictures are not the best but you get the general idea. Any pointers would be much appreciated whether its on the knife or the picture taking!
I forged this from a bmw coil spring, not really sure what type of steel it was. I heated it and did the old magnet trick and then quenched the edge in oil. I still have to do some buffing on it but I will keep everyone (who cares) updated on my progress.
The handle is from an Adirondack whitetail and the spacers are buffalo horn.
I did some file work on the spine but the picture is kind of rough!
Everyone on here has been extremely helpful in the past so any further input would be great.
Thanks
Dan

 [/IMG]

I forged this from a bmw coil spring, not really sure what type of steel it was. I heated it and did the old magnet trick and then quenched the edge in oil. I still have to do some buffing on it but I will keep everyone (who cares) updated on my progress.
The handle is from an Adirondack whitetail and the spacers are buffalo horn.
I did some file work on the spine but the picture is kind of rough!
Everyone on here has been extremely helpful in the past so any further input would be great.
Thanks
Dan

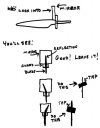
") I played hell getting a handle fitted up, and finally just took what I could get and chalked it up to experience. Now I have a way to approach a correction; thanks! Except I have a question.
I played hell getting a handle fitted up, and finally just took what I could get and chalked it up to experience. Now I have a way to approach a correction; thanks! Except I have a question.