My last hand filed knife : Turning into WIP( pic heavy)

Joined
Apr 2, 2011
Messages
425
Well I got my craftsman 2x42 and am waiting on my belts ( Canada Post strike) and to move out of the condo so I can use it . I got a piece of CPM S35VN 1/8 x 2' about 9 inches long that I've descaled and sanded flat. I've only made 2 knives before both Loveless style drop points ( I hate attaching that name to the monstrosities I made). I want to make a knife for a friend I served with in Afghanistan who is back there . I was initially thinking of making something similar to the ZT 0121 , but less fancy now I'm second guessing that type of design. It will be mainly used as a utility/edc knife to be used and abused.

I'm not asking for someone to make me a design , just a little push in the right direction of what a very beginner should try to make for this situation. Examples are welcome, I have the L Harding templates and a bunch of knife making books, loveless,etc. Here is pics of my last knife I just finished waiting for HT to show my skill level or lack thereof .


Thanks
 
Last edited:
I would either crisp up the drop transition on the spine, or smooth it out into one smooth curve. it looks kind of akward. I think the handle also looks a bit chuncky, I would try to ad some curves on the underside, to make it more comfortible
 
I would either crisp up the drop transition on the spine, or smooth it out into one smooth curve. it looks kind of akward. I think the handle also looks a bit chuncky, I would try to ad some curves on the underside, to make it more comfortible

thanks for the advice on that knife , I'll make some changes . But I'm looking to make a new knife too.
 
Can't tell what you have in mind for the handle, but I have really messed up on front pin placement when I didn't think enough about guards etc.
 
Can't tell what you have in mind for the handle, but I have really messed up on front pin placement when I didn't think enough about guards etc.


It's going to get some black linen micarta , one corby and a ss thong tube. The other holes are mistakes , any advice for the new knife style.
 
The bottom of the handle looks very straight, some curves are likely appropriate.


Pin holes should be on centre line, or slight above, it's in one of Bobs books or videos - even if you put on perfect center line, they will LOOK low.
 
Well some design points for an edc knife for a soldier: don't make too fine a tip, it will get used for prying. Maybe expose the last 1/4" of tang beyond the scales for whacking things. I wouldn't make the blade more than 6" as any bigger is a pain to carry. I would include a small V notch for stripping wire, maybe on the spine edge. Finger notches look cool, but limit grip options. I would include a small sharpening stone with the knife so your friend doesn't have to look for one. Edge geometry is paramount! Just as important as heat treat.

This is all I can think of at the moment. I am sure someone else will chime in.


-Xander


Thanks for the response, I was in the army for 12 yrs and a paratrooper with 3 tours of duty. I'm just trying to think what I can do with the CPM S35VN since I have just hand files and limited skills/experience to work with. I like the lines and shape of the Zero tolerance 0121 and am thinking of using that type of outline minus the cut in edge and a simpler ricasso transition or make a drop point hunter style with a bit thicker blade. I know a lot of soldiers like tanto's but in experience I never liked them . I was issued a jump knife and a bayonet , in the sandbox i ditched the bayonet and carried the jump knife and a gerber multi-tool which I jerry rigged all kinds of things with on ops.
 
Last edited:
I would go with a fairly simple single edge drop point design. I personally avoid false edges, choil notches, and sharp "glass breaker" points on the pommel, although they are fairly common features on tactical knives. I also like a distinct guard that protrudes from the edge side.
 
I would go with a fairly simple single edge drop point design. I personally avoid false edges, choil notches, and sharp "glass breaker" points on the pommel, although they are fairly common features on tactical knives. I also like a distinct guard that protrudes from the edge side.

Thanks , that's probably my best bet for success with this project. Once I make it I'll post a pic to show how it worked out.
 
With regards to tanto style blades, I like the general blade shape of Cold Steel's Master Tanto but without the secondary point. If I had a knife with that same gentle upsweep of the blade, but with the secondary point rounded off then that would be my ideal combat knife. You get the very strong point without the limited uses of the secondary point. I also second the recommendation of a pronounced guard. Make me one of these and I would be a very satisfied Soldier/Marine.
 
Thanks , that's probably my best bet for success with this project. Once I make it I'll post a pic to show how it worked out.

No need for thanks, if anything I should be thanking you for your service. I will look forward to seeing what you come up with.
 
I'm going to make some changes to that drop point tomorrow and fix the big problems identified , I've also almost finsihed profiling my new knife. I ordered an expensive file guide since I've had trouble with ricasso and plungle cuts in the past . Canada Post is still on strike ( glad I paid for express mail for $30 more for nothing) so I'm wondering if I should put off doing the plunge cuts and ricasso. Or could I just save some space and go back to it . Regardless still work to be done to get to that phase, a little more profliling. I ended up going in a different design idea, we'll see how it turns out .

a few pics from profiling the new blade:


Very cool design man. Kinda reminds me of the zero tolerance fixed blade... what are the specs on this one?

I feel you on the strike... I STILL have 4 blades at heat-treaters waiting to come back to me, and i ended up getting my jantz order couriered because I'm bored outta my mind with no steel to grind on.


Made some changes to that first knife , fixed up the transition on the spine I might change the front handle hole now . The placement looks off a lot more now .I'm not sure I'm to happy with what I did to the underside of the handle still gotta smooth it out a little. This is only the second knife I've made . My new knife is blued up and ready to be scribed and the initial 45 degree edge on.
 
I have a trick for plunge cuts that might help you out. A photo is worth a thousand words with this setup so I'll see if I can get one or two and PM them to you.
The new design looks good but the recurve might be a challenge to grind, you might practice that before going to town on the blank.
 
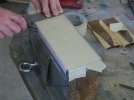
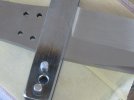
On second thought, I'll just post 'em up here. Basically I just get them as even as I can on the grinder, with the belt hanging over the edge of the platen a little so they are slightly radiused, then I use the radiused corner of a granite plate covered with sandpaper to hand-lap them. This obviously works best with a flat grind, because the bevel is used to establish the angle of the plunge. The corner of the plate is radiused to provide the radius I want in the finished plunges. Any hard material such as metal, micarta, G10, etc. can be used for the plate.

I use a file guide on the blade to guide it along the edge of the granite and keep the plunge straight. The placement of the file guide is key and takes some figuring out. Occasionally I have to move it back to get rid of a deep scratch or corner in the bottom.

The flat surface of the sandpaper is covered with masking tape so that the corner of the plate is the only area with exposed abrasive. I move the sandpaper and tape as needed to keep fresh abrasive at the corner, and usually finish the plunges to one grit finer than the final blade finish, before doing the in-line hand rubbed finish. This method will cause wear on the file guide unless you use tape to cover the abrasive on the edge of the plate, I don't usually bother, it seems easier to me to just true up the face of my guide periodically.
IMG_1618.jpgIMG_1620.jpg
 
I have a trick for plunge cuts that might help you out. A photo is worth a thousand words with this setup so I'll see if I can get one or two and PM them to you.
The new design looks good but the recurve might be a challenge to grind, you might practice that before going to town on the blank.


Sounds great thanks , I've never tried to file a recurve so this will be a big learning process as I go. I was thinking of putting a false edge on top , either that or take the bevels fairly high. Like slightly higher than the tip.
 
On second thought, I'll just post 'em up here. Basically I just get them as even as I can on the grinder, with the belt hanging over the edge of the platen a little so they are slightly radiused, then I use the radiused corner of a granite plate covered with sandpaper to hand-lap them. This obviously works best with a flat grind, because the bevel is used to establish the angle of the plunge. The corner of the plate is radiused to provide the radius I want in the finished plunges. Any hard material such as metal, micarta, G10, etc. can be used for the plate.

I use a file guide on the blade to guide it along the edge of the granite and keep the plunge straight. The placement of the file guide is key and takes some figuring out. Occasionally I have to move it back to get rid of a deep scratch or corner in the bottom.

The flat surface of the sandpaper is covered with masking tape so that the corner of the plate is the only area with exposed abrasive. I move the sandpaper and tape as needed to keep fresh abrasive at the corner, and usually finish the plunges to one grit finer than the final blade finish, before doing the in-line hand rubbed finish. This method will cause wear on the file guide unless you use tape to cover the abrasive on the edge of the plate, I don't usually bother, it seems easier to me to just true up the face of my guide periodically.
View attachment 220087View attachment 220088


I think I understand the principle here , I'm only using hand files on this so the recurve should be less likely to be rounded ( in theory in my head) my only problem is my file guide that I made sucks balls and is thin and bent up . I doled out $50 for a nice one from jantz supply and it's sitting in a box with the rest of an order at the US border right now waiting for the postal strike to end. I want to get going on this knife but don't want to shoot myself in the foot at the start. I rounded the bottom of the handle a bit on that mini drop point this afternoon , it looks smoother now then that pic from earlier today.


Here's a small update


Last edited:
Back
Top