New guy, hamon question

Joined
Mar 21, 2016
Messages
272
First post but I have been lurking for awhile, there is a ton of information here and I have been studying for weeks.

I made a couple knives as a kid with an old man who was a friend of my grandfather, and a conversation with a friend a few months ago sparked my interest again.

Bit of background, I have worked with my hands all my life, from cars and motorcycles to amplifiers and guitars. ( currently the work on amps and instruments is my side job).

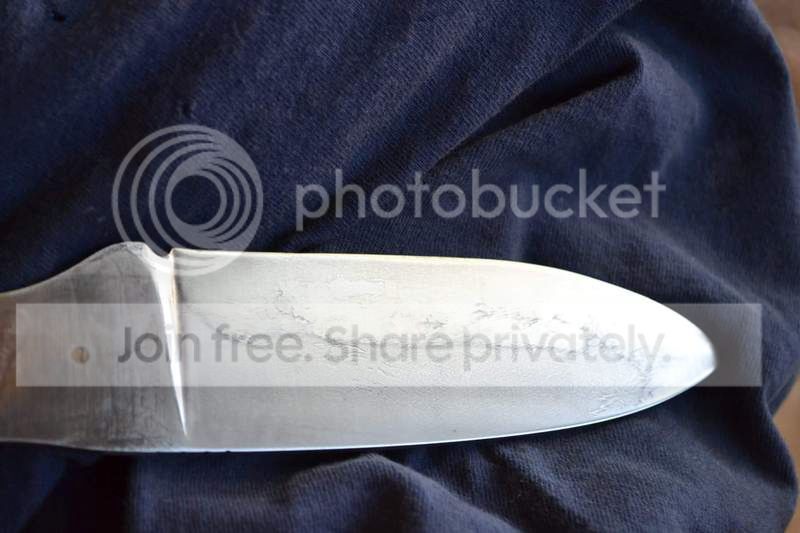
So to the question, this is knife number 2 or 3 (I have 3 I'm working on) and there is some crazy hamon activity going on, but I'm not sure if I can bring it out more. ( also not sure how well it photographed).

This is 1095 clay quenched, the hamon area is quite a bit bigger than where the clay was also. It was etched at 1000 grit in ferric chloride, than polished to 1800 grit.


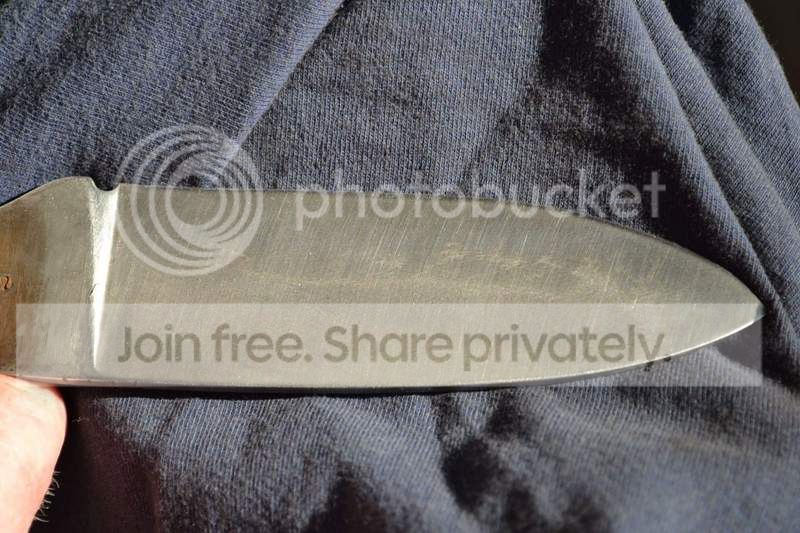
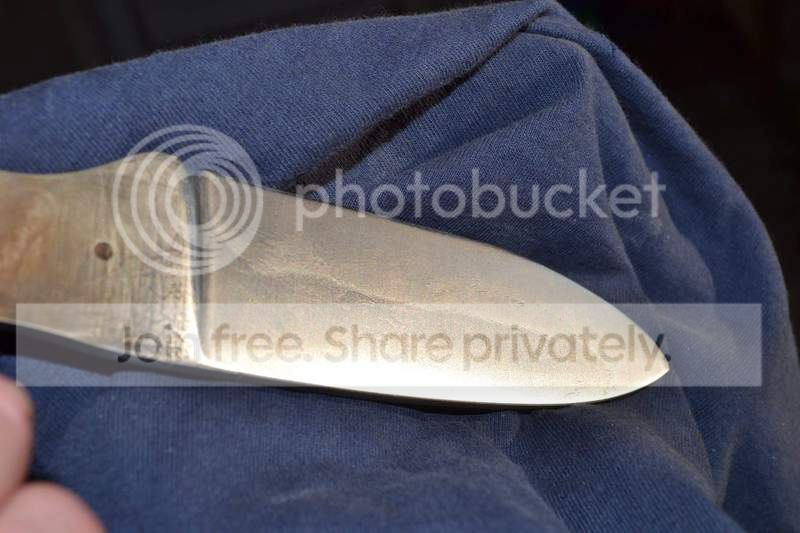
Seems like the photos look a little different than real life, but hope you can see what I'm talking about, so is there anything I can do to bring it out more?

 
It looks like there are still grinding marks in the blade. Sand with 220 until they are gone, and go up grit by grit to 1000 or more, look up Nick Wheeler's hamon polishing tutorial. There is a lot of great info in there. Try different etchants. I like vinegar, then lemon juice. Others like ferric chloride.
 
That's not an 1800 grit finish. I can see grinder marks for sure all down the blade in the first pic. You need to drop back to like 400 grit maybe and start hand sanding. When you get to 1000 grit, with no deeper scratches under the finish (change direction by 45 degrees or so every grit step) Then etch. You didn't mention what you etched in, but I hope its ferric chloride. Dilute it 4:1 or so with water, and do multiple etches for a minute or two at a time. Until the blade goes all black. Then pull it out, scrub the oxides off with flitz or something, wash hard with detergent, etch again. Every time the hamon should pop a bit more. Don't sand in between etches, just scrub clean.
After the last etch, polish with flitz and leave it that way, with a little oil rubbed onto the surface last.
You should get a good vivid black hamon. If you want a white hamon with all of the activity brought out, you will need to research hybrid polishing and go with some different etchants and methods.

Yeah I knew I still had some scratches in it, I realised I had rushed it and was pretty far into it. I did use ferric chloride but I don't think the dark hamon is what I'm looking for.

Thanks for the replies.
 
1 part ferric, 4 parts water.

You can get a white hamon, beginning with ferric chloride. Etch and scrub until you have a vivid black line. Then, lightly sand the blade clean with 1500 paper. This is just to take the black off, the hamon should be visible and beautiful but white and only in the right light. It should be invisible, viewed straight on from the side.
Then proceed with heated fresh lemon juice etched, or heated vinegar with detergent- scrubbing in between etched with a slurry of 1500 grit silicon carbide rock polish or 4f pumice or rottenstone in water or oil, until you have a beautiful white habuchi that is quite visible viewed from any angle in most lighting, but POPS when viewed from a certian angle in a certain light. White fluorescent light helps to see this.

You can do all of it without ferric, but ferric saves a lot of time in cutting your etch deeply, before finishing up with the milder acids.

Here's a pic FWIW of a blade of mine, etched in the above fashion...
DSC03855.JPG
 
Last edited:
Thanks guys.
Here is what I tried tonight and what I got so far on my 2nd hamon knife. I got a lot more polishing to do I guess.
25973058290_cb4005af40_b.jpg
 
Last edited:
1 part ferric, 4 parts water.

You can get a white hamon, beginning with ferric chloride. Etch and scrub until you have a vivid black line. Then, lightly sand the blade clean with 1500 paper. This is just to take the black off, the hamon should be visible and beautiful but white and only in the right light. It should be invisible, viewed straight on from the side.
Then proceed with heated fresh lemon juice etched, or heated vinegar with detergent- scrubbing in between etched with a slurry of 1500 grit silicon carbide rock polish or 4f pumice or rottenstone in water or oil, until you have a beautiful white habuchi that is quite visible viewed from any angle in most lighting, but POPS when viewed from a certian angle in a certain light. White fluorescent light helps to see this.

You can do all of it without ferric, but ferric saves a lot of time in cutting your etch deeply, before finishing up with the milder acids.

Here's a pic FWIW of a blade of mine, etched in the above fashion...
DSC03855.JPG

Thanks again for the reply. Yesterday I went back and sanded from 220 to 1000, then etched again. It has a nice dark hamon, needs more polishing for sure.

I am going to work on it today and then try to get a couple pics in the sun.

Edited to add, that knife in the picture is amazing, that is what I wanted the hamon to look like, not as much activity on mine, but that's what I'm going for.
 
One more question, I went back and re sanded to 1000, I started at 220 and sanded wet through all the grits using water, should l be sanding dry at first or is wet OK, also is water a suitable lubricant for the initial sanding?

I had planned on using a light oil after etching, and since I don't have any flitz or loose abrasive on hand could I use baking soda?

I also have some small sanding/polishing pads that are very fine,up to about 8000 grit.
 
Some of the other metal polishes will work. Simichrome, even brasso. If it has a chemical tarnish removing agent that smells like ammonia, it will be similar to Flitz but just probably not quite as good IME. Even NevrDull wadding compound will work, I believe someone told me. You could try it. The point is to get that black crud off the blade from the etch cycle. Abrasives will tend to take your hamon as well.
After etch, neutralize with windex/ammonia. Or, baking soda in water. I think baking soda will just dissolve rather than help you scrub oxides.
You may not have FLitz on hand, or loose grit abrasives or pumice, but if what you want is great results, these things should be obtained- especially when learning, substitutes won't get you the finish you deserve for all your hard work. The devil is in the details, as they say.
Sanding wet will help your paper not clog, and water is all I use. Many other things are used by folks, including Mobil oil, WD, and Simple Green... but I'd rather have water all over my hands than any of those other things! I sand dry only when pulling a final finish.
 
thanks for posting this, great info
 
Thanks again I really appreciate you taking the time. I think I may stop where I am until I get some abrasive, no place that I know to get it around here so I'll have to order it.

When the wife gets back I will get some pictures and again thanks for taking the time.
 
Not the best pictures in the world but here is where I am right now.

The least active side.


like this better


While I was sanding it gotvery sharp, nearly had an issue but didn't draw blood thankfully.

I have 2 more heat treated with clay, at least one of those is going to be a dark hamon, I want to see what that is like too.
 
It looks like you still have some decarb to go through. Back to 220, sanding until the decarb is gone, then up through the grits again. It's a pain in the xxx, I know.
 
It looks like you still have some decarb to go through. Back to 220, sanding until the decarb is gone, then up through the grits again. It's a pain in the xxx, I know.

Wouldn't be so bad if I had done it right the first time. I am definitely learning as I go this is the first time I have messed with clay and hamons, I'm sure the next will be much easier.
 
Another question (seems like I have a lot of those), is there a way to help prevent de carb?

I'm working on one of the others and think I'm off to a better start, though I'm sure I will make some mistakes along the way.
 
Some people use a light clay wash over the blade before the thicker clay for the pattern. I don't. I leave my blades at 0.030" at the edge before heat treat. There can be up to 0.010" of decarb to go through, but it's usually about 0.005". I leave extra as I've had a few that ended up too thin before getting through the decarb. I do the normalizing and thermal cycling before grinding the bevels. If you do the bevels first, then cycle, the decarb will be deep.
 
Little update, I took a break for awhile due to time and stocking up on sandpaper, belts and grit, i took it out today and I was going to etch and scrub with the loose abrasive and crap, there is some very fine pitting on the blade.

I had wiped it down and oiled it with some olive oil, (first oil I came to), but that was a couple weeks ago.

So I guess I am going to try sanding again and see if I can get the pitting out, this knife may drive me mad before it's over.

Anybody ever had one with very (I mean very) fine pitting and did it come out?
 
Back
Top