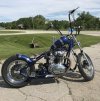
New member, first blade

Joined
Jul 6, 2024
Messages
18
Hey everyone! I’ve been a long time lurker and finally joined up. I just started bladesmithing literally 3 weeks ago but have been a long time welder, fabricator, and custom chopper motorcycle builder for the past 7 years. I’m not gonna lie, The TV show Forged in Fire is a favorite of mine and I started bladesmithing after years of watching it and just being into metal fabrication in general. Being a natural metal fabricator, bladesmithing just interests the hell out of me so I decided to give it a try.

Of course being the metal fabricator that I am, I decided for my first knife I was going to do a low count Damascus (which I know, is not a starter technique but I’m a go big or go home kind of guy lol) with only 9 layers of 1095 and 15N20.

I also fabricated a press out of a 6 1/2 ton log splitter because even hammering 9- 1/8”thick layers of Damascus is a mother f’er.

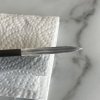
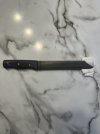
So anyways, I built my first knife and here it is. I used 20 mule team borax as flux and a rounded head hammer to set the welds and they welded like I hoped they would. The knife, after grinding, ended up being about only 5 to 6 layers because I got too excited and started grinding it way too thick before I drew it out to the thickness I actually should’ve needed.

Anyways, this is my first knife so take it easy on me. But at the same time I’m here for advice so if you have some for me, please, let er’ rip!
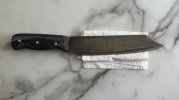
IMG_6381.jpeg
IMG_6382.jpeg
 
Congratulations on your first knife, it looks pretty good!
My advice would be
a) look at existing knife patterns/templates and pick one to shoot for, rather than making your own design (I assume that's the case here). Just now I rehosted knife patterns from Dan Comeau as his site appears to be breaking down (due to his passing). I'm sure you can find some nice patterns there - https://respite-engineering.com/knifemaking/dcknives-blogspot-knife-patterns-reupload/
b) bring the bevel higher up the blade, as it seems that right now it's more of a chisel than a knife (esp. given the spine thickness).
Keep us posted on your future knives.
 
Yeah you were pretty spot on as far as your assessments. I didn’t go into it with any “plans” so to speak because I didn’t know what to expect with forging. I think I was just so focused on forge welding the 9 layers correctly that I was just happy when that happened. lol I kind of just let the steel take me wherever but I definitely plan on following a template next time.

And yes, as far as the bevel goes, my plan WAS to bring the edge bevel up almost all the way to the spine so I could see all the layers when I etched it but I’m working on a kind of sub-par 4x36 belt grinder and a lack of patience lol so I never made it there. I think I’m going to re-work it though and try my best to get that bevel up to the spine.

As far as grinding in that bevel, would you grind that bevel perpendicular to the belt or would it be better to run the belt parallel with the blade from tang to tip?
 
No worries, I completely understand what you are saying. The bevel on my first knife was also farther away from the plan than I wanted.
The grinding is conventionally done with the knife being perpendicular to the belt movement direction, edge being up facing the belt (rather than trailing it), if that makes sense. I'm sure you can find lots of guidance on youtube (or here on the forums for that matter) for that. The parallel (or length-wise) scratch pattern you may see on finished blades from other makers is generally achieved with hand sanding.
 
Gotcha, I’m gonna rework it because right now it’s more of an Appleseed grind than a flat grind. Thanks for your response, encouragement, and advice!
 
Welcome and good job for a first knife.

The main thing that caught my eye was the handle-blade transition. The front of the handle should have gone a little farther forward to cover that dip at the spine. Also, the handle at the blade throat (where it curves up to the handle) should meet the blade evenly and not stick out. You can still fix that.

The second issue is the rivet placement. They should line up and be centered on the handle.
As far as your first critique, yeah, the handle was supposed to be further forward but when I drilled my pin holes something got messed up that set the handle back a little too far.

As far as the blade at the throat, are you saying I can fix it by sharpening the the blade all the way back to the handle? Otherwise I’m not sure what you mean as far as fixing that.

And as far as the pin alignment goes, yeah, I fubared that up. That was another pin alignment issue I had. It’s weird, it’s like I’m usually very good with measurements and lining things up, but once I drilled my holes through the tang and then the scales, it was like NOTHING wanted to line up.

As far as through tang knives, what is the way you all do them? Like what’s your process to make sure everything lines up?
 
B breakbeatz69 very nice for a first piece and kudos to you for throwing it out there. That's not easy to do, but you wanted some good criticism....this alone will make you a better knife maker in time!

Regarding pin alignment, here's a tip: perceived smooth arcs and straight lines that flow through the handle form, are visually appealing. Until you get better with placement of your holes accurately on your tang, consider the look the line or arc will take and give yourself some room for error in the design. An example: looking at the line or arc of your pins, they slope down when scanning from tail to tip...the blade swoops up. Knowing the blade will swoop up, then set a visual reference in your head that your front pin can never go lower than your back pin. They may not align perfectly where you want them until your processes improve, but they will be more in tune with the overall design. This all makes 100 percent sense in my head but its not so easy to explain I'm seeing 😂

P.S. Your pins aren't that bad at all, and the knife will NOT fly apart from any known natural forces :)

Nice job and welcome to the madness.
Hey thanks a lot! Totally understand what you’re saying when you talk about aligning the pins.

And as far as the knife potentially flying apart, I took it outside and beat the sh*t out of it into some newly cut oak fire wood I had (still wet and not split, I have 11 acres of woods that I take fire wood from) and it took it like a champ. Nothing loosened up and my heat treat must’ve been good enough because there wasn’t a mark on the blade edge whatsoever when I was finished. (It was sharp enough to cut paper cleanly when I finished it and it still does) I chopped at that wood probably 20 times and I bench press almost 400 lbs (not that bench press has a ton to do with swinging a knife other than I gave it my all with my strength) and that blade took everything I had.

It’s funny because I told my wife all these things because I was super proud and she was like “yeah whatever” while I was super impressed with myself. Lol
 
Congrats on sharing your 1st and completing it. It will always be a piece to cherish as well as look back on to see how far your skills have progressed. Take note of what the other members have suggested and work on those tips for the next one. Something that worked well for me was to stick with the same pattern and steel for the 1st few knives and master every aspect of that until you feel like its money. Then pick another pattern and repeat. Keep hammering and grinding away!
 
Congrats on sharing your 1st and completing it. It will always be a piece to cherish as well as look back on to see how far your skills have progressed. Take note of what the other members have suggested and work on those tips for the next one. Something that worked well for me was to stick with the same pattern and steel for the 1st few knives and master every aspect of that until you feel like its money. Then pick another pattern and repeat. Keep hammering and grinding away!
Right on! And thanks!
 
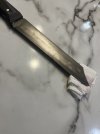
So I got some ceramic belts in the mail this afternoon and thought, “What a great time to put the blade on a weight loss program and bring the bevel of the edge up higher to the spine. I refined the handle also to try and straighten things out and this is what I got…
IMG_6385.jpeg
IMG_6386.jpeg

Now it has a really cool Damascus pattern on the sides but being only 9 layers it’s hard to see unless you catch it in the right light. I’m using ferric chloride to etch. How do I get my pattern to be more pronounced without just darkening the blade completely? Do you all etch for a long time or just a little time? What are the tricks to making that Damascus pattern really “pop” in any lighting??
 
Pretty good first go Round. 👍👍👍........A+++ for your efforts
All that other stuff comes with time and practice.-------- which.is knowledge earned👌......
Keep em coming and thanks for sharing your work with us....🙏
 
Better, I would leave this one alone now and work on Knife #2.

It is a bit "stiff". Many first knives have a look we humorously call, "Sharpened bar of steel". Some knives are deliberately made that was for a specific use in butchering and meat carving, but most knives look better with a tiny amount of curve in the handle and/or blade. Changes as small as 1/16" can visually make a blade have "flow". Look at some photos of knives and notice how the handle usually has a little drop to the butt and a slight curve on the bottom to fit the hand. The blade is often ever-so-slightly curved down along the spine and up along the edge as well. On both handle and blade a small amount is far more pleasing that a large curvature or many dips and curves. Simple is the answer to most design elements.

What I was saying about the place where the handle sticks out past the blade on the bottom where the blade curves up was to grind/sand the finger groove in the handle back until it meets the blade ... thus removing that little projection. I can't quite see in the dark photo, but it looks like you have done that now.

TIPS:
A lot of us start with designing the knife on paper and then cutting it out in cardboard or thin wood. This serves as a template for the blade and handle in making the knife. I know folks with buckets full of cardboard or wooden knives that serve to help make beautiful, finished blades repeatedly. I often glue the paper "knife" on the steel and use it to cut out and shape the blade blank.

A tip that works especially well when you are new is to not drill the tang holes in the blade until the blade is ready for HT. Then mark them and drill them about 50% oversize. The extra space will allow a little wiggle room for the pins in fitting the scales. Then do the HT.

After HT and all final sanding (but not sharpening), lay the blade on a sheet of cardboard and trace around it, also marking the tang holes. Do this several times about 3" apart down the sheet of cardboard. Now, draw the proposed handle shape on the first blade outline. Refine or change it on the other outlines until you get what looks best. Cut that "knife" out and test it for "feel in the hand". If it is a go, use it to mark the profile on the scales. You can cut the scales to shape, but still leave a little extra for shaping after assembly. Lay the blade on the scales and drill the holes in the scales as the last step once everything looks right.
If you need to change the tang shape to make a handle work better this method allows doing that before it is too late. Having a few carbide drill bits around to move a tang hole in a hardened blade if needed is also a good idea.

A good tip for cleaning up the place where epoxy bead that collects at the ricasso (flat area where the blade meets the handle) is to make a brass graver. Take a piece of 1/4" brass and grind the end into a sharp graver. Use it to cut away the dried epoxy squeeze-out. The brass won't scratch the blade. You can make a nice handle for it and have a tool that will last a lifetime. Resharpen as needed.

Fill out your profile with your location and some info about you. It helps us with answers and may get you in touch with a local knifemaker or offers of free supplies and equipment.
If I could double “like” the effort you put in to explaining all that stuff to me I would’ve. Lol Thank you sooooo much for all of that info. I’ll definitely take all that advice going into my next blade. This knife I made I honestly didn’t make any kind of template mostly because I didn’t expect myself to be successful at forge welding the 9 layers of 1095 and 15N20 together successfully. Lol I pretty much went into it as learning experiment and didn’t actually think I would come out with a functional blade. I think at this point I’m going to take a step back from the Damascus and just use some 1084 flat stock I have and work on forging those into shapes to match a template and then I’ll revisit Damascus pattern blades.

The cool thing about being a custom bike builder and an auto technician is I have a lot of the tools and tricks already to manipulating steel in my proverbial toolbox. I actually was a professional firefighter and paramedic for a decade up until a year and a half ago when I decided to leave the fire service due to burnout and PTSD. Leaving the fire service was one of the most difficult decisions I ever made in my life but the cool part about being an automotive technician now is that I have an unlimited supply of scrap steel I can take from work. I already have some coil springs and some leaf springs I got from work but until I feel comfortable forging, I’m going to stick with clean high carbon steel flat stock for my first blades.

Anyways, thank you for your help and encouragement and thank you to everyone else that came in my thread to comment. There’s a few bladesmithing forums out there but I’m starting to feel like I picked the right one to join just from the positive and helpful comments I’ve received here.

Well, onto the next blade!
 
I haven't read all the replies, so apologies if this has already been said, but there are two things that stand out to me with this knife;
-the notch between the handle and blade on the spine looks to be a pretty bad stress riser
-pins look best when they're centered along the width of the handle and spaced evenly between each other and from the ends

A question for you- are you building bicycle frames as well?
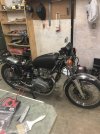
Thanks for your feedback! As far as frames go, no, I just build custom motorcycles. I don’t do much in the way of aluminum welding which most bicycle frames are built from now a days. Most of the choppers I build are from 70’s and early 80’s soft tail bikes that I re-work the frames into classic hardtail frames and completely change the bike. This is a before and after motorcycle I built from a 1979 Yamaha XS650…
IMG_1508.jpeg
IMG_2022.jpeg
 
Back
Top