New Project - Sabers

I made a Pommel for the sword yesterday. Today I will start on the micarta scales. OD green canvas for this first one as its what I have in stock.

I am trying to be very conscious of weight. We have taken measurements as we have gone along and they are below.

Blade - .84 lbs
-Raw bar - 3.5 lbs
-Profiled blank - 1.42 lbs
-Surface ground (to put in the beginnings of the distal taper) - 1.12 lbs
-After fuller grinding and basic edge grinding (ready for heat treat) - 0.84 lbs

Guard after hammering and slotting for blade - 0.54 lbs

Pommel and mounting ring - 0.12 lbs

Total weight so far - 1.5 lbs

While that is not bad, my goal is to stay under two lbs, I will eventually be able to reduce the weight of everything but the blade. The ideal weight of the blade I plan to base on historical examples which I feel can't be bettered. That is to say modern materials will not allow for weight reduction while the handle material and guard can be made lighter and stronger than the historical examples with titanium and burlap micarta or carbon fiber. Steel still weighs what steel did then. I have already ordered the titanium for the guard and pommel. I'll have to learn a lot about balance before I design the 3rd piece. The 3rd piece is the one I will start looking to finishing details, and final materials. Once I finish this first one, I plan to break it.

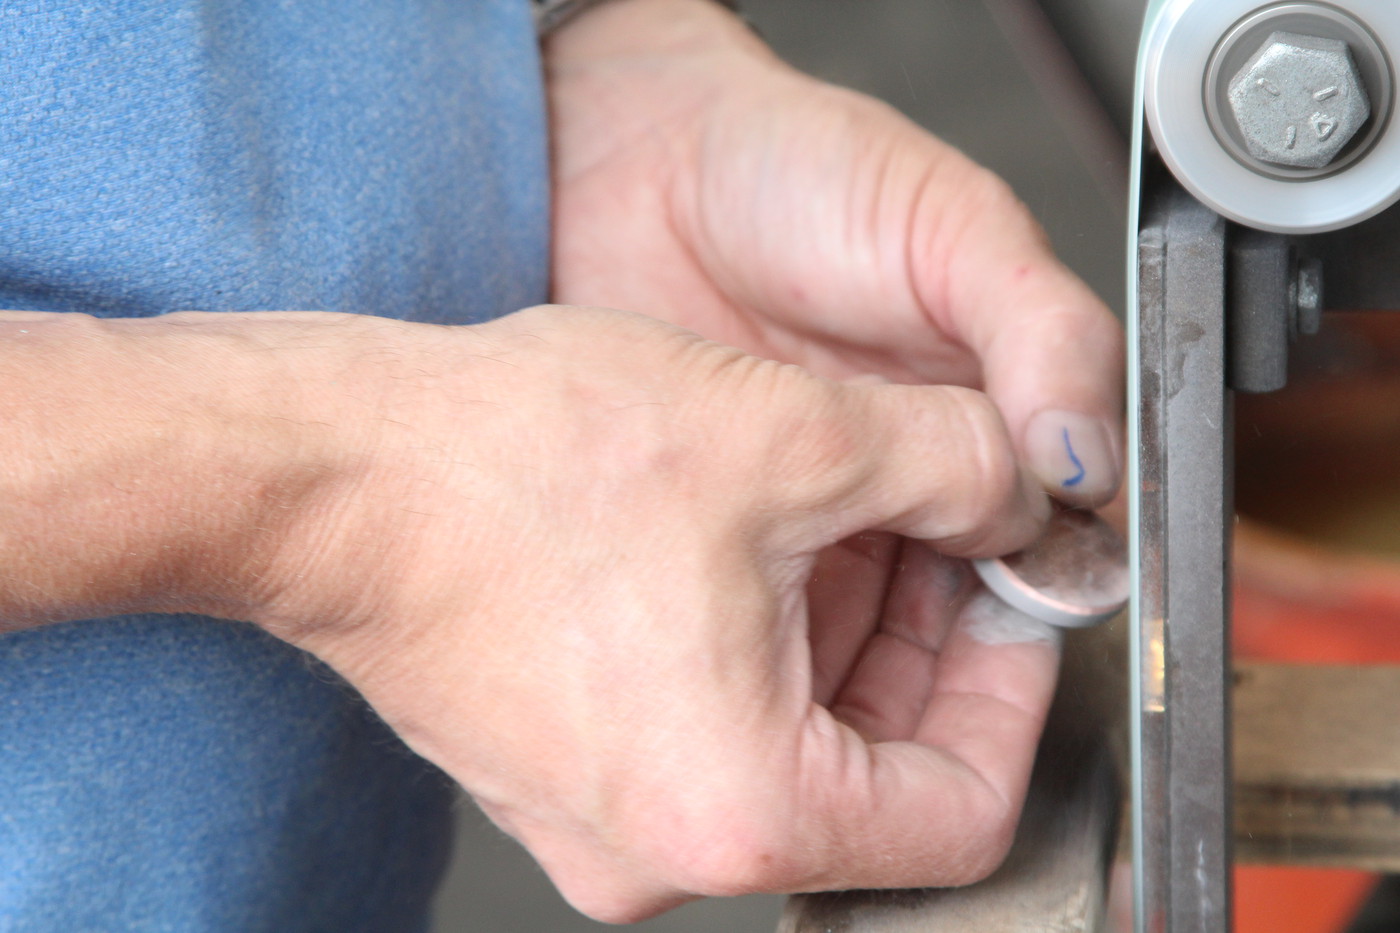
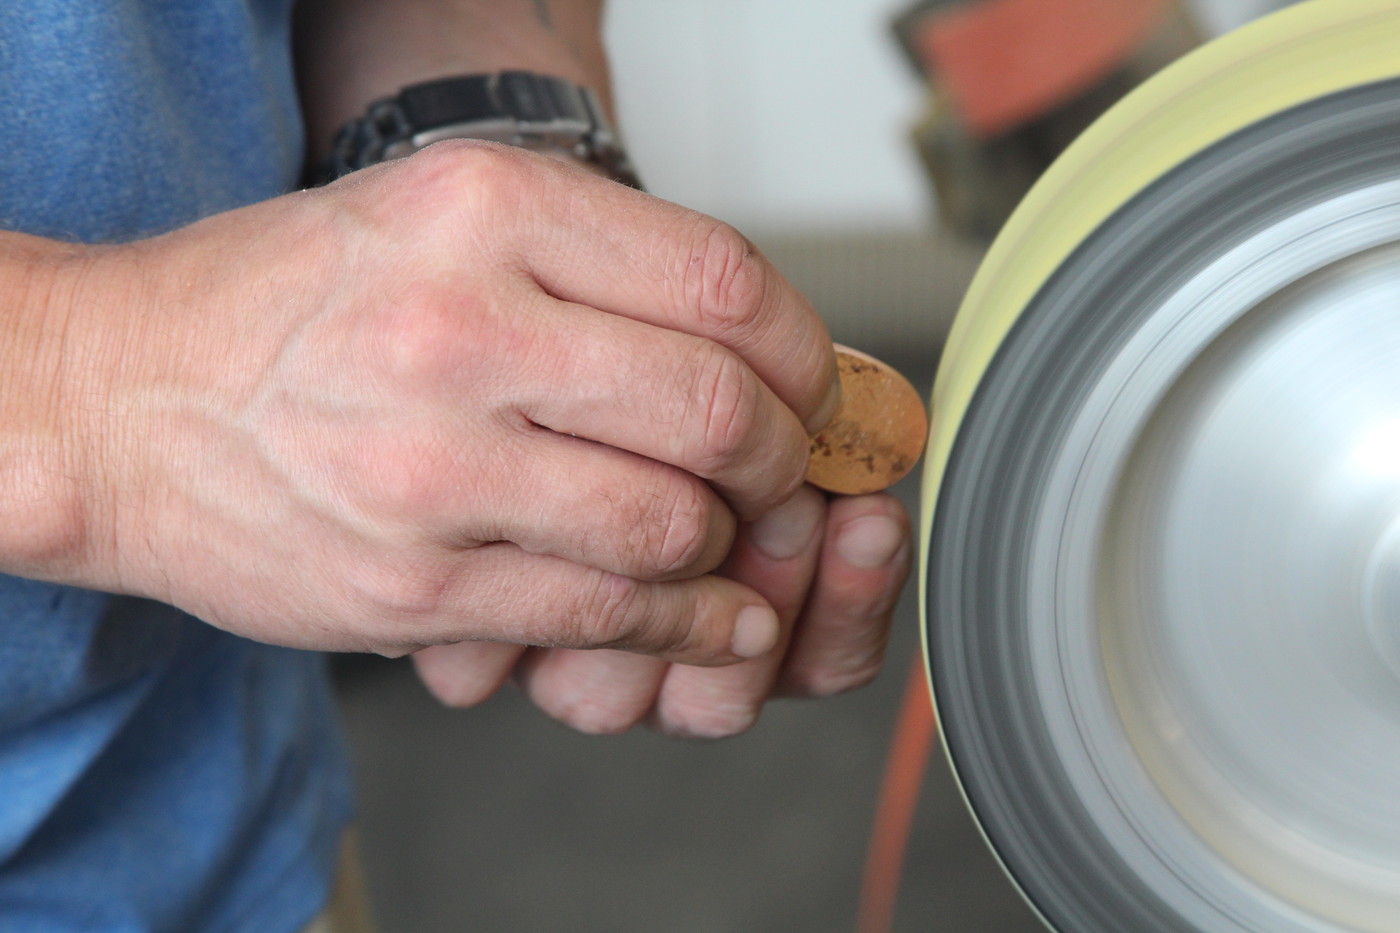
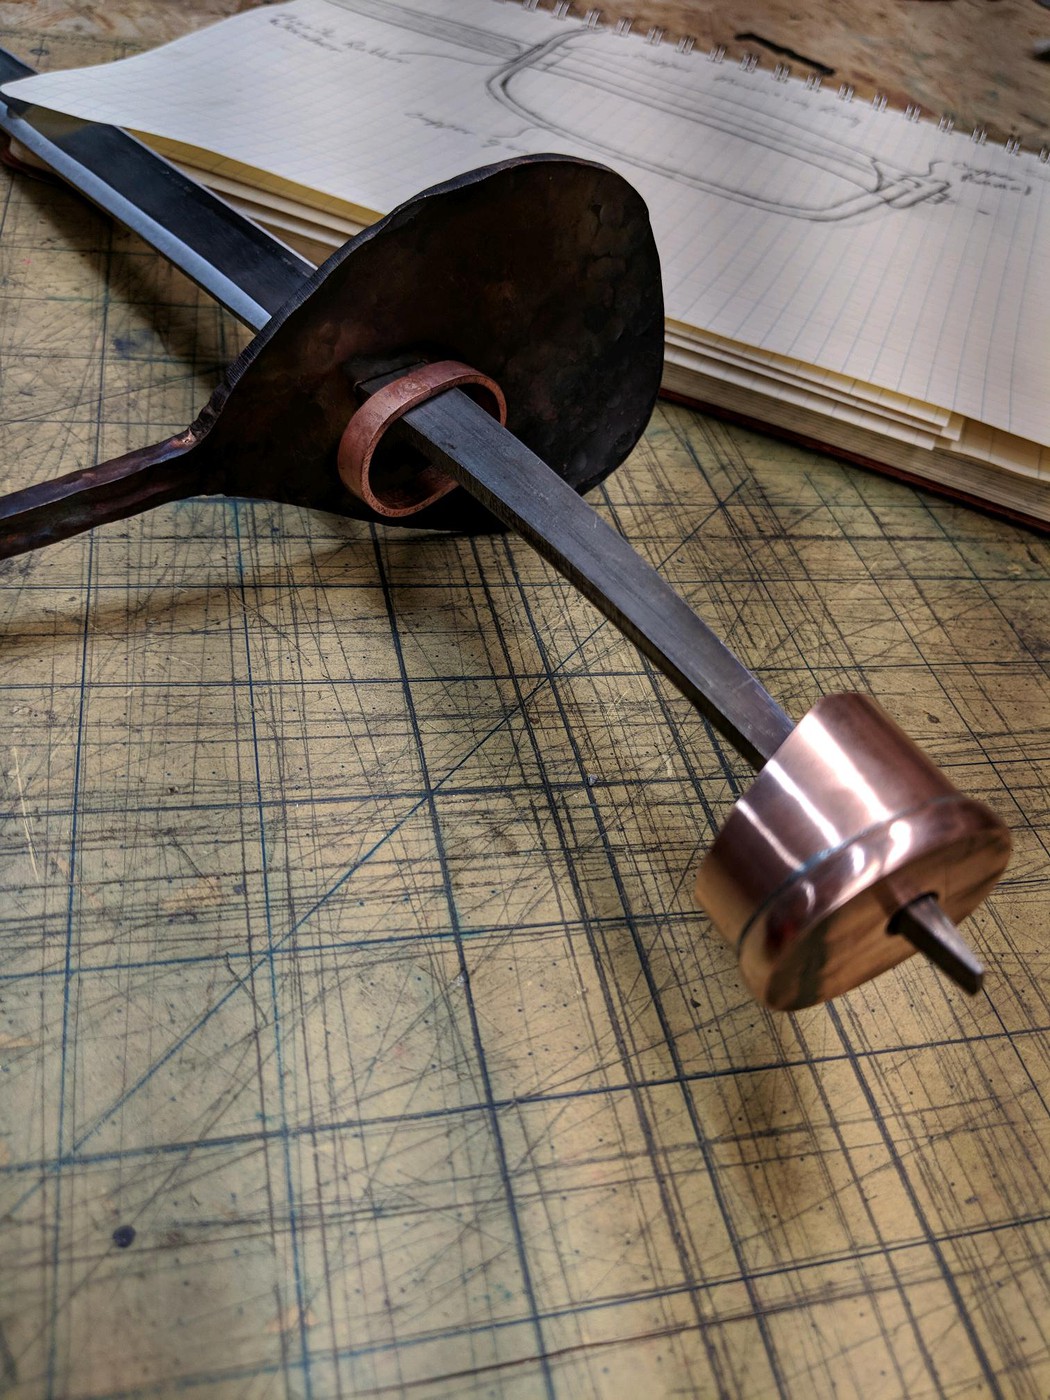
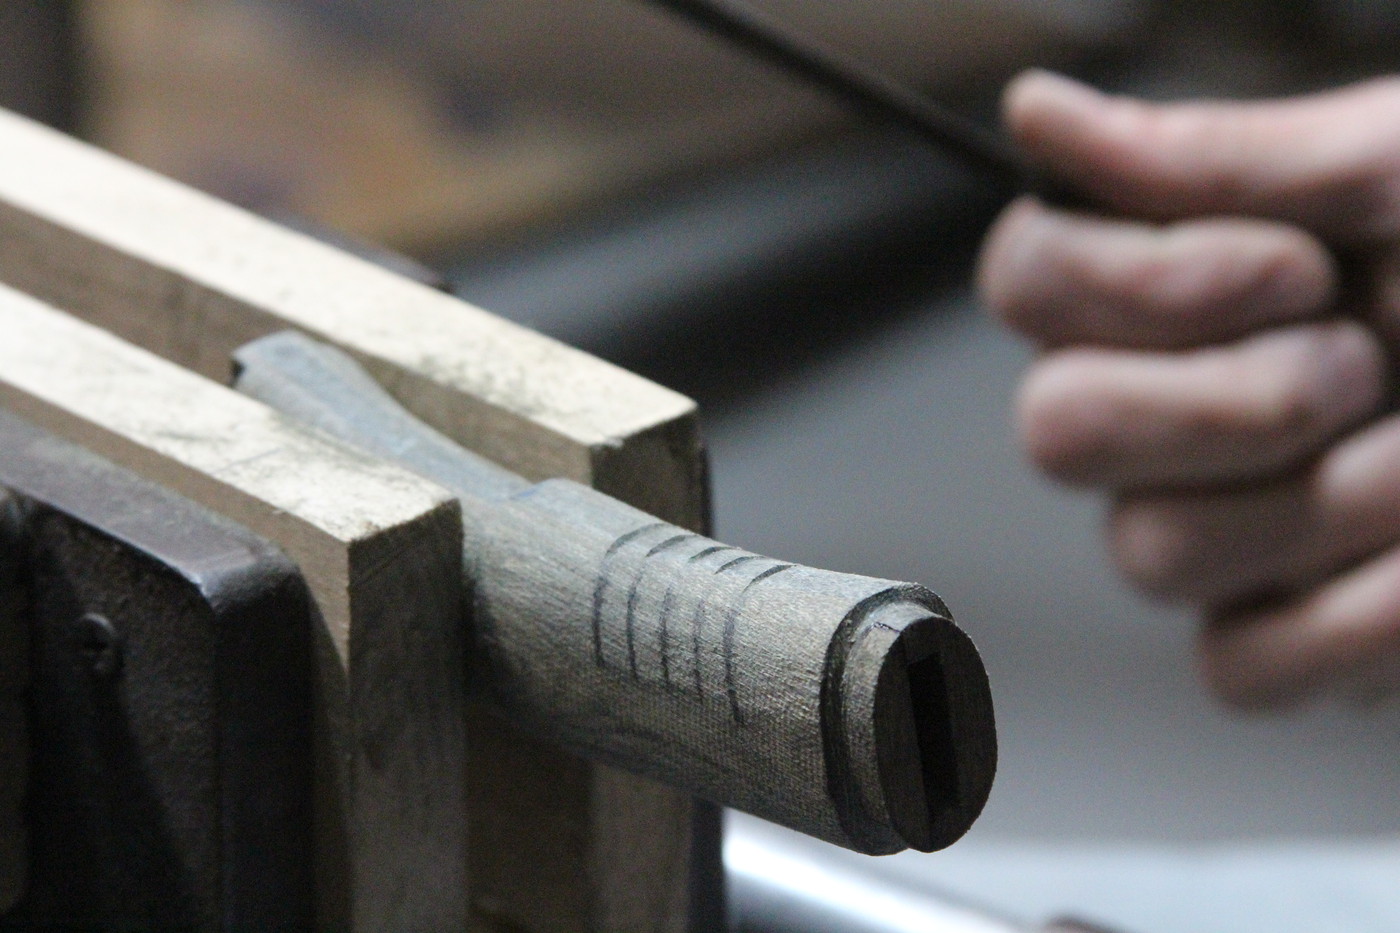
The pics below show the pommel being made. The process in a run on is to anneal the pipe and bend to shape, trace the shape onto sheet stock and cut out leaving a smidge extra, round and shape the cap then solder and finally put the cutout toward the front of the sword.

2v2J5u9FoxurAoi.jpg


2v2J5u9G8xurAoi.jpg


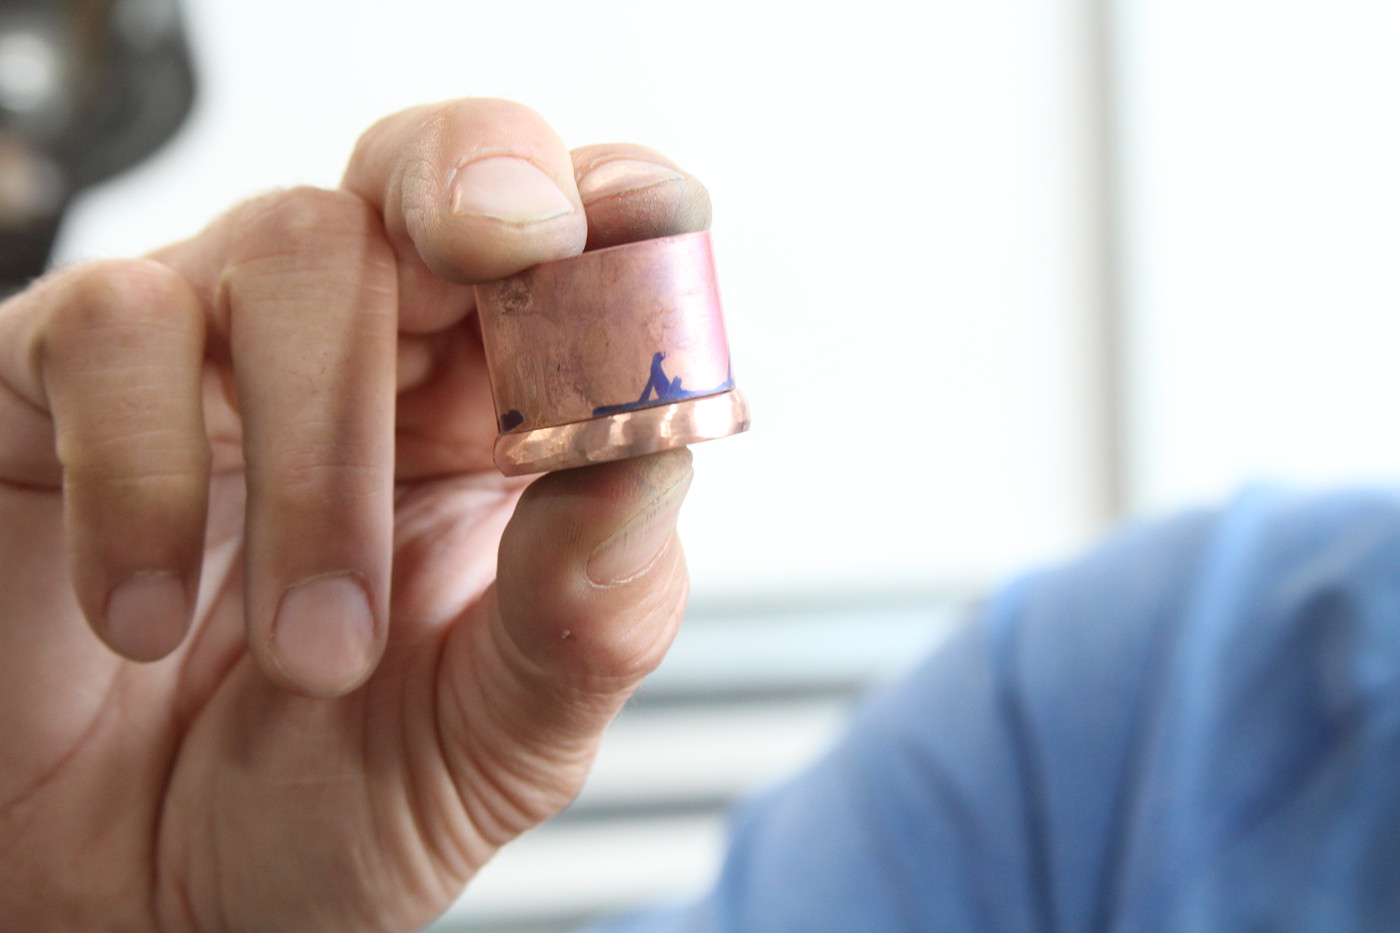
This is the stackup ready to be soldered.

2v2J5u9h2xurAoi.jpg


2v2J5u9A3xurAoi.jpg


2v2J5a8gVxurAoi.jpg


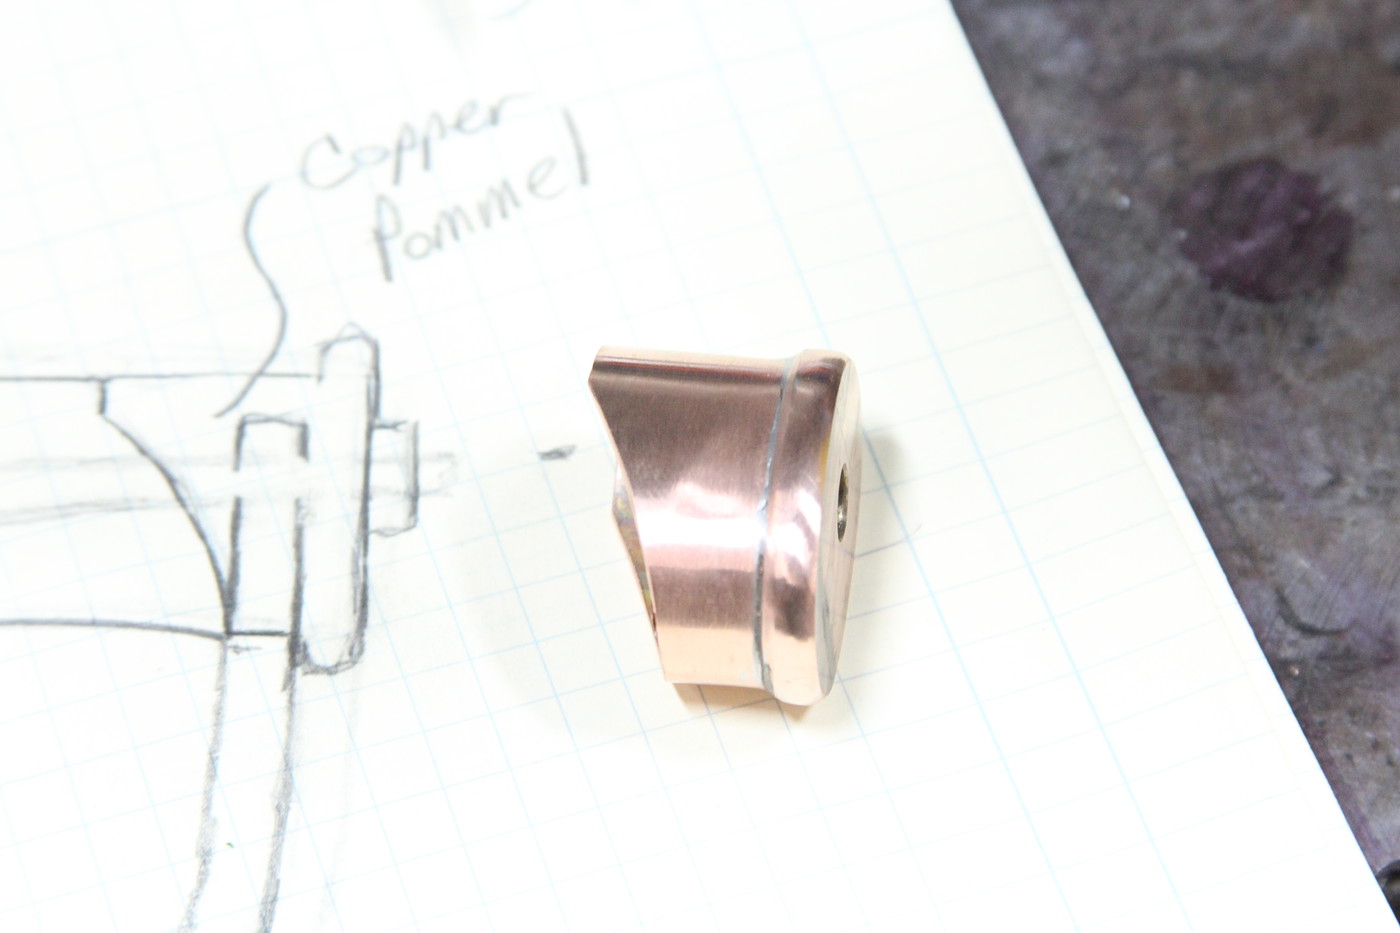
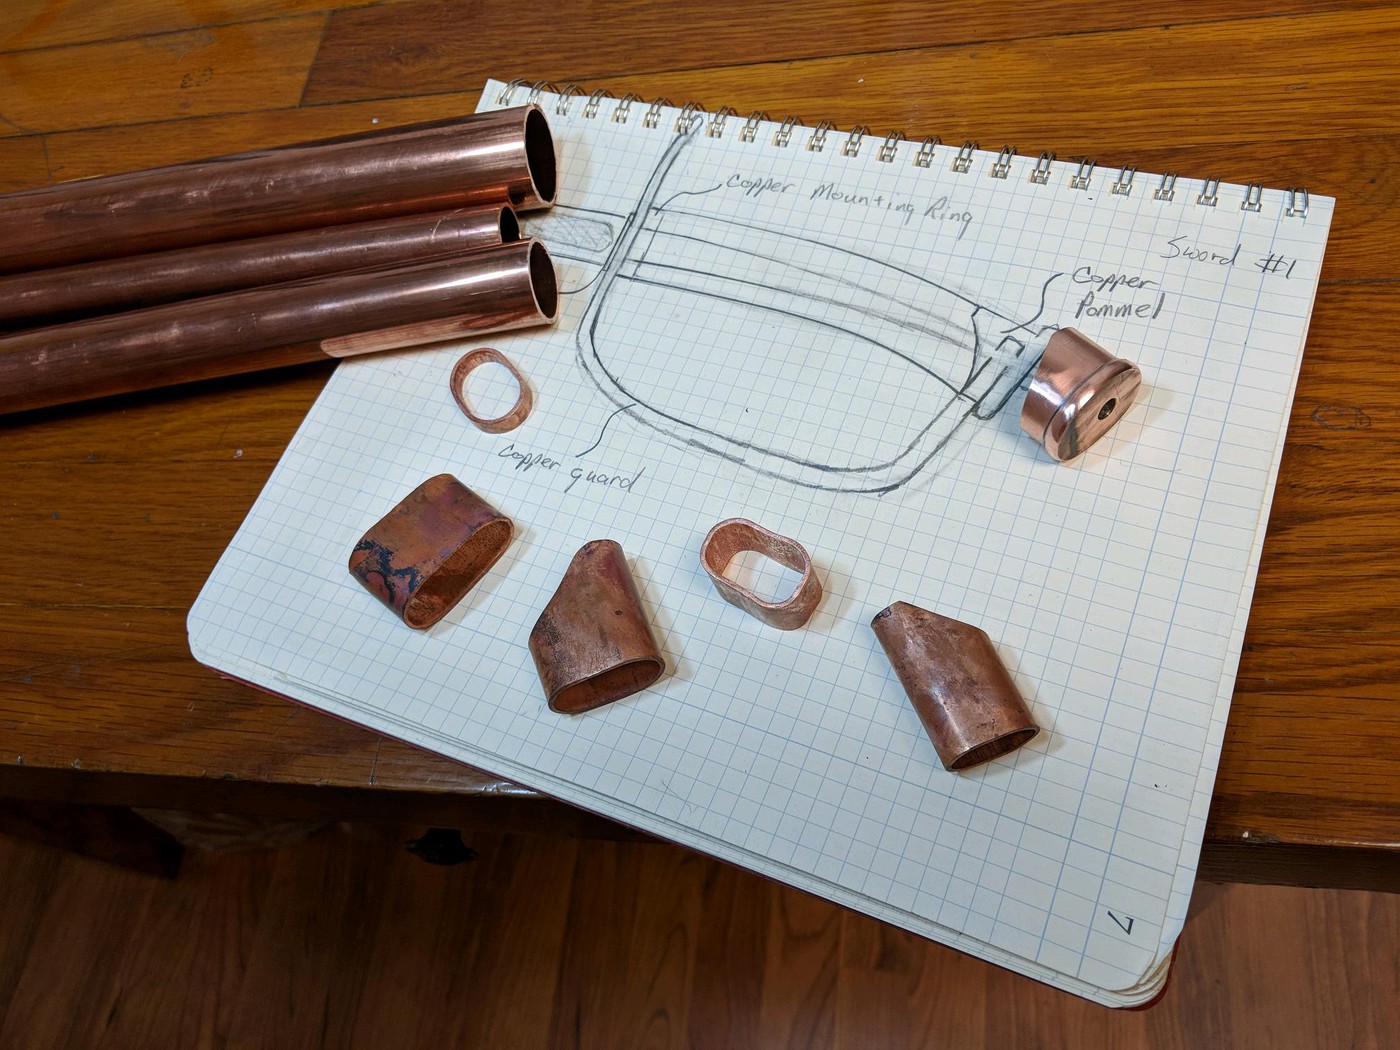
This one shows a bunch of the not good enough, ones and experiments in tubing sizes I did. It also shows the 1 to 1 ratio handle stackup drawing for this sword. There still has to be a notch cut into the pommel to accept the strap from the guard.

2v2J5a8hjxurAoi.jpg


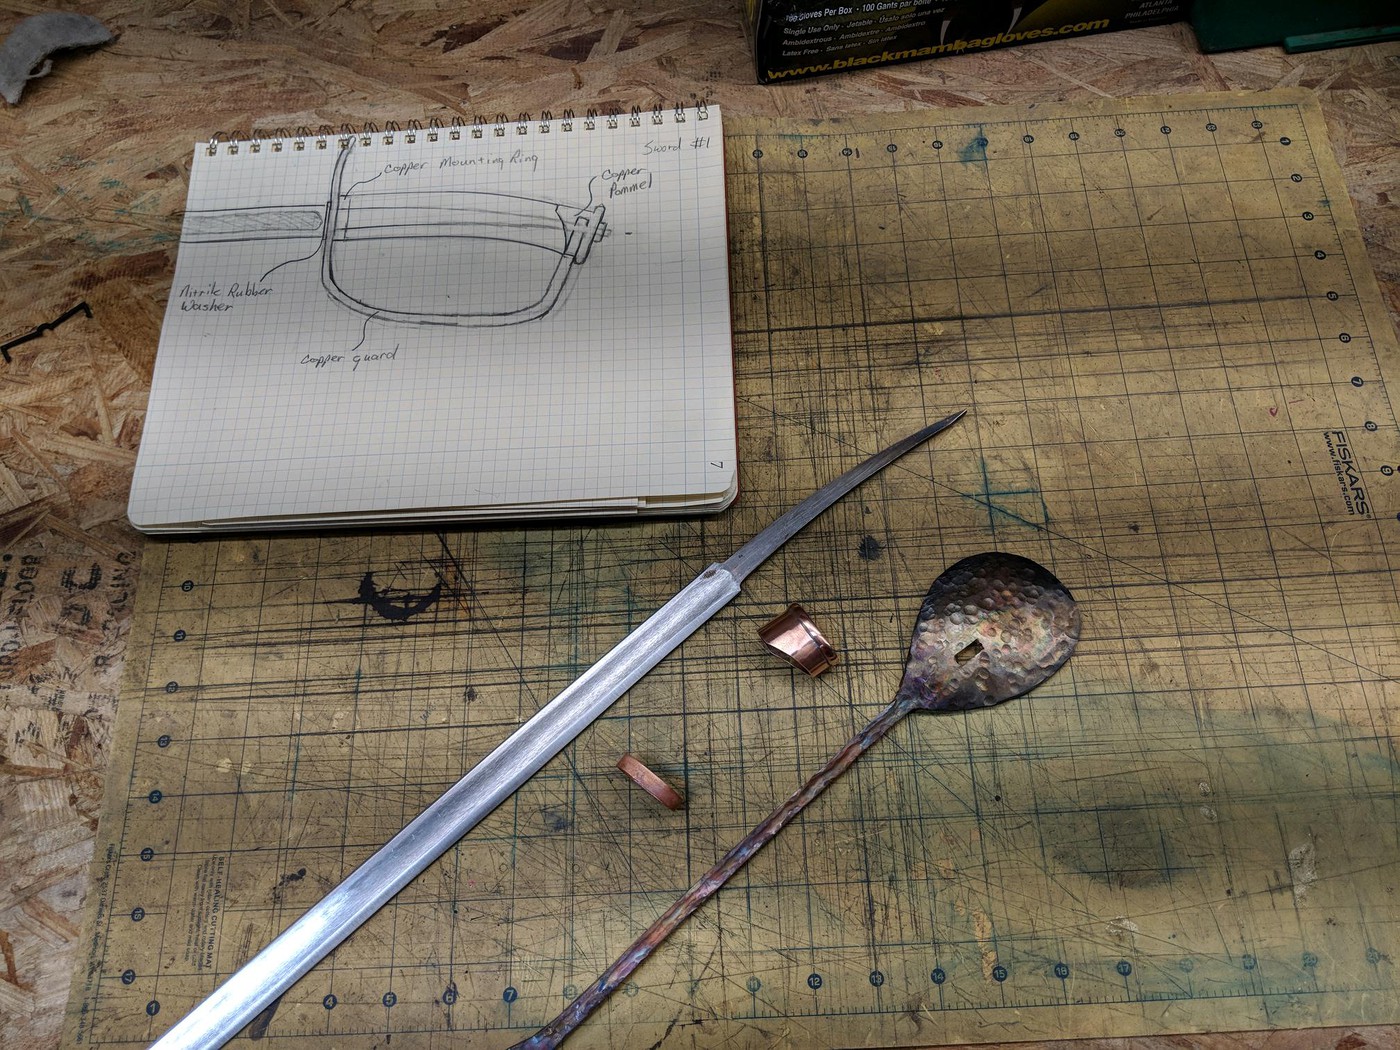
This one is just all the parts so far and the drawing.

2v2J5a8WhxurAoi.jpg
 
Wow, Andy! That is beautiful!

Are you by any chance adding these to your production line?!?

Not likely, at least not for a long time. My first misconception about swords was that I could just use the same theories and methods I use to make knives. Swords are a lot more complicated. Not just the methods either. I have no sense for their balance (way more important in swords). I finally have 4 sabers that are authentic to hold and swing and try to get an idea for how they should feel and move. Those are 2x MLE1822 Bancal French cavalry sabers (I will be grinding off the peened tang and disassembling one of these soon, one French national guard saber, and I finally got my hands on a British 1796 light cavalry saber. Of these, I like the 1796 the best.

Also, the labor is rediculous compared to a knife. And I haven't even done any hand finishing on this first blade. There will definitely be quite a lot of hand finishing of the blade once I get ready to sell one. And I will only do that once I feel confident I make a good fighting sword. So much to learn.
 
When I get orders for swords the finish goes 220 greaseless on hard felt, 400 greaseless on a hardsewn wheelc cut & color and buff.
All the sabers I've done stopped at 400 greaseless-it's a very even satin finish and slick enough to cut well. And if you're doing a pattern welded blade it etches just right-the only hand finishing I ever did on swords (other than complex hilts) was back in the Longago when i ground off the scale with an angle grinder and scraped/drawfiled the rest of the way to shape.
Hand finishing sword blades is for Nihonto (and, occasionally, the birds:D )
 
Well I will definitely be saving my pennies one day to buy such a sabre. I mean a Fiddleback is a Fiddleback (especially when you have a couple old school ones like me;)), and I will always hold the brand in high regard.

But a sabre built from the ground up? That's an Andy Roy. Definately one to go over the fireplace.
 
My first misconception about swords was that I could just use the same theories and methods I use to make knives. Swords are a lot more complicated. Not just the methods either. I have no sense for their balance (way more important in swords). I finally have 4 sabers that are authentic to hold and swing and try to get an idea for how they should feel and move.

I HIGHLY recommend that you read this article about sword balance, if you haven't seen it already:
http://www.thearma.org/spotlight/GTA/motions_and_impacts.htm#.W6ETVrpFzoo
It's a rather simple concept once you understand the idea. Pick up a stick and move it around & whack a few things while you're reading.

Once you've digested that, there's plenty more, if you're interested.
 
FWIW, Peter's lists the max sizes: They are pretty decent

• Oil hard maximum capacity is 24” in length.
• All other steels maximum capacity is 50” in length.
 
Well it took a while for my mind to jump to the next step in shaping this handle. I have been swinging my examples around a lot to determine what I liked and what I thought the handle needed. Here is the handle in a vise having the shape rough filed to shape. The handle is od canvas micarta with a black micarta center spacer.

2v2E2kz4rxurAoi.jpg


2v2E2kMVnxurAoi.jpg


More to come. Should have the blade out to peters next week.

2v2E2kMSGxurAoi.jpg
Seems to me that would be a little rough on the hand ?
 
Will the shape be rough on the hand? Well, I don't know for sure of course, but I don't think so. Its all theory until I get one made and we start getting learned opinions on its usefulness and comfort. I have been swinging the ones I have around. Doing drills with each sword that I have found on schola gladitoria. The handles are all ROUGH as hell on the hands. ESPECIALLY if the wire wrapping is still there. I summised from this that having a smooth handle is way less important than keeping your sword in your hand. Now, I am a handle centric maker. What I mean is that my knives are handle design driven. Still, the design of this handle eluded me. The fitted blank sat by my keyboard for over a month. I sketched out a bunch of shapes the first week based loosely on how I shape knife handles and threw all those sketches out. Finally I realized I wanted a positive place for the pinky palm area of my hand. Thats what I call the thick part of your hand. Just as Jake noticed I went back to my khukuri roots. What does this have to do with Khukuris? Everything. I seperated the hand zones with a ring much like theirs, but mine doesn't go across the back of the handle. I find myself pusing on the back of the handle, and pulling with my fingers, so the back of the handle is smooth, and the front of the handle has traditional style carvings to pull on. So far, I'm very pleased with both the look and feel. The carvings on the front wisper of the old handles, and the rest is much more functional. BUT, this entire paragraph is bullshit theory, as you know, because the thing has yet to be peened onto metal and really swung. LOL. We'll see. I finished the roughing. I'll try to get more pics today.

Nice eye Jake. You know where I came from.
 
Nice eye Jake. You know where I came from.

Same place as me, Bro;) I'm eager to see how it turns out.

Those of you who have never handled one of Andy's knives will know exactly what he means by being handle centric. They are by far the most comfortable and organically ergonomic I have ever used. I have no doubt that when he nails down the design of the grip that it will be like shaking hands with an old friend.

I hope these take off and prove both fun and lucrative to make. I'd love to buy one to hang above my mantle should they ever go on sale. It would be a symbol of the culmination of a friend who has grown as a maker with subtle hints of the knives we first bonded over. Wonder how big of smile this would put on Uncle Bill's face.
 
It depends but the formula is fairly common, adjusting thicknesses a bit. Once we get to the 19th century, a lot of mass production of sword blades lends to a more linear distal taper. There are fairly few absolutes as well. One might regard British (and other) naval cutlasses that are dead straight, quite stiff and used throughout the 19th century. They had a more linear distal. Whereas say a British 1803 infantry sabre will typically show a more concave distal taper. The French made patterns, by and large, continued with refined distal properties suited to use. Sabres continuing to display more mass towards the hilt. One of the buzz words a decade or so ago was "low polar moment" which really just translates to a very neutral feel in handling a weapon (or designing a car).

Cheers
GC
Interestingly enough, the forging process for american sabers civil war and onward is really noobish from a forging perspective. Most blades end up being a flat bar with the tang just thinned, above that is left as stock, further no beveling is done to the blade, and then the blade section is peened into a bevel forming the curve out to the tip, the thing just gets sharpened after that all the way down to maybe a rough 4 inches of stock which gets engraved.

Really its shit craftsmanship from a swordsmith perspective. Not to say it isnt effective as a weapon but it's pretty much an axe.

Good smithing would be to forge a bar drawing out two angles, one extremely long and going down to almost a point while the other maybe drawn to half an inch. at this stage the tang section would be forged in from the smaller cross section. the bar is thick at this stage so the tang while not being wide is still thick leaving a good deal of mass inside it. despite there being a long section the bar is balanced, from there the blade is beveled, the bevel is worked down to straiten the bar and rebeveled, and the spine is worked down as well to straiten the bar, the combination of these two created the double triangle shape found in most swords. Despite all of this the balance point can remain consistently close to the tangs meeting of the spine, the mass is kept relatively centered throughout the blade wheras grinding creates more mass at the spine. (weird to think of the edge as squished mass instead of removed mass,squished mass the balance does not change). The end section of the tang can still receive any additions such as the pommel and the guard. The result is that the blade moves extremely fast because of the leverage and as it cuts it gains leverage on the draw. This format is found in every sword throughout history and is the standard of excellence.

Smiths and cut away people have lost the perspective of this geometry, 98% of katanas are trash for this reason, im assuming its worse with sabers at least of american design, and for this reason I refuse to forge them for people.
 
My work will be the stock removal variety. That has been fine on this first straight bladed swork, but on the cavalry sabers, the radical and curving distal taper is prohibitive. Anyway recently at a hammerin I helped Mark Hopper of Goat n Hammer forge a saber blade based on the 1796. Once this straight one is done I'll go pick up the forged saber blade and give a try on it. Mark says he can forge out more if I need them. The other option is to cnc mill the blank. Estabolish the taper and the fuller that way and go to the grinder from there.
 
Honestly I dont care for the grind work and prefer the forging, maybe in the future when I get more time I could find one of you guys who are spiffy at the cleaning process to finish a few blanks
 
Back
Top