Number three.

MyDogsHunt

BANNED
Joined
May 12, 2011
Messages
182
This is my third attempt at making a half way presentable sheath.
I struggled with the stitch layout quite a bit on the first two, but I think I'm getting better.
Well,, a little better anyway.
003-5.jpg

Edges are improving too, although I still wish they'd take the dye a little better.
Not great, but better.
001-7.jpg

The sheath hadn't been wet formed yet, but here's the knife that will be going in it.
001-1-2.jpg

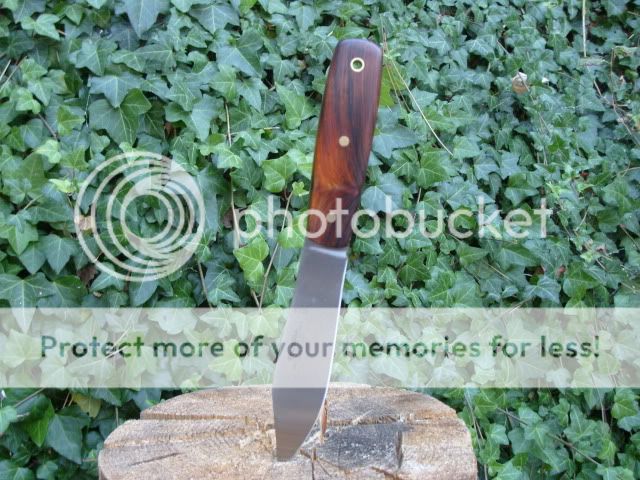
Comments, both good and bad are welcome.
Thanks
Charlie
 
Nice and clean, straight and symmetrical, stitching looks good, way beyond half way presentable.
 
Looks really good. If you want a thicker welt, you could glue two pieces of leather together. I do this all the time and it works good. I also usually use a dark brown for my edge dye it gives the sheath some contrast and then finish it off with a nice burnish.
 
Looking good! :) The edges and stitching look good to me.

As noeesp said, just stack those welts till you get the desired thickness. You can also skive them down to get a nice wedge towards the tip if you wanted that effect.

Edge color has forever been an issue to leather crafters, it never seems to go evenly or dark enough, again noeesp has a good idea with using a darker color though watch out for over dying and going off onto the body of the sheath. Been there, done that. :p
 
Nice clean looking work....Cant say anything bad about it !
 
Nice looking Russell Green River blade to go in it. Got any other pics of the knife?

As for the sheath, it looks good! However, it doesn't appear that you are using a stitch groover nor an overstitch wheel. I would recommend both of these as they will greatly improve the look of your stitches.

For finishing after dying and burnishing the edges, what are you using?

Also, you can use the groover to make another line inside the stitch line that will bring a little life to the front of your sheath.

One last suggestion is that you can skive down the end of the belt loop to taper and lay flatter against the back of the sheath instead of having a pronounced raised area.

All in all, looks good for a 3rd attempt. Keep at it!
 
I used these.
006-3.jpg

Not sure what you mean by "what am I using on the edges after I've burnished and died em", but theshort answer is nothing.
Is there another step I'm unaware of?

I'm a hobbiest, not a pro like you obviously are, so I'll not post any more pix of the knife.
Like you said, "it's just a plain jane Green River" with some Cocobolo scales, so there's no mystery there.
 
I, too, do this as a hobby and to make a few bucks here and there. I am not a pro, by any stretch of the definition.

Well, I see you have the overstitch wheel and the groover...it just looked like the stitches were sitting on top of the leather....perhaps a trick of the picture. After you stitch, do you go back and dampen the stitches lightly and tap them with a mallet before running the wheel? I picked that trick up from Chuck Burrow's DVD and it seems to "set" the stitches in better, then the wheel works to define them. Try taking that groover (on the next one) and making another line parallel to your stitch line...adds a bit of character to the sheaths face.

For the edges- basically, I was curious if you're using anything other than just water (or spit) when burnishing the edges. Are you using any beeswax, gum tragacanth, or saddlesoap? And, what kind of top coat finish are you using on the sheaths once they're dyed?

BTW, I do really like that knife. The cocobolo works well with that blade and the brass sets it off. Been thinking about making some of those Green River blades.
 
I too think it looks great. However, I don't think you need a thicker welt - unless you need a thicker welt at the handle portion of the sheath.

The blade welt thickness should be about 75% of the thickness of the blade. Like the others said above - just stack the rest if you want a thicker welt for the handle.

You may want to mess around a bit with styling your sheaths - but this is all in the eye of the beholder. I make the same damned type of sheath over and over - and I like it. You can go as far as you want with this hobby - but if you are just aiming to have a good looking functional thing to carry your blades in - you did well!

TF
 
Quote: "I struggled with the stitch layout quite a bit on the first two, but I think I'm getting better."

Charlie, very nice job.......extremely well done. A couple things I noticed which could make life easier on future sheaths etc. Consider doubling (at least) the distance from the actual edge to your stitch line. 5/16 to 3/8 inch is just about ideal and gives you some meat to work with when finishing the edges. Your welt thickness is plenty thick as shown. I agree with TF on this except I use 50% of the blade thickness as my rule of thumb. Also as Tal said if you have a fat handle in a pouch sheath then stack the welt up using a wedge to give you increased capacity in that defined area.

You are off to a great start!

Paul
 
Last edited:
Your welt thickness is plenty thick as shown. I agree with TF on this except I use 50% of the blade thickness as my rule of thumb.

Would using a welt that is too thick (at the blade portion of the sheath) cause the sheath to not fit as tight as it possibly can? I've been using 8-9oz leather on my sheaths and just using a strip of it for the welt....I take it that this is overkill for the welt? You said you use 50% blade thickness...that is 1/16" for a 1/8" thick blade, that isn't too thin?

I always thought you wanted the welt to be thicker to protect the stitches.
 
There is a point of diminishing returns on welt thickness, and times when the blade is just too thin to make an effective welt that is thinner than the blade. As a rule of thumb I never go thinner than 7 ounce for welts, thats just my stopping point and personal preference.

Again with personal preference, but I make my welts as close as possible to the knife thickness especially on sandwich style sheaths. But I work with a lot of camping style blades that are thicker than normal, and people who are harder on their equipment than normal. That may be the reason why I do what I do.
 
Consider doubling (at least) the distance from the actual edge to your stitch line. 5/16 to 3/8 inch is just about ideal and gives you some meat to work with when finishing the edges.

Paul

I hear ya Paul.
I actually did exactly that on my second attempt, but making the stitch line wider caused me to have to make the welt a bit wider which in turn required the entire sheath to be a tad wider. In my mind, the sheath already seemed huge so adding the width made it even worse.
Course, this all leads back to TF's suggestion to work on the style. (Which BTW,, I totally agree with.)
Here's a couple pix of the first two. The lower one (with the Walnut scales) has the wider stitch line. Looks GINORMOUS to me. HA
001-4.jpg

002-3.jpg

I definatly need to change it up a little in the design dept. A nice little drop point blade to start with would probably make the pouch type sheath a little easier to work on and be more pleasing to the eye if I can find one I like as much as I do these Russel blades.

Fortunatly I just do these as gifts for friends so nobody's sent one back wanting a refund. Yet ;>)

Quick question,,, I give the sheaths a good rub down with Neets oil when they're finished. Is that enough?
I've read about dipping them in wax, but I'm not sure that's for me.

Thanks for all the good suggestions guys.
Charlie
 
:D Looks like you need to be somewhere in between the two eh? Its the on going struggle between form and function, what do you like best vs what works best vs what the customer prefers.

Wax dip? I'm not a fan, but it seems to be popular among a group. To me, its not really necessary. A sheath gets wet, simply let it dry low and slow in an area out of the sun. Then put a good conditioner on it afterward. Done and done.

I am a fan of the back stitch on the top of the sheath, especially with a drop point knife. It takes up a lot of open unused space in the sheath and makes it more streamlined. I normally use a 5/16" welt on the edge side, and a 1/2" welt on the back stitch side so I can wiggle it a little and still have some meat to work with when I get done sanding it smooth. I dont like a bump where the stitching stops and the bend begins. Its one of my "minor" obsessive things. (one of many) :p

psst, dont tell Paul, but I like the first one..... ;)

Don't worry Charlie, Paul and I "disagree" often, but when it comes down to it we agree far more than we would admit to in public. :D :D :D

If you take a peek at the "The Cows Were Happy" thread by my late friend Dave Cole, you will see why we are seen as a bunch of cranky old farts. :p
 
I am a fan of the back stitch on the top of the sheath, especially with a drop point knife. It takes up a lot of open unused space in the sheath and makes it more streamlined. I normally use a 5/16" welt on the edge side, and a 1/2" welt on the back stitch side so I can wiggle it a little and still have some meat to work with when I get done sanding it smooth. I dont like a bump where the stitching stops and the bend begins. Its one of my "minor" obsessive things. (one of many) :p

Example of the backstitch mentioned and the "bump where the stitching stops", please :).
 
Charlie, Neat's Foot Oil works to put some oils back in the leather lost during tanning and subsequent dying. A little goes a long way and too much can eventually be detrimental to the sheath, causing the leather to turn spongy and soft.

For a final finish, if you want to keep it ultra simple, skip the neats foot oil and get you a small container of Mink Oil compound....usually found with the boot supplies at places like WalMart. Take a little and work it into the sheath with a cloth or your hands. Using a hair dryer works best as the compound will get thin and be readily absorbed into the leather.

You can do a wax finish, and it's EXTREMELY easy! The most common recipe is equal parts paraffin wax, beeswax, and neatsfoot oil, allowed to melt in a double-boiler or crock pot. Once melted, stir to mix well.

Now you can do this 2 ways. Pour up the liquid in to cups to harden then apply like a paste using a blow dryer for heat to work it into the leather, or, give the sheath a quick dip while the liquid is warm...NOT scalding hot. You're not deep frying here :). Allow the excess to run off, then work the remaining into the leather with a hair dryer.

I know I keep repeating the use of a hair dryer, but it is a VERY useful tool when working with these types of finishes.

You can also get a wax compound that has pine pitch in it called Sno-Seal. I've heard GREAT things about it and would like to get a container to try myself.

Other finishes include:
Bag-kote
Tan-kote
NeatLac
Satin Shene
Super Shene
Mop n Glo mixed 50/50 with water

The finish chosen really depends on the sheath and what kind of use it's going to get. Example: for a sheath that will never be outside, a wax finish is WAY overkill...on the flipside, you wouldn't want a thin acrylic coating on a sheath that gets hard use in the woods.
 
Back
Top