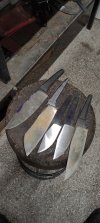
Road to journeyman

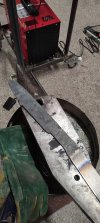
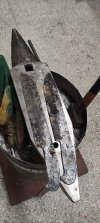
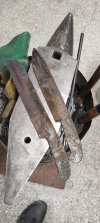
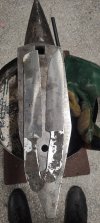
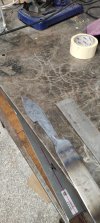
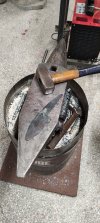
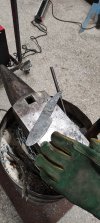
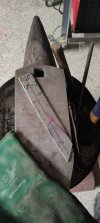
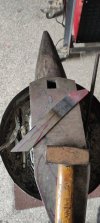
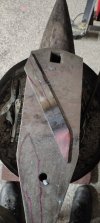
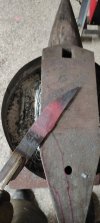
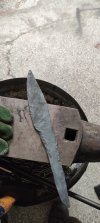
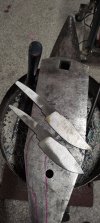
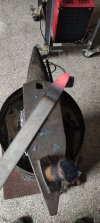
Once I was ready to forge out the handle, I took some measurements. Here is when I realised my mistake. When I marked the edge, I marked it at 10 inches (maximum blade length for the test).
However, I did not take into account that the blade will stretch out as I forge it and ended up with a longer blade than it is allowed.
44.jpg

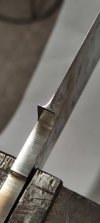
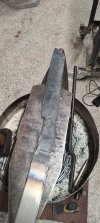
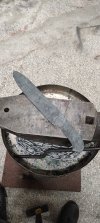
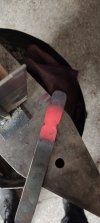
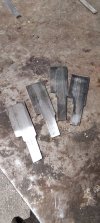
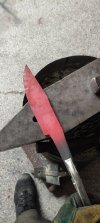
I cut off some excess material from the tip and refined my shape again. Also, I began forging the handle.
45.jpg46.jpg

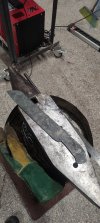
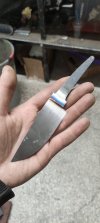
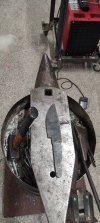
A little bit of clean up on the grinder and the first blade is done!
48.jpg

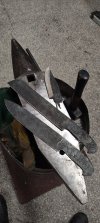
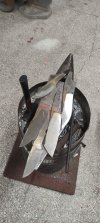
Following pretty much the same steps, I forged the second blade as well. This time I did not make the same mistake while marking my edge and I didn't have to sacrifice the tip.
49.jpg50.jpg

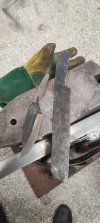
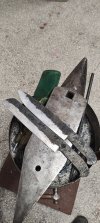
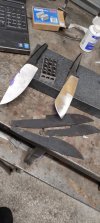
Some profiling later on the grinder and both blade are ready for the heat treatment.
51.jpg

Yesterday I completed the normalisation, thermal cycling and annealing. Today's plan is to do the rough grinding and complete the heat treatment.
 
Way to stick with it. Stick with the 1075 and don't look back.
 
Thank you guys for the kind words!

One thing I forgot to mention, both blades are made from the same 1075 as my previous successful test.

Today's update will consist more videos from the test compared to last time.
With the preparations done, I ground a little bit the bevels and was ready to quench. I don't grind a lot prior the quench to avoid warps, just enough to ensure full hardness on the edge on shallow hardening steels.
52.jpg

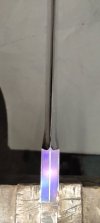
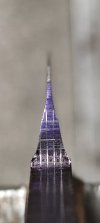
As quenched and as tempered. I tempered them twice at 400F for two hours each.
53.jpg54.jpg

Final ground to an ugly 120grit belt finish. The edge was 25 thousands before sharpening.
I also blue backed the spines and handles four times on each knife.
55.jpg

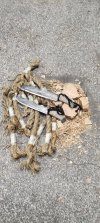
It took me a few tries to figure out the cutting technique for the rope but I finally got it to cut the rope consistently.

WARNING: this one is a bit loud!
The vice was fighting me a bit but I got it in the end. I chopped twice with each knife and both had no damage at all.
Also, with the spearpoint, I cut the rope again after the two 2x4s to see whether it affected its performance, no trouble cutting the rope again.

The results of the testing.
56.jpg

It was time to decide which knife to bend in the shop and which one to keep for the real thing. As you may have noticed, the competition style chopper had some deep hammer marks I couldn't take out with the grinder, I decided to test this one in the shop.

This time I was more careful to stop at 90 degrees and not go past it like the last time. You may hear some click clack noises, that's from the wood stressing on the vice.
I bent it 8 times to 90 degrees and on the 9th I went it until it cracked. Even with the crack, it'd be a pass because the crack did not travel more than 1/3 of the width.
Pretty happy with how it performed. I'm sure if I didn't go past 90 degrees, I could have done it a few more times.

Now, it's time to make arrangements to test for real. If everything goes well, the next step is to make five knives to be judged on bladeshow by a panel of mastersmiths for fit and finish.
In the meantime, I'm going to study knives from other successful sets and get inspiration for my set.

I will be back soon!
 
Thank you guys for the kind words!

One thing I forgot to mention, both blades are made from the same 1075 as my previous successful test.

Today's update will consist more videos from the test compared to last time.
With the preparations done, I ground a little bit the bevels and was ready to quench. I don't grind a lot prior the quench to avoid warps, just enough to ensure full hardness on the edge on shallow hardening steels.
View attachment 2733949

As quenched and as tempered. I tempered them twice at 400F for two hours each.
View attachment 2733950View attachment 2733951

Final ground to an ugly 120grit belt finish. The edge was 25 thousands before sharpening.
I also blue backed the spines and handles four times on each knife.
View attachment 2733952

It took me a few tries to figure out the cutting technique for the rope but I finally got it to cut the rope consistently.

WARNING: this one is a bit loud!
The vice was fighting me a bit but I got it in the end. I chopped twice with each knife and both had no damage at all.
Also, with the spearpoint, I cut the rope again after the two 2x4s to see whether it affected its performance, no trouble cutting the rope again.

The results of the testing.
View attachment 2733953

It was time to decide which knife to bend in the shop and which one to keep for the real thing. As you may have noticed, the competition style chopper had some deep hammer marks I couldn't take out with the grinder, I decided to test this one in the shop.

This time I was more careful to stop at 90 degrees and not go past it like the last time. You may hear some click clack noises, that's from the wood stressing on the vice.
I bent it 8 times to 90 degrees and on the 9th I went it until it cracked. Even with the crack, it'd be a pass because the crack did not travel more than 1/3 of the width.
Pretty happy with how it performed. I'm sure if I didn't go past 90 degrees, I could have done it a few more times.

Now, it's time to make arrangements to test for real. If everything goes well, the next step is to make five knives to be judged on bladeshow by a panel of mastersmiths for fit and finish.
In the meantime, I'm going to study knives from other successful sets and get inspiration for my set.

I will be back soon!
My man!!! Nice job....Way to keep at it....👍👍👍........Your goals will be achieved sooner than you realize 😉.....
 
My man!!! Nice job....Way to keep at it....👍👍👍........Your goals will be achieved sooner than you realize 😉.....
Thank you very much for your kind words!

Since my last update, I've been studying successful JS sets to get inspiration for my own set of 5 knives. I've been using the gallery from SharpByCoop SharpByCoop website which was a tremendous help and for that I would like to thank SharpByCoop SharpByCoop .

The ABS rules state that all knives must have guards or bolsters and two of them must have a blade over 6". Pattern welded steel is prohibited anywhere on the knife. Any antique style finish is a no no.
With all that in mind, I made a plan. So far my set consists an angry nessmuk style blade, a hunter style, a small bowie, a trench inspired spear point and a bowie.

I began by forging the angry nessy, I got my rough profile from a bar of 80CrV2 steel.
57.jpg

I cut it off the bar to work a bit more on the tang side of things.
58.jpg59.jpg

Next one was the small bowie, made from some 1070 steel.
Even though my life would have been easier if I began my forging from the angled cut side, I forged my tip from the square side for the practice.
60.jpg61.jpg

Some refinment on the tip and I started working on the bevels.
62.jpg63.jpg

Almost done with this one as well.
64.jpg


I got a bit carried away with these two and ground them prior the heat treatment, hopefully this will not bite me in the butt later on.
65.jpg

And some fast forward (I was too focused and didn't take any pictures), I forged the rest of them and cleaned up the profile on the grinder.
66.jpg

My plan for today is to do the thermal cycles, anneal them and be ready for the final stages of heat treatment. More likely these 5 knives will not end up being my final set, as long as I have time, I'm going to keep making knives and in the end choose the best of the lot.
 
Thank you very much for your kind words!

Since my last update, I've been studying successful JS sets to get inspiration for my own set of 5 knives. I've been using the gallery from SharpByCoop SharpByCoop website which was a tremendous help and for that I would like to thank SharpByCoop SharpByCoop .

The ABS rules state that all knives must have guards or bolsters and two of them must have a blade over 6". Pattern welded steel is prohibited anywhere on the knife. Any antique style finish is a no no.
With all that in mind, I made a plan. So far my set consists an angry nessmuk style blade, a hunter style, a small bowie, a trench inspired spear point and a bowie.

I began by forging the angry nessy, I got my rough profile from a bar of 80CrV2 steel.
View attachment 2742349

I cut it off the bar to work a bit more on the tang side of things.
View attachment 2742350View attachment 2742351

Next one was the small bowie, made from some 1070 steel.
Even though my life would have been easier if I began my forging from the angled cut side, I forged my tip from the square side for the practice.
View attachment 2742352View attachment 2742353

Some refinment on the tip and I started working on the bevels.
View attachment 2742354View attachment 2742355

Almost done with this one as well.
View attachment 2742356


I got a bit carried away with these two and ground them prior the heat treatment, hopefully this will not bite me in the butt later on.
View attachment 2742357

And some fast forward (I was too focused and didn't take any pictures), I forged the rest of them and cleaned up the profile on the grinder.
View attachment 2742358

My plan for today is to do the thermal cycles, anneal them and be ready for the final stages of heat treatment. More likely these 5 knives will not end up being my final set, as long as I have time, I'm going to keep making knives and in the end choose the best of the lot.

Nice work👌
 
Thank you very much for your kind words!

Since my last update, I've been studying successful JS sets to get inspiration for my own set of 5 knives. I've been using the gallery from SharpByCoop SharpByCoop website which was a tremendous help and for that I would like to thank SharpByCoop SharpByCoop .

The ABS rules state that all knives must have guards or bolsters and two of them must have a blade over 6". Pattern welded steel is prohibited anywhere on the knife. Any antique style finish is a no no.
With all that in mind, I made a plan. So far my set consists an angry nessmuk style blade, a hunter style, a small bowie, a trench inspired spear point and a bowie.

I began by forging the angry nessy, I got my rough profile from a bar of 80CrV2 steel.
View attachment 2742349

I cut it off the bar to work a bit more on the tang side of things.
View attachment 2742350View attachment 2742351

Next one was the small bowie, made from some 1070 steel.
Even though my life would have been easier if I began my forging from the angled cut side, I forged my tip from the square side for the practice.
View attachment 2742352View attachment 2742353

Some refinment on the tip and I started working on the bevels.
View attachment 2742354View attachment 2742355

Almost done with this one as well.
View attachment 2742356


I got a bit carried away with these two and ground them prior the heat treatment, hopefully this will not bite me in the butt later on.
View attachment 2742357

And some fast forward (I was too focused and didn't take any pictures), I forged the rest of them and cleaned up the profile on the grinder.
View attachment 2742358

My plan for today is to do the thermal cycles, anneal them and be ready for the final stages of heat treatment. More likely these 5 knives will not end up being my final set, as long as I have time, I'm going to keep making knives and in the end choose the best of the lot.
Those all look good. You have a lot of talent. Thanks for sharing.
 
Good morning everybody!

For anyone wondering, I have not forgotten about this thread. Things have been a little bit hectic lately but progress towards the goal is made, which is nice.
Since my last update a lot have happened therefore my todays update is going to consist a medley of the past months.

First and foremost, the plan has changed and I will not take my performance in France. Instead, I will take it in New York city (if anyone is in New York city and wants to meet/give me some advice on what to avoid etc, feel free to contact me)
I came into contact with mastersmith Paul Distefano who agreed to let me take the test in his shop. I'm currently waiting for my passport to be able to make the required arrangements.

Also, we spoke on the phone and he gave a lot of advices. There is a big chance I will not present my set of 5 on this bladeshow. It will all depend on the feedback I will get on my fit and finish when I visit Paul.
Until then, I'm practicing various techniques.

As Neels Van den Berg said (mastersmith from Sout Africa) and I'm paraphrasing "making a knife is a series of steps, learn and perfect each step and in the end you have a knife". With this in mind and Pauls' advice, I scrapped all my blades and began working on the steps I was having trouble.

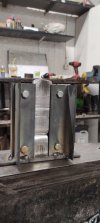
The first step to improvement was to make a guillotine tool. This will help me isolate the tang area without messing up my ricasso.
The tool was made from scrap steel I had in the shop, hence its awful appearance. However, it works like a charm!
67.jpg68.jpg

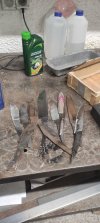
These are my scrapped blades so far (I have many more since I took the picture). A lot of different reasons on why each got scrapped, however some steps had a higher percentage of failure.
69.jpg

One of those steps was the plunge lines. Even tho I can get them pretty even, I wanted to get them a step further.
Since I could not make a knife out this steel, I used the 1084 steel that had a problem with the grain to cut out a few blanks. These blanks resemble a ricasso just to practice the plunge lines.
This was the first round.
71.jpg

Many blanks and various different techniques later, I'm pleased with the end result. The picture with the close up and the grid looks a bit uneven but keep in mind, the two center lines are 20 thou apart (0.5mm).
72.jpg
73.jpg

And with all that being said, I'm currently working on a practice knife. This one will not be on the set for sure (it's a stock removal knife). However, I will complete it and send various pictures to Paul for more feedback.
74.jpg

Now that I know what I have to do, I will update more frequently.
 
Good evening everybody!

Things have been a little bit hectic in the shop but there is progress. I'm not posting a lot lately because things are a bit repetitive.
I almost completed the practice knife and along with Paul's advice, I managed to upgrade my skills. I did not 100% complete it because it had compounding errors which made no sense to keep fighting them.

With my newfound knowledge, I began what will hopefully be my set. I still do not know whether I will make it in time for Bladeshow. If I don't, there will be a second testing in Troy Ohio in August.
So far I have not taken a lot of pictures, I keep forgeting when I'm focused.

My plan this time was to forge them thick and give me plenty of room for mistakes.
75.jpg

A little clean up with the grinder and some more forging.
76.jpg77.jpg

All of them surface and rough ground prior to the heat treatment.
78.jpg

Post heat treatment and began the long process of grinding them.
81.jpg

An easy way to make sure the decarb is completely ground off is to etch the blade, decarb shows up light grey (same as the line above the bevel) instead of black.
80.jpg

Magnetised blades caused by the surface grinder pose a problem, they attract steel dust which scatches beautiful finishes (a big no no). A small watch demagnetizer works wonders for that (I bought it as a proof of concept, I plan on getting a bigger-better one)
82.jpg83.jpg


Here are all of them in their current state, ground to 60grit, ready to move forward with the final grind.
84.jpg

Tomorrow's plan if to keep moving forward with the final grind, hopefully will have at least one completed.
 
I hope everybody had a great Easter! I'm really glad you guys enjoy the process, there is still a long way to go but hopefully things will start make sense as I go along.

I've decided to work on all five knives at the same time or at least for most of the steps. I will not post each step from each knife because it will be repetitive. I will try however to capture all the steps of the way. I'm pointing this out because you may notice different knives from one step to another or different finishes written on the blades and might be confusing.

Since I've began the final grind on all the blades, I decided to sand the flats a little bit. Not a lot, just enough with 180grit to remove the surface grinder 120grit scratches.
Ever since I got a laptop with netflix into the workshop , sanding has been a joy.
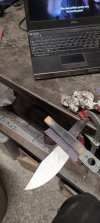
85.jpg

So far, all of them have a sanded 180grit finish on the flats and a 60grit on the bevels. I'm trying a new process for the final grind and I think I will stick with it.
This is my new process:
1) 60grit to remove the bulk of the material.
2) 120grit to refine the scratch pattern and get close to my final thickness.
3) 240grit to take off all the deep scratches
4) insert a carbide file guide and with a 120grit on my waterfall platen even up the plunge lines.
5) refine the scratch pattern and plunges with a 400grit.

This is my waterfall platen, I wil definitely need a better motor on my grinder because mine has no torque and it's really easy to stop it with this configuration. Luckily, slowly but surely it works for now.
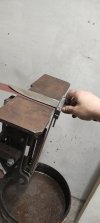
86.jpg

With the table square to the platen, I can check whether the plunges are indeed even. The two little tabs make it really easy to spot any unevenness.
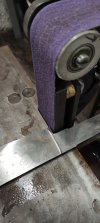
93.jpg94.jpg

And here it is with the choil compeltely ground. I'm pretty happy with the result on the plunges. As a point of reference, the edge in the zoomed picture bellow is a little less than 20thou. Other than a very zoomed in view, there is another way to check for symmetry later on.
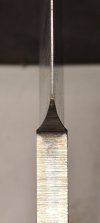
87.jpg

The first knife I decided to work on was a small-ish fighter/big chonky EDC. I quickly took it to a dirty 400grit and set it aside to work on the next one.
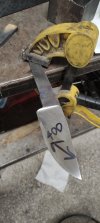
88.jpg

The next one was a fighter. I pretty much followed the same steps as the previous one.
A major step I forgot to mention earlier was to check the tip centricity and that my distal taper is even (yes, you may have a centered tip but an uneven distal taper)

There are many ways to check the tip centricity, a dirty and easy way is with a 123 block and a stable can.
Lay the blade flat on the ricasso on a 123 block, scratch the can, flip and scratch again, the two scratches should line up.

A more accurate way is with a height gauge.
Same as before, lay the blade on a 123block and with the height gauge go until it barely glazes over the tip. Once there, zero the dial and flip the blade.
A perfectly centered tip should glaze the same way on both sides without any adjustments on the height gauge. If it's not centered, the dial will show how off the tip is and which side should be ground to fix it.

Here is a video of this process from an older knife, as you can see this one was 0.1mm off center.
A flat and parallel ricasso is a must for both to work, if the ricasso is not parallel, the measurements will be all over the place.
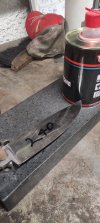
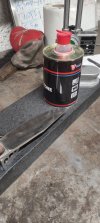
90.jpg91.jpg

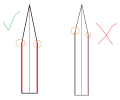
For the taper, things are much easier. Three scribe lines on the spine will reveal any uneveness.
My picture does not capture correctly what I want to show, therefore I made one in paint.

A center line and two more near the edge of the spine are all that it's required. With an even taper, the two outer scribe lines end in the same plane (cyrcled areas).
taper.png

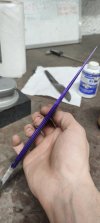
If you notice closely, you can see the two scribe lines terminating at the same plane.
92.jpg

That's it for today's update. I will have more to show within the week.
 
Back
Top