Shaping and sanding difficulties. (Rapier)

Joined
Jan 12, 2025
Messages
27
Hello everyone. I am working on a rapier right now. I am REALLY struggling with my belt sander (inconsistent angles, tooling marks left, deep gouges in spots, etc.) I have a cheap Ryobi 4x36. Two questions. It it really super helpful to have a 2x42 or a 2x 72 instead? Also, I make swords more than knives (at least for right now) is there any good jig setups you'd recommend to help keep angles super consistent? I find myself doing A LOT of hand sanding to get out blemishes that in principle should not be there after belt sanding.

The rapier itself is 5160 spring steel hot-rolled and annealed, Hammer-forged, normalized twice, heated until glowing red and non-magnetic, 7 second quench in Parks 50 oil, tempered at 350 for one hour, then again at 400 for one hour. Came out upper 50's HRC, great flexibility. Relatively straight, one super annoying curve at the tip. Pro tips on straightening after quenching I could use also. The untrained eye wouldn't notice the bend but.......I DO lol.
 
an extra 30" of abrasive goes a long way especially when a lot of material needs to be removed.
 
Clamp to a 2x4 and use files, they'll help even out the grind and get the deep marks out. Coarse, fine then jewelery files. I dont mean the little ones, I mean the super fine files used for jewelry making. Hard enough for most hardened steel and leave a finish you can move to stones or paper. use files in one consistent movement though, otherwise you'll pick up steel and leave a worse gouge than before.
 
On a long blade the best way is by hand. Turn off the equipment and go back to Old School.
Clamp the blade to a straight 2X4 at the edge and use abrasive paper wrapped around a piece of hardwood or aluminum. Work your way down in long strokes.
Dipping the paper in soapy water helps a lot. Use abrasive paper like it was free and toss it when it shows down.

Caution: The edge may become sharp while sanding. Dull it back as needed to avoid cutting yourself. This tip is from personal experience.

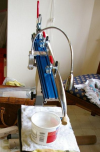
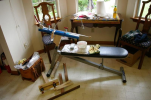
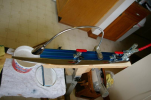
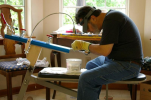
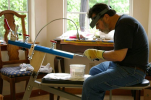
Photos and info on my togi dai:

1740661171741.png1740661191773.png1740661206890.png1740661219731.png1740661240873.png
Togi Bench.jpgtogi bench 1.jpgtogi bench 2.jpg

You can make a super long platen for doing sword blades on the horizontal position of a good 2X72 setup. I made a 24" long platen but almost never used it. I used a longer belt (IIRC, 89") for the long platen. I eventually took the platen apart and re-made it to fit my radiused platens.
 
Last edited:
Clamp to a 2x4 and use files, they'll help even out the grind and get the deep marks out. Coarse, fine then jewelery files. I dont mean the little ones, I mean the super fine files used for jewelry making. Hard enough for most hardened steel and leave a finish you can move to stones or paper. use files in one consistent movement though, otherwise you'll pick up steel and leave a worse gouge than before.
Thanks. I HAVE used filed for this purpose before. Probably should have now instead of the belt sander.
 
I’d grab one of those tilting table jigs for keeping angles the same. Housemade makes them as do a few others.

For warps, pick up a carbide tipped hammer. Worth its weight in gold.
Great tips, thank you. I will look into Housemade. Do they come with degree marks? or just....eyeball it. Also, What purpose does the carbide tip serve?
 
They don't come with degree marks because that is relative to the degree of the platen. You can get an angle guide, (I like the digital magnetic) zero on your platen, then set the tilt rest to whatever you want. I don't know what tools you have or your fabrication ability but I made my tilt rest from angle iron and 3/16 plate.
 
No angle degrees on the rest, just start at a 45 degree to grind to your center line then slowly make adjustments tilting the angle shallower until your bevel line climbs to where you want it.

The carbide tipped hammer is for warps. Some light taps on the concave side of the warp fixes it like magic.
while still hot?
 
Does anybody else ever have a project that feel just cursed from the beginning? lol. Running out of stuff, making mistakes, rushing towards completion, then making more mistakes? This thing is worth nothing more that a display piece now. Which, is good that that is all it's for lol. Cosplay.
 
And yes on the cursed part.
😁
on the concave part? (i.e., the low spot)

also relevant, look for T Taz 's comment with pictures:
 
😁
on the concave part? (i.e., the low spot)

also relevant, look for T Taz 's comment with pictures:
Haha yes the low spot, not the “cursed” spot
 

So here it is everyone. The problem comes from being rushed. I feel like I could have done a much nicer job had I been able to take my time. I made so many mistakes that I decided to go with the "used/weathered" pirate sword approach. Not sure really what this is called. The blade is the dimension of Arya's sword "needle" from game of thrones.

My niece intends to use it as a cosplay sword, basically only for dress up. Which is good because, I snapped off the Tang and had to re-weld it on. So, not functional this one. However, snapping off the Tang DID allow me to get a good look at the grain size from my forging/quenching/tempering process, which I think was very good. Looked like a very fine sand.
 
I only see an image of the pommel and part of the guard? Is there a photo of the whole sword?

"Fine sand" may look different depending on where your sand is from. Fine sand from Hawaii would be very good. Fine sand from North Carolina's Outer Banks would be not very good. I don't know what Colorado sand looks like.
Break a file in half and look at the grain. That is fine grain. Also, snapping the tang off is a sign of improper HT and/or tempering more likely than grain size.

On your statement, "I could have done much better if I had been able to take my time." ... the remedy is simple ... Take your time. There is no excuse for trying to take short cuts or rush things. Slow down. Some knife/sword projects may take a year to finish. I have two nice Japanese sword blades that are almost finished sitting in the corner of my living room waiting for the time when I can dedicate the many hours of final sanding and polishing (shiage togi) and do the tsuka-maki. When I get to the finishing, I will do it slowly and completely. I could glue on some scales and do a quick maki, and say they have an ancient look, but that would not be true or fair to the blades or myself.
While we all do it occasionally, saying, "That's good enough." is rarely true.

Labeling a rough finish as "rustic"" antique", "pirate", "primitive", etc. is not how to do it. Those looks are gained by carefully creating the knife with a deliberate surface or finish, as in kurouchi or Brut-de-Forge. Many antique blades are very well made and finished. Time and the elements may have changed the surface, but the workmanship is still clear. Another example is calling a big roughly made Bowie a Frontier knife. There were probably a million big Bowies made in Sheffield England and shipped to the USA and Australia in the last half of the 1800's. None that I ever saw had a poor fit-and-finish or rough surfaces. Some were works of art despite their selling for a cheap price.

Funny memory:
I don't recall if it was at a hammer-in or at Ashokan, but a fellow doing a talk on fit-and-finish had a knife that was pretty rough looking. He said it was a primateive blade (not primitive). After folks laughed, he explained that it was made in one day by a monkey in his knife shop. He showed a blade of the same size/shape/handle and it looked quite nice. He said it was made by the same monkey when he took his time. His point was it is often not a matter of skill but a matter of taking the time to properly finish every step before going to the next one.
Stacy, I agree. I know why it snapped, and it was because of a series of events I did, which DID ruin the heat treatment in that exact localized spot. And then I tried to bend it. I also agree that there's no substitute for time. As you so aptly pointed out earlier to me, that is the reason why my first post with the red Ninjato was much higher quality. However, knife making is less important than my family. So, it needed to be done and over with. As far as "fine sand" think closer to powder than small rock grain. I did flex test the blade, and it was VERY flexible, but then I stick welded it at its thinnest point. Some of us learn the hard way.......I HAD intended on not welding the handle at all, rather pinning it but......life happened
 
Last edited:
Also, the imgur link I posted has several pictures? I'm still not sure why it won't let me use the actual image link
 
Back
Top