Sharpening Practice and Progress (Likely to be pic heavy)

Joined
Sep 9, 2013
Messages
118
I have sharpened my knives for years using stones, ceramic rods, a Lansky guided system, and a few other devices but I've never done it regularly or well. Recently, I decided to get serious about sharpening and, over the past 2 months or so have acquired 3 new systems:

- A Washboard from HeavyHanded
- A Ken Onion Edition Work Sharp
- A set of Shapton glass stones in 500, 1k, and 4k

I want to learn to freehand (hopefully well) with both the Shaptons and Washboard but I couldn't resist the Work Sharp ;) I have a few pretty beat up folders but most of them are semi-serrated and aren't ideal to use as learning tools. So, I've been looking for several weeks for some more appropriate knives to practice with. Today, I hit the mother-lode. I found 2 partial sets of knives with matching wood blocks for $9.99 each at a Salvation Army store. The edges range from dull to completely blunt; most have stains or other marks; and some are damaged with chips, broken tips, and the like. One is a "Hampton Forge" set, the other is "Chicago Cutlery". Both are made of an unspecified Chinese stainless steel and are the type of inexpensive set sold at Walmart and Target. In other words, they are

PERFECT!

I'll be practicing with all 3 systems but will focus on the Shaptons, at least initially.
I intend to beat the hell out of these knives as I gain skill and refine my technique. I plan to sharpen them and then purposefully dull them so they can be sharpened again. And again. And again.

As I was driving around doing other errands this afternoon, it occurred to me that I was really excited because I had just bought a whole bunch of low quality knives in poor shape. Ohhhh, the irony... :)

- Tim


I'll post some pictures of my results as I progress. Here are some shots of the victims:

The knives and blocks:
7IB5JVY.jpg


After washing:
lZcO3pR.jpg


Condition example #1:
57vnnbJ.jpg


Condition example #2:
VLDf8ga.jpg
 
Tim, looks like a great project. Will be interesting to see how it goes.

Andrew
 
Round 1 - Hampton Forge Chef's Knife

Since all of these knives are pretty beat up, I decided to cheat a bit. Before I wasted any time on my stones, I wanted to make sure they would actually take an edge so I used the Work Sharp - Ken Onion edition to verify I'd be able to sharpen them at all.

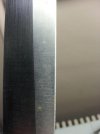
I apologize for the picture quality as all I have is my phone camera. The first picture is the "before" shot but it needs a bit of an explanation. The angle the shot is taken from is closer to edge-on than perpendicular. There wasn't much visible bevel on the blade and what little existed was abused. It's hard to tell from the picture but the edge was more or less flat and blunted. It looked like someone had chopped veggies on a marble counter top or something. The edge would not cut paper and I could run it across my finger with virtually no bite.

BoXWD0B.jpg

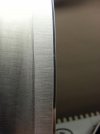
The second shot is after I ran it on the WS set to 17 degrees using 4 belts:
  • The stock, WS P120 Extra Coarse
  • Micro-mesh 240
  • Micro-mesh 320
  • Micro-mesh 600


fiTnao8.jpg

The scratches you may be able to see running along the length of the body of the blade are from a rust eraser I used to take off most of the rust spots and stains. If you look at the bottom of the bevel you'll see a reflection of part of my hand. Yeah, the WS is pretty impressive and FAR surpasses my skills using stones or strops. Still, this gives me a target to aim for.

- Tim
 
I've been using my Shaptons heavily lately. They benefit tremendously from a little pre-"soak." don't actually soak them in water, but leave water on the surface for 15 minutes.

Shapton calls these "splash and go," but I don't think they are.
 
I've been using my Shaptons heavily lately. They benefit tremendously from a little pre-"soak." don't actually soak them in water, but leave water on the surface for 15 minutes.

Shapton calls these "splash and go," but I don't think they are.

Yeah but IIRC you have been using the lower grit stuff , the series as a whole is splash and go , but everything 1k and under I let soak a couple minutes..
 
even at higher grit i've yet to find a stone thats doesnt benefit from a short "soak" before use. being splash and go just means that it works without, wich is not the case of most stones, not that its the optimal way.
 
I've been using my Shaptons heavily lately. They benefit tremendously from a little pre-"soak." don't actually soak them in water, but leave water on the surface for 15 minutes.

Shapton calls these "splash and go," but I don't think they are.


I have been doing this as well. How's that 500 working out Mag? It's on my short list.
 
Thanks for the info on a slight pre-soak for the Shaptons. I'll be using them for the next knife.

- Tim
 
I love the group photo of them laid out on the towel - a rogues gallery of sullen and neglected cutlery. Looking forward to seeing them reformed - save them brother Tim, save them :)

Makes me want to swing by the Goodwill and see what they have kicking around...
 
I love the group photo of them laid out on the towel - a rogues gallery of sullen and neglected cutlery. Looking forward to seeing them reformed - save them brother Tim, save them :)

Makes me want to swing by the Goodwill and see what they have kicking around...

Heheheh, I'm going to try, Martin. A couple of the blades are pretty dinged up and chipped and I plan to use the Washboard for those. I don't want to gouge the stones with my less than refined technique :) And one of the great advantages of the Washboard is cost - sandpaper is a hell of a lot cheaper than Shaptons! Your entire system and enough sandpaper to last me several months cost less than the 1000 grit glass stone ;) In any event, by the time I'm done I'll have gotten a bunch of practice time on all three systems.

My original thought was that I'd find the one I like best and sell the others. After getting a little time in on all of them, I'm beginning to see that might have been a simplistic goal. It seems to me that each system has strengths and weaknesses and there isn't going to be a "best" one. Once I've run through all of these knives I'll write up my assessments of each system from a beginner's perspective.

I also went to a leather store last weekend and found that they sell leftover pieces of hide. I bought a shoulder that was about 4 sq ft of 8oz - 9oz (cow) leather for $25 and was able to get 9 clean 4" x 12" strips. I'm going to case and compress them and make some strops by cementing them to 2 x 4's. But that's a story for another thread...

- Tim
 
Last edited:
Round 2 - Hampton forge utility knife

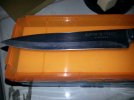
I decided to give the Shaptons a go tonight with this knife:

ovMfdhe.jpg

It wasn't as sharp as the Chef's knife and again, parts of the edge were nearly flat. Although it was dull, I was able to sort of saw/tear through paper.

I used the 500 to work a steeper bevel onto the blade. Once that was done I was able to raise a small burr fairly easily which I worked back and forth several times. Once it seemed like I was more or less just flipping it back and forth, I started using lighter and lighter strokes and then edge-trailing the blade until I got the burr off.

I moved on to the 1000 and was again able to raise a small burr pretty quickly. When I say small I mean that at times I could barely feel it with my fingernail. It was here that I realized the curve of the blade leading to the tip and the tip itself were not as sharp as the rest of the edge. I tried focusing on that area and seemed to be getting good results but when I started removing the burr (lighter strokes, fewer passes, trailing passes) it seemed like it was getting duller.

I decided to move on to the 4000 anyway and that's when I realized I had a problem. I took a good look at the tip area and discovered the blade was a bit thicker up there so I must have been working the shoulder rather than the edge. At this point I'd been working for almost an hour and decided I'd put it away and give it a shot tomorrow.

- Tim
 
sounds like angle issues and not apexing. but you are doing it the right way by practicing! :thumbup::thumbup: do you own a loupe? A good, powerful loupe will let you see exactly what the apex looks like under magnification after each stone. I recommend the Peak 22X.
 
sounds like angle issues and not apexing. but you are doing it the right way by practicing! :thumbup::thumbup: do you own a loupe? A good, powerful loupe will let you see exactly what the apex looks like under magnification after each stone. I recommend the Peak 22X.

Yup, I have a 20x loupe but it was out in the garage and I was lazy last night. I'll be using it tonight for sure.
 
As an aside, which model Peak loupe magnifier do you guys recommend? I bought a 10x Peak all plastic loupe (less than $25), but it's not easy to use; getting enough light on the blade and positioning the loupe to be in focus have been challenging. A bigger field of view would be a real plus.
 
I got the Peak 22 and haven't looked back. Very nice, multi-element coated lens. You can see everything happening on the apex. Depth of field is small due to the high magnification.
 
I got the Peak 22 and haven't looked back. Very nice, multi-element coated lens. You can see everything happening on the apex. Depth of field is small due to the high magnification.

Thanks. I'll try the 22. Having the ability to see the the edge, to see the burr, will be helpful to me since my finger tips are losing sensitivity.
 
I had a sick kid over the weekend and that precluded any knife work. Last night, I grabbed another of the Hampton Forge knives and took another run at the Shaptons, using the 500 and then the 1000 and then a light strop on the Washboard with plain paper. I re-watched some of heavyhanded's videos before I started and made a few changes to my technique:

  • I used shortened my strokes, still using a back and forth "scrubbing" action, and worked the blade in smaller, overlapping sections.
  • I used a somewhat more obtuse angle as I think part of the issue with my previous attempts on the stones was that I was trying for too tight of edge. I think I was actually re-profiling the blade rather than sharpening the edge.
  • I had more patience and was less...rigid(?) in my approach. I didn't worry about doing an exact number of strokes per side on the 500. I worked one side until I was leaving less swarf on the stone and my passes felt "smoother" for lack of a better word. I'd check for a burr and then work on the other side in the same way. After my passes started feeling smooth and easy on both sides, I started evening out the number per side and lightening my strokes a bit and then, eventually, back-trailed the blade lightly several times on each side before moving to the 1000.
  • On the 1000, I used less pressure and made more of an effort to work both sides evenly.
  • I used my loupe this time :) I saw defined, (mostly) uniform scratches during and after working both stones.
  • While stropping on the Washboard with plain paper, I used very little pressure.

The results were good - the best I've achieved so far using any stone. Most of the blade came out very well with a uniform edge that was 3 finger sticky and easily able to cut printer paper smoothly and, for me, quietly with a gentle draw. Newspaper worked very nearly as well. Still, I have some issues.

  • The area I am having trouble with is the end of the blade as it begins to curve up to the tip. As I was checking the edge, I'd see a little bit of light reflected back along that part of the edge only.
  • I spent extra time working just that area, focusing on keeping the angle the same as I moved along toward the tip.
  • Oddly, the edge from maybe 1/4" down the blade out to the tip, came out well. It was that area from 1/4" back to the beginning of that curve, maybe a total of 3/4" that I couldn't get quite right.
  • It came out sharp but definitely not as sharp as the rest of the blade and I could hear, see, and feel the difference cutting through paper.
  • The loupe showed that the edge was thinner in that area of the blade but it is not strong enough for me to really determine if the angle is much different.


Any advice on how to deal with that rounded approach to the blade tip?


I'll post some shots tonight but I doubt my camera will be able to capture detail at that level. I may borrow a better digital camera and see if I can get some clear shots.

- Tim

It can take a few to work this area down coming from the factory - is frequently ground at a more obtuse angle - not sure if that's what you meant when you said the edge was thinner. Is frequently a spot where the feedback tends to diminish somewhat as well, leading to a bit less bevel consistency. Just take more time on the 500 before moving up, make sure the burr is continuous before advancing. The pics below give an idea of how the bevel contacts the stone through that region, and is a good idea to work it a bit more dynamically - fore and aft at the same time as you manipulate the handle up and down. No need to hit the entire belly in one pass, I scrub right through it in overlapping sections just as the rest of the edge.

Also recommend using two sheets of paper on the WB and a bit more pressure when stropping, especially with no compound and on softer cutlery. The polishing/burnishing effect will be more pronounced.

0612021230a.jpg


0612021231a.jpg


0612021231.jpg
 
Thanks, Martin. Those pictures are perfect. I was not lifting the blade as much as I came around from the main body of the edge to the tip. That does make sense as I think about the results - that curve was clearly not as sharp and since I could see a bit of light reflecting off the edge there, the apex must have been incomplete at that point. I was worried that too much lift would wreck the edge. I'll try to clean it up tonight with a steeper angle.

I may have been using my terms incorrectly. By saying "I used a somewhat more obtuse angle", I meant that I inclined the blade towards perpendicular to the stone as opposed to laying the stone flatter against the stone - a steeper or higher angle (like for putting an edge on a hard use knife) vs. a shallower or lower angle (like for putting an edge on a fine work blade like a sushi knife).

- Tim
 
Back
Top