Smokestacks and the Whatnot

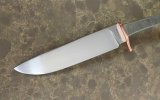
The edge on that is just under 3", a no frills little cutter in .10" 52100. Thin scales (maybe walnut or cherry to keep the cost down), and bronze pins @.093". A basic sheath with a nice and easy price.

Hey, seems like the little one would just be easy to carry. You might even carry it several times a week. You might even give it a clever acronym, such as......Several Times A Week="S.T.A.W". That would be easier to reference it as well, "This Redmeadows knife is my STAW! :D


Just kidding, John! ;)
 
That's A Terrible Acronym ←Oh hey, the TATA! :D

We need a "worst acronym contest"!
(Man I hate acronyms) MIHA!
 
I used to date this lop-sided chick, it was pretty amusing. :D
 
Random picture. I'll be soldering guards once the blades are all handsanded.
 
I'm slowly finding a style that I like, guards are a lot of work for me so far, but they open up a lot of options in the design.
 
The extra hardware makes a nice backdrop for the photo!:cool:
 
Last edited:
I agree, I love the finish on the primary bevel, I can't see it as much on the second pic because of the lighting but it's easy to see in the first pic though. Is that all done usin' a small contact wheel, the radius by the choil is so tight/small. The lines are crisp and not muddy like I see on a lot of knives in that area. :thumbsup:

IMG_20170413_023631_zpssfgbir8c.jpg


index.php
 
Thanks Ted, I use a flat platen on a 2x72 to grind the plunges and main bevel. I do it freehand and spend a lot of time cleaning things up by hand. The choil area radius is done with files. It's not a perfect radius, it straightens out a bit before it meets up with the guard.

The finish in the first pic is 320, the second is to 600 with a few 1000 grit strokes over that. I need to find a spot to keep my light box permanently set up so I can get better pics without the glare. Shiny things are a pain to photograph!

I don't go crazy over crisp lines everywhere, personally I think there should only be one edge on a knife! I usually soften the edges of spines and swedges a tiny bit, thats blasphemy to some. I do like things to look clean in the plunge/ricasso area, and that's a constant battle for me.

 
Just crisp where they should be, I'm not fond of 90* spines except for Bushcraft knives and only a small portion in front of the scales. One day John, we'll work out something and I'll get to throw a small EDC from you into my back pocket. For now I'll live vicariously through Mack and the knives and WIP s here. I especially loved the one where you did the stacked washers, that was awesome. :thumbsup:
 
Sounds good Ted, a pocket fixed blade project would be sweet.

Ok Dennis, so this is a turrrrrble picture and it might be tough to imagine what the end result would be, but take a look at the spacer layout and let me know what you think. From front to rear it's:
Copper guard
Aluminum spacer
Leather/bronze times a bunch (very technical terms right there:D)
Blackwood
Aluminum spacer
Copper end piece

That might sound like a hodge podge but I think the bronze spacers will make the copper pop on each end and the aluminum wont be too overbearing and bring it all together.

IMG_20170419_120940-1760x470.jpg

Dennis, if ya hates it, we can go whatever direction you want brother. I'm easy like Sunday morning.
 
John, I'ma liking that lots! With the shiny blade and copper, I think it will look great! Drive on! :thumbsup:
 
I might try adding a slice of copper and another aluminum piece behind the guard. We'll have a better idea when we start stacking. The blackwood is slotted through, that was fun on a curved tang.
 
Back
Top