Spark Bong question/WIP/construction

Joined
Jun 3, 2019
Messages
2,714
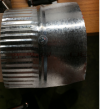
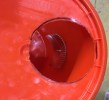
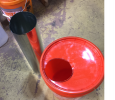
A recent thread commenting that spark bongs can be effectively made from plastic buckets started me off on making one (which I have wanted to do for a while, but procrastinated because I thought I needed to use a metal can). so .... a Home Depot bucket with hole cut out in the lid for a length of 5" steel duct:
upload_2020-10-15_16-9-6.png

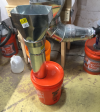
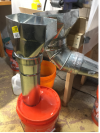
Said duct inserted into bucket with 6" heat register and reducer down to 5"(I will add a big pipe clamp later around the pipe to maintain appropriate height relative to the grinder and bottom of the bucket, and to make it adjustable :) ):
upload_2020-10-15_16-10-59.png

The outlet, to be added later on the right side of the bucket will be 2" PVC with a run to the dust deputy just visible on the right of the photo.

HERE IS THE QUESTION: previous plans call for a divider between the inlet and outlet running from the bottom of the bucket to within a few inches of the top. Previous comments have been to make that divider out of sheet metal. Probably stupid question, but.... ==> where on earth do you get a small quantity of sheet metal like that????? I have looked at my local hardware store, and Home depot, and see none at all. Any ideas???
 
Oh, yeah, duh. I was actually glancing at some the other day, and did not make the connection. Getting old I guess....
 
home depot/lowes sells small sheets, and my local auto parts store sells small sheets for repairs. even plexiglass or plastic would work. make sure the airspace area above the divider is larger than the input/output tubes so it will not cut down on the airflow.
 
They sell metal 5 gallon buckets with metal lids at my local Benjamin Moore supplier for about $8 a piece.
With metal, I was mostly hesitant about my ability to cut reasonable circular holes in the lid. Also, the lids don’t have a gasket seal the way the Home Depot buckets do...
 
home depot/lowes sells small sheets, and my local auto parts store sells small sheets for repairs. even plexiglass or plastic would work. make sure the airspace area above the divider is larger than the input/output tubes so it will not cut down on the airflow.
Oh yeah ... rest assured I went through all the airflow cross sectional area calculations to make sure that would not happen. :)
 
Have the inflow tube (bong) come to 2" above the water. 4" is a good size tube, and the AC duct piece you used is what most folks use. The outlet tube should be smaller, with 2.5" being a good size ( to accelerate the airflow. The outlet tube should not stick any more below the lid than necessary.
The divider should go as far down the bucket as the inflow tube does. A piece of plywood screwed to the bucket from the outside would fine. It is a directional diverter, and being airtight isn't a necessity. It is good to put a piece of weatherstrip foam across the top to seal the top a bit better to the divider, but it really doesn't make much difference. Sealing up the tubes in either metal or plastic can be easily done with silicone caulk.

TIP:
Make a metal "bracket" of some sort to mount on the inside of the bucket for the inflow tube to rest on. It should have a little lip or piece that goes up the tube a bit. This makes the tube less wiggly and likely to get tilted or want to lean in use. On the last one I built I used the reduced cutoff end from the piece of ducting tube I used for the down tube and just screwed it to the side with a few spacer washers. The down tube seated on the reduced end and made the assembly rock solid. Once everything was fitted up in the bucket, I snapped the lid shut and applied the sealant around the down tube from the outside of the top. Ater it was cured, I applied it to the tube on the inside of the lid.
 
Last edited:
Thanks Stacy. Two questions:

I thought the divider went all the way to the bottom ... so the airflow (and particle flow) is firSt down, then over the top of the divider, then down again on the second side (giving any metal particles two opportunities to fall into the water).. can you clarify and try to relate reasoning?

I was thinking about using those cutoffs in some way, but nothing good occurred to me. I’m having trouble visualizing what you are relating. Are you saying to take a piece of cutoff. And secure it to the side of the BUCKET. Leaving a little ledge for the bottom of the down tube to rest on?

a plywood divider would be easier to construct ... and I could use small L brackets to hold it in place. You would not worry about the plywood breaking down being in constant contact with water? (Sorry, I guess that is 3questions)
 
The plywood will probably last longer than the bucket in the setup I described. It does not sit in the water. A piece of 3/4" exterior works great. Some folks make the plywood a snug fit to the bucket sides and attach it to the lid with screws and caulk. As long as it seats fairly snug against the sides when the top is sealed, it is fine.This makes cleaning the bucket really easy.

No need for brackets. Just screw it in place with screws from the outside of the bucket.

Yes, you can use the down-up-down method, but that does put the divider in the water. Un;ess the bucket is made perfectly watertight between the two sides, the uptube can suck the water out of the bong into the shop vac ... which is a bad thing.

The down-under-over method works just as well and is simpler. No need for a watertight divider wall. The sparks go straight into the water and quench. The heavy grit and metal shards do the same. Any fine dust has to travel through the low pressure zone across the bottom and up to the top of the other side before exiting through the high velocity port. Most will drop by gravity into the water before it reaches the top. The rest gets caught in the shop vac or dust collector. There is almost zero chance the bong can accidentally run dry and have a fire start in it. Use a simple dip stick stuck down the down tube. The aunt of wet end is the water depth. Ad long as there is 1" of water you are fine. Pour some water down the tube to add more as needed. Unless you do a lot of grinding, you may only dump and clean the bong once a year ( although monthly is probably a good schedule).

There are two ways to use the cutoff piece to make the seat for the down tube.
1) Cut a roughly 4" long piece piece from the crimped (reduced) end and the down tube. The down tube will seat into it. Just attach it to the inside of the bucket so the bottom of the attached piece is about 2" above the desired water level. The down tube seats on the crimped end and holds tightly in place.
2) The cutoff piece is from the straight end of the tube and is attached the same way. Orient The down tube with the crimped end down to seat as above. Both are effectively the same. Technically, the second arrangement is better, but it is almost negligible.


NOTE:
I didn't point out in my earlier post that about 4" of water is a good depth, which puts the down tube about 6" above the bucket bottom. This amount of water is sufficient to ballast the bucket and keep it from tipping or being knocked over easily.
 
Last edited:
thanks again stacy. Im afraid my cutoffs came away in pieces, so your method wont work (unless I buy another piece). I'll figure something out. I thought I read earlier that 2" of water in the bucket was appropriate - looks like I will need to re-cut that downpiece (it is already closed up - I wonder if the portasaw will work easily on getting through that?)

With your "down-up-down" method I was not planning on making the divider watertight, and the outlet will be just a few inches below the top .... but your thought of screwing the divider to the top will work great - i'll take that approach! In either case - I will have a water filled dust deputy just downstream of the bong, so a little water going downstream should not be a problem. I am willing to take the hit in flowrate for the added defense against sparks making their way into the shop vac.....
 
Bolt a "Z" bracket inside the bucket and let the end of the tube sit on it.
s-l500.jpg
 
On my way to Home Depot now. Got a simpler idea (just a mod of yours). Will show photos when done
 
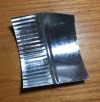
So Stacy - I did not have left an intact compete circle of the smaller "corrugated" end of the tube, but I did have several arcs:
upload_2020-10-16_18-3-34.png
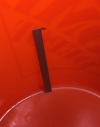
so ... measure 6 inches up from the bottom of the bucket:
upload_2020-10-16_18-4-22.png

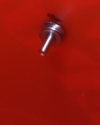
compensate for the width of the washers on the machine screw, drill a hole, and place the machine screw:
upload_2020-10-16_18-5-34.png

drill corresponding hole at appropriate location on that arc of duct:
upload_2020-10-16_18-6-25.png
and secure that piece of duct onto the machine screw (tighten with bolt):
upload_2020-10-16_18-7-36.png

Shorten the duct piece to appropriate length (dremel cutoff wheel worked well for this) to have the whole thing ride at the appropriate height for my grinder:
upload_2020-10-16_18-9-18.png
hopefully tomorrow I will be able to work on the PVC for the outlet side.

I think I am going to really like this. It should be both safer and easier to maintain than the current setup I have.
 
I don't understand what you mean here. The airspace above the divider being larger
Its a cross-sectional air flow thing. In the extreme, if you had a 5" diameter inflow tube, and the space above the divider (or below, depending on your construction) was the size of, say, a pin head, then you would have a huge resistance to air flow through that pin head size hole. So (I told you I had done the math!) - if the inflow tube is 5" diameter, its cross sectional area is pi*radius^2 = 3.14159*(2.5in)^2 = 19.6 in^2. So for the divider, if the width of the bucket there is, say, 12 inches .... it the gap is 1" in height, the cross sectional area would be length*width = 12in*1in = 12in^2 .... which is smaller than the cross sectional area of the inflow tube. If you make the height 2 inches, the cross sectional area above the divider would then be 12*2=24in^2 ... which is bigger than the area of the inflow tube, and thus should not add a bunch more flow resistance. Make sense??

(the actual "precise" flow calculations are much more complicated than that .... but this is a reasonable place to start to avoid creating a significant "pinch point".....)

No.
 
Back
Top