Stainless San Mai

Joined
Nov 27, 2013
Messages
1,626
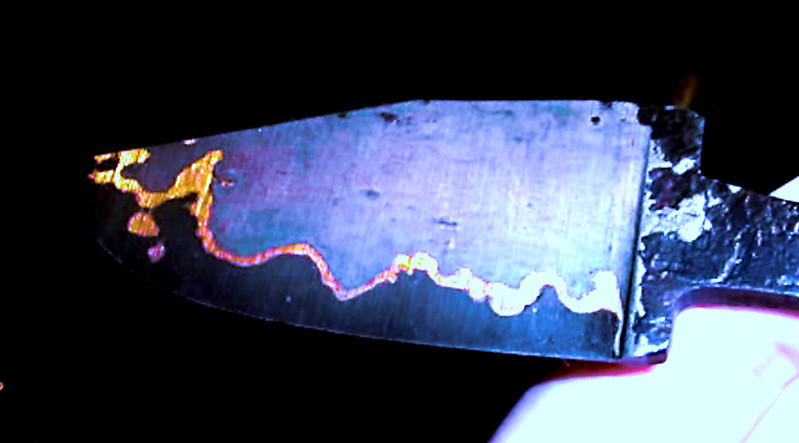
im gonna get right to it with this thread.

I’m hearing 420 stainless is the easiest stainless steel to forge weld for San Mai. The problem is, I can’t find it anywhere in a thickness less that .250”. Does anyone know where to get some 3/32”, 5/64”, or even 1/16”?

Now, as far as using it for San Mai. What is the easiest high carbon steel to weld it to? Once it’s forge welded, can the billet be drawn out a little or will that cause problems with the 420?

Lastly does anyone have advice for doing this? I’m planning to weld around the entire billet prior to attempting to forge weld it. In an effort to “dry weld” it. As there anything else I’m forgetting?
 
303,304 and 316 also work really well. Grind all surfaces clean then stack and weld. Weld all the way around. Then just pop it in the forge and heat and press. This is a 304/W2 blade I forged last year.

Photo%20May%2005%2C%205%2054%2010%20PM.jpg
 
410 can be drawn out. I started with a 3" long billet of 1/4" O-1 in the center, next on both sides was a thin piece of 15N20, then on the outside 1/4" 410. I drew the billet out to 8-9" long. I think maybe some have de-lamination problems when they try to forge when the billet is not hot enough.
 
Thanks a bunch for all the info gents, I really appreciate it.

Where are you guys getting your stainless steels for doing this? I can’t seem to find thinner 420 stainless anywhere. The one or two places I found it only had 1/4” thick or more. I’d really like to get some 3/32” or even 1/8” thick 420.

I’ve heard some folks use AEB-L, but that it etches darker than 420/410or 3xx stainless. I already have some thin AEB-L. So depending on what feedback I get, regarding forge welding AEB-L, I might just try that with some 1084.
 
Although, I personally do like using nickel sheet when using wrought iron for the jacket steel, the different carbon migration zones are one the coolest effects in san mai, at least in stainless san mai, but I still have yet to make it myself ;)

Here is one with nickel in between the wrought iron and 1084. Don't mind the horrible picture, it was taken like 5 or so years ago:


Hopefully Karl Andersen will chime in with a picture of one of his latest beautiful san mai blades showing all the activity going on in the migration zones.

I believe I remember hearing from Karl some years ago, regarding the core steel, at least if choosing between 1095 and W2, that 1095 keeps its nice, dark etch much better than W2 does, which I believe he said tends to get pretty dull after being scrubbed with 0000 steel wool. In other words the contrast remains better when using 1095.


~Paul
My YT Channel Lsubslimed
... (It's been a few years since my last upload)
 
Hopefully Karl Andersen will chime in with a picture of one of his latest beautiful san mai blades showing all the activity going on in the migration zones.

~Paul
My YT Channel Lsubslimed
... (It's been a few years since my last upload)

The degree to which you can display the migration/transition zone is equally proportional to the amount of TIME! you spent at welding heat.
Too many guys try to find thin jacket material in an effort to get their weld and then BAM! be done with it. And it's always easy to see who did this because their display is nothing but boredom.
On the contrary, I want to spend as much as I can at full heat slowly drawing out the billet.
I start with 3/8" 1095 and 1/4 inch 410. And I only draw out the billet by reducing 1/16" per heat.
This allows plenty of time to create cool migration effects.
The carbon migration in this amount of time is only taking place very near the weld. Don't worry - all your carbon that's at the cutting edge - in the middle of the core steel - is still there later for martensite creation.
CspJamL.jpg

VNsPpmg.jpg


Here is a metallography photo by Kevin Cashen.
On the far left is the core steel. The next stop to the right is where the carbon has vacated the carbon rich environment of the 1% C. 1095 and it "jumped"! into the carbon deficient stainless jacket in the next step to the right.
Then, finally, the fully carbon deficient stainless at the far right.
It is not a gradual transition. It seems to go in stages and "hesitates" before moving further. This can be seen in the very dramatic delineation between the zones in my photos above.
YEGqaTw.jpg
 
I actually shot a message to Karl on Facebook the day before yesterday. He got back to me yesterday and confirmed that he does indeed use 1095 for his cores and 410 for the jacket. He also pointed me in the right direction for finding the 410. Jantz knife supply. Karl makes some awesome looking stainless San Mai. So does Salem Straub.

Now that I’ve located the materials I’ll need, I need to focus on technique. My plan is to start small with a little 1.25” wide x 6-7” long piece around 1/4” thick. I’m thinking I’ll get .063” thick 410 for the outside jacket and a piece of 1/8” 1095 for the core. That should put me at around 1/4” thick or a little less after forging.

From what I’ve been reading, it’s best to “dry weld” all around the profile of the billet. That way it will be sealed. That being said, I’ve also heard to leave a small little port, but I’m not sure why. I’ll probably just seal around it entirely. Unfortunately all I have at the moment is a flux core mig welder(180 Lincoln weldpak) to do the welding. It can use gas/mig but I don’t have any at the moment. Will flux core be okay? I’m sure it will, but I always over analyze and worry about everything.

As far as the forge welding, I’m planning to have the forge running at temp and put it the billet in immediately after doing the dry weld. That’s a good idea BTW Tom Lewis. I appreciate it. Then heat until it’s bright yellow(2300f if I remember correctly) and then set the forge weld with light hammer strikes.

Once the weld is set, I’d like to draw the billet out some. But I’m not sure it that’s something that can be done without damaging the stainless 410. It’s not exactly a forging steel... Any advice you guys could give me about this or forge welding stainless would be greatly appreciated.
 
Oh, and I’ve heard of guys who blue or parkerize their blades to deepen the blackened color of their high carbon core. Is this something I should pursue?
 
But I’m not sure it that’s something that can be done without damaging the stainless 410. It’s not exactly a forging steel... .

Where did you get the idea you're going to damage your jacket? My billets are 7/8" thick when I start and I forge them down to their final thickness of about .270" before clean up.
 
The 2 biggest problems I encountered doing this are trying to draw too aggressively in a forging press, because the dies grip the jacket steel and move the core to a greater extent, you can squeeze it out like the stuffing of a warm Oreo and break your welds, and second, hammering the profile after setting the welds at too high of a temperature and breaking the welds.

Karl's advice is really good, especially reducing slowly. Not just for the carbon migration effect, but because stainless also doesn't seem to move exactly the same as the carbon core(edit- at least the 300 series. 400 series and I'm guessing AEBL seem better), so small bites and frequent heats keep from separating what was initially a good weld.
 
I've never experienced a delamination during forging and I forge against the vertical to forge down the ricasso and also fully forge out my hidden tang to size on my power hammer.
If you are fracturing welds, then, you don't have a weld. And until you resolve that problem you damn sure can't sell those knives.
 
Last edited:
I like to use coffee to blacken my cores after a ferric etch. Gets 'em solid black.
Carbon migration is indeed a cool look, and that micrograph by Cashen there is awesome and very good explanation. You do need to be careful though not to over-migrate when you're getting into very thin stuff like chef knives, since the grind angle is so low and the spine so thin the migration zone can really be wider than you want.
410 can be bought in big rounds and forged down. It forges nicely, and sticks to a mag chuck unlike 300 series (not great migration with those, either.)
With thicker blades the line will be a bit more stark, yet clean...
23659650_1540977862644951_1984776891539693145_n.jpg


With thin wide blades it can be wild and crazy from just having been drawn on the hammer...
22310546_1504773406265397_4924999151185377127_n.jpg


These are in AEB-L... you can see the effect of too much time at temp, too much migration, with the top one. Even in the bottom one, with a clearer line, you can see that AEBL, while it welds readily, etches a bit gray. This can be fixed somewhat by selective after polishing with loose abrasives or Flitz.

16683900_1280325818710158_4137563050275490859_n.jpg


This is 304 stainless... you can see that the line is much less active in terms of migration, even though it moves a lot from the dies.

16832088_1280326025376804_3675977970886789130_n.jpg


It can look really cool over damascus, particularly if you cut ladder in along the edge before final bevel forging.

20953109_1462340223842049_2607458077554618215_n.jpg


Or just random for a core... although using pattern weld for a core leads to a lot more experimentation to get the etch just right. Still messing with that.

23795489_1541877995888271_658216452635669320_n.jpg
 
Back
Top