Started My First Knife at Indian George's

Alright here is what I came up with in your earlier pic. Good news is looks like you can still turn it more into a drop point with what you have there. The black line could get you more of a drop point look. (Assuming you can draw it in better than my horrific MS paint skills). The other was going to be my suggestion if you wanted to stick with the hooked clip point design

I'm sorry Fletch, It's not your fault you can't keep up with my screw ups :D

I can't even keep up. But the advice and support is giving me a second wind.
 
And again another line of thought with your new look.

What you want to do is first and foremost RELAX and TAKE YOUR TIME.

Get yourself a sharpie marker or whatever and draw on the piece of steel what you want the shape of the blade to look like. Keep some acetone or whatever nearby to erase if you need to. But you have the ability to draw whatever shape you want the blade to look like and from there you can use whatever you have to remove the steel once you get the look you want. Remember to go slow and constantly evaluate what's taking shape. You can always remove as you go, but you can't add. You still have some wiggle room if you want more of a clip point. Just resist the urge to rush, hell my knife took months to get finished. If you need to post pics as you go with any questions. Again you don't have to follow that horrible drawing verbatim but maybe it'll help get the ole creative juices flowing.
 

Attachments

  • jeffs new knife-4.jpg
    jeffs new knife-4.jpg
    28.9 KB · Views: 17
I told you I got a second wind. I need to shower again though...

Did I save it???

006-3.jpg
 
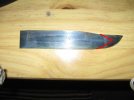
I can only advise that I find it much easier to work when I have a defined line I am working to. If you can draw at least a rough, oversize shape of what you want on the steel with a permamnent marker you can work faster to get the basic outline, then adjust and fine tune from there. You will have to re-mark the lines from time to time, they usually rub off after a while.

Trying to profile with a just a file is going to be an excersize in patience any way you do it. If you can use a hacksaw to at least take corners off where you have a lot of excess material, you will save yourself a lot of time. With some practice and creativity you can use intersecting cuts to remove metal in places most people would think impossible to get to with a hacksaw. Add a drill press to this and you can do even more by drilling metal out in places where the hacksaw won't work.

If you can get set up with a small portable bandsaw at some point in the future you will be able to profile with much better efficiency. In your situation this is probably the most cost-effective/least messy/dusty power tool you can add to your setup. The metal chips are too big to go airborne so they mostly just end up at your feet. I know this is probably a ways off for you but maybe it is something to look ahead towards. This would allow you to get 70-80% of the unwanted metal out of your way in a hurry compared to what you are doing now.

Harbor Freight sells one for around 80$, I'm not sure how well it performs though. Better than a hacksaw I would bet. I have a Porter Cable which cost around 280$ and works very well.

For a "stand" I have a small piece of 2x6 bolted to the frame of the saw that I just clamp into my bench vise and it becomes an instant bench-mounted bandsaw.
 
Hey Craig, Indian George gave me a stag handle to use, so I'm going to need a stick tang with a thread welded after heat treat. Here is a pic of the stag handle:

007-3.jpg
 
Nice piece of antler there. I have the antlers from my dad's 1st and only buck, a big 11 pointer and the antlers from my 1st buck, a smaller 7 pointer, that I'm going to use for handles in a "father and son" knife set....when I get good enough to use them ;)
 
How do I ensure my plunge cut is square? If I had a factory cut spine, I'd just use a square, but that's not the case. I'm thinking of starting my plunge a hair under 4". That's state legal for me, and it will be an EDC.

Thanks Everyone. More pics will follow as I slowly shave the metal away:D

Jeff
 
Make sure like Justin said, you draw out what you want the knife to look like on the steel. Just shaping it as you go is going to cause you more frustration than you need. You can make some minor mods here and there from the drawn design as you go should you feel you need it. But get the design on the knife so you know where you're going with it.

A file guide of some kind is probably the best way to go. When I did mine I used a TON of tape. I kept layering it upon itself in strips so I had something to go off of and it acted as a somewhat stop for the file. If you have a tap kit you can probably get, for the time being, some mild steel. Drill and tap holes on either end and put a machine bolt through it and make a clamp like that. Or just drill holes and use a nut and bolt. Just bear in mind that it'll be a soft steel and a file will wear away at it fairly easily. But basically anything to use as a guide can work just use some imagination.
 
Actually Fletch, I have a file guide, I just wanted to know how I can insure that it is straight and/or perpendicular to the spine?
 
I would just draw the plunge line with a marker and erase/redraw as necessary until I was satisfied. You can make minor adjustments to the angle of the plunge if you dress it using the method I described to you.
 
There is a way to use a straight edge laying along the blade to mark a line, which you can square off of, to get a square plunge or guard line when the spine/back edge of the grip are curved. I'm not sure I can describe it without pictures, I can shoot you some in an email if you want.

Edit: I just sent an email showing what I am talking about.
 
Last edited:
Back
Top