- Joined
- Jun 4, 2010
- Messages
- 6,642
Howdy, decided to take a quick and closer look at the common carbide scraper, have never used one before and was curious about the near universal disdain exhibited by many on the forum - folks act like they're warding off the 'evil eye'. Was hoping to come up with a best practices should someone be stuck with one or have to give advice regarding their use. Was also curious how difficult it might be to improve one to a tolerable level of use. Am not trying to get to the level of the ERU, which is garnering good reviews and boasts much R&D and tight manufacturing. Just what I could manage at my workbench.
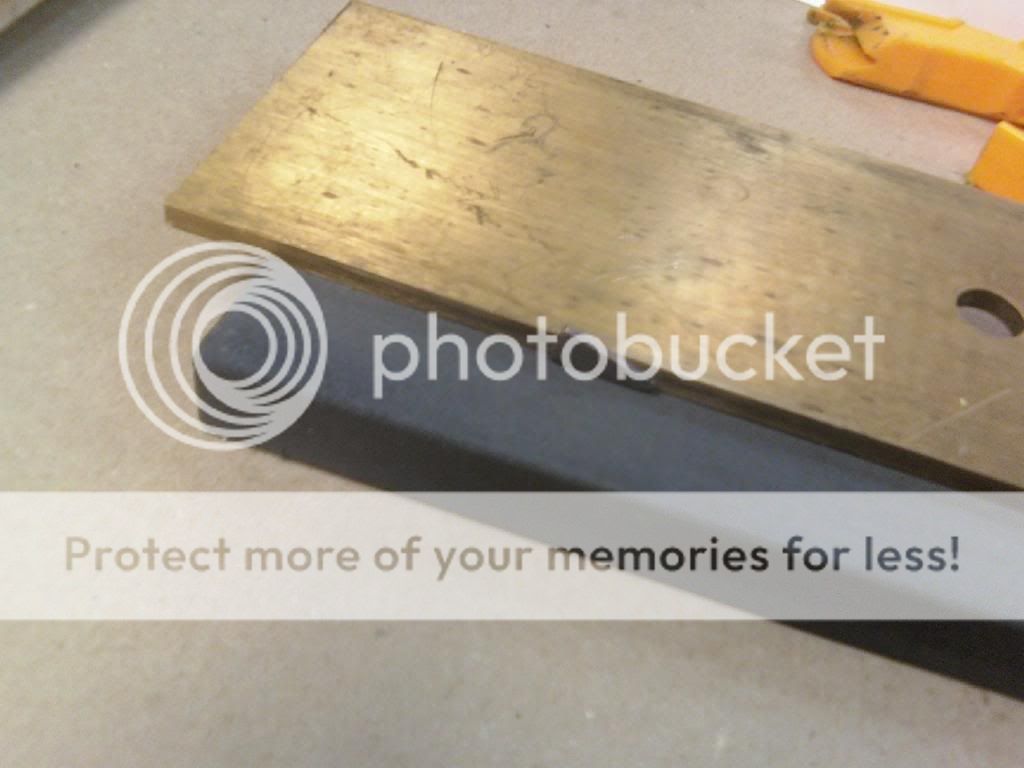
I started out with just some basic use on a $5.99 carbide scraper - Chinese mfg, on a boning knife from my kitchen set that I never use. Right off the bat I noticed several things. These do load up with swarf and a cleaning with a toothbrush or similar helps keep them cutting well. Secondly, the one I tested had many small imperfections in the carbide scraper that result in serious problems. The first pics are fom the scraper as it was purchased. Was very difficult to get a "clean" edge as the defects kept cutting groves into/along the apex - couldn't get it to leave a well refined edge but would still be considered an improvement over dull. First two pics show the best I could manage. I held the unit stationary on its side and brought the knife to it with a light, overlapping scrubbing motion.


-------------------------------------------------------------------------------
I stropped it on paper on my Washboard and the depth of those edge issues jumped right out. You can see in the third pic where the "edge" actually pulled away from the backbevel because it was undercut and barely attached. The second pic shows what most of the edge looked like, it wasn't torn up along the entire length. At this stage it could slice newspaper, but was erratic as it went - vaguely similar to a knife honed with a circular grind on a very rough stone.
Probably the most important factors in using the low budget scraper are to keep it clean, use light pressure, and swap it end for end every couple passes to minimize imperfections in the cutter per side (this is the biggie).


-------------------------------------------------------------------------------
Next I pulled the cutters from the unit and ground them clean on a silicon carbide (Norton Econo) stone. I also ground a bit more pitch to them so I'd have a slightly more acute inclusive angle. They still had some scratch pattern but was along the cutting head, not with it. They looked like there shouldn't be any large dings to cause trouble. I also wound up unintentionally softening the outside cutting shoulders as I did my resurfacing freehand - couldn't keep it dead flat on the stone - I believe this negatively effected its ability to shear off the burr. Still a big improvement. Swapped it end for end every five or six passes and had to slightly microbevel it to remove the burr (mostly). Pics show it is now much cleaner and uniform - burr on the opposing side is worked back into the bevel similar to a steeling. Would cut newspaper pretty well, still not pushcutting but definitely better. Could just shave some arm hair. For most folks this would be a sharp edge, and if it could have cut the burr off a bit better would have been even more acceptable.


-------------------------------------------------------------------------------
Burnishing with plain paper on the Washboard only hepled this so much the first time, I suspect running a smooth steel along this sort of edge (parallel grind) would be far more effective but didn't have one handy. So I went straight to my white compound on paper. Took about 30-35 passes to clean it right up, stopping halfway to apply a fresh smear. Second pic shows what was left of the parallel scratches - not much. This was an interesting exercise in another way as it gave me a clean slate to see the effect of the multi-grit compound without any prior scratch pattern interference - 100% WB compound. First pic was after 15 passes, second was after the full 35. Arm hair now piling up on the blade and crosscutting newspaper with a push.


-------------------------------------------------------------------------------
Learned a bit from this, and gained an appreciation for how this humble tool might be a good alternative for some folks. Am not pretending to have gained any insight into Fred's ERU, but clearly if the stock units can be made better with ten minutes on a workbench, a load of R&D and proper tooling should make quite an improvement over the norm.
Martin
I started out with just some basic use on a $5.99 carbide scraper - Chinese mfg, on a boning knife from my kitchen set that I never use. Right off the bat I noticed several things. These do load up with swarf and a cleaning with a toothbrush or similar helps keep them cutting well. Secondly, the one I tested had many small imperfections in the carbide scraper that result in serious problems. The first pics are fom the scraper as it was purchased. Was very difficult to get a "clean" edge as the defects kept cutting groves into/along the apex - couldn't get it to leave a well refined edge but would still be considered an improvement over dull. First two pics show the best I could manage. I held the unit stationary on its side and brought the knife to it with a light, overlapping scrubbing motion.
-------------------------------------------------------------------------------
I stropped it on paper on my Washboard and the depth of those edge issues jumped right out. You can see in the third pic where the "edge" actually pulled away from the backbevel because it was undercut and barely attached. The second pic shows what most of the edge looked like, it wasn't torn up along the entire length. At this stage it could slice newspaper, but was erratic as it went - vaguely similar to a knife honed with a circular grind on a very rough stone.
Probably the most important factors in using the low budget scraper are to keep it clean, use light pressure, and swap it end for end every couple passes to minimize imperfections in the cutter per side (this is the biggie).
-------------------------------------------------------------------------------
Next I pulled the cutters from the unit and ground them clean on a silicon carbide (Norton Econo) stone. I also ground a bit more pitch to them so I'd have a slightly more acute inclusive angle. They still had some scratch pattern but was along the cutting head, not with it. They looked like there shouldn't be any large dings to cause trouble. I also wound up unintentionally softening the outside cutting shoulders as I did my resurfacing freehand - couldn't keep it dead flat on the stone - I believe this negatively effected its ability to shear off the burr. Still a big improvement. Swapped it end for end every five or six passes and had to slightly microbevel it to remove the burr (mostly). Pics show it is now much cleaner and uniform - burr on the opposing side is worked back into the bevel similar to a steeling. Would cut newspaper pretty well, still not pushcutting but definitely better. Could just shave some arm hair. For most folks this would be a sharp edge, and if it could have cut the burr off a bit better would have been even more acceptable.
-------------------------------------------------------------------------------
Burnishing with plain paper on the Washboard only hepled this so much the first time, I suspect running a smooth steel along this sort of edge (parallel grind) would be far more effective but didn't have one handy. So I went straight to my white compound on paper. Took about 30-35 passes to clean it right up, stopping halfway to apply a fresh smear. Second pic shows what was left of the parallel scratches - not much. This was an interesting exercise in another way as it gave me a clean slate to see the effect of the multi-grit compound without any prior scratch pattern interference - 100% WB compound. First pic was after 15 passes, second was after the full 35. Arm hair now piling up on the blade and crosscutting newspaper with a push.
-------------------------------------------------------------------------------
Learned a bit from this, and gained an appreciation for how this humble tool might be a good alternative for some folks. Am not pretending to have gained any insight into Fred's ERU, but clearly if the stock units can be made better with ten minutes on a workbench, a load of R&D and proper tooling should make quite an improvement over the norm.
Martin
Last edited: