The Sunday Picture Show... (1-21-2018) . . . OLD Show Look at the DATE...

View attachment 833558 View attachment 833559 View attachment 833560 View attachment 833561 View attachment 833562 Now chuck up a Firex spottting drill and decapitate the rivet. Snag #1. The drill grabs the rivet and spins it. Put that drill upside down in the table vise and go after the other end of the rivet using the bottom drill to keep the rivet from spinning. I still wound up doing a little grinding to complete the removal. Now drill the counterbore for the #5 cap screw (socket head screw) in the left handle slab. Then enlarge the 1/8” diameter hole in the right handle slab to accommodate the #5X40TPI Helicoil tap. A #29 drill (.136” diameter) readies the hole for the tap. The hand tapper aids the process.
 
Last edited:
View attachment 833584 View attachment 833585 View attachment 833586 Snag #2. Because the spring holder is molded into the back of the handle (not removable), it keeps me from swinging the rocker out of the way. Therefore I cannot slide the handle as far onto the jig as I would like. Placing the Helicoil on the insertion tool requires that the collar is placed such that the tang is at the bottom of the slot. This is because the Helicoil lengthens as you screw it into the threaded hole. This design has the coil exerting pressure against the female thread in the handle. It keeps the coil from coming in and out with screw. Helicoils come in different lengths usually expressed as a multiple of the diameter. After the coil is in place, the tool’s collar is slid back, the fork is lifted off the tang, given a 1/4 turn, and rapped to break the tang off. Now the knife can be assembled.
 
View attachment 833584 View attachment 833585 View attachment 833586 Snag #2. Because the spring holder is molded into the back of the handle (not removable), it keeps me from swinging the rocker out of the way. Therefore I cannot slide the handle as far onto the jig as I would like. Placing the Helicoil on the insertion tool requires that the collar is placed such that the tang is at the bottom of the slot. This is because the Helicoil lengthens as you screw it into the threaded hole. This design has the coil exerting pressure against the female thread in the handle. It keeps the coil from coming in and out with screw. Helicoils come in different lengths usually expressed as a multiple of the diameter. After the coil is in place, the tool’s collar is slid back, the fork is lifted off the tang, given a 1/4 turn, and rapped to break the tang off. Now the knife can be assembled.
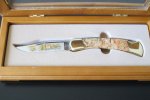
Wow! That's involved! Not enough gear in my toolboxes for all that.

Zieg
 
tiguy7, Thanks so much for the write-up. Is the original pivot pin size on the knife 1/8", and is that generally the size of other Buck models?
 
The pivot rivet is 1/8” diameter as is the #5X40TPI machine screw. The beauty of the #5X40TPI Helicoil (thread insert) is that it fits in the rivet hole when said hole is enlarged and tapped with a special H/C tap. Helicoil kits usually include the special tap drill, the special tap, the insertion tool, a tang breaker, and an assortment of inserts. My #5X40TPI kit came from Travers Tool Co. and is the Recoil brand. Helicoil is to thread insert as Kleenex is to tissue.View attachment 835768
 
Back
Top