- Joined
- Mar 12, 2013
- Messages
- 1,167
Hey all!
So I spent most of June completely re-building my process for making my knives from scratch! It was a big leap, and a bit of a risk doing so, but it turned out to be totally worth it!
I have been using CNC for a lot of my process for the last year or so, but the previous processes were always very fiddly keep running right. A tiny variable changing here or there could really throw things off and because of that I have scrapped a lot of blades over the past year, probably close to 100 blades went in the scrap bin because of various problems in fact. However during all these issues I was making sure to take notes and think about what improvements could be made.
One of the big issues with my old process was that when the CNC machine was running I had to stand next to it and change parts every few minutes. It was never running in parallel with other things... Commercial machine shops have a measure of efficiency that they call 'spindle uptime', which refers to how long each day the CNC machine is running for. When I worked out my spindle uptime over the course of an entire batch it was very low (around 8% or so) because when the machine was running I wasn't doing other things, and when I was doing other things the machine was not running.
So when I set out to design the new process I had a few goals in mind:
1) The CNC part of the process should run 'unattended' meaning that I don't have to stand in front of the machine and change parts all the time
2) The CNC part of the process should be super robust and reliable, it should not need constant tweaking to keep running correctly
3) The new process should produce knives that are better and more consistent than anything I've made previously
4) The new process should empower me to do other things in parallel, and reduce the amount of 'batch work' which I find very stressful (sandblasting for days on end is no fun!)
With these goals in mind I decided to make a large 'fixture plate' that would mount to my CNC machine, it would have stations for each of the CNC processes that I do, and as such every time the machine would run it would turn out 1 blade ready for hand sanding and 1 pair of handle scales ready to go on a knife.
First up was initial concept sketching, very crude I know!

Then I started building the 3D models using my CAD program (Fusion 360). I ended up re-designing all of my 3D models for the knife and all associated parts during this process, as my original 3D drawings were less organized than I would like:

After the CAD models were completed and it all looked like it would work, I started making the various parts of the fixtures...
The top clamps for the beveling stations. These are made from A2 and received a heat-treatment and spring temper:
The side clamps for the beveling stations, these also got heat-treated:

Exchangeable pallets for the handle scale machining:

The base plate for the fixtures (this is a 1x10x22" slab of 6061-T6 aluminum!):
Here you can see all the fixture parts before assembly. The individual stations are made to be replaceable. They're made from 1018 steel blanks that are bolted onto the aluminum baseplate. The assembled fixture weighs close to 90lb:
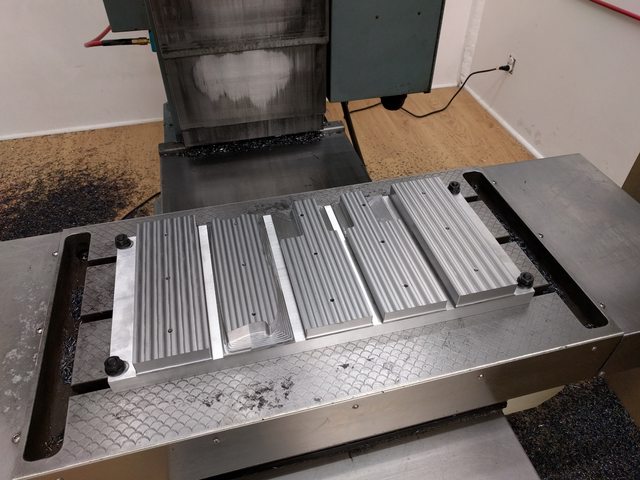
The fixture plate was then assembled and located on the CNC table via a pair of locating pins:
The fixture was then machined 'in place' to ensure the highest possible level of accuracy. Here you can see the first step, cutting the tops/sides of all the fixture blocks:
All of the fixture stations then had their individual machining done. Machining everything took about a day as I was being careful not to muck anything up:
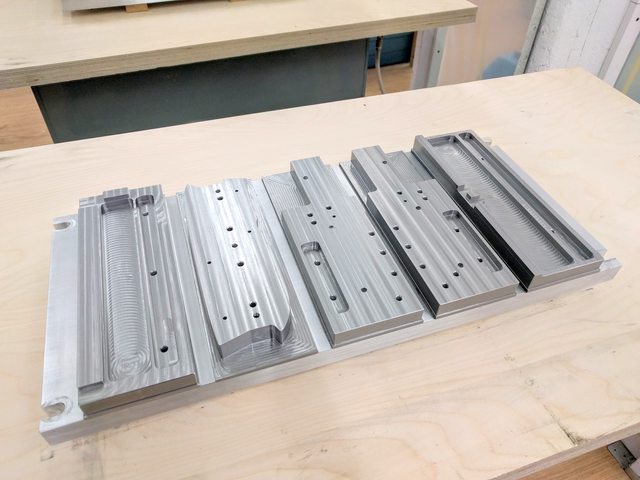
All of the 1/4-20 holes were then tapped by hand and the fixture was fully assembled:

The side clamps (spring-loaded clamping cauls) for the beveling operations are part of the secret sauce of this fixture plate. They let me hang onto the spine and edge of the knife to provide 100% access to the bevel without marring the knife. The spine side is made from hardened A2 and you can see how it operates in the GIF below. The edge side of the clamp is stationary and made from a replaceable insert of 4140HT steel so that it won't get worn out too quickly by the clamping force applied to such a tiny area (just the 0.015" thick knife edge):
The final fixture plate consists of 6 stations for 6 operations:
1) Machining of the weight relieving cutouts, pin holes and lanyard holes
2) Machining the spine of the knife along with the right hand side of the windowbreaker bevel
3) Machining the edge of the knife and the left hand side windowbreaker bevel
4) Machining the left bevel
5) Machining the right bevel and engraving my logo
6) Machining the handle scales
Each time the plate is loaded each knife blank moves one station to the right, across 5 machining cycles it will go from a raw rectangular blank to a knife ready for hand-finishing and heat-treatment! This eliminates the need to work in batches and allows me to make constant small improvements to the process as I work which has turned out to be invaluable!
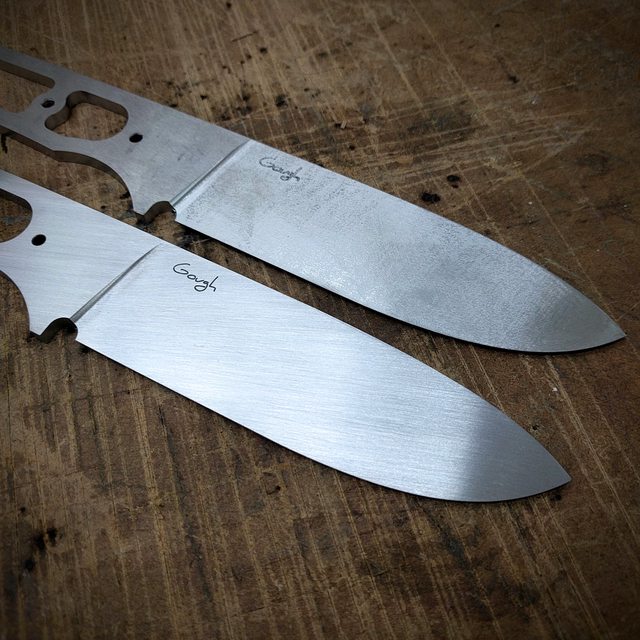
Here you can see one of my Resolute MkIII knives as it comes off the CNC machine (top) and how it looks after hand finishing to 220 grit (bottom):
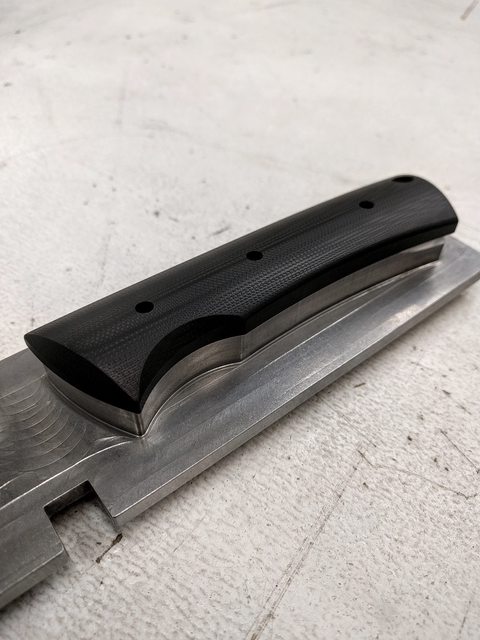
The handle scales are now completely 3D contoured using the new process, which means that I can include a lot of small details (like smooth blended corners and so on) that I wasn't able to previously. The handles now come off the machine looking like they used to after I did the hand finishing on them in the old process:
So far I'm incredibly pleased with this process. After some small tweaks it is running really consistently and turning out really awesome blades! The CNC machine runs for 2 hours to complete all the steps on the fixture plate, and during that time I do hand finishing on the last blade that came off the machine as well as various other parts of the process on blades at various stages of completion. My 'spindle uptime' is now close to 80%, up from around 8% with the old process, which is amazing!
The new process really spreads out my efforts and breaks up the day, which makes life far more pleasant than it used to be. Standing in one spot doing one small part of the process for days on end was really not fun, now I get to do lots of different stuff all the time which is great!
I plan to make a video showing the fixture plate in action soon, I will post it here when I do so!
Anyway, hope you enjoyed seeing the new process! As always I'm happy to answer any questions you guys might have!
-Aaron
So I spent most of June completely re-building my process for making my knives from scratch! It was a big leap, and a bit of a risk doing so, but it turned out to be totally worth it!
I have been using CNC for a lot of my process for the last year or so, but the previous processes were always very fiddly keep running right. A tiny variable changing here or there could really throw things off and because of that I have scrapped a lot of blades over the past year, probably close to 100 blades went in the scrap bin because of various problems in fact. However during all these issues I was making sure to take notes and think about what improvements could be made.
One of the big issues with my old process was that when the CNC machine was running I had to stand next to it and change parts every few minutes. It was never running in parallel with other things... Commercial machine shops have a measure of efficiency that they call 'spindle uptime', which refers to how long each day the CNC machine is running for. When I worked out my spindle uptime over the course of an entire batch it was very low (around 8% or so) because when the machine was running I wasn't doing other things, and when I was doing other things the machine was not running.
So when I set out to design the new process I had a few goals in mind:
1) The CNC part of the process should run 'unattended' meaning that I don't have to stand in front of the machine and change parts all the time
2) The CNC part of the process should be super robust and reliable, it should not need constant tweaking to keep running correctly
3) The new process should produce knives that are better and more consistent than anything I've made previously
4) The new process should empower me to do other things in parallel, and reduce the amount of 'batch work' which I find very stressful (sandblasting for days on end is no fun!)
With these goals in mind I decided to make a large 'fixture plate' that would mount to my CNC machine, it would have stations for each of the CNC processes that I do, and as such every time the machine would run it would turn out 1 blade ready for hand sanding and 1 pair of handle scales ready to go on a knife.
First up was initial concept sketching, very crude I know!

Then I started building the 3D models using my CAD program (Fusion 360). I ended up re-designing all of my 3D models for the knife and all associated parts during this process, as my original 3D drawings were less organized than I would like:

After the CAD models were completed and it all looked like it would work, I started making the various parts of the fixtures...
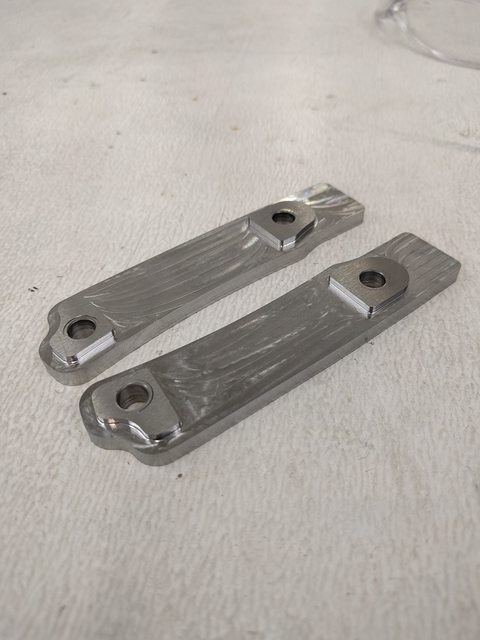
The top clamps for the beveling stations. These are made from A2 and received a heat-treatment and spring temper:

The side clamps for the beveling stations, these also got heat-treated:

Exchangeable pallets for the handle scale machining:

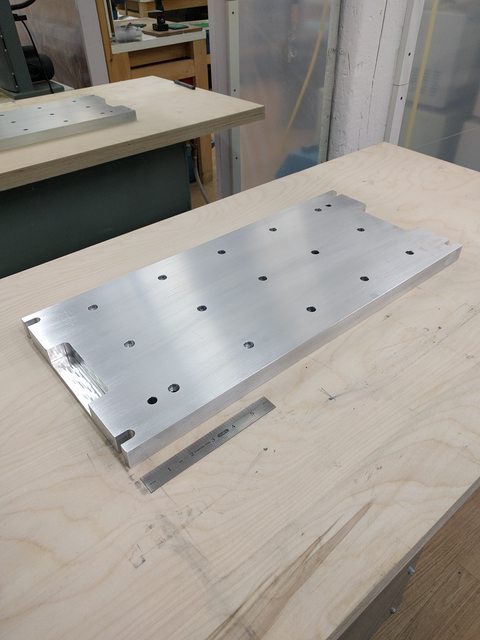
The base plate for the fixtures (this is a 1x10x22" slab of 6061-T6 aluminum!):

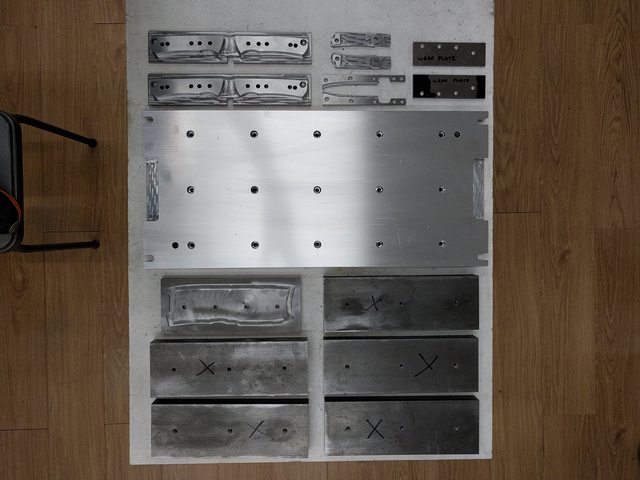
Here you can see all the fixture parts before assembly. The individual stations are made to be replaceable. They're made from 1018 steel blanks that are bolted onto the aluminum baseplate. The assembled fixture weighs close to 90lb:

The fixture plate was then assembled and located on the CNC table via a pair of locating pins:

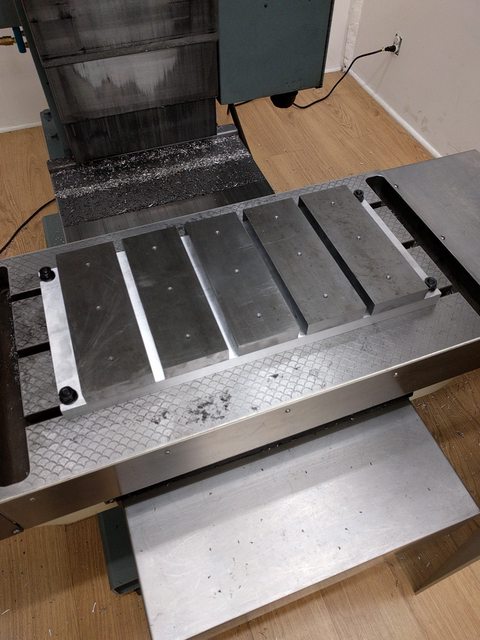
The fixture was then machined 'in place' to ensure the highest possible level of accuracy. Here you can see the first step, cutting the tops/sides of all the fixture blocks:

All of the fixture stations then had their individual machining done. Machining everything took about a day as I was being careful not to muck anything up:

All of the 1/4-20 holes were then tapped by hand and the fixture was fully assembled:

The side clamps (spring-loaded clamping cauls) for the beveling operations are part of the secret sauce of this fixture plate. They let me hang onto the spine and edge of the knife to provide 100% access to the bevel without marring the knife. The spine side is made from hardened A2 and you can see how it operates in the GIF below. The edge side of the clamp is stationary and made from a replaceable insert of 4140HT steel so that it won't get worn out too quickly by the clamping force applied to such a tiny area (just the 0.015" thick knife edge):
The final fixture plate consists of 6 stations for 6 operations:
1) Machining of the weight relieving cutouts, pin holes and lanyard holes
2) Machining the spine of the knife along with the right hand side of the windowbreaker bevel
3) Machining the edge of the knife and the left hand side windowbreaker bevel
4) Machining the left bevel
5) Machining the right bevel and engraving my logo
6) Machining the handle scales
Each time the plate is loaded each knife blank moves one station to the right, across 5 machining cycles it will go from a raw rectangular blank to a knife ready for hand-finishing and heat-treatment! This eliminates the need to work in batches and allows me to make constant small improvements to the process as I work which has turned out to be invaluable!
Here you can see one of my Resolute MkIII knives as it comes off the CNC machine (top) and how it looks after hand finishing to 220 grit (bottom):

The handle scales are now completely 3D contoured using the new process, which means that I can include a lot of small details (like smooth blended corners and so on) that I wasn't able to previously. The handles now come off the machine looking like they used to after I did the hand finishing on them in the old process:

So far I'm incredibly pleased with this process. After some small tweaks it is running really consistently and turning out really awesome blades! The CNC machine runs for 2 hours to complete all the steps on the fixture plate, and during that time I do hand finishing on the last blade that came off the machine as well as various other parts of the process on blades at various stages of completion. My 'spindle uptime' is now close to 80%, up from around 8% with the old process, which is amazing!
The new process really spreads out my efforts and breaks up the day, which makes life far more pleasant than it used to be. Standing in one spot doing one small part of the process for days on end was really not fun, now I get to do lots of different stuff all the time which is great!
I plan to make a video showing the fixture plate in action soon, I will post it here when I do so!
Anyway, hope you enjoyed seeing the new process! As always I'm happy to answer any questions you guys might have!
-Aaron
Last edited: