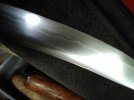
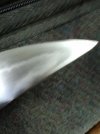
Traditional Style Tanto Bevels and Materials

The name for a two-piece handle is a mortice handle. A frame handle is something very different.

The kissaki (tip) on a tanto doesn't need the true yokote and such that will look best on a katana. It can be much more like a 1" wide fillet knife shape.

My observation on many first tanto is they are too long, too thick, and too blocky. Yours isn't bad compared to many I have seen. Are you planning on making the matching saya (sheath)?

Yeah I will, although I don’t know when I’ll end up doing it. I haven’t been working as much on it lately as I’ve had a lot going on. I may move on to something else if I don’t like it, for a time, I’m weird like that. I’m kind of just trying to learn the lessons and move on. However I’m definitely finishing it, whether it takes a few months or not. I wouldn’t want to leave it without a saya, after all that work.
 
Last edited:
Anyway thanks again Stacy for all the help, you really went above and beyond. Thanks to richard also. It’s like I don’t even need any other sources, you explained so much. It’s very appreciated.

I’m going to put up more pictures from various angles eventually, so you can really see how it looks and how it fits.

I’m thinking I may change the tip now also, after seeing the pictures (should at least have that sharper direction change, rather than the bulbous round look), hopefully I can figure out a way to grind it better. I haven’t finished the blade yet, again, knowing that I may need to mess it up again, so I guess that was a good idea. I’ll do that last.
 
Last edited:
Hey Stacy, I do have one more specific question if you see this, and have the time:

- So do the copper fittings on the handle go over/on top of the sting ray leather (or whatever it is), or do they go right onto the wood and then the wrap just goes in between them?

I rounded out the handle today and got it much slimmer. Obviously I have to remake the fittings now which sucks, but if they have to go over the leather then that changes things a bit. Thanks.
 
It depends on how the tsuka will be made.

If it will be wrapped with tsuka-maki, then the rayskin will go under the fuchi and kashira. The maki will sit even with the fittings that way.

If it will be an exposed rayskin tsuka, then the same' is cut so it butts up against the fittings so the surface is even.

If the tsuka will be exposed wood, the wood is tenoned (recessed) at the ends so the fittings seat even with the surface.

The thing you want to avoid is having a lip at the fittings that would be hard on the hands. The tsuka should end up smooth and even from end to end.
 
I use livers of sulfur to blacken copper. Soak for an hour, rinse and clean with a toothbrush, soak again, repeat. After a few hours it will form a rich silver-black patina that is permanent. It looks like ancient Japanese silver fittings.

I am going to have to find a way to incorporate this into a kitchen knife. Maybe an endcap of some sort on a Wa handle. Any idea if the patina is toxic at all?
 
No, it is just silver/copper sulfate. They make jewelry with a similar compound called Niello.
It is a pretty durable surface, but I don't know how it would hold up on a kitchen knife.
 
That looks really nice Stacy, I like that shape a lot.

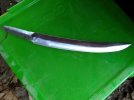
Well, don’t laugh at it too much, but below is the rushed and rough finished tanto. Unfortunately I decided not to grind the tip again, even though i know now that it would’ve made it look a lot better. I just didn’t want to open that can of worms, as I’m not good at grinding these tips yet. Definitely on the next one I’ll worry a whole lot more about the geometry.

I also will finish everything better in the future: do engraving on the fittings, finish to a higher luster before blackening, actually get a real silk wrap or at least a better cotton one and more importantly do real wrap (I looked it up but I rushed it big time, the knot is TOTALLY wrong, I know, I just wanted to get it done to see it all, I will be wrapping this better in the near future).

Basically there are a ton of things wrong with it, and I’m aware of most of them. Every fitting has issues, especially the kashiri which I designed (stupidly) on my own without much research. It’s kind of a monstrosity, but for my seventh knife I’m overall pretty happy because at least it’s a functional knife and everything is structurally well made (the blade most importantly).

Thanks a ton for all of the advice and knowledge, especially Stacy; I really learned a LOT doing this knife. I weld and do all types of metal working, but I never brazed something in my life before this. It was an adventure, that’s for sure, and as you can see I didn’t have an easy time of it lol. But all in all it’s mostly done (wrap monstrosity aside, and some finish work I can still do), and I have a lot of new knowledge to work with in the future. To expect much better when people work on this stuff for a lifetime would be a little conceited I think... I can see why it takes a lot of time, and I’m pretty happy that I at least got a knife made. And I couldn’t have done it without Stacy’s help.

I will take it apart to get some better photos one day when I have some more time, I was in a rush here. I have to make the Saya too still clearly.

0RyRafs.jpg
 
Last edited:
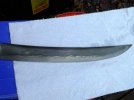
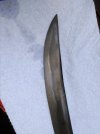
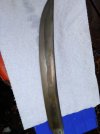
I got a chance the other day to shoot some photos of a tanto I am ready to polish. The hamon shows upn great inthe etch, but will need more togi to become clear when polished.
View attachment 1032105 View attachment 1032106 View attachment 1032107 View attachment 1032108 View attachment 1032109 View attachment 1032110 View attachment 1032111 View attachment 1032112

I like that curve in it, I didn’t realize you could do them with such a big curve it looks great. Looks like t will be a serious slicer too. That perfectly wavy hamon is cool too. And it gives it a good geometry for a tip thrust too I imagine.

Did that curve at all when hardening or do you put the curve in ahead of time? Is it only longer blades that curve in water? I actually got some 50 oil, but I kind of like the whole water thing.

Also your hamon is so differentiated from the unhardened steel, it looks really clear. I wonder what I need to adjust to get it like that...
 
Most of the sori was forged in.
The phots showing dark/light on the hamon are just etched. The last three shots (blurrier because of the angle you have to hold the blade in order to photograph a hamon) with no dark/light difference are taken after a light sanding with 800 grit paper.

Your tanto looks good. The tsuka maki is pretty darn good for a first try. You have one wrapping error in it that no one would ever spot, but makes a difference in durability and look. Notice how your top twists are all going the same way? They should reverse each time so it makes a tighter and more defined triangle.

Pay attention to which leads gets twisted which way and which one goes down first on each turn … it reverses each time. If you twist them all the same, the pattern looks somewhat spiraled, and the diamonds get lopsided. Done right and the "overs" are side by side and the "unders" are side by side on each point of the diamond. Don't feel bad about yours, I see them that way often by good makers, and have done that error myself in the beginning.

To play with wrapping tsuka maki, make an 18" piece of 1X2"scrap wood that you ground the last 8" to be like a tsuka. Practice on it to get the open spaces perfect diamond shapes. Sit on the long part of the stick and wrap the "tsuka". Lift your but cheek and turn it over. Wrap and un-wrap it over and over until you get a consistently tight pattern.

This set of tsuka maki photos lets you see how the overs and unders are side by side on each send of the diamond:
https://www.bing.com/images/search?...744&selectedindex=6&ajaxhist=0&vt=0&eim=1,2,6

A wrapping stand with some small clamps to hold the ito as you turn the tsuka over each time will help for more consistency. This is almost a must on a katana tsuka.
 
Nice. Looks like you figured out the twists to get the wrap right. As the copper fittings age, they will develop a nice patina.
 
Nice. Looks like you figured out the twists to get the wrap right. As the copper fittings age, they will develop a nice patina.
Thanks, but I didn’t figure it out so much as you told me lol. That’s one thing I haven’t been able to find online oddly enough, only you said it as far as my research goes. I used cheap leather though which I’m sure you can notice.

I feel like it could look cool with a fuller, but im not sure because the balance is good right now and I think the weight makes it a better cutter/chopper. It’s only 5/32 stock so it’s not too heavy (it tapers to the tang and has a distal taper from the... maki, I believe). As for the micro bevel, oh well, that’s a tough one imo.

I found while hand filing the copper that it gives a coffee color that almost looks like glass, but after buffing it hasn’t come back. I guess I have to handle the pieces more to get it again? I love that color though. Also this time I made a die for the butt cap so it’s a legit looking one. Anyway thanks again for all your help, maybe one day I’ll make a third one, two years from now lol.
 
If you get some actual leather ito, you will like the look even more. Leather wraps can be very "tactical" looking.

A fuller is a nice accent. On tanto they are sometimes only small shallow grooves, often in a group of three.

The copper can be darkened by a wipe with ammonia, or by "Smoking" or "Fuming". This can produce a variety of coloration.

Smoking/Fuming copper:

Clean the copper koshirae (fittings) well with soap and water. Scrub with pumice or baking soda (I use baking soda) and wash well with clean water. The purists wash again in distilled water. Do not touch the parts with your hands after cleaning.
Put the fittings in a small plastic storage bin, sitting on some sort of stand/support so they are a couple inches off the bottom. Place a small cup/dish/bowl in the bottom and put a little ammonia in it. Close the box and check it in a few hours. Check every so often until the patina is where you want it. It can smoke for several days if needed. Take the parts out, clean off by rinsing in clean/distilled water. Gently dry off the copper with a soft cloth. I like to let them sit for a few days and then lightly buff by hand with a very soft cloth. The colorful patina can be rubbed off with use and wear, so it should be considered somewhat delicate.

Another treatment ( my favorite) is a soak in Livers of Sulfur, which will turn the copper a very nice dark silver-black. It looks very antique, like centuries old Japanese fittings. Thus is a very durable type of patina treatment, as it actually changes the surface metal to a hard sulfate of copper..
 
Back
Top