wa handles wonky

Joined
Nov 14, 2018
Messages
180
hi all this is frustrating situation.
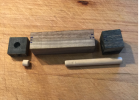
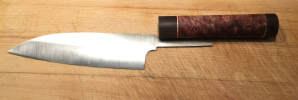
i keep having issues with the blade not ending up straight on wa handle. i always use a small piece of dark wood a the top of the handle and the rest is a lighter color wood.I start with fairly square stock, mill the slot in the top wood piece and drill a 1/2 in hole from the bottom. Then i drill a 1/2 in hole in the larger handle portion. a 1/2 dowel is slotted with band saw and widen with sandpaper. everything looks good at this point so i glue up the handle and pull the blade out as it starts to cure. once it has cured i burn the tang back into the slot. i mark my lines to grind the handle to, grind it down, and but the blade back in to check if its still in line. Its not its crooked and no longer square to the handle. i just dont get it. ANy help with this would be greatly appreciated!!!
 
A fellow that owns a chef's knife online store told me their knifemaker does the custom wa handles by suspending the blade over the handle to let epoxy set. I imagine a purpose built jig, as he mentioned holding the blade vertically with magnets.

Good luck. I use all wa handled kitchen knives by other makers and a crooked blade/handle is a certain disappointment.
 
Last edited:
If you are milking a slot in the top piece and assuming a the slot is square to that block, consider doing away with the dowel insert. You don’t need it.

then use 5 min epoxy. Hold it in place by eye. In a few minutes it will be set.

what is the point of pulling the blade out and then burning it back in?
 
Most likely removing the blade to finish shaping the handle without having interference from the blade.
I’d suspect this is when things go wrong, probably no longer grinding it square to the slot.

As always pics would help.
 
I have had similar issues when I tried to mark the wa shape on the handle block directly using a height gauge. I think my problem was that I did not have the blade in a consistent plane when marking the left and right sides. Supporting the blade in a plane parallel to your surface plate is a bit tricky if you have a distal taper, and much more so if the neck area of the knife is not perfectly parallel. I switched to only marking the center line and using wa handle templates. The center line can easily be checked by sighting along the blade, and the templates make grinding the octagon easy. My current process is as follows:
  1. I prep and glue up the handle blank just as you describe. When the epoxy starts curing, I pull the tang out, and clean it with alcohol. I then stick it back in, wait a minute or two before pulling it out, and clean it off again. I repeat this maybe three times until the tang comes out clean.
  2. After the epoxy is cured, the tang normally fits back in the slot without burning in. Sometimes, it does not go in all the way and I prefer grinding a bit of the end of the tang rather than burning it in.
  3. I put blue painter's tape on the ends and cut out the slot for the blade in preparation for step 5.
  4. To mark my lines, I set the blade's neck on a 1-2-3 block. I check that the tip of the knife is at the same height when I flip the knife over. I also check the edge of the blade to make sure the blade is level in that direction. I have used a second 1-2-3 block and shims to get the blade as close to level as possible. Then, I mark the center lines on all faces with an improvised height gauge. I do this twice, once with the right side resting on the block, once with the left. I like to leave a small gap between the lines marked from either side and use the gap as the center line rather than the line itself. After the center lines are marked on the handle block, I sight from the back along the blade to make sure everything is in line.
  5. I then align steel grinding templates on the two faces using the lines marked in the previous step and let a drop of superglue seep under the templates to secure them. I posted a thread about this method here: Natlek's wa handle jig
  6. I grind the handle to my templates and pop off the templates.
Sadly, the neck area on my knives has not always been perfectly parallel and I all too often grind into it a bit when grinding the bevel at the heel. That can really mess things up quickly if you use the neck to support the blade when marking. Since I switched to marking the center line and using the templates, I have had much better results.
 
thank you everyone!
Hubert i am very confused with step 3. Also when you have the neck of the knife on the 123 block how are you checking that its level? are you using a level? this handle jig sounds great. my blades are all tapered so i cant use a flat to reference. again thank you!!
 
Happy, sorry about the confusion. I put painters tape on the ends because I glue the templates down and I don't want to clean the glue off the ends or risk tear-out when I remove the templates, which sometimes takes a good whack with the hammer. On the front, you have to cut an opening in the blue tape for the blade to go in. That's probably the confusing part. I use an X-acto knife to trim the blue tape and cut a hole for the blade slot.

I do not use a level, I don't think that would work because of the bevels and distal taper. I set up a second 1-2-3 block at the tip and check by eye and use shims on the second 1-2-3 block when needed. I also check that the heel is at about half the blade thickness above the 1-2-3 block visually. I adjust that direction by where I push the blade down. It is much harder to explain than to do, really. Instead of the 1-2-3 blocks, you could probably use a thick piece of aluminum or even wood, as long as it has parallel faces. All you need is clearance to get the handle block off the surface plate. With the templates, I think you could probably mark the center line on the back freehand by sighting along the blade, but I've never trusted myself to do that. I still mark all sides of the handle block because any error I make supporting the blade can be noticed that way.
 
ok great i get it now i also looked at a old post of yours and i see what your talking about. thank you. hahaha i have 123 blocks, a granite surface plate (cheapo), a height gauge with a pencil taped on, disk grinder..... but no good knives!
 
I have come to the conclusion that trying to get a blade to sit straight (up down, right/left, and rotationally) in a Wa handle is just plain really-rally hard if you are relying on the "fit" between tang and slot to define the blades location. So .... what I do instead is this:

I will glue up the various layers of the handle, drilling a 3/8" hole to maybe 1/8" from the front piece (then mill or drill out a 1/8" slot at the very front for the tang to slide through), then drill out the main body to the length of the tang, and then glue the pieces together using a 3/8" dowel to hold pieces together .... BUT (unlike in the picture below), the dowel between the front piece and the main body is very short - going all the way into the hole in the front piece, but maybe only about 2/8 - 3/8" into the main body (and the dowel is solid). This leaves a huge open chamber below the dowel, with a depth about equal to the total length of the tang.
upload_2021-3-26_10-45-12.png

After glue up, I drill out (using a 1/8" drill) the dowel below the front slot .... then use either files or a toothed tool (forget the name...) to open up the complete slot. With the dowel being only an inch or so long, this is easy. THEN I shape and finish sand the handle, and grind/adjusts the tang length and taper to allow the tang to correctly sit completely into the hole in the handle:
upload_2021-3-26_10-48-33.png

The fit is VERY loose .... with LOTS of wiggle room for the blade to move around in up/down, side-to-side, and rotational degrees of freedom. The trick is that things need to be loose enough to allow you to find the position where the orientation of the blade is "just right". I then mix up a bunch of G-flex, and go about dripping it into that small slot in the front of the handle until the entire big cavity is filled, and there is enough epoxy present so that when you insert the tang, the epoxy almost comes to the top of that front slot, but not quite (too much and it overflows and makes a mess). You can check this by periodically inserting the tang as you fill, and see where the epoxy rises to on the tang. (heating the mixed epoxy slightly with a heat gun makes it much thinner and easier to get it to flow down into the hole in the handle). THEN I insert and manually position the blade as it needs to be, and use this little cobbled together rig to hold the handle/blade combination in place while the glue cures:
upload_2021-3-26_10-55-32.png
(the top piece of wood is just carefully lowerd onto the point of the blade while held against the back piece of wood, then held in place with a clamp. At first things are loose, and really easy for the blade to be moved out of position. But get it close. As the glue cures, it gets thicker, and I periodically go back and check/correct the orientation of the blade. Eventually it gets thick enough that you can gently move the blade around (small amounts!), and it holds position when it goes back into the "jig". I would NOT do this with 5-minute epoxy - too little time to correct. with G-Flex you have, what, 4-5 hours for the stuff to get really thick? Lots of time to check/tweak/re-check....
upload_2021-3-26_11-2-26.png

(credit - this basic approach, especially the large cavity left open, is not mine .... it came from Carter Hopkins)
 
I have come to the conclusion that trying to get a blade to sit straight (up down, right/left, and rotationally) in a Wa handle is just plain really-rally hard if you are relying on the "fit" between tang and slot to define the blades location. So .... what I do instead is this:

I will glue up the various layers of the handle, drilling a 3/8" hole to maybe 1/8" from the front piece (then mill or drill out a 1/8" slot at the very front for the tang to slide through), then drill out the main body to the length of the tang, and then glue the pieces together using a 3/8" dowel to hold pieces together .... BUT (unlike in the picture below), the dowel between the front piece and the main body is very short - going all the way into the hole in the front piece, but maybe only about 2/8 - 3/8" into the main body (and the dowel is solid). This leaves a huge open chamber below the dowel, with a depth about equal to the total length of the tang.
View attachment 1534344

After glue up, I drill out (using a 1/8" drill) the dowel below the front slot .... then use either files or a toothed tool (forget the name...) to open up the complete slot. With the dowel being only an inch or so long, this is easy. THEN I shape and finish sand the handle, and grind/adjusts the tang length and taper to allow the tang to correctly sit completely into the hole in the handle:
View attachment 1534345

The fit is VERY loose .... with LOTS of wiggle room for the blade to move around in up/down, side-to-side, and rotational degrees of freedom. The trick is that things need to be loose enough to allow you to find the position where the orientation of the blade is "just right". I then mix up a bunch of G-flex, and go about dripping it into that small slot in the front of the handle until the entire big cavity is filled, and there is enough epoxy present so that when you insert the tang, the epoxy almost comes to the top of that front slot, but not quite (too much and it overflows and makes a mess). You can check this by periodically inserting the tang as you fill, and see where the epoxy rises to on the tang. (heating the mixed epoxy slightly with a heat gun makes it much thinner and easier to get it to flow down into the hole in the handle). THEN I insert and manually position the blade as it needs to be, and use this little cobbled together rig to hold the handle/blade combination in place while the glue cures:
View attachment 1534349
(the top piece of wood is just carefully lowerd onto the point of the blade while held against the back piece of wood, then held in place with a clamp. At first things are loose, and really easy for the blade to be moved out of position. But get it close. As the glue cures, it gets thicker, and I periodically go back and check/correct the orientation of the blade. Eventually it gets thick enough that you can gently move the blade around (small amounts!), and it holds position when it goes back into the "jig". I would NOT do this with 5-minute epoxy - too little time to correct. with G-Flex you have, what, 4-5 hours for the stuff to get really thick? Lots of time to check/tweak/re-check....
View attachment 1534350

(credit - this basic approach, especially the large cavity left open, is not mine .... it came from Carter Hopkins)
You make some nice handles, Cushing. I talked to Carter Hopkins about a year or so ago about his method, but decided it was not for me because my blades are typically only 0.06"-0.08" thick. Do you use this method for thin blades as well and just try to leave an even gap filled with colored epoxy? I try to get the slot to be a tight fit with a 1/16" end mill, but end up with a little bit of play most of the time. How long do you leave the tang? It looks a good bit shorter than what I have been doing, which is typically around 3.75".
 
You make some nice handles, Cushing. I talked to Carter Hopkins about a year or so ago about his method, but decided it was not for me because my blades are typically only 0.06"-0.08" thick. Do you use this method for thin blades as well and just try to leave an even gap filled with colored epoxy? I try to get the slot to be a tight fit with a 1/16" end mill, but end up with a little bit of play most of the time. How long do you leave the tang? It looks a good bit shorter than what I have been doing, which is typically around 3.75".
Oh ... Im sorry - I meant to mention this. Re. thin handles, the long one I showed (third photo) is as I recall somewhere between 0.06 and 0.07" thick. I do NOT try to get a perfect fit between the tang and the slot at the front of the bolster. I purposefully do not allow the clear epoxy to completely fill to the front of the slot. Ideally there is maybe a 1/8" or so depression in the epoxy around the tang at the front of the slot (you can easily make this happen with a q-tip to wipe away excess epoxy). After things cure, I go back at it with a small amount of epoxy with graphite powder added to it, and using a toothpick carefully fill that space around the slot with the black epoxy. If you use a very dark or black bolster material it looks ok, and there are absolutely no gaps present. Not sure what you would do if you had a lighter colored bolster material. Maybe the clear epoxy would work ok .... ???? Hopefully that helps.

Thank you for the comment on the handles. so far the most complicated one I have done is this one (the wood though is not the best .... this was actually something of a trial-run:
upload_2021-3-26_12-4-16.png

The dimensions of the various pieces are all based on the "golden ratio". The stack up was a bear (in terms of keeping the various pieces flat with parallel top and bottom surfaces) .... so I have only done the one. Now, however, that I have my mini-mill (god, I love that thing), I can execute that flat-and-parallel need better, so I might just do more :-)
 
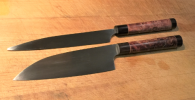
You guys rule seriously. This may not look great to anyone else but it’s a big improvement for me in terms of straightness. Handle jig was HUGE thank you what a great idea. I filled the 1/2 hole with 5 minute epoxy and basically held it straight till I thickened up. Then I took it out and put on handle jig paying more attention to squareness relative to the slot for the tang. The blue tape thing works great.
 
You guys rule seriously. This may not look great to anyone else but it’s a big improvement for me in terms of straightness. Handle jig was HUGE thank you what a great idea. I filled the 1/2 hole with 5 minute epoxy and basically held it straight till I thickened up. Then I took it out and put on handle jig paying more attention to squareness relative to the slot for the tang. The blue tape thing works great.
Glad you're making progress. I can't take credit for the jig idea, Natlek first posted about it.

I'd really like to see a picture of the handle you made...
 
Now, however, that I have my mini-mill (god, I love that thing), I can execute that flat-and-parallel need better, so I might just do more :)
I have tried the mill for doing that and do not like it at all. I found it almost impossible to avoid tear-out, plus it took forever and made a mess. And I still ended up with a less than perfect fit.

A table saw cross cut sled is much quicker and gives perfect results. I mark one face of the block with a V so I know how the pieces go back together and cut away. It's quick, I have dust extraction and the pieces fit perfectly. I get only a small amount of tear-out even if I'm too lazy to change out the ripping blade for something with more teeth. If you have a table saw, give a cross cut sled a try, I'm pretty sure you will like it.
 
You guys rule seriously. This may not look great to anyone else but it’s a big improvement for me in terms of straightness. Handle jig was HUGE thank you what a great idea. I filled the 1/2 hole with 5 minute epoxy and basically held it straight till I thickened up. Then I took it out and put on handle jig paying more attention to squareness relative to the slot for the tang. The blue tape thing works great.
I am glad that worked for you :) did you mean to attach a picture of your creation??
 
I have tried the mill for doing that and do not like it at all. I found it almost impossible to avoid tear-out, plus it took forever and made a mess. And I still ended up with a less than perfect fit.

A table saw cross cut sled is much quicker and gives perfect results. I mark one face of the block with a V so I know how the pieces go back together and cut away. It's quick, I have dust extraction and the pieces fit perfectly. I get only a small amount of tear-out even if I'm too lazy to change out the ripping blade for something with more teeth. If you have a table saw, give a cross cut sled a try, I'm pretty sure you will like it.
I don’t have a table saw...

I also don’t have problems with tear out using an endmill. I wonder the difference?
 
I also don’t have problems with tear out using an endmill. I wonder the difference?

Size of endmill, materials, speeds and feeds. Same thing that makes a difference on all milling operations!
 
I don’t have a table saw...

I also don’t have problems with tear out using an endmill. I wonder the difference?
Maybe the woods you use are stabilized? I've tried milling tropical hardwoods (ipe and ebony) and they seem to want to chip at random times, even when climb milling around the perimeter to minimize tear out. I did not spend a whole lot of time trying to optimize this process. It was during that time when I had just gotten the mill and had to try everything on it. The mill worked well enough for squaring up a block with a face mill, but not so well on the end grain. I bet one can make it work, it just seems a whole lot quicker and easier on a table saw.
 
If you are just bedding the tang in the handle and pulling it out, why not do that step at the beginning? Grind the profile, especially the tang, then fit the handle while the steel is still flat. Avoid all the complications of distal taper and little ricasso. I guess if you grind pre heat treating, there is a bunch that could go wrong. Grinding post, you just gotta watch for warps, but that is sop anyway.

Thoughts?
I don't see why it wouldn't work. Dealing with the distal taper probably sounds more complicated than it really is, though. The one downside of your proposed method for me would be having to grind in the shoulders and the tang first. I like to do that at the very end, otherwise I tend to round over the corners at the shoulders. I guess one could make a separate tang template to make the handle to, and then grind the actual tang and shoulders to that template.
 
Back
Top