Why I havent been making many knives... My shoptime is going into this!

Joined
Oct 21, 2006
Messages
1,652
So, my TR6 needs a new frame. I've got a replacement frame just about ready to go (needs a few things like the differential mounts boxed in, and some other things I'll do to reinforce it since it's by itself right now.)

Having having taken my newly acquired TR7 for a nice long 144 mile round trip foliage tour yesterday with New England Triumphs, I picked today to start dismantling the TR6.

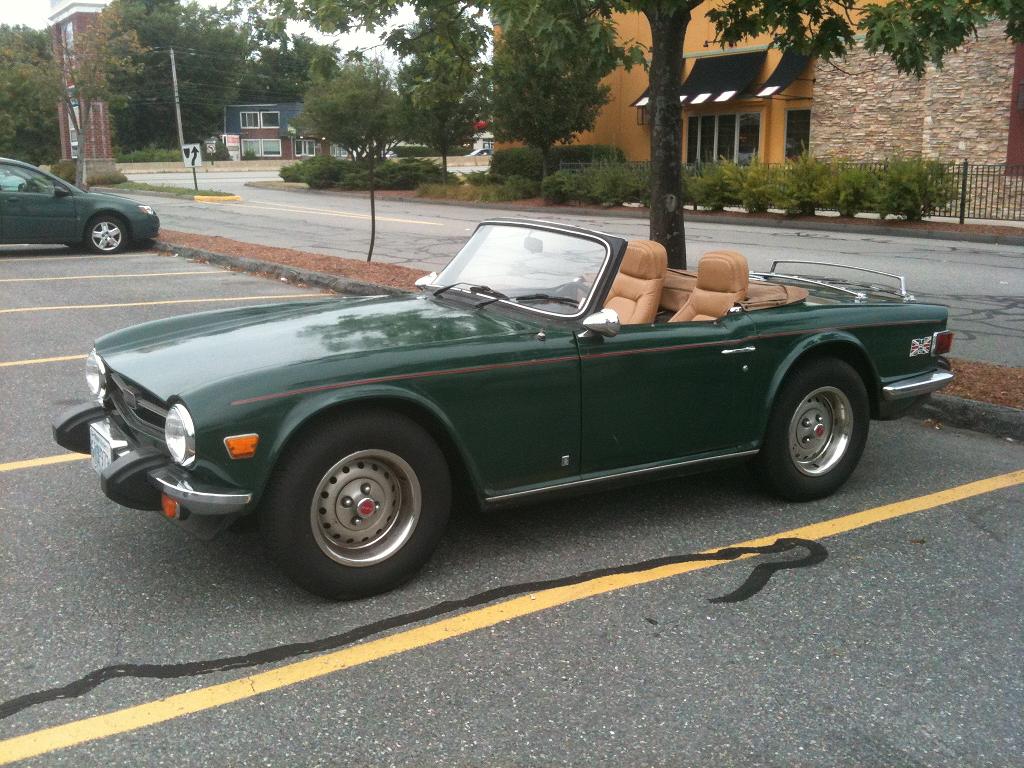
Here's the TR6 as it was the last day I drove it
tr6.jpg

Here's the TR7 yesterday morning while waiting for others to show up for the foliage tour
DSCN0834.JPG


Today I removed the seats, most of the carpet, the front bumper and scoop, the two front fenders, the driver side door, and the bonnet all removed. Things are at once both worse than I hoped, but better than I feared.

The very first sign of trouble was when I was removing the driver side light fixture so that I could get at the interior bolts to remove the fender. The inner-cup part had significant rust holes in it.
DSCN0903.JPG


I also had two stubborn bolts, after torches, penetrating oil, and big breaker bars failed to work, I had to drill through the heads and chisel them off
DSCN0907.JPG

DSCN0908.JPG


In order to get the bolt off inside the light housing, due to lack of having a ratchet with an adjustable angle head, I took the bonnet off first
DSCN0911.JPG


Once I did get the driver side fender off, this is what greeted me. The yellow thing is a pen that some how got into the wall of the car
DSCN0913.JPG


The driver side fender isnt that bad, the rust at the bottom should be repairable.
DSCN0915.JPG


When I cleaned out the driver side wall, I was surprised that the rocker panel is solid, and it's just the front panel that's realy rusted out. A little bit of rust has crept to the tub wall, but only at the very bottom corner.
DSCN0919.JPG


The top of the tub where the fender bolts down is a bit rusted, but should be repairable alright.
DSCN0922.JPG
 
I continued with the passenger side front fender, this one has less rust at the bottom over the rocker, but has a bit of rust where it bolts to the front valence. This too should be repairable and recoverable
DSCN0925.JPG


The inside of the passenger side, for all that there was no hole into the wheel well, was much worse however, mostly down at the rocker panel.
DSCN0928.JPG


The top of the tub panel here is rusty too as with the driver side.
DSCN0929.JPG


Here's the passenger side after cleaning out the pine needles and dirt.
DSCN0932.JPG


The rocker panel on this side is real bad, and almost non existent for the first 8 inches or so
DSCN0933.JPG


The floor pans are both coming out and being replaced. Besides holes up front in both of them, under where the seats were are holes and lots of rust too
DSCN0934.JPG

DSCN0935.JPG


So here's my dismantling job for one afternoon thus far
DSCN0936.JPG


This should keep me busy for a good long long time ! Unfortunately that eats into my knife time =/
 
Yes, i've got a lincoln 140 mig welder. (well i've had it for a whole 6 days) I need to pick up a 75/25 C02/Argon tank before I teach myself to mig with it, though I could just run flux core wire for now to learn I guess. I bought a 2 ton engine hoist and a sand blasting cabinet last weekend as well

Here was some old TR6 factory steel hardtop hardware that was all rusty and with bad chipped black paint
hardtop07.jpg

hardtop04.jpg


I took them to my sand blasting cabinet to see how they'd clean up, and I'm very happy with the results. I didnt know if the screens would clean up well at all, but they came out looking great.
DSCN0900.JPG
 
POR15 rocks, but if you want to do it right, you need to get down to the bare metal first, then use their acid prep then their primer then the por15, then it's just about indestructible =D

I'll be taking the panels and tub down to bare metal, repairing what needs to be repaired, and going from there. Originally I was just going to do a quick bang-up job to get the replacement frame under it and have it back together to drive next summer, but now that I've got a 2nd triumph, I'll take my time and do it right the first time.

Anyone know a good source for stainless fasteners (nuts / bolts / washers) that doesnt charge an arm and a leg? Anything that doesn't need to be grade 8 or load bearing or whatnot, I'm going to do in stainless so down the road there are no problems disassembling for work or whatnot =)
 
Justin, For the love of God, call the junk man now and have him tow it away. If you don't, the next thing that will happen is you will discover that women are better than sheep.....and then neither the car or any knives will get worked on.

Nice project.
 
When I was young, I believed the TR7 would be my first car. The wedge shape really inspired me. When I turned 16 I test drove one... and was very disappointed to learn I didn't fit in it. My legs were too long, even with the seat pushed all the way back my knees were up against the steering wheel. I ended up settling for a '71 Cougar XR7.

Since then I discovered Toyota MR2s, which (ironically) fit me perfectly. I would still have preferred the original look of a TR7, but over time I adapted. I still own an '87 MR2. It's probably about due for the sort of tear down you're doing on the TR6.

Late last month I went on a vacation and found a 1964 Ford Fairlane 500 in a special outdoor section. They wanted $600 for it. Had I been 100 miles closer to home I might have bought it, then I'd be in the same position Justin is in now... hopelessly deep into rust mitigation. But oh, those old cars do have a certain attraction.

Wishing you the best, Justin.
 
I continued the dismantling of the car tonight.

First I pulled off the soft top. Thankfully there was no rust on this top panel, the paint was rubbed off all along the bottom of where the back of the soft top frame mounts, but it wasn't rusty.

DSCN0938.JPG


After pulling off the interior panels to get at the bolts for the rear fenders I found some more rust on the inside of the car on the tub

DSCN0942.JPG


The rest of the rear tub behind the fender looks in fine shape though. We'll see once i knock the undercoating off.

DSCN0944.JPG


I noticed however that it looks like the inside layer of the rear inner valence panel is completely rusted out under the top layer. The top is in fantastic shape, and I think it may actually be a replacement panel on the outside, because I see some points that are normally spot welded that are not connected. it doesn't look good in there, and may actually be the worst place on the car from what I can see poking around.

DSCN0946.JPG


Both fenders look just fine and without rust.

DSCN0947.JPG

DSCN0948.JPG


The bottom of the rear on the driver side is slightly squished in, so it appears that the car was in a fender bender, explaining the replacement outer rear valence.
DSCN0949.JPG


The rest of the panel looks in fine shape as well except right down by the rocker panel
DSCN0950.JPG


Here's a close up, and you can see the paint and undercoating bubbled up a bit in the corner
DSCN0951.JPG


So after day two of disassembly I've now got all the quarter panels off and the top off, infact there's not a whole lot left to remove from the tub other than the dash area, the trunk and the gas tank.

DSCN0952.JPG
 
Glad you posted this. I couldn't remember who I needed to send Triumph pictures to from Ashokan. Just tell me you aren't putting those gawd-awful luggage racks back on. . . .
 
Justin, that looks like it going to be allot of fun.:cool::thumbup: It gives me flash backs of when I restored my 1947 Indian Chief. But you got a ton more of sheet metal work to do.:eek:
Keep us updated with your progress.:D
 
Tonight I was able to get back in the garage to continue dismantling. I had no time this weekend between a 14 hour work day on Saturday and the Cape Cod British Car Club show on Sunday with the TR7.

The first thing I worked on was removing the gas tank, now that I had emptied it out. In pulling apart the rubber connector between the chassis metal fuel sending line and the one attached to the tank, I pretty well mangled the rubber, good thing its' being replaced anyways.

With the fuel tank removed, I then removed the trunk lid as well. I also took the center section of the rear bumper off finally, I had just not gotten around to it yet.

DSCN1108.JPG


Next I went to work on the dash area. This caused me a few problems because I wasn't sure how to get the wiper switch taken off so that i could pull the wooden dash forward. After some looking around online I finally found that there was a pin i had to push in after unscrewing the chrome bezel, and was able to unplug all the wires from the dash and remove it. The dash will need to be re-finished, and I'm thinking of re-veneering it with some nice burl wood. Since I am replacing the whole wiring harness, I was able to save myself some time by not having to label every little wire as I removed it. In addition there were a LOT of wires just sort of hanging and capped off with electrical tape or twist caps under the dash, probably why none of the door lights, heater fans, blowers, etc never worked =D

DSCN1109.JPG


I then pulled out all the air ducting and the glove box, so I could get easier access to the bolts holding the windshield in place. It's amazing how much STUFF is crammed under the dash in a TR6, though I'm of the opinion that much of it is unnecessary, but that's just me =) I'm debating how much air ducting / heater stuff I'll be putting back in when I rebuild it. I may just put electric seat heaters in the miata seats that I'm using, and forego the heater core all together. It's another thing in the TR6 which didn't work, and which I really didn't miss either.

DSCN1112.JPG


The car's almost just down to the contents of the engine bay left to remove. I need to get the steering wheel off and get some of the old wiring harness out from the dash. Remove the heater core and a few other things, and I think I will almost be ready to lift the body off.

After talking with some people at the car show this weekend, they said to NOT do my floorpans before lifting the body, because I'm using a new/different frame, and that I should instead just take the body tub off, do all the work on it that needs to be done, then put it on the new frame, and THEN do the floor pans / rocker panels so that I can get the alignment right on the new frame, which could be slightly off from my old frame.

So until next time, here's how my poor little TR6 looks.
DSCN1111.JPG

DSCN1110.JPG


My garage doesn't have a whole lot of space... but I'm single and I've got a good size room in the basement... so all my bits and pieces are going in the basement for the time being =D
DSCN1113.JPG
 
Today after work I went down to the wood shop to prep for some re-finishing of the faded and peeling dash. I figured, if I'm going to refinish the dash... I better do it in style. I'm not a big stickler for originality, and I love good burl wood.

First I'm going to have to remove the top layer of the old dash
DSCN1114.JPG


I found myself some very nice raw yew burl veneer with a high level of chatoyance that will look gorgeous. I also made sure there was enough of the veneer that I can do it twice if I screw up the first time =)

DSCN1115.JPG
 
I'll probably forge myself a veneer hammer out of an old ballpein, and use that to level press the veneer into place forcing out any extra glue, then, since the dash is flat, I'll sit it on something with a piece of plywood on top and some bricks on top of that for even pressure while the glue cures. I'm going to experiment a little bit first to make sure I get it done right.

It's actually going to take slightly over 2 pieces to cover the whole dash, so I will have two 'bookmatching' points where I flip the subsequent sheet of veneer over. The remaining section of the 3rd sheet will be for the back of the glove box door. I'll use a mirror to line up the splices for the best look, and in the points where it will be the least obvious if they don't match up perfectly. I'll try to get the part of the veneer with the most figure over the glove box area since that's the largest un-broken area. If one of the splits where I need to match up two pieces of veneer is midway through the tach or speedometer, for example, there's only about an inch and a half of actual seam.
 
Looks like a major job,As far as the rust go's it dose not look too bad but it looks like you will be good with your mig by the time its over:cool: . Doing so much work on a car like that you must really like em. Just one more thing are you going to leave that standard motor in it
 
This last week I have not had much time to get work done , but I got some done. I had to strip the old veneer from the dashboard. In order to do this I found myself a cheap thin chisel ground blade. I started to try with a razor, but it would catch in the wood at any slightly wrong angle. I took the knife and dulled it a little bit, sharp enough to wedge still but not so sharp to easily catch the grain of the plywood backing.

DSCN1116.JPG

DSCN1117.JPG


It took several hours, but it was far cleaner and less work than sanding it off, and it came out very clean and neat.

DSCN1120.JPG

DSCN1121.JPG


This weekend I stopped by Woodcraft in Providence and was asking questions about finishing and applying veneer. When I was there one of the managers mentioned that they were having a vacuum bag veneering demo on the 28th of this month. I asked what they were demoing and they said they didn't have anything particular planned, but if I wanted to bring in my dash and veneer before hand, they could vacuum bag apply the veneer to the dash as the demo...

So I'm going to take advantage of the offer and get it done by someone who knows what he's doing and has done this many times before making guitars and the like !
 
Today was re-doing the dash!

Some prep work was done before this including book matching the burl veneer and quickly cutting out some particle board for a press top. First we've got everything laid out on the table.

dash01.jpg


We decided to do the face of the glovebox at the same time as the rest of the dash, so first we waxed up the edges of the glove box so that the glue would not adhere to the sides.

dash02.jpg


For glue we chose titebond III because of its water resistant properties for outdoor use.

dash03.jpg


An outline of the dash was traced onto the bookmatched and taped up veneer so that blemishes could be stuck within parts that will be removed or cut away.

dash04.jpg


We used a large vacuum bag from the Vac-U-Clamp company which was large enough for the dashboard.

dash05.jpg


for vacuum veneering you need make sure the vacuum will reach the whole bag and create and even pressure, cross-scored MDF is used to make a base that will go within the bag for the bottom of the 'press'

dash06.jpg


It's important to position the nipple on the corner of the board so that it can draw vacuum from all the way around and not end up with good pressure in just one area.

dash07.jpg


To ensure that the veneer didn't shift, it was tapped to a back board on the corners where the dash would not be affixed

dash08.jpg


Because of the holes in the dash, to get an even pressure with the vacuum bag, a top-plate was cut to match the outline of the dash, with the top corners rounded off so that they wouldn't damage the bag when under vacuum

dash09.jpg
 
A wood glue roller was used to apply the glue in a thin layer over the whole face of the dash.

dash10.jpg


The dash was then carefully positioned within the traced outline and pressed down to let the glue get tacky

dash11.jpg


Some tape was then used to make sure that it would not slide side to side at all when inserted into the vacuum bag

dash12.jpg


Next the top plate was positioned ontop of the dashboard

dash13.jpg


With that done, as a unit the stack was inserted into the vacuum bag and held steady while the pump started to suck

dash14.jpg


The vacuum builds slowly, so care was taken to make sure that nothing shifted

dash15.jpg


Once most of the air was out it holds itself pretty well. The glue will set faster under vacuum than without, and it should sit like this under vacuum for at least 4 hours

dash16.jpg


You cant really see it in the resized image, but of note is that there is almost no glue 'squeze out' around the edges of the dash and veneer, you want to be very sparing with the glue for veneer so that it doesnt get sucked right through the veneer and stain it.

dash17.jpg


Finally we can see that teh vacuum is being maintained at about -25 Bar, that equates to (if my math is right) about 320 PSI, far more efficient than using a clamp table and a whole ton of clamps.

dash18.jpg


I'll be picking up the dash tonight so that I can start using a razor to trim the edges and the cutouts and get to finishing it.
 
Back
Top