- Joined
- Aug 13, 2002
- Messages
- 5,703
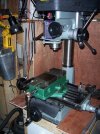
It finally arrived. Isn't she a beauty? Well for an import anyway. Can't afford a Kurt right now.
I still have to take it apart and give it a good cleaning.
I also want to make another handle for it, this long thing is not working at all.
My question is, should I leave the swivel base or there or remove it to get more rigidity and more room under the quill?
Patrice
I still have to take it apart and give it a good cleaning.
I also want to make another handle for it, this long thing is not working at all.
My question is, should I leave the swivel base or there or remove it to get more rigidity and more room under the quill?
Patrice

")

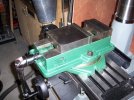
") . i have vice mounts on my aluminum table cover so i can mount my vise, or add other fixtured ect.
. i have vice mounts on my aluminum table cover so i can mount my vise, or add other fixtured ect.


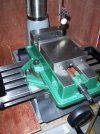
 I slowed it down some (around 850 rpm) and it did help but it still was not good. It got the job done with the t-nuts anyway.