A knife for Mark by Markman

Joined
Dec 7, 2008
Messages
7,187
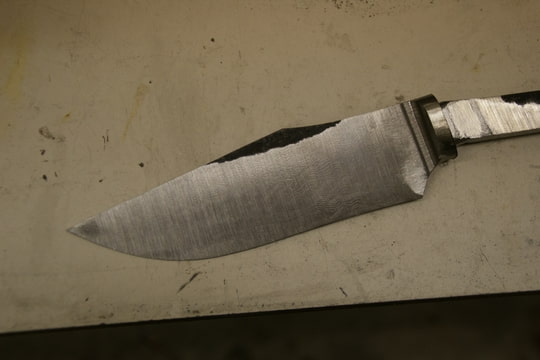
These are some photos of a knife being made for me by Erik Markman.
Some of the things I really like in a knife are:
Integral Bolsters
Interesting Patterns in the steel
Sculpted Handles
Ultra Clean overall
From what I have seen in Erik's knives, these are normal features.

Here is what Erik has sent so far;

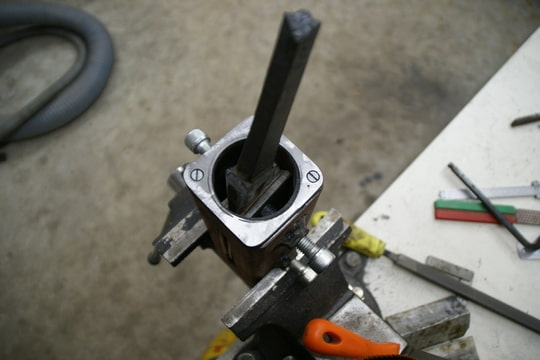
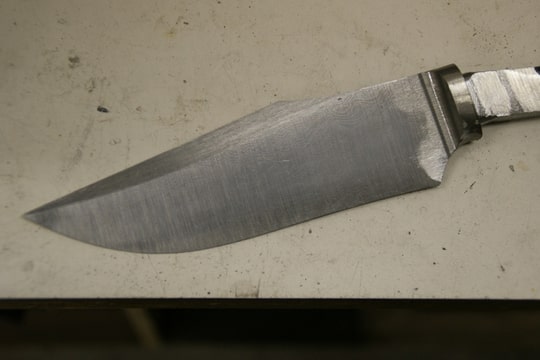
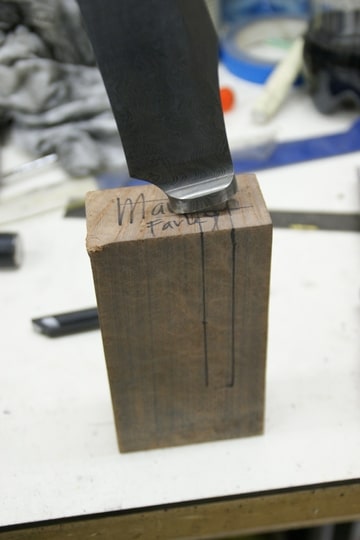
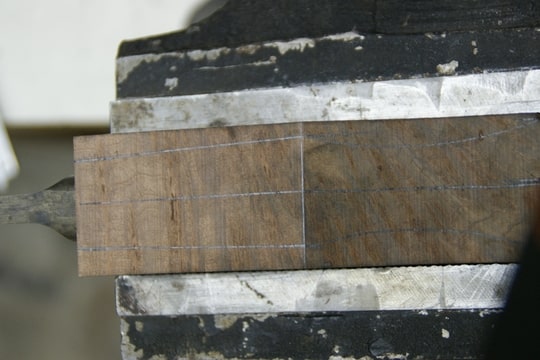
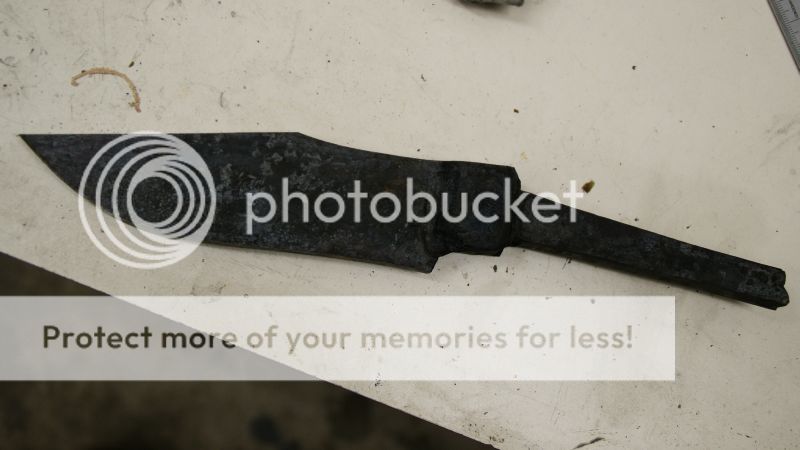
First pic is welded, forged and profile ground.
001-1.jpg


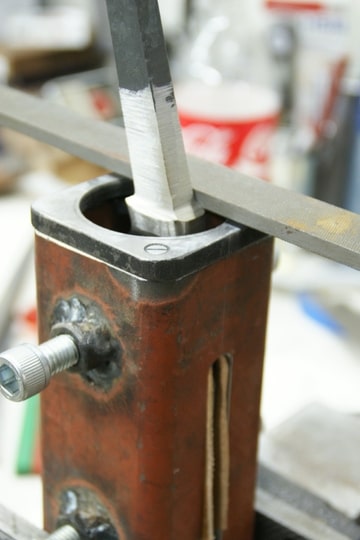
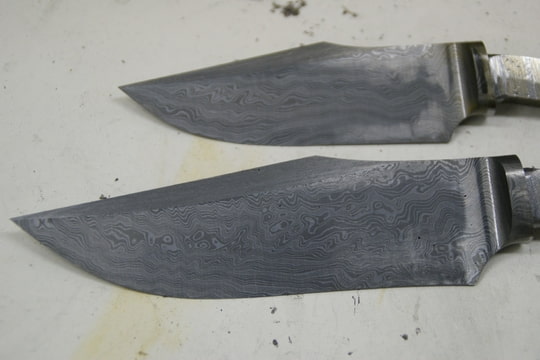
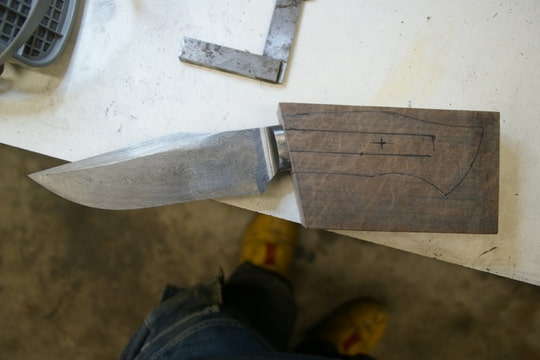
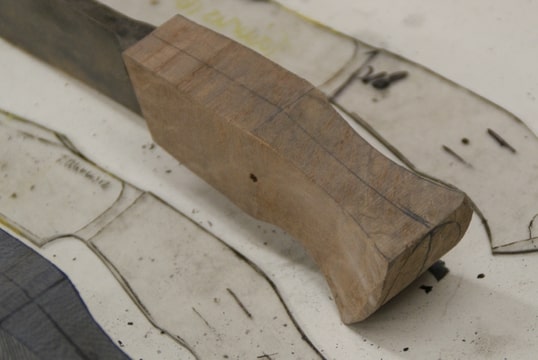
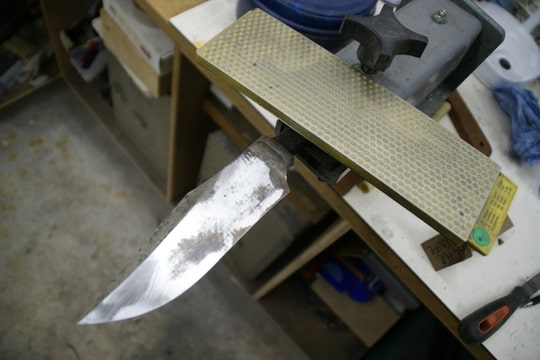
On the second pic I have ground the bevels and the transition to the bolster.
2-4.jpg


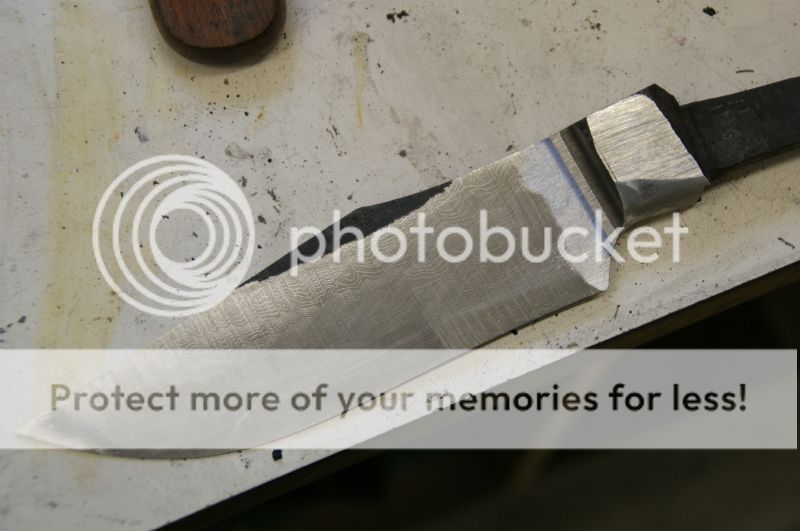
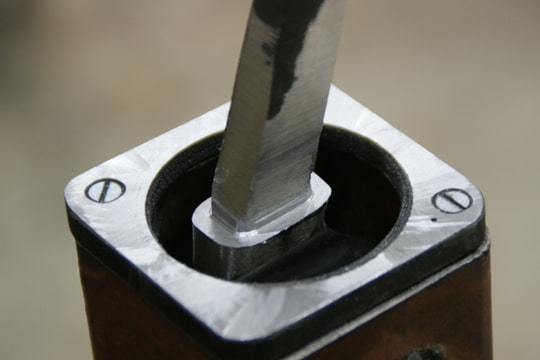
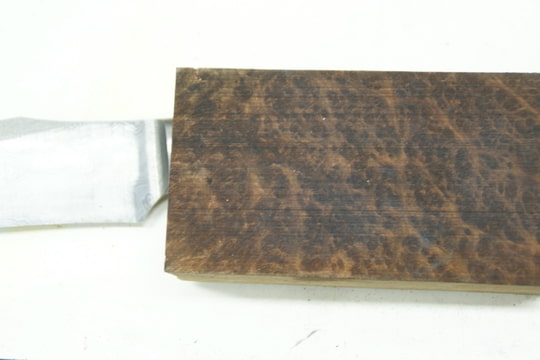
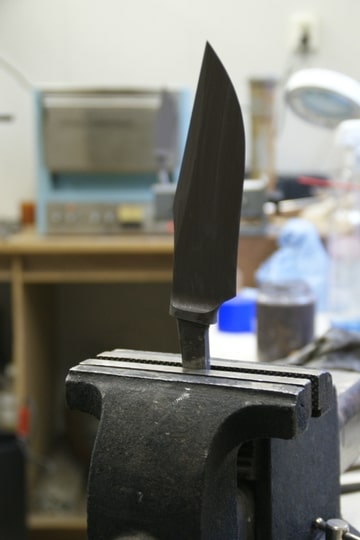
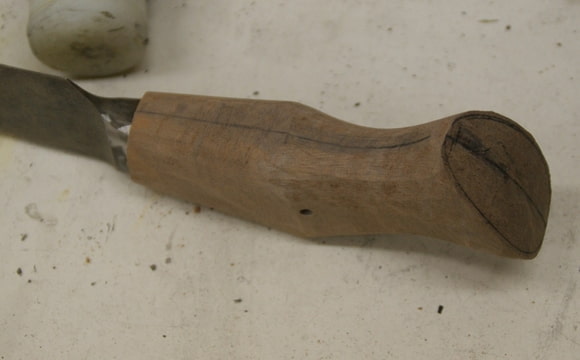
A little more grinding and it is ready for heat treat.
 
Last edited:
Thanks for the introduction Mark!

Here is the progress of yesterdayevening.

After rounding the bolster to its final shape i placed the blade in my newly made clamp for grinding and filing the back of the bolster square and flat.
It has a slot on the front so I can see if the blade is in the right position and has 2 leathercoverd steel plates inside it that are pushed together by the bolts sticking through the sides. It also has a piece of allthread running through the bottom of the square tube and the plates so the don't drop out. There is a hardened steel plate on top so the file doesn't chew up the surface. It works much nicer than my old clamp wich I will show later.

Foto-UEFBKZQQ-D.jpg


Here you can see the plates clamping the blade.

Foto-YDKD6D6W-D.jpg


After grinding away the bulk of the unneeded steel.

Foto-EIIR8QVG-D.jpg


After filing the back of the bolster.

Foto-SIMTCNCS-D.jpg


Here it is out of the jig, the tang is still almost half an inch thick by a little over 3/4 high, that doesn't come off easily..

Foto-LICQMIQH-D.jpg


Erik
 
I ground and filed the false edge and tomorrow evening it's time to clean up the tang and grind the blade to 400 before heattreat.

Foto-KNBNX3FT-D.jpg
 
The blade with the beautiful stabilised Redwood burl block provided by Mark.

Foto-BTVNRQQL-D.jpg


Drilling the pilothole.

Foto-MRRKMGKR-D.jpg


Getting there...

Foto-TMF7PSPX-D.jpg


Sawed off the angle for the bolster with not much fitting left to do.

Foto-SZBKIDRM-D.jpg
 
The block fitted against the bolster, the contour of the handle scribed and ready to drill the pinhole.

Foto-ZIXSCNZ8-D.jpg


The blades painted in antiscale compound and my HT oven heating up.

Foto-R7XSTCE8-D.jpg


Quenchoil heating up. This is Durixol 25W wich is a professional HT oil, I have been using it for almost a year now and it is a great improvement over peanutoil in hardness and keeping things straight.

Foto-43UZUBVA-D.jpg


The blades as-quenched, nice and straight and free of scale. Lucky me......

Foto-FL6QFMCU-D.jpg
 
This is looking great Erik.
I am really looking forward to seeing when you start sculpting the handle.
 
Man, I'm loving that knife. Great thread.
 
Here is the block ground to profile and the lines for the contour scribed.

Foto-LO8ZUUVN-D.jpg


Roughly ground to shape.

Foto-YEXIOH4C-D.jpg


With the template I use for these knives.

Foto-CCH4XNJH-D.jpg


The corners knocked off and roughly shaped.

Foto-TE76WOKP-D.jpg


I make sure i keep the centerlines on top and bottom so it is easier to keep things symetrical.

Foto-3HHWAIPY-D.jpg


Now it is time to finish the blade. I like a flatground blade so I use a DMT diamondplate to take out scratches and high spots to get things really FLAT.
This is after a few wipes and it was almost flat already.

Foto-JXOP7OQZ-D.jpg
 
This is great! Thanks for taking the time to put this together, Erik!

Hartelijk bedankt!
 
Back
Top