An Interactive WIP - Resurrecting an Old Bread Knife

I'm interested in seeing if those bolsters stay on when you go to shape them. Soldering alone is pretty weak. I would drill two holes with a carbide bit and put in brass rivets.

I agree with the others that the pink liner is wrong. Use a dark red or black.

Not opening up the holes because you don't want to "take the time" is a poor excuse for not doing it right.
Wow Stacy ... that is pretty harsh. This is for my own use, and I am ok with 1/8” pins. Part of the hurry is other knives I need to attend to . The other part is that this is my only bread knife ... and I kind of need it back in service :)

Solder is considered to be pretty weak without pins? If they come off, then I’ll at a later time strip everything off and start over, which will be an opportunity for your larger pin holes
 
It was not meant to be harsh. Sorry if it sounded that way.
It was a different way to say, It isn't OK to do a job "good enough" because it is for you. Good craftsmanship is doing it right every time, no matter who the final user is.
Same as the reason a good craftsman never says, "I was in a hurry so I skipped X and Y and just did Z."
I can't remember if it was Bill Moran or B.R.Hughes who said, "If you don't have the time to do it right, don't do it until you have the time."
 
Stacy ... it is not a matter of “good enough”. I am OK with 1/8 pins. Would corbys be a better look? Sure. But so would gold (ok, ok, too soft). But the point is, not everything needs to be over the top. On this knife, adding the bolster and nice wood is in the scope of what I had in mind. If I wanted more ... I would have started from scratch. If anything less than “everything you can do” is considered “good enough”, then you are playing a losing game.

I won’t go in to specifics ...but I really don’t have the time. Please do not push more on that point, or judge me for taking that stand.
 
I'm interested in seeing if those bolsters stay on when you go to shape them. Soldering alone is pretty weak. I would drill two holes with a carbide bit and put in brass rivets.

I agree with the others that the pink liner is wrong. Use a dark red or black.

Not opening up the holes because you don't want to "take the time" is a poor excuse for not doing it right.
ok Stacy - here you go (sorry for the delay in continuing this - hard to get time in the shop these days. You did not even need to wait until shaping the bolsters: this happened just now while I was gluing on the second scale, and cinching the scale up to the bolster lengthwise using a clamp:
1621541913478.png

What you are looking at is light shining through a gap that opened up between the top bolster and the blade. I wanted to try this because Boye recommended soldering (without pins) as an option to brazing. Just wanted to see and experience. I have to admit, I am surprised that the solder joint is THAT weak. I think I will just go ahead and throw away my solder and flux, and stick with JBWeld and pins from now on.

Not quite sure how to salvage this. Perhaps let the epoxy cure, get a carbide bit, and try to shoot two holes for pins through both sides of the bolster and the blade, then peen the pins in place. I'd hate to totally dissassemble this at this point, as all the pieces fit up nicely, and I would destroy all those pieces if I tried to get them off at this point. not very hermetic between the bolster and blade .... but this blade sees very little water anyway.

I need to get this finished: I've been using a cheap 2.5" serrated blade to cut my bread - and I miss this blade!
 
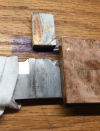
Yeah ... after I unclamped this, the thing pretty much just fell off:
1621612830908.png

From the looks of this, it seems not so much that the solder joint is weak, but rather that the solder just did not effectively penetrate into the joint (you can see that on the left side of the bolster there is just no solder at all) . Im kind of surprised, as I definitely cleaned it, and used plenty or rosin, and the joint was up to temp (solder melting just on contact with the bolster, no flame present). Maybe too tightly clamped/ surfaces too flat??? Anyway .... after seeing the way this can fail, I do think I will just give up on soldering from now on.

Carbide drill is coming in on sunday. Can drill holes for pins from the blade side, glue this side of the bolster back on with JB Weld (and epoxy aganst the scale), then complete the through holes using the other side of the bolster as guide .... then pin and peen .... so I think I can salvage this.

Lesson learned on solder. Like I said - I am surprised though....
 
If you used rosin or paste flux used for plumbing work, that was the problem. The solders we use for attaching bolsters and guards are a silver bearing solder,. TIX is the best IMHO. You need the flux that is the mate to the solder used. It is a thin liquid usually.
 
If you used rosin or paste flux used for plumbing work, that was the problem. The solders we use for attaching bolsters and guards are a silver bearing solder,. TIX is the best IMHO. You need the flux that is the mate to the solder used. It is a thin liquid usually.
Hmmm. I used a paste flux made by Harris. I bought it as part of a silver soldering kit sold by (one of the major knifemaking suppliers - name edited out). I assumed compatibility as they sold it as a set. Was that a bad assumption?
 
If it was the flux that came with it, it should have been OK. When you called it rosin, I was concerned that you used plumbing or electronics flux.

There are a lot of things that can go wrong in soldering. Too much heat is number one. It destroys the flux and makes the joint refuse to flow. It takes a very small torch and flame to solder guards and bolsters correctly. Many people use a plumbers propane torch, which is about 100 times more powerful than needed.
Oh ... my mistake. Said rosin when i*meant* flux. I do know the difference. Too many years soldering electronics I guess....

Not sure what went wrong then... I did use a small torch, and only heat until I clearly get solder melting and flow. The previous two bolsters i soldered went just fine. Maybe I’ll hold onto the solder after all and try some practice on scrap. However, given this experience, and other issues around soldering (like discoloration and extraneous solder flow), m still not sure I will seriously consider soldering again (versus jbweld and pinning)..

Thanks again Stacy.
 
I've seen a lot of folks use pieces of solder that they have smashed flat, put in the joint, then applied pressure with a clamp, and applied a torch to it. That way the solder is already in place and you don't have to worry so much about whether you got complete coverage.
 
I've seen a lot of folks use pieces of solder that they have smashed flat, put in the joint, then applied pressure with a clamp, and applied a torch to it. That way the solder is already in place and you don't have to worry so much about whether you got complete coverage.
Yeah, I have read that. Tell the truth though, that approach kind of goes against the grain for me. In a good joint, the solder should wick in - otherwise the bond to the metal is not there. Clearly that did not happen in this case ... I’ve got no idea why (it’s literally been decades since I have produced a bad solder joint of any kind. I hope this is not an indicator of things to come 😊
 
I'll post a guide to soldering guards and bolsters:

Make sure all parts are super clean and fit dead flat. Clean the solder with a piece of sandpaper.
If clamping them in place, use only light pressure. It is better to not clamp, as solder needs a very slight gap to flow in.
Make a brass pick from a piece of 1/8" brass wire. Put it in a dowel handle. Use this to make the solder flow along the joints.

Apply the flux liberally, and wipe away any excess. Too much flux is almost as bad as not enough.
Heat the joint slowly and evenly until the flux starts to sizzle.
Move the torch to one side of the joint and apply the solder to the other side.
Tough the solder to the joint. If it doesn't immediately melt and wick into the joing, apply a little flux and heat a bit more. When the joint is at the right temperature, the solder should suck into the joint.
When the solder flows, IMEDIATELY remove the torch flame. You can bring it back and draw the solder into any areas it didn't completely flow into.
Use the brass pick along the seams to make the solder flow as needed. Apply a tiny bit of flux and a bit of heat if needed.
DO NOTR apply a lot of heat trying to make the solder flow, as this will just burn the flux and oxidize the solder joint.
If the solder isn't flowing right, STOP. Take things apart, clean everything, sand/file, clean again, re=do it with less heat.

TIPS:
A heat gun works well for low temp soldering.
Those $10 refillable butane torches also work well.
TIX solder and its flux are, IMHO, the best for soldering knife parts.
It only takes a tiny bit of solder to flow through a joint, BTW. Adding more solder just makes amess and if it isn't flowing, more won't help.
Solder isn't sufficiently strong to use alone in most cases. Pins/rivets are what should be used to make a strong joint, and solder is what seals the joint.
You can make spring wire clamps for soldering bolsters from 10 gauge piano wire. Shape into a "U" and turn the ends toward each other like pinchers. Harden and temper at 500°F. Make a bunch with different opening spaces. These will have just enough pressure to hold the parts in place while soldering.
Make a brass/bronze graver from 1/4" square stock. Grind/file the end at 45° to make a sharp chisel edge. This will cleanly cut excess solder away from the blade surface and leave a nice looking joint.
 
Hmm. It is quite likely I had clamped too hard with surfaces too flat, and that caused my problems. I had had issues in the past with parts shifting slightly, and so was compensating 😒. Thanks Stacy
 
In the jewelry world we take large tweezers and bent the tips to make light duty clamps. They work great for low temp soldering things like guards, too.
 
Decided to take time today to finish this up - I have missed my bread knife!

Drilling through the steel and through the remaining attached bolster half went just fine. MAN - those solid carbide bits are nice! (though I suspect this steel isnt extremely hard). the bolster that fell off got glued back on with JB weld (the edge of epoxy from the scale I glued on supplied a really nice registration point, so the bolster went back on pretty much exactly where it was in the first place). Another run with the drill bit, and I had two nice through-holes for 1/8" pins. I decided to not glue, but just insert and peen the pins (both for bolster and handle) - so that went fast. To my surprise, the pins in the bolster are basically not visible. I only took the handle up to 600 grit, then applied Mothers wax. (did I mention I have missed this knife? I need it back in my knife block!). Oh, also touched up the blade using a scotch bright belt. the addition of the bolster to the handle gives the blade a nice heft it did not have originally....
1621971083744.png
 
Back
Top