-
The BladeForums.com 2024 Traditional Knife is available! Price is $250 ea (shipped within CONUS).
Order here: https://www.bladeforums.com/help/2024-traditional/
You are using an out of date browser. It may not display this or other websites correctly.
You should upgrade or use an alternative browser.
You should upgrade or use an alternative browser.
An old HOG....needs love?
- Thread starter propbuildervash
- Start date
propbuildervash
Gold Member
- Joined
- Jan 4, 2011
- Messages
- 540
Just a heads up the screws and posts come in various lengths, you want to get a female post that goes all the way through the scales and blade AND seats just below the recessed 1/4 part of the hole in the handle scale. Make sure the threaded section length of the screws you buy are under 1/2 the length of the post. If they are over 1/2 you may have to grind them down or they will bottom out into each other and your scales wont be tight.
Also the screws are Torx Plus, it is a lil different than a standard torx bit and harder to find, definitely get 2 bits from the same site so you can hold one screw still and torque the other. A regular torx big works, but will leave a bite mark in the screw head, the proper bits will leave it unmarked for the cleanest install!
Posts
https://www.mcmaster.com/female-thr...ial~stainless-steel/threading~fully-threaded/
Screws
https://www.mcmaster.com/flat-head-...el-torx-flat-head-screws-8/thread-size~10-32/
Bit
https://www.mcmaster.com/54305A24/
Last edited:
dogboye
Gold Member
- Joined
- Nov 23, 1999
- Messages
- 7,206
Thanks for posting those links. I anticipate they will be quite useful in my future.Just a heads up the screws and posts come in various lengths, you want to get a female post that goes all the way through the scales and blade AND seats just below the recessed 1/4 part of the hole in the handle scale. Make sure the threaded section length of the screws you buy are under 1/2 the length of the post. If they are over 1/2 you may have to grind them down or they will bottom out into each other and your scales wont be tight.
Also the screws are Torx Plus, it is a lil different than a standard torx bit and harder to find, definitely get 2 bits from the same site so you can hold one screw still and torque the other. A regular torx big works, but will leave a bite mark in the screw head, the proper bits will leave it unmarked for the cleanest install!
Posts
Screws
Bit

McMaster-Carr
McMaster-Carr is the complete source for your plant with over 595,000 products. 98% of products ordered ship from stock and deliver same or next day.
I had run across McMaster before. They are a good source of fasteners. I just didn't know the size that would be needed for replacing Busse scales.
dogboye
Gold Member
- Joined
- Nov 23, 1999
- Messages
- 7,206
Posts
Screws
Bit
McMaster-Carr
McMaster-Carr is the complete source for your plant with over 595,000 products. 98% of products ordered ship from stock and deliver same or next day.
So... uh.... am I the only one that the direct links won't work? I'm just taken to the front page of McMaster's. Or it won't even open at all.
propbuildervash
Gold Member
- Joined
- Jan 4, 2011
- Messages
- 540
i fixed them, not sure why the forum borked the link when i copied them from my previous post.
dogboye
Gold Member
- Joined
- Nov 23, 1999
- Messages
- 7,206
Awesome! Thanks!i fixed them, not sure why the forum borked the link when i copied them from my previous post.
propbuildervash
Gold Member
- Joined
- Jan 4, 2011
- Messages
- 540
Just a status update - The handle hardware has arrived and is nearly spot on for what I needed. Ideally the hardware would have been 11/16ths in length, 3/4 is too long for this blade, but that wasn't an option so I rolled with 5/8 and that looks like it will work great. Busse makes these handles to such a tight tolerance that I had to apply a micro bevel the last Stainless Steel standoff so I could install it smoothly without undue force. Nothing a handheld cordless drill and a file couldn't take care of in about 10 seconds. I am still waiting for more buffing wheels to arrive. My other wheel was starting to fall apart so I ordered a handful of spares in several different types.
propbuildervash
Gold Member
- Joined
- Jan 4, 2011
- Messages
- 540
The polishing wheels arrived a couple days ago. It took me a while to put more polish on it. I only polished for a min or two at a time and then let the blade return to ambient temp in my garage, about 25 degrees F. I did not want to mess up the heat treat and I didn't want to end up with a mirror polish.
Here are the final results.


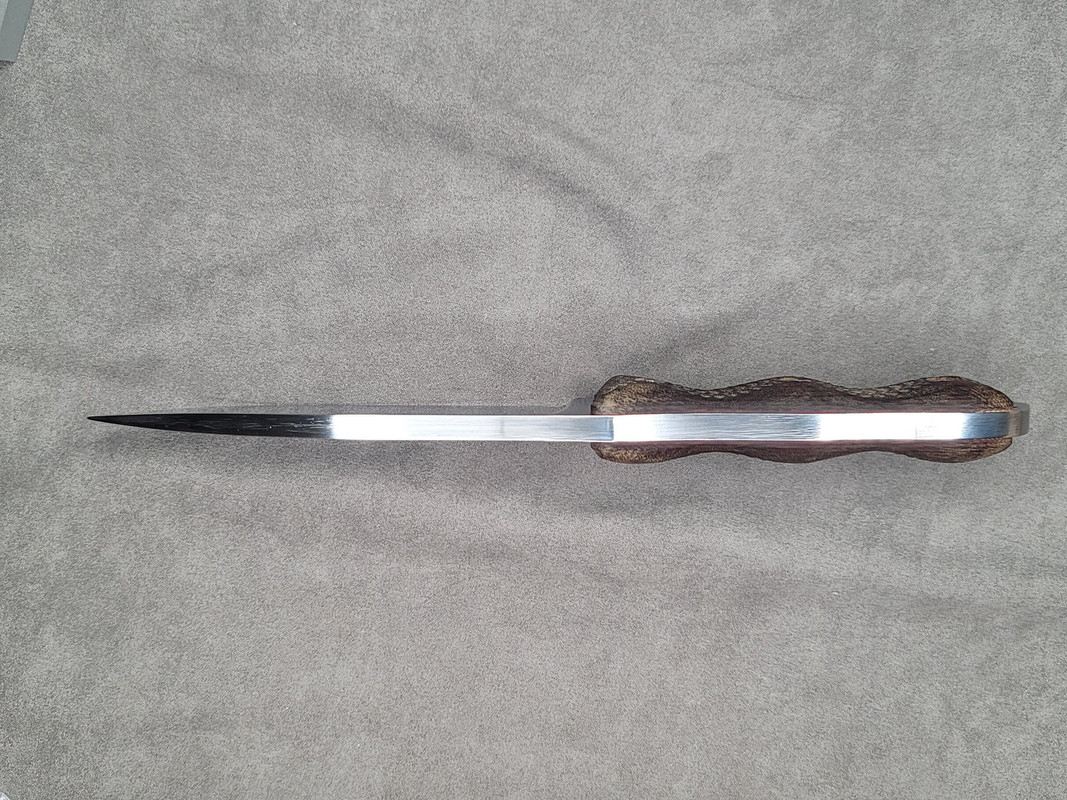
Here are the final results.
Last edited:

Agree! Users grow on you more.Beat the shizen out of it. Show it the love it deserves. Give it some proper battle scars and make it yours")
Soulrack223
Gold Member
- Joined
- May 8, 2007
- Messages
- 5,661
That turned out great. Worth the work to make it yours. Now I hope you use it.
- Joined
- Apr 8, 2021
- Messages
- 113
Ashley, love thatYou did a fine job on the Ash. I miss my Ashley,

propbuildervash
Gold Member
- Joined
- Jan 4, 2011
- Messages
- 540
I believe it was 11/64 or 3/16 but I am not sure. I cleaned up my shop last week and tossed the old rivets out so I cannot check to verify. The key is to enlarge the inside hole partially to create a shoulder of material inside the tube, you do not want to drill all the way though, then you carefully remove the top of the flare with a medium stepped drill bit. Once its removed, you secure the scales using e-tape and you can then place a punch on the new formed inside shoulder of the tube to lightly tap it out of the hole, without a shoulder to place a punch on it is very difficult to remove the tubes.To the OP what size drill bit did you use to drill out the tubes? 3/16"?