Bill Burke fighter, progression thread

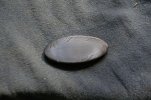
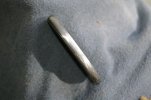
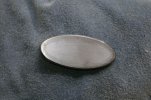
First picture is the bar after welding drawing, cutting and twisting - 4/9ths right, 5/9ths left. Second photo shows detail of twists. Next is the bars after cutting. The long bar will be in the center. The fourth photo shows the stack ready for welding. The fifth is the end view of the stack. The final photo is the stack in the forge.

14-web.jpg


15-web.jpg


16-web.jpg


17-web.jpg


18-web.jpg


19-web.jpg
 
There's something really special with multibar damascus. In short - it rocks.
 
I check everyday to see if there is an update... i learn so much thru these threads.
trully awesome. an inspiration to be sure.
thanks!
~Chris
 
Welded and drawn out.

20-web.jpg


The beginnings of the point.

21-web.jpg


A little more refinement to the point.

22-web.jpg


Point almost done.

23-web.jpg


Point finished and the bevels started.

24-web.jpg
 
Really looking forward to the finished piece.
I was throughly impressed upon examining Bill's knives at Blade.

It seems I get to examine his knives about every six months (reno/blade) and he is moving rapidly forward to say the least.
 
Thanks for taking time to make this thread it is always interesting to see how others do things, I always learn something from treads like yours.
 
The first picture is the piece of the mother billet that Bill saved for the guard, heating in the forge. The pattern is on the narrow face, so it has to be re-forged so that the pattern will be on a wide face of the guard. Next is the re-forged billet being cleaned up and given parallel sides on the surface grinder. Last, a quick etch to show what Bill has to work with.

31-web.jpg


32-web.jpg


33-web.jpg


34-web.jpg
 
Yes indeed, it looks like the guard will be amazing......

All the best,
David Darom (ddd)
 
surface grinders ROCK!!!
and the steel is amazing! any explination of how that pattern was achieved?
i cant wait!
thanks for showing
~Chris
 
surface grinders ROCK!!!
and the steel is amazing! any explination of how that pattern was achieved?
i cant wait!
thanks for showing
~Chris
Chris, the pattern is just a w's billet that I cut a chunk off from and then upset so that the pattern was on the wide face insted of the narrow face. The outer layers of w's spread and straighten from the way that the press deforms the billet during the upsetting.
 
here is a picture of a guard that I did for one of my ms test knives. I call it a picture frame guard. this is NOT a loaf slice but is welded up as a one of a kind.
 

Attachments

  • IMGP0505.jpg
    IMGP0505.jpg
    76.9 KB · Views: 113
  • IMGP0508.jpg
    IMGP0508.jpg
    41 KB · Views: 67
  • IMGP0509.jpg
    IMGP0509.jpg
    74.4 KB · Views: 120
First, milling out the slot for the tang.

bb1-web.jpg


Next is a couple of shots of the guard on the blade

bb1a-web.jpg


bb1b-web.jpg


A few shots of the collar/habaki fitted to the ricasso area of the knife.

bb1c-web.jpg


bb1d-web.jpg


bb1e-web.jpg


A couple of shots of the guard with the collar/habaki.

bb1f-web.jpg


bb1g-web.jpg


The collar is mokume gane made with shakudo and silver the habaki is silver. The collar is wrapped around and soldered to the habaki.
 
Back
Top