- Joined
- Jan 11, 2015
- Messages
- 2,575
my goal with the in-depth tutorial is to teach you to fish... If you've got a drill press and some sanding drums you can build your own!
I appreciate it. I was just ribbin ya.
The BladeForums.com 2024 Traditional Knife is available! Price is $250 ea (shipped within CONUS).
Order here: https://www.bladeforums.com/help/2024-traditional/
my goal with the in-depth tutorial is to teach you to fish... If you've got a drill press and some sanding drums you can build your own!
I appreciate it. I was just ribbin ya.
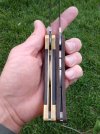

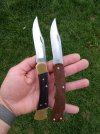
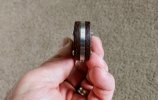
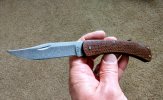
So do I...congrats. Hope we see more of your work!I think it came out pretty well
Wish I didn't understand that!I've thought of a few other ways I could potentially mess it up - my motto is, if it ain't broke, fix it til it is.
yes it did come out well. excellent job. very impressive.
Wish I didn't understand that!
You might look up some of tiguy7 posts. He takes apart a lot of Buck knives and makes 'selectors' and explains what tools and hardware he uses.
Here's one to start https://www.bladeforums.com/threads/112-bcci-take-apart-canceled.1715622/ post #12.
Most excellent results! Congratulations on an excellent knife!
As to the other mods, if it were mine I'd probably partially recess the screws.
I don't think I'd put a clip on it but definitely a no flap leather sheath or a flapped one from hitch and timber. If you do decide to clip it you could try to find a lynch or MXG Gear clip used and put it on there?
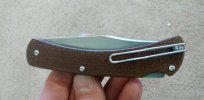
Wow - looks great! I really enjoyed following this post! I couldn’t help but chuckle on your “if it ain’t broke” philosophy. Also chuckled a bit on how worn down the donor 110 blade was.
Just MNSHO...that is not good looking, maybe it works for you, but not me. I say no to clips on 110/112sI don't mind the Spyderco wire clip overall - here's kind of what I had in mind:
I also put the pivot bushing on my anvil and really slowly and lightly worked around the inside edge of the bushing with a ball peen hammer... I kinda doubt this will be a permanent solution...
View attachment 1335349
Thank you! It's exactly what I was hoping for. We'll see if it kicks the 112 Slim Select out of my pocket. That's been a sweet little knife too! I'd kill for a 112 LT in CPM154...
Wow! That's a really cool idea, I will look for more of his posts, that's very clever and well-executed. Definitely out of my league
Thank you! I like the idea of a slip. I do some leather work too, I may go that way. I really had not even thought about it! . I'm beginning to agree with you on recessing the screws. I have been wanting to hold off to see about whether or not I can live with the small head on the pivot screw. I have the size/thread pitch of the screws ~ If I can source something with a bigger or "flat/countersunk" head, I would rather not recess these. Flat screws, or the ones with a V or trumpet shape head would be my preference so I could get them totally flush but the relief would need to match the screws. Otherwise, it's riding OK in my pocket today
I don't mind the Spyderco wire clip overall - here's kind of what I had in mind:
View attachment 1335354
I'd need to inlet a couple of grooves for the clip to ride in. it'd work, but I just really like how clean and simple the knife is as it stands now.
Ugh, I just can't leave stuff alone once I start up. i did a Spyderco mod not too long ago. It came out really great. Then I messed with it, and messed with it, and messed with it. Now it's in a cup on my workbench with problems I'm not sure how to resolve.
I should put that worn down 110 blade on these handles, sign up for Instagram and generate a following for my Hard Use lifestyle
On the "can't leave it alone" front, I spent most of my meetings today with 2000 grit sand paper and the washers on my desk, sanding my .005" washers down to .002" ~ the gap in the backspring is essentially gone (I guess it's probably .004", but who's counting? I can't see it.). I also put the pivot bushing on my anvil and really slowly and lightly worked around the inside edge of the bushing with a ball peen hammer. I completely removed the up/down play from the blade. I kinda doubt this will be a permanent solution, but it's good to know that's where the play was coming from for when it comes back. As for now, it's rock solid in all directions. I should look for some .125"ID steel tubing to make a new bushing as a more permanent way of reducing play.
To get rid of side play, make sure that the pivot bushing is only about .002-.003” thicker than the blade. I’m not sure where you are using washers, but most 110’s do not have washers in the blade pivot area (or the rocker pivot area).
You can get #2X56TPI screws in button, socket, and flat head configurations. Button and socket need a #2 counterbore. Flat or oval heads need a #2 countersink.
Pivot bushings can be sanded to reduce thickness, but skinny bushings are a problem (I hate sanding down a blade to fit a bushing).
