- Joined
- May 12, 2012
- Messages
- 846
Hello everyone.
A few weeks ago I asked for critique on a small modified sheepsfoot design of mine. It was well received and the thread grew into a WIP as I made a prototype from 1095. Now I am going to make a run of five of the same design from CPM 3V. I am also making two in 1095 for the fun of it. One of the 3V blades has already been set aside for a member here, the rest I plan to market on the exchange.
For those not around the first time, here is the original thread: http://www.bladeforums.com/forums/showthread.php/999988-Design-critique-please-NOW-A-WIP
Now on to the gravy!
Specs:
7" OAL, 1" height
.113" (3/32") CPM 3V tempered to 60Rc
Almost full flat right hand chisel grind with microbevel
1/8" G10 handles, bright colors with black .060" G10 liners. I have Orange, Neon Green, Blue and Red.
Design:

Note 1: Though the design has the grind on the left side, this will be a right hand chisel grind (unless someone requests a left hand grind )
Note 2: I designed the blades originally to use 1/4" chain ring bolts. Since I can't get any that will work with a blade and handle this thin I am going to use 1/8" stainless pins and 1/4" stainless tubestock for the lanyard hole.
There are lots of pics of the prototype in the last thread.
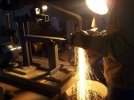
Here is what I have so far:

These have had my design printed out and glued to the bar then I cut them to length. I like to drill all my holes before I profile because the heat from profiling will usually require a dip in water to cool the blade; this blurs my lines. I know where the profile should be (I designed it after all") ) but I like to drill my holes based on the template.
) but I like to drill my holes based on the template.
That's all I have done for now; my 2"x72" grinder will arrive on Monday and I will profile them then. My belts and everything else I'll need came with the steel from USAKnifeMaker.com
I would really appreciate feedback from you guys.
Thanks,
Matthew Markell
A few weeks ago I asked for critique on a small modified sheepsfoot design of mine. It was well received and the thread grew into a WIP as I made a prototype from 1095. Now I am going to make a run of five of the same design from CPM 3V. I am also making two in 1095 for the fun of it. One of the 3V blades has already been set aside for a member here, the rest I plan to market on the exchange.
For those not around the first time, here is the original thread: http://www.bladeforums.com/forums/showthread.php/999988-Design-critique-please-NOW-A-WIP
Now on to the gravy!
Specs:
7" OAL, 1" height
.113" (3/32") CPM 3V tempered to 60Rc
Almost full flat right hand chisel grind with microbevel
1/8" G10 handles, bright colors with black .060" G10 liners. I have Orange, Neon Green, Blue and Red.
Design:
Note 1: Though the design has the grind on the left side, this will be a right hand chisel grind (unless someone requests a left hand grind )
Note 2: I designed the blades originally to use 1/4" chain ring bolts. Since I can't get any that will work with a blade and handle this thin I am going to use 1/8" stainless pins and 1/4" stainless tubestock for the lanyard hole.
There are lots of pics of the prototype in the last thread.
Here is what I have so far:
These have had my design printed out and glued to the bar then I cut them to length. I like to drill all my holes before I profile because the heat from profiling will usually require a dip in water to cool the blade; this blurs my lines. I know where the profile should be (I designed it after all
) but I like to drill my holes based on the template.That's all I have done for now; my 2"x72" grinder will arrive on Monday and I will profile them then. My belts and everything else I'll need came with the steel from USAKnifeMaker.com
I would really appreciate feedback from you guys.
Thanks,
Matthew Markell