Cutting and Drying Wood

Purple Heart. At least that’s what it looks like to me...
 
Its purple heart.

Its a heavy wood, when fresh cut it is a little brown but oxidizes to a brilliant purple hue
 
definitely heavy - you can feel the density. not bad for ~$8 for the block ... hopefully my trick of inserting into plastic bags will reduce the moisture gradient and keep it from splitting. Thanks!
 
Interesting experience tha other day. Have some small pieces “scales” of walnut i want to use on some small knives. Bought this as kiln dried slabs and cut down to scales/blocks. I thought i would try making sure they were as fully dried as possible, so took a few small pieces and put them into a food dehydrator. They started out at a weight of 145grams. 24 hours later they were leveled out at 135g.

Now, these were already quite dry (they tested at 7-8% moisture), but since 1g = 1 milliliter of water, this seems like a LOT of water to be retained! (On the other hand, 10g/145g is about 7%, so that seems to match.)

Now, after taking the slabs out, another day later they are up to 138 g. (Will insert picture later) So... uptake and loss versus ambient conditions is real (not that we doubted it!)
upload_2019-7-12_11-36-49.png


I was surprised there was not more discussion on my other thread asking about stability of Dymondwood. I thought it interesting that another member (daizee) reported information consistent with expansion (n a more humid environment). Easy enough to replicate these weight measurements (along with thickness measurements) on Dymondwood scales(and also stabilized wood). I have the dymondwood (i THINK it is dymondwood..) but not the stabilized wood scales. Will need to get some..... (sorry, yes, i remain a nerdy engineer at heart )

I am not so sure that the resin reinforced materials are as dimensionally stable as we would like to think they are ...
 
Last edited:
I promised a while ago that when I got around to trying to assemble a wood drying box, I would post the process. Had a little time the last couple days to collect materials, and do much of the assembly.
materials:
4 pieces, 2' x 4' MDF (1/4")
2 pieces 2' x 2' MDF (1/4")
4 pieces 2x2's, cut to 4' length
screws: #8 x 1 1/4
other odd pieces of 2x4's used to cut down to brace pieces

Here is the pile of materials:
upload_2019-8-3_14-35-8.png

started by screwing the 2x2's onto the long edges of the large pieces of MDF (5 screws per side)
upload_2019-8-3_14-36-23.png

screwed the two sides to those existing 2x2's ...
upload_2019-8-3_14-37-12.png

then screwed on that other large piece of MDF with the 2x2's already attached:n
upload_2019-8-3_14-39-42.png

put one of the 2x2' MDF pieces on the end, just screwed into the 2x2's at the corners (also used this to square up that end of the box)
upload_2019-8-3_14-40-35.png
 

Attachments

  • upload_2019-8-3_14-38-6.png
    upload_2019-8-3_14-38-6.png
    42.9 KB · Views: 1
drying box continued...
the big MDF pieces were actually a little over 4' ... so the other end had a gap above the 2x2's. Ripped down some 2x4's to make some longer "brace" pieces to attache the 2x2' MDF to (this side will be the top of the box)
upload_2019-8-3_14-42-41.png

attached the other 2x2' MDF piece to those longer brace pieces (and torqued things to square up the box)
upload_2019-8-3_14-43-43.png

I have labeled the side I wanted to be the "front" ... as it is one of the sides where the MDF is full-width - not "nested" inside of the other sides.
remove (just unscrew) that side I want to be the front, and we now have a box :).

upload_2019-8-3_14-45-44.png

For heat I am just going to cobble together an electrical box with a light bulb receptacle (75W is recommended - but I will play with it). I am also planning on putting a 12V computer case fan in there to circulate air. My only question now is what exactly am I going to do for shelves. Right now I am thinking baking drying racks suspended across dowels or something like that. Anyone have any quick/cheap ideas for racks?

Oh ... I am actually thinking of not even hinging the front piece. I can put a small piece of wood across the bottom to hold that front piece up, and just latch it at the top to hold it in place. You really dont want the cabinet to be extremely "tight" anyway, right? You need a way for moisture to escape the box.... but maybe I am not right there....
 
Just how warm should a drying cabinet be? Stacy elsewhere has said use a 75W bulb, and the temp should be just above ambient (which is currently the case in the box i am building) Boye says he used a 350W heat bulb in his cabinet (that has GOT to produce a temp considerably above ambient...). I know this is probably an “it depends” issue, but just looking for some general guidance. A piece of me wonders if the best of worlds is a small ceramic space heater turned on and off by a temperature controller, combined with a small electronics case fan for continuous internal circulation.....
 
With a 75W bulb, a box the size of yours should warm to about 100F. The front panel should be reasonably snug to prevent air escaping along the sides. You want the air to flow up the box and out the top hole. Eight 1/4" holes (2 per side) on the sides near the bottom will provide new air.
 
With a 75W bulb, a box the size of yours should warm to about 100F. The front panel should be reasonably snug to prevent air escaping along the sides. You want the air to flow up the box and out the top hole. Eight 1/4" holes (2 per side) on the sides near the bottom will provide new air.
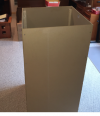
You are absolutely right 100 is almost exactly where it is. (Reminds me of the guys behind the meat counter who reach in and grab exactly 1# of ground beef - thats experience talkng!). The question though is, is i want to somewhat accelerate things (with risk i know) what temp do i want to aim for? 120 maybe???
 
BTW - do you have any idea how difficult it is these days to buy a true 75w bulb? Everytng these days is LED (no heat) or “energy efficient fluorescent” which means like for a 75w bulb you are really only burning 50w or therabouts. I am turning to “ceramic heaters”, which are sold for environments in which reptile pets are housed. Probably more accurate, and dont give off ambient light (just infrared). EXPENSIVE at a place like petsmart ($30?). Much more affordable through amazon ($10?). Times change...
 
A ceramic heater or other low wattage heating element connected to a dimmer switch will allow temperature adjustment. You could also use a 250 watt bulb and the dimmer switch. I wouldn't try to speed up drying .

Everything comes to he who waits - Disraeli
 
I wouldn't try to speed up drying .

Everything comes to he who waits - Disraeli
Thanks Stacy. Right now i am not so much drying as needing to drive the equilibrium water content lower than ambient will allow so i know i am either ready to stabilize or use the wood as is knowing it is not likely to shrink much more. I need higher temps to do that. The few pieces of wetter wood i have will not see the inside of that cabinet for quite a while
 
OK, getting the wood lower tan 10% might take a little extra warmth, but I still wouldn't go much past 100°

The big wood drying kilns used in industry run between 80°F and 115°F.
Soft wo0ds, like construction pine and fir are dried between 100° and 115°, while hardwoods are dried at 80°F.

BTW, I was wondering if the info you read from Boye was to use three 50 watt bulbs ( not a single 350W bulb)? A 350 watt bulb is a huge and very hot bulb.

I remember the "Make and Bake" oven of the 1950's. It was a foil and insulation lined girls oven that used a 75 watt light bulb for the heat. The set came with tiny pans to bake little cakes and muffins … heated by the light bulb. They stopped making it because the light bulb was a fire hazard.

Here is your nerd fact for the day:
Incandescent light bulbs are 2.1% efficient. That means for every 100 watts, the emit 2.1watts of light energy and 97.9 watts of heat energy. This is why they were replaced by fluorescent, and now LED lights, which are many times more efficient.
 
Soft wo0ds, like construction pine and fir are dried between 100° and 115°, while hardwoods are dried at 80°F.

BTW, I was wondering if the info you read from Boye was to use three 50 watt bulbs ( not a single 350W bulb)? A 350 watt bulb is a huge and very hot bulb.

I remember the "Make and Bake" oven of the 1950's. It was a foil and insulation lined girls oven that used a 75 watt light bulb for the heat
I too remember the Easy Bake Ovens, - which means I have just dated myself for the forum....

Here is the diagram Boye gives for his cabinet:
upload_2019-8-12_8-21-59.png
His verbal description of the lamp used is:
upload_2019-8-12_8-22-58.png
I agree with the fire-hazard potential of a true 350W bulb - I only mentioned that because it is a quote from Boye, NOT that I would use something like that! But clearly, if he really did this, he was hitting something higher than 100F for his cabinet temperature.

Interesting datapoint on the temperatures used by commercial kilns - but I am wondering that their target moisture contents are higher than we might want for handle material - especially if targeting stabilization (where we want as low a moisture content as possible). Another interesting datapoint is the temperatures reached by "solar kilns" - the oklahoma extension org indicates typical operating temperatures of 120-130F for solar kilns:
upload_2019-8-12_9-5-51.png
similar documentation on commercial kiln drying indicates that caution on drying rate (and temps) must be exercised when moisture is above 15% or so (moisture measurement is urged, and apparently the extension services publish tables of acceptable moisture-loss rates versus moisture content) - but below that 15% or so moisture content no such caution is given. I do wonder, when the moisture drops low enough, whether we cant reasonably safely push the temp higher to drive lower moisture contents??? Two datapoints (very limited datapoints...) - in my home food dehydrator I have placed both black walnut slabs (about 1" thick) and purpleheart (from that wood I bought a month or so ago), both of which tested at, respectively, 10% for the walnut and 14% for the purpleheart, with the temperature at 145F. Both definitely lost weight (1-2 days for the walnut, a week or so for the purpleheart) - but both had not splitting, and retained dimensional stability quite well (the walnut developed a very slight bow - but was easily sanded flat, and the purpleheart remained flat).

I am thinking of targeting 120F or so with continuous mild air circulation. I am thinking that heat sources could be a small "standard" ceramic space heater (again, controlled by a more accurate thermal control with probe), or something like the below (a "reptile heat lamp" that plugs into a standard light socket (ceramic for safety) - they can be had in a range of powers, from 60W up to 250w or so: (though I think the "safest" option would be the tightly controlled space heater)
upload_2019-8-12_9-21-43.png
 
I remember that drawing. Boye was a good guy, but he was very old school and cut his blades out of two-man saws using a torch.
That cabinet has 82.5 cubic feet. Your cabinet has 16 cubic feet. He also used a radiant heat lamp, not a light bulb. It was still probably hotter in the cabinet than optimal.

I'll toss in some ideas:
Use a cheap PID, TC, and a 25 amp SSR. Wire the reptile heater to the SSR and set the PID for whatever temp you want. It might run $40 tops.
https://www.ebay.com/itm/Digital-F-...254006&hash=item46477b6c34:g:Qq0AAOSwT~9WlmxK
 
pretty much what I was heading towards - though for this application, I would tend to believe the precision of a PID controller is not really necessary. I was thinking of just a basic on/off controller with hysteresis. less temperamental than a PID and dont require a SSR ... and a couple times I have used in the Lab, and they are usually good for control within 2-3 degrees. $35 for a plug-and-play version, $16 for one that requires a little soldering and a project box....
upload_2019-8-12_16-15-57.png
upload_2019-8-12_16-16-18.png
 
For your lower temp use, eithert will work. I like to use a PID system built in a box so I can plug whatever I want into it.

But, you are correct, any simple thermostat system will work for a 100F box of wood.
 
Knots can make twisting/drying more likely to crack. There are so many variables with different woods, seasonal differences etc. that’s why I set pieces to dry 1” per year...

I bought a large maple burl slab to process and send to K&G. Also grabbed a moisture tester, but my question is what setting do I use to test it? It has multiple settings for different woods, any idea how to find the base species to test this as?

Rhinoknives - if you look earlier in this thread, i make reference to a wisconsin extension service document that gives acceptable drying rates versus moisture content. Bottom line is that you can dry faster as the moisture gets lower... and below 15% or so you can dry really fast. I think the 1 year per 1 inch is a good rule of thumb, but my guess is is somewhat conservative (if you wanted/needed to get wood dry faster). In my case i have wood at about the 12 -15% level, and am driving off the last low level moisture in preparation for either using or stabilizing. (But that cherry burl sat uncut on a shelf for a couple months to make sure its moisture was down to that level!)

DustinY - ive played with my moisture meters, and found the difference in moisture readings varies really only by a few percent based on setting. Im not trying to be really accurate, so i just keep them on an intermediate setting and go with that. If you have a pinned meter, that is probably pretty accurate for burls, spalted woods, and most domestic hardwoods ... but they appear to be basically useless for any of the resinous tropicals. For those you will need a more expensive pinless meter (which my dear wife gave me for my birthday, and i use all the time...
 
BTW - when i first started up my drying box, i experimented with temps up to 120F - and all the wood in it survived just fine (again, all were below 15%). Because you want wood to be stabilized as dry as possible, i again cranked it up to 120F, left my spalted blocks in there until they read zero moisture, then quick vacuum sealed them into plastic bags before sending off to K&G. Most of the time ijust keep it at 90F to keep wood in there ready to use.
 
Back
Top